Potato Salad with Fennel, Lemon, and Dill

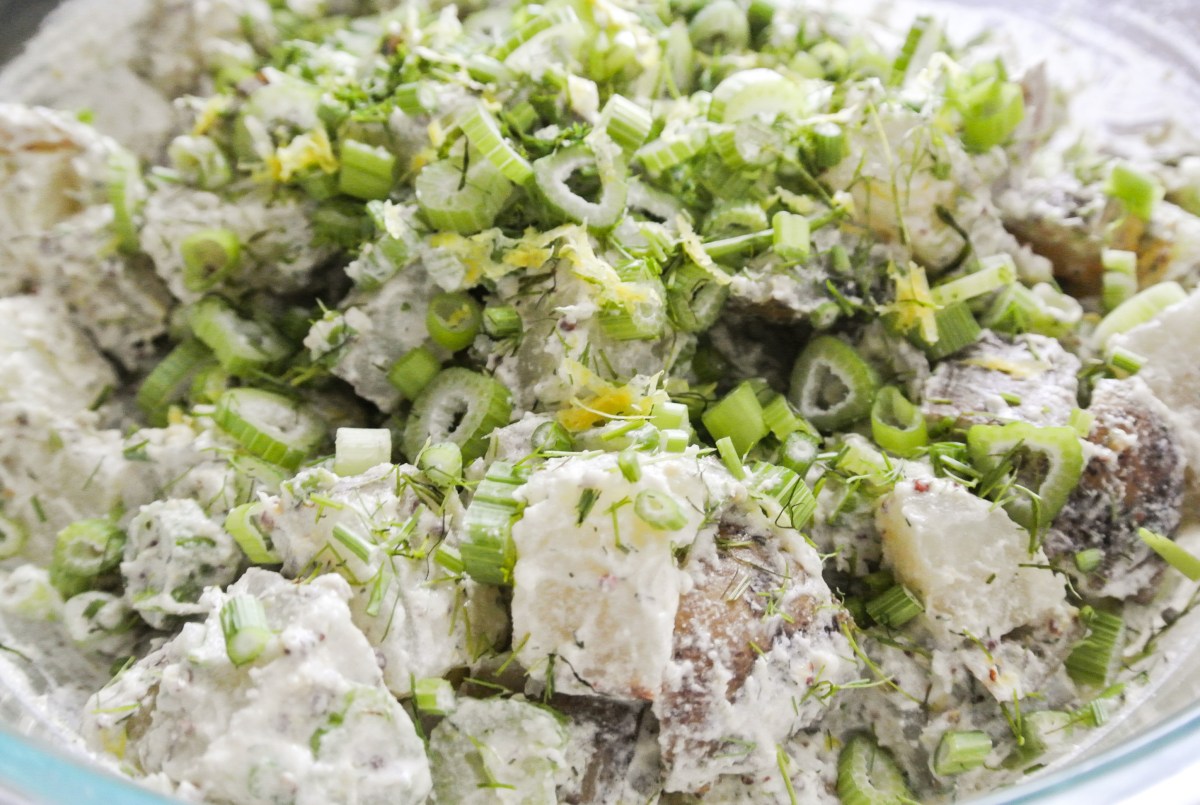
This square meal is a game-changer!  When I first developed my potato salad formula, I knew it was good, but it wasn’t until I whipped up today’s version that I really fell in love.  Something about the combination of raw fennel, lemon, and dill just says summer.

That taste/feeling of summer is fresh, with bright, light flavors.  In a dish like potato salad that is dense and creamy, this balance is so important, especially when you’re lugging a heavy bowl of the stuff to a hot backyard barbecue.  In addition, if you’ve tried making my potato salad before, you know that unlike its mayo-based distant relatives, mine won’t get all funky after sitting in an outdoor buffet for a couple hours.  Woo!

What’s more, when it comes to my food, the approval of my family and friends means a lot.  I don’t need it per se, but it certainly reaffirms why I take the time try new recipes and write about what I’m eating:  I really have an opportunity to educate others about healthy eating…and share with the world that despite what you may have heard, vegan food is ABSOLUTELY delicious and satisfying.

I write all of this because my brother-in-law, who may as well have started fan club for mayo lovers, put his stamp of approval on today’s recipe.  This is HUGE!

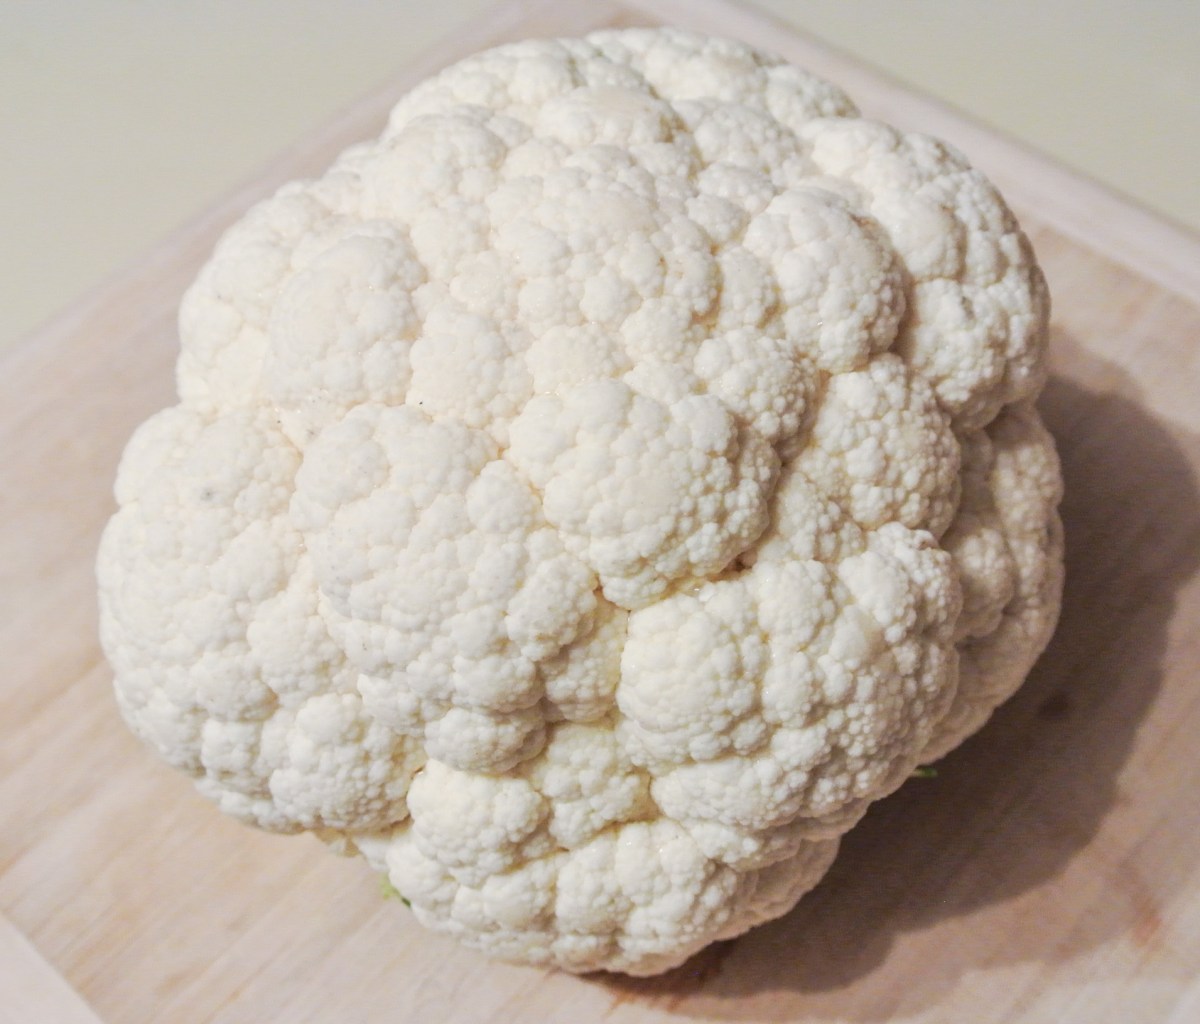
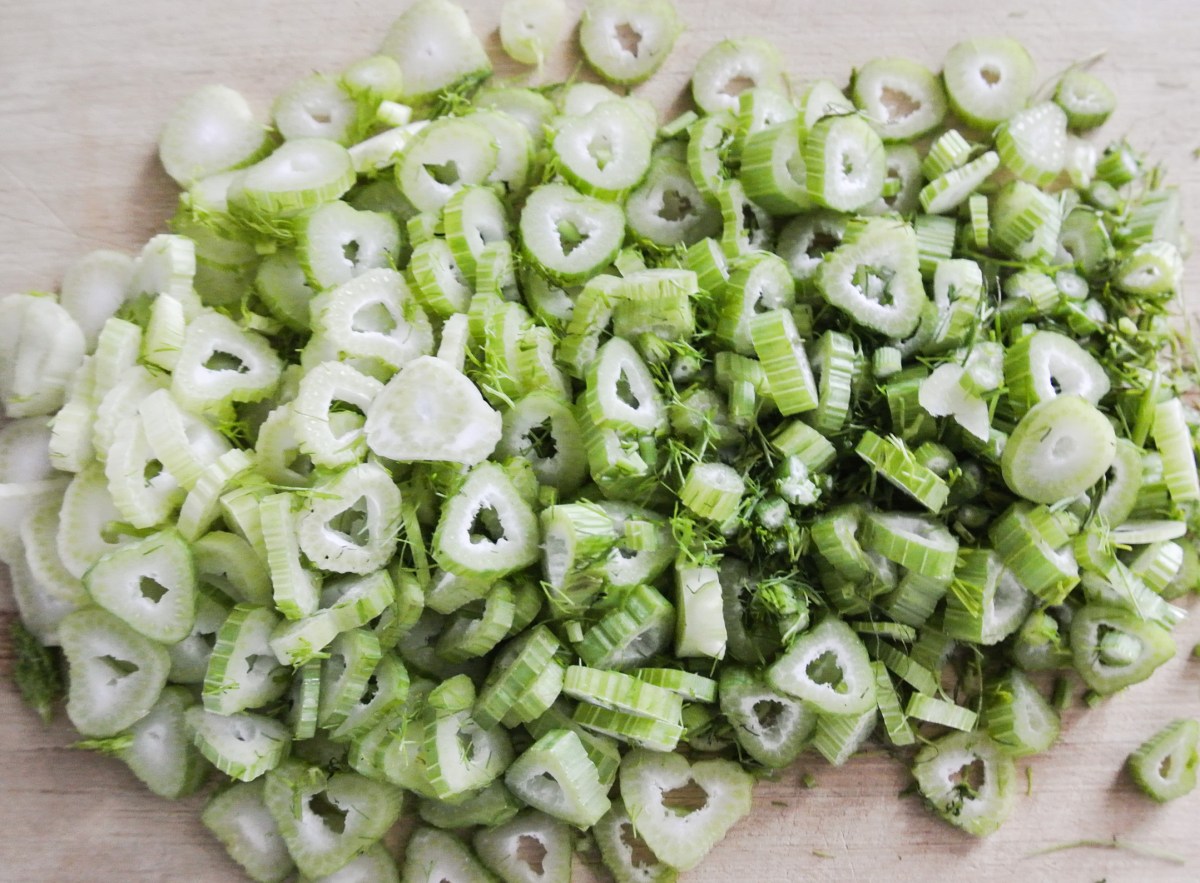
The star in today’s potato salad is fresh fennel.  I love to eat the bulb—the most commonly consumed part of fennel—in a number of ways, but this recipe utilizes only the stalks and fronds (you could use the bulb instead/as well).  I keep it simple with thin slices and mix right in.  Fennel—which looks like a standard vegetable but is actually an herb—is loaded with fiber and potassium, but is notable primarily for its digestive benefits.  Fennel can relieve bloating and gas, as well as stimulate appetite and digestion.  I once visited a vegan restaurant where fennel seeds were served after our meal for this very purpose.

fennel

The last item I want to mention is that I don’t use processed, mock mayonnaise products to substitute for the real deal (I also don’t used processed “cheeses” and “meats” either); I find plant-based whole foods that can be transformed without preservatives, chemical additives, or excess salt to satisfy the craving for animal-based counterparts.  This requires more time in the kitchen, but it is often less expensive, and more importantly, I like to know what I’m eating.  🙂

You.  Will.  Love.  This.  Recipe.  Enjoy!

FORMULA BASE: POTATO SALAD

Serves 4-6

  • 2 pounds potatoes –> I’m using russets.
  • 2 cups diced raw vegetables –> I’m using the stalks and fronds of one medium-sized bulb of fennel and approximately ¼ cup of sliced green onion.
  • A double batch of my creamy salad dressing (see below)
  • ¼ cup crunch (raw seeds, nuts, etc.) (optional) –> I’m not using any since the raw fennel is quite crunch itself.

For the dressing (NOTE: Formula already doubled below.):

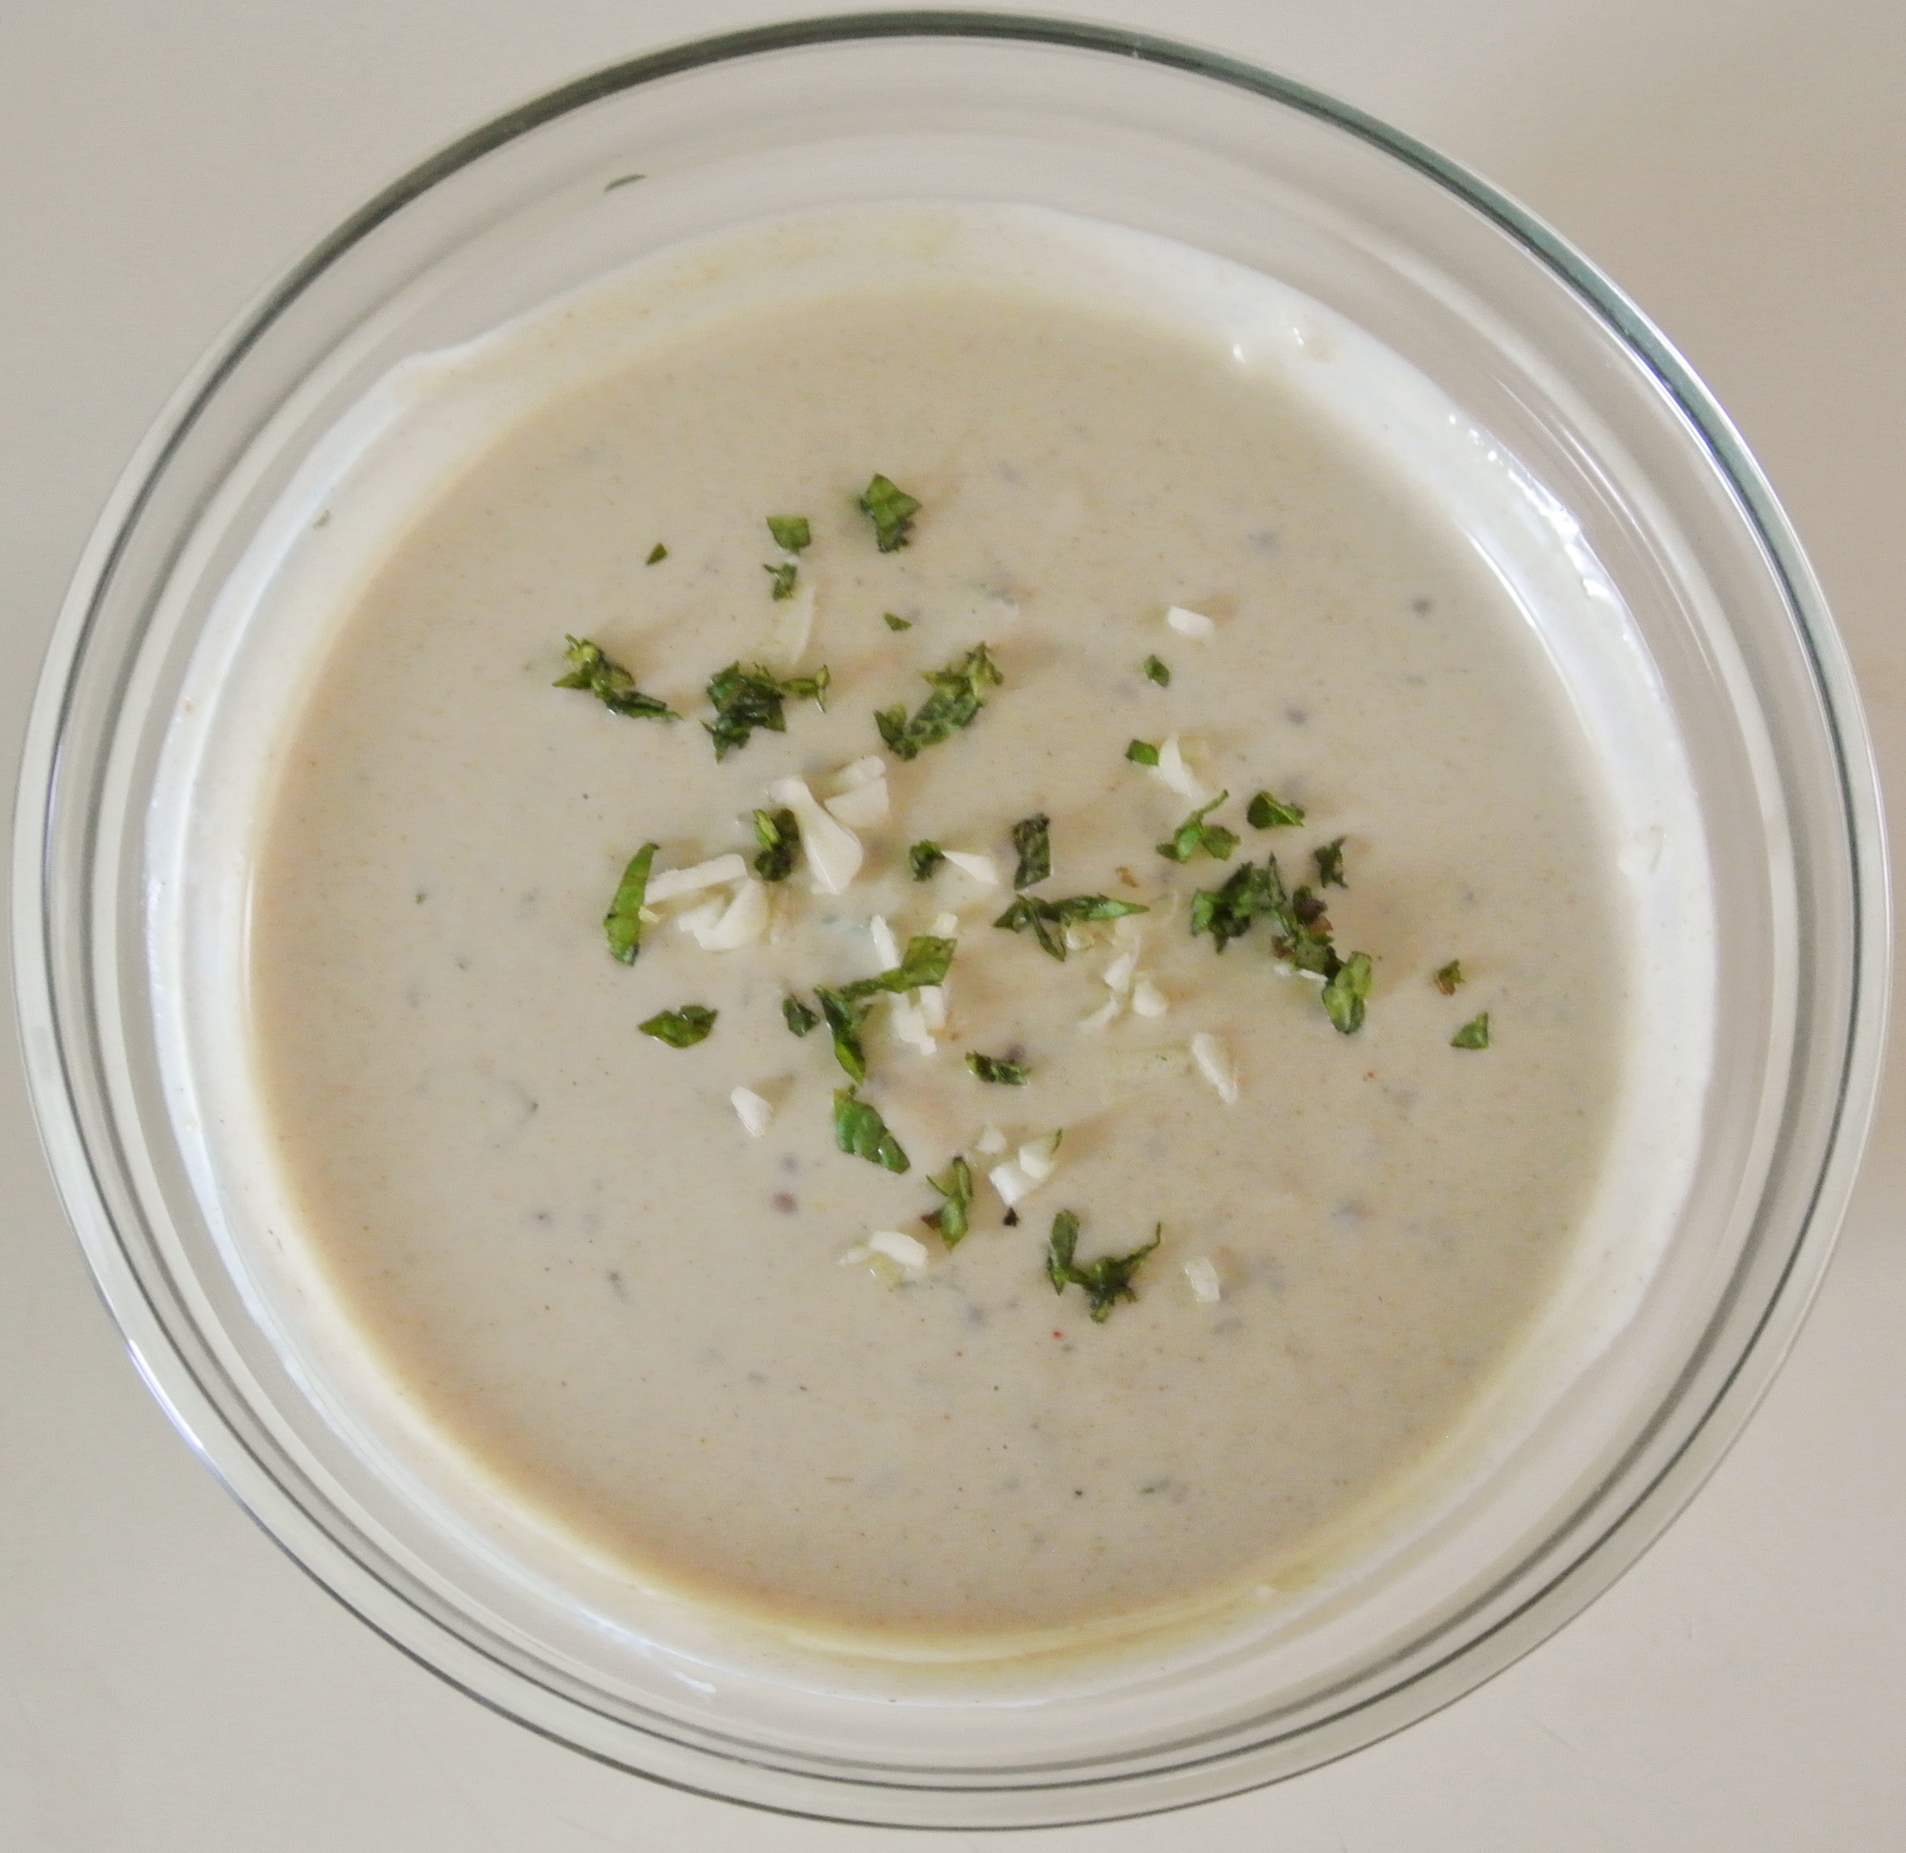
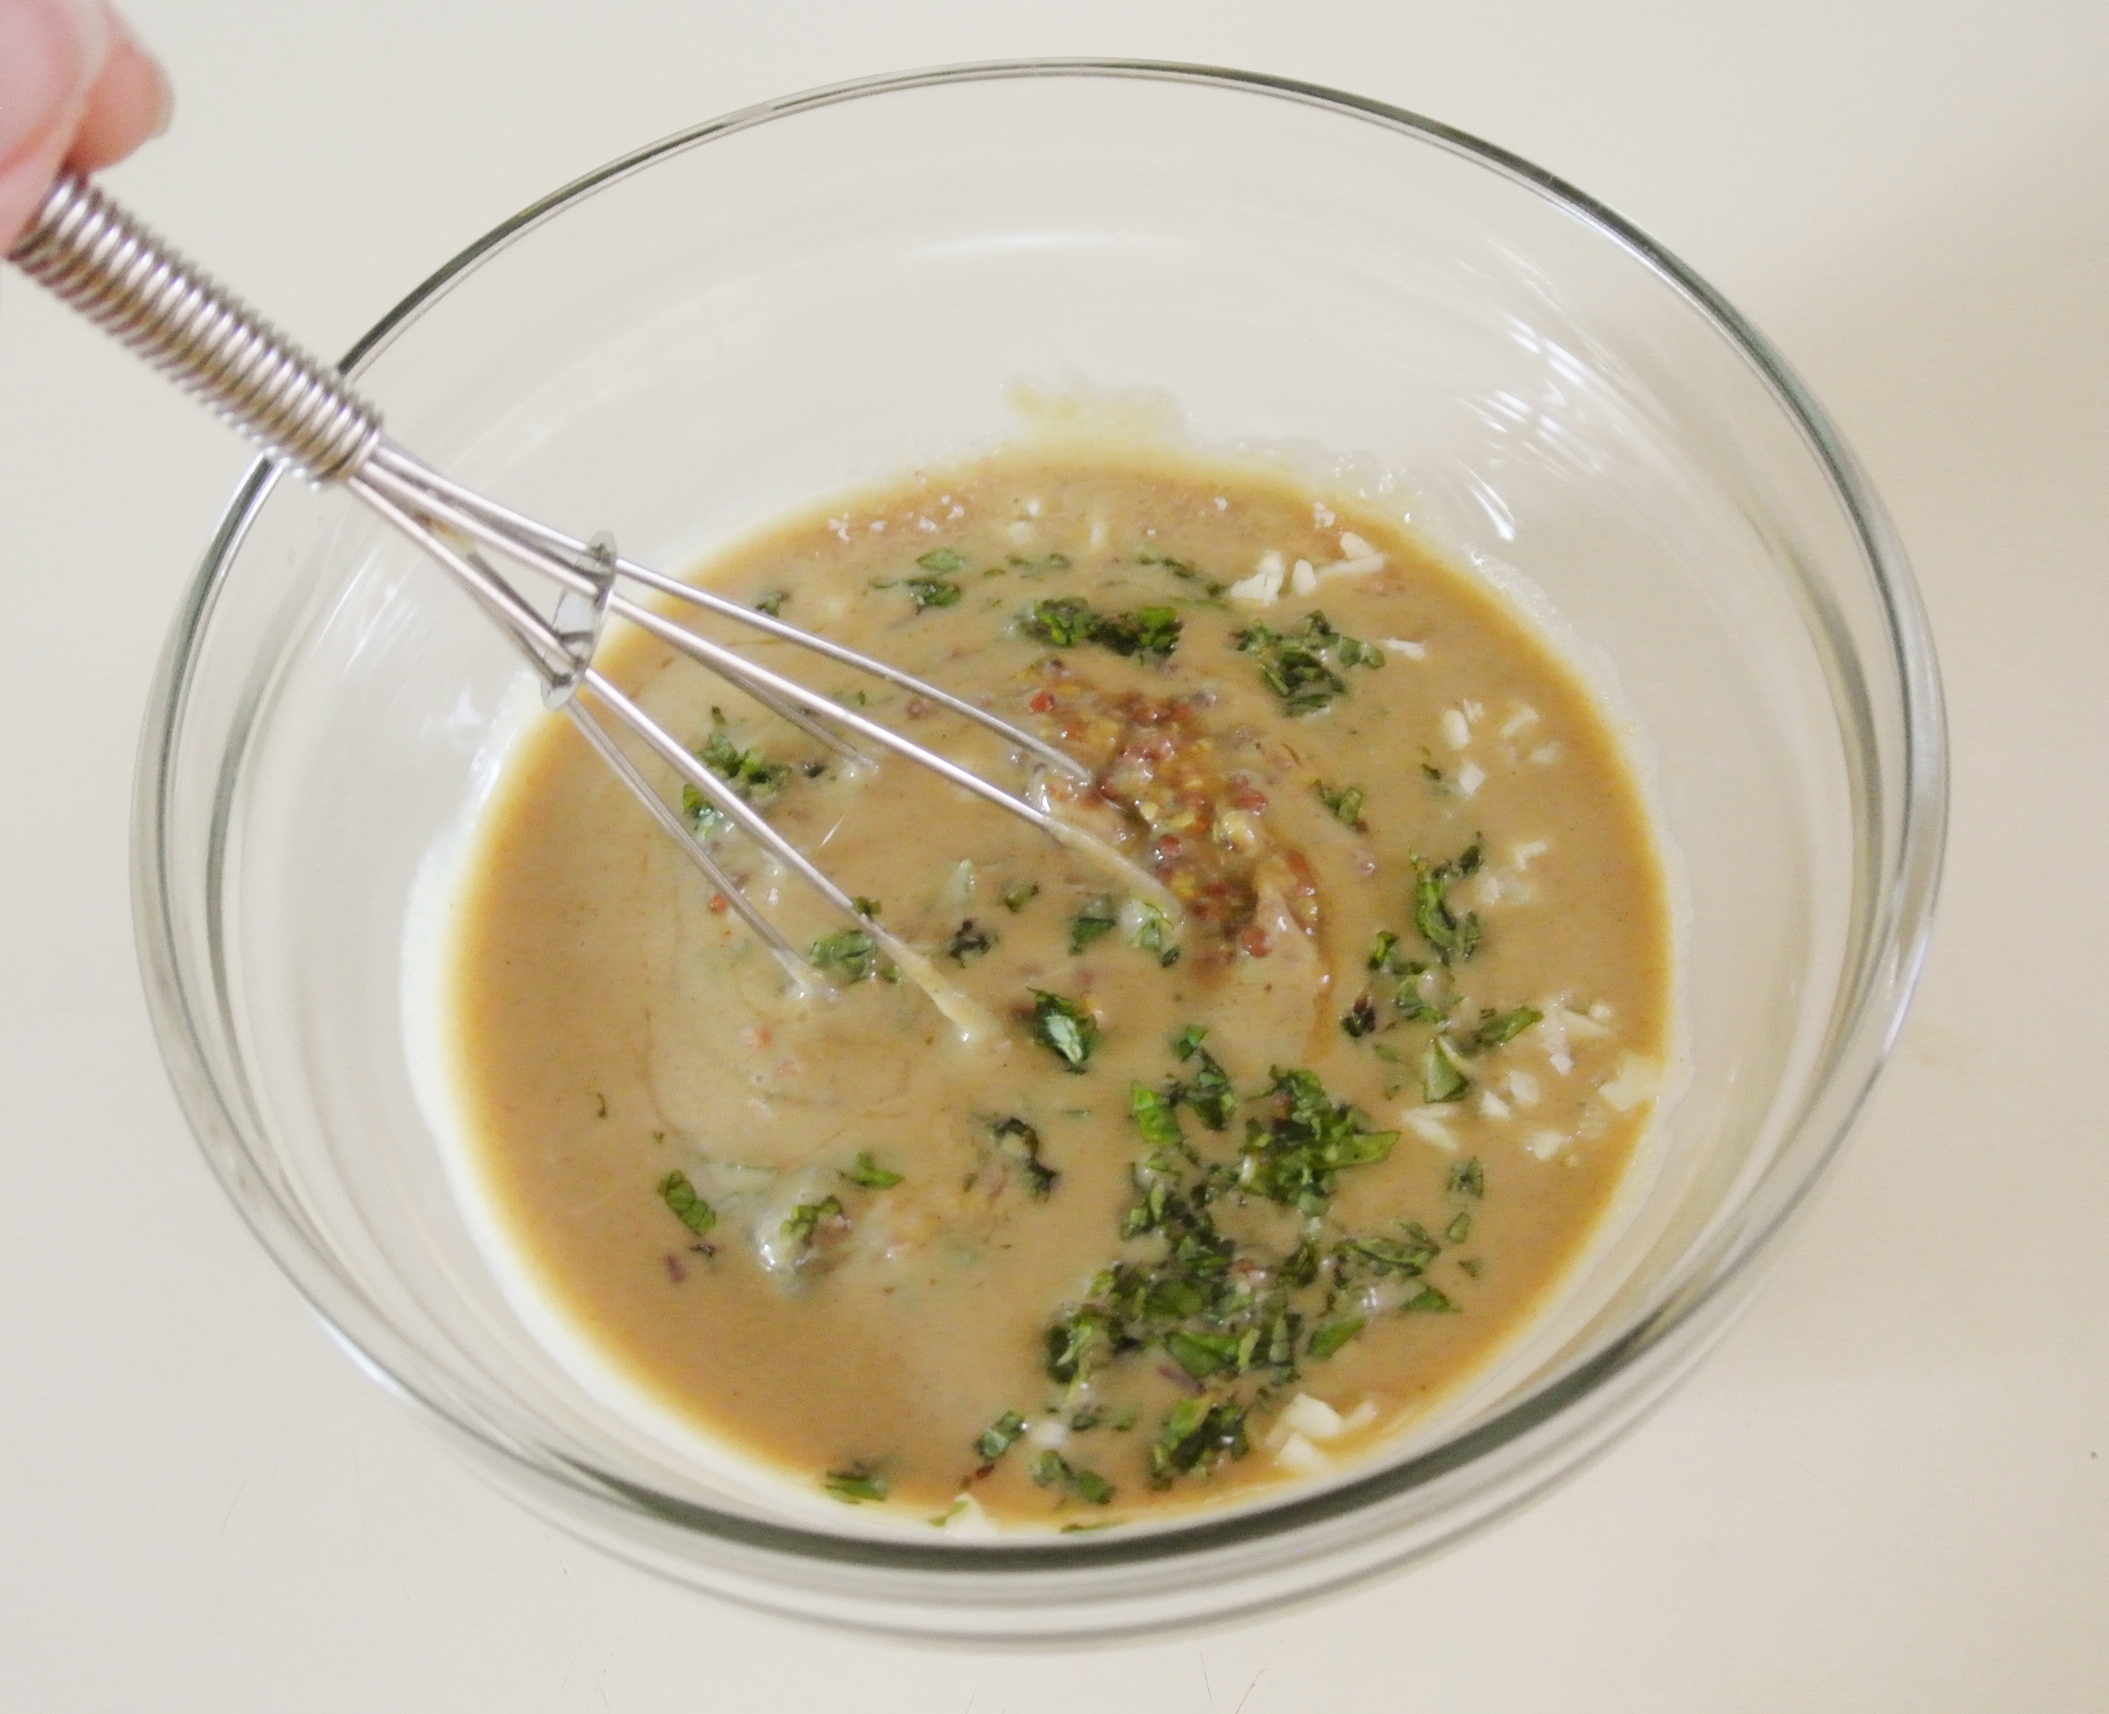
  • ½ cup seed or nut butter –> I’m using cashew cream (soak raw cashews overnight and blend with just enough water to form a thick cream).
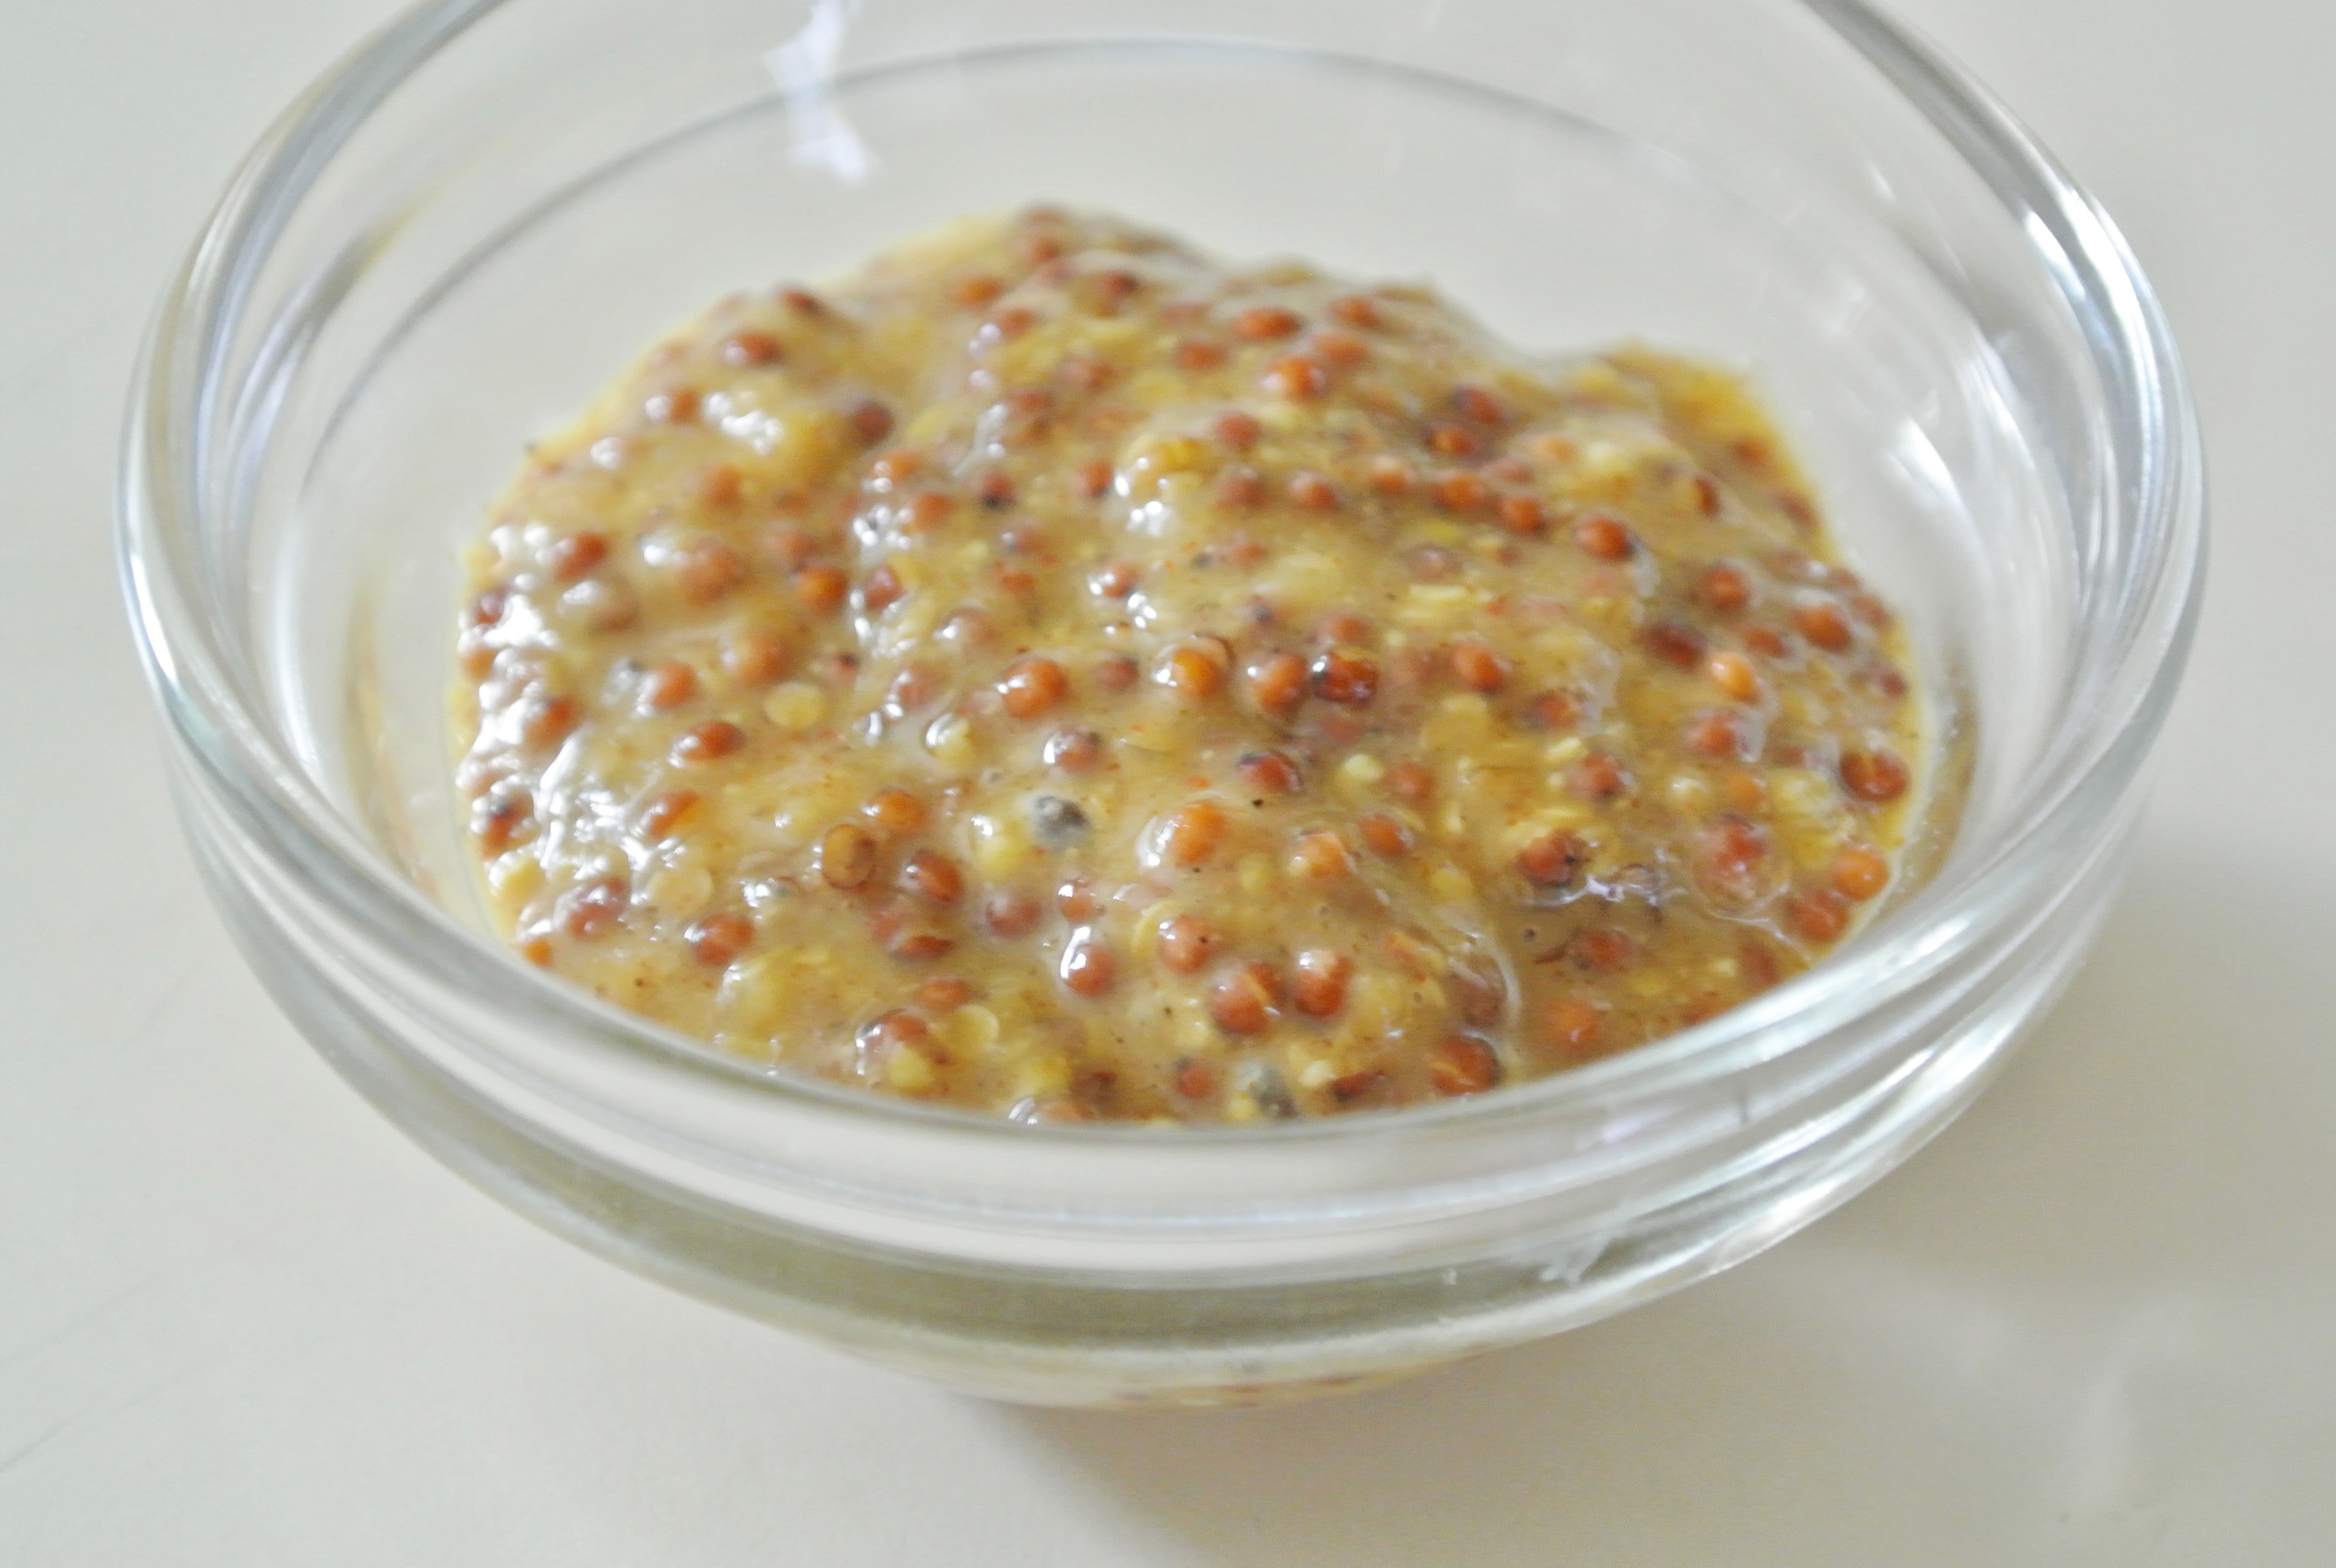
  • 5 tbsps acid (citrus juice, vinegar, mustard, or a combination) –> I’m 1 ½ tbsps of whole grain mustard, plus the zest and juice of 1 lemon.
  • Thinning liquid as needed (ideas:homemade veggie stock, water, or more acid) –> I’m not using any.
  • Up to 4 tbsps raw garlic and/or fresh/dried herbs and/or spices (optional) –> I’m using ½ tsp garlic powder, ½ tsp onion powder, and 1 tsp dried dill.
  • 1-2 tsps sweetener (optional) –> I’m not using any.
  • Pink Himalayan sea salt and pepper to taste –> I’m using ½ tsp salt and several turns of freshly ground black pepper.

Thoroughly wash your potatoes so that you can keep the skin on. Chop into bite size pieces and steam, boil, or roast (I’m roasting). While your potatoes are cooking, make your dressing. Cover and place in the fridge for the flavors to come together.

When your potatoes are done cooking, drain (if necessary) and place in a glass bowl to chill in the fridge, at least to room temperature. While the potatoes are cooling, chop your veggies and crunch element, if using.  After the potatoes have cooled sufficiently, pour your dressing on top and stir gently to combine. Enjoy for several days (if you have any leftovers!).

potato salad

Advertisement

Creamy Cauliflower Alfredo

When I first developed my creamy vegetable sauce formula, I had only tried it out with eggplant and wasn’t sure it how it would work with other veggies.  Since then, every vegetable I’ve used—butternut squash, pumpkin, and now cauliflower—has been a success.  Today’s version with one of my favorite cruciferous vegetables redefines alfredo sauce.

In addition to looking the part of a traditional alfredo, cauliflower makes for a super creamy puree when doctored up with some of my favorite flavors.  On another note, you learned about the health benefits of romanesco—brother to cauliflower—in my wonton post, so you already know that including this family of vegetables in your diet is a must.

Cauliflower

Make a batch of this sauce to throw over pasta or my ridiculously easy zucchini noodles, or get adventurous and trying serving cold as a veggie dip (maybe toss with some fresh dill?  I’ll have to try it out…).  Top with fresh veggies or herbs and serve.  Enjoy!

FORMULA BASE: VEGETABLE PASTA SAUCE

Yields sauce for one box of pasta

  • 2 cups coarsely chopped raw vegetables –> I’m using cauliflower.
  • ½ cup cashew cream (soak raw cashews overnight, drain, and blend with just enough water to form a thick cream)
  • 2 tbsps nutritional yeast
  • 1 tbsp acid (i.e. vinegar, mustard, citrus juice, etc.) –> I’m using white whole grain mustard.
  • ¼-1 tsp seasoning (i.e. fresh/dried herbs, spices, etc.) –> I’m using ¼ tsp ground nutmeg.
  • Pink Himalayan sea salt and fresh ground pepper to taste –> I’m using approximately ½ tsp salt and several turns of pepper.

Peel (if necessary) and chop your vegetables. Steam, roast, or boil (I’m steaming) to cook.

While your vegetables are cooking, bring a pot of water to a boil and prepare your pasta of choice. When the vegetables are finished, combine with all other ingredients (except the pasta, of course!) in a blender and puree until smooth and creamy.

Pour atop your pasta (or use in another application) and enjoy immediately for most desirable consistency. It will keep just fine in the fridge, but will dry out a bit.

Pasta

Shitake Mushroom Risotto

A few months back, I introduced you to my risotto formula, starring Arborio rice and garnet yams.   I explained that I like to do risotto up with a vegetable that either needs to be cooked or is generally more palatable cooked, thus allowing me to consume the majority of my other vegetables raw.

Today’s risotto features shitake mushrooms. These fungi don’t need to be cooked and I actually really happen to enjoy them raw atop salads, but their richness (and meatiness) is certainly more prevalent in a cooked state. Thus, Travis and I typically make our risotto with some sort of potato, mushroom, or both (but of course, you could use any vegetable or none at all).

Shitake mushrooms have been shown to strengthen the immune system and lower blood cholesterol levels. They are also powerhouses of selenium, iron, fiber, protein, and vitamin C. They have been used in China for medicinal purposes for thousands of years, so I’m confident that eating a bunch of ‘em will only serve me well.

DSC_2389

Since I’ve already walked you through how to make risotto, I kept the pictures few and simple for this post. Make sure you check out my previous post if you’d like to see step-by-step visuals for making this decadent dish. Enjoy!

FORMULA BASE:  RISOTTO

Serves 4 (as a meal)

  • 8 cups homemade vegetable stock (or water)* –> I’m using veggie stock. This batch contained beet scraps, so it’s a little on the reddish side. 🙂
  • 2 cups Arborio rice**
  • 1 cup chopped vegetables (optional) –> I’m using shitake mushrooms.
  • ½ cup white wine –> I’m using moscato.
  • 1 small onion –> I’m using white.
  • Several cloves garlic (go with what you like) –> I’m using 3.
  • 2 tbsps oil –> I’m using extra virgin olive.
  • Fresh herbs, spices, salt, and pepper to taste –> I’m using 1 tsp dried thyme, a few turns of fresh ground black pepper, and a ½ tsp pink Himalayan sea salt.

*You may not use it all, but it’ll be close. Have it handy on your stovetop in a pot on low heat, ladle-ready.

**Unlike other grains, do not rinse your Arborio rice before use.

Start by chopping your onion and garlic and sauté in a touch of oil over medium-high heat until they are almost cooked through, but not quite. Then, transfer them to a bowl, return the pan to the stovetop, add a touch more oil, and sauté your vegetables, if using, until almost cooked. Transfer them to a separate bowl and return the pan to the stovetop, this time over medium heat.

Add more oil (about 1 tbsp) to the pan to toast your dry rice. Stir the rice constantly to prevent sticking, toasting it until it has deepened in color slightly, about 5 minutes. Add in half of the cooked onions and garlic, as well as your seasoning of choice, and deglaze your pan with the white wine. After the wine cooks down, add a ladle of your veggie stock and stir fairly regularly over the course of the time it takes for that ladle to absorb completely. You can expect 3-5 minutes between ladles.

You will repeat this process—ladle and stir—many times over the course of 40-45 minutes. When the rice is almost finished, add in the remaining onion and garlic, as well as your veggies (if any), to the pan to finish cooking. From start to finish, this dish will take you 60-75 minutes (depending on how fast you prep and such) and a lot of attention. As soon as the rice is tender, you’re done, so taste as you go.

Garnish with fresh herbs or thinly-sliced green onion. Makes for yummy, comforting leftovers for 3-5 days.

DSC_2391

Fill-in-the-Blank Salad Sandwich

Chicken, tuna, egg, etc. + mayo = a salad sandwich. These popular combinations make for easy sandwich building, as the protein, produce, and condiments are prepared in one mixture. I have found that you either love or hate a salad sandwich, likely due to your feelings about mayo. Travis detests mayo, so he would only even consider one of these sandwiches if it were practically dry.

I, personally, love the creamy consistency and convenience of a salad sandwich, pending it isn’t soupy or drippy (soggy bread: no no no). Since I no longer eat mayo and don’t like to buy processed, vegan mayo substitutes, I had to get creative. Having already experimented with making my own creamy dressing, pesto, and potato salad, I knew that I really just needed to come up with a suitable protein base.

I have found that beans or lentils + raw fruits and vegetables work best for the ideal texture, but you could also use tofu. Since tofu has so much water in it, you would want to dehydrate it in the oven or on the stovetop first. This will result in a consistency similar to chicken, without the extra moisture to water down the creamy element of your filling.

Today, I’ve featured one of my favorite small kitchen appliances: the panini press. Travis and I received this one as a wedding gift over four years ago and it’s still going strong. I love that the plates are nonstick, so coating bread with butter or oil isn’t necessary. As I’m sure you’ve guessed, I’m making my curry salad sandwich (chickpea base) into a panini on sourdough bread, fresh from San Francisco.

DSC_2364

All in all, this formula is pretty simple and keeps well in the fridge for days. You could easily make a big batch to have on hand for sandwiches or wraps all week long and opt either to mix your produce right in or keep it separate (which is what I like to do). This way, you can change up the combinations from sandwich to sandwich to suit the taste preferences of different household members. Enjoy!

FORMULA BASE: SALAD SANDWICH

Makes 4 sandwiches

  • 1 ½ cups cooked protein (beans or lentils, or chopped, dehydrated extra firm tofu) –> I’m using chickpeas.
  • ¼ cup finely chopped onion –> I’m using green.
  • ¼ cup mayo substitute (seed/nut butter, vegan pesto, pureed avocado, etc.) –> I’m using tahini + a few tablespoons of water.
  • 2 cloves minced garlic
  • ¼ cup “crunch” (chopped raw nuts/seeds, unsweetened dried fruit, etc.) (optional) –> I’m not using any.
  • Spices, fresh/dried herbs, salt, and pepper to taste (optional) –> I’m using 1 tsp each cumin and garam masala, ½ tsp turmeric, and a pinch of pink Himalayan sea salt.
  • Additional raw fruits/vegetables to mix in or for garnishing –> I’m topping with my salad with a few thin slices of roma tomato and green pepper, and slathering my bread with whole grain mustard.

Coarsely smash your beans/lentils, if using.

DSC_2357

Combine all ingredients.

DSC_2358

Assemble with additional produce on bread or in a wrap, if desired.

DSC_2360

I’m running my sandwich through a panini press before consuming. 🙂

DSC_2363 DSC_2366

The Plant-Based Decadence That Is Risotto

DSC_1955

If you’re like me, at some point, you may have thought or assumed that risotto contained milk, cheese, or some other form of dairy to give it its creamy consistency. While some cooks add dairy to make risotto extra creamy, it is a naturally plant-based and wonderfully decadent dish.

I use risotto as an opportunity to fulfill a craving for comfort food and to eat vegetables that must be cooked to be palatable, such as sweet potatoes. When Travis and I whip up a batch, it almost always contains some form of potato or other root vegetable, allowing us to eat the majority of our other vegetables raw. If you’re not in the mood for veggies (hopefully because you’ve been chowing them all day!), just make it plain, seasoned to taste.

Since it doesn’t, in fact, contain dairy, you should know that risotto achieves its creamy consistency through a slow and steady cooking process that involves an abundance of liquid and regular stirring. Risotto is NOT a last-minute go-to dish, nor is it for light snacking; this, is a square meal that will fill you up before you get to the bottom of your bowl.

Risotto is prepared with an Italian short-grain rice called Arborio. Arborio rice is high in protein, packed with vitamins and minerals, easy to digest, and can even help to fend off disease and maintain regular bodily functions. Plus, when slowly simmered in white wine, vegetable stock, sweet onions, and fresh herbs, it is simply delicious!

DSC_1936While you can certainly prepare this Italian must-have as a side dish, I put down a whole bowl as my dinner. Enjoy!

FORMULA BASE: RISOTTO

Serves 4 (as a meal)

  • 8 cups homemade vegetable stock (or water)*
  • 2 cups Arborio rice**
  • 1 cup chopped vegetables (optional) –>  I’m using one medium peeled garnet yam.
  • ½ cup white wine –>  I’m using Riesling.
  • 1 small onion –>  I’m using yellow.
  • Several cloves garlic (go with what you like) –>  I’m using three large.
  • 2 tbsps oil –>  I’m using refined coconut.
  • Fresh herbs, spices, salt, and pepper to taste –>  I’m using a sprig of fresh rosemary (which I will remove after cooking) and a pinch each pink Himalayan sea salt and fresh cracked pepper.

*You may not use it all, but it’ll be close. Have it handy on your stovetop in a pot on low heat, ladle-ready.

**Unlike other grains, do not rinse your Arborio rice before use.

Start by chopping your onion and garlic and sauté in a touch of oil over medium-high heat until they are almost cooked through, but not quite. Then, transfer them to a bowl, return the pan to the stovetop, add a touch more oil, and sauté your vegetables, if using, until almost cooked. Transfer them to a separate bowl and return the pan to the stovetop, this time over medium heat.

Add more oil (about 1 tbsp) to the pan to toast your dry rice. Stir the rice constantly to prevent sticking, toasting it until it has deepened in color slightly, about 5 minutes. Add in half of the cooked onions and garlic, as well as your seasoning of choice, and deglaze your pan with the white wine. After the wine cooks down, add a ladle of your veggie stock and stir fairly regularly over the course of the time it takes for that ladle to absorb completely. You can expect 3-5 minutes between ladles.

DSC_1946 DSC_1947

You will repeat this process—ladle and stir—many times over the course of 40-45 minutes. When the rice is almost finished, add in the remaining onion and garlic, as well as your veggies (if any), to the pan to finish cooking. From start to finish, this dish will take you 60-75 minutes (depending on how fast you prep and such) and a lot of attention. As soon as the rice is tender, you’re done, so taste as you go.

DSC_1948

Garnish with fresh herbs or thinly-sliced green onion. Makes for yummy, comforting leftovers for 3-5 days.

New Formula: Super Creamy Dressing, Hold the Cream!

DSC_1647A few nights ago, my sister sent me a recipe for spiced chickpeas that she said I just had to try, and she was right. If you’ve never heard of Thug Kitchen, you NEED to check out these uber-talented and funny vegan chefs! What the thugs figured out that I couldn’t put my finger on until I completed their recipe (sorry guys, it’s not on their website, but it is in their cookbook, which I am now ordering ASAP) is that seed and nut butters make for the ultimate rich and creamy dressing for salads, wraps, sandwiches, and fruit and veggie dipping.

Really, this has made sense for longer than I realized. I love to eat tahini (made from sesame seeds) on sandwiches and peanut butter on apple slices. So, I’ve been using seed and nut butters in a dressing and dip capacity for quite a while, and you probably have, too. When it comes to more delicate applications like salads, however, a thick peanut butter alone just won’t cut it in the dressing department.

Prior to becoming an honorary thug, I attempted to make creamy salad dressing in a number of ways, from thickening plant milk with chia seeds to puréeing silken tofu. While these methods have afforded me some success, the resulting dressings were no match for the tahini-based dressing in the thugs’ spiced chickpea recipe. As I do with just about any recipe I come across, I played around and made the dressing my own and thus, a new Basic Formula was born.

Yikes, seed and nut butters are fattening! Yes, but remember, fat is ok in moderation…and if it doesn’t come from animals. If you are going to opt for ranch dressing, for instance, think of it this way: You are also opting for cholesterol and potentially, hormones from the animal products. Seeds and nuts are cholesterol-free fats that do not contain hormones and do contain tons of protein and other nutrients. Also, when I shared my chocolate peanut butter banana smoothie recipe with you, I explained that seeds are nuts are one of the only sources of fat in my diet, so a little here and there is not going to hurt me (or you).

Don’t forget to purchase, whenever possible, seed and nut butters than contain ONLY seeds and nuts. Many jarred butters contain unnecessary added salts, oils, and sugars. If I deem them necessary, I would rather add these ingredients to a homemade dressing so that I can control the quality and quantity.

Finally, I consider mustard an acid, even though it is technically derived from seeds and processed with acid (vinegar). The acidic, sometimes bitter taste reminds me of the sensation of consuming a purer acid like citrus juice or straight vinegar. If you include mustard in your dressing, seek out a stone ground or whole grain variety. Mustard seeds are an excellent source of selenium (just like brown rice…see my whole grain salad recipe) and Omega-3 fatty acids.

DSC_1637

Below is my new formula and an application inspired by the tahini dressing that gave way to my latest culinary brainchild. Satisfy your craving for a rich, creamy dressing or dip by turning to seeds and nuts rather than cows and goats. Enjoy!

FORMULA BASE: Creamy Dressing

Dresses 3-4 salads

  • ¼ cup seed or nut butter –> I’m using tahini.
  • 2 ½ tbsp acid (citrus juice, vinegar, mustard, or a combination) –> I’m using 1 tbsp stone ground mustard and 1 ½ tbsp lemon juice.
  • Thinning liquid as needed, depending on whether you’re going for a dressing or thick dip (ideas: veggie stock, water, or more acid) –> I’m using 3 tbsp water.
  • Up to 2 tbsp raw garlic and/or fresh/dried herbs and/or spices (optional) –> I’m using one small clove minced raw garlic and I tsp finely chopped fresh sweet mint.
  • ½-1 tsp sweetener (optional) –> I’m using ½ tsp 100% pure maple syrup.
  • Salt and pepper to taste –> I’m using a pinch of pink Himalayan sea salt.

Combine all ingredients with a small whisk. Add thinning liquid as needed to achieve desired consistency. Still not creamy enough for you? Run the whole mixture through a food processor or blender (I enjoy the texture of the mustard seeds, so I am leaving my dressing as is after whisking). Drizzle over salad, spread on bread, pita, or wrap, or use for dipping. You are seriously going to LOVE this dressing! Ranch…what’s that?!

DSC_1646