I’m excited to report that Travis and I have found a way to make cheese-less pizza totally delicious. We’ve always known it was damn good, but the proof was in my meat-and-dairy-loving father’s approval; when he comes to Phoenix to visit, he always requests that we make our vegan pizza.
What’s especially wonderful about pizza meets The Fresh Formula is that the creation of this American favorite is already formulaic in nature: dough + sauce + toppings in endless combinations. I’m here today to help you with ideas, quantity, and process…the rest is up to your taste buds and creativity.
Great news: If you’ve already mastered my yeast bread formula, you can make pizza dough! Woo! Below, you’ll see my bread formula with a few slight changes, suggestions, and optional ingredients that you may want to consider. The key is determining the type of crust you want—chewy or crunchy—and going from there.
Next, you’ll want to think about sauce. We most often use a homemade marinara (another post, another day), but have also made pizzas with barbeque sauce, pesto, and curry at the base. While I haven’t yet done a post about BBQ, I have written about how you can make pesto and curry, if you want to go an atypical route. I also have a formula for a “cheesy” sauce similar to an alfredo if you’re looking for what some restaurants call a “white” pizza.
Finally, toppings. Earlier this week, I made my first homemade vegan sausage (pictured below) and used that to top the pizza in this post. If you’re after a protein punch, you could use something similar (homemade, of course), or add tofu, tempeh, beans, nuts, or seeds. Wait…beans on a pizza?! Yessir, I wouldn’t make my BBQ “chicken” (tofu) pizza without black beans…
 You might also consider adding fruits or vegetables. Most fruits don’t hold up to the high heat that pizza requires for baking, but a classic such as pineapple or a hearty fruit like pears will. Determining which vegetables to add comes down to preference of flavor and texture. Cooked vegetables will maintain fewer nutrients and be higher in calories, but will have a softer texture and richer flavor. Raw vegetables, will then, be higher in nutrients, lower in calories, crunchier, and a little less flavorful. Since I’m in the business of eating as many raw fruits and vegetables as possible, I do not typically pre-cook them before they top the pizza; they will par-cook a little in the fifteen or so minutes that the pizza is in the oven.
Here are a few combinations that we love:
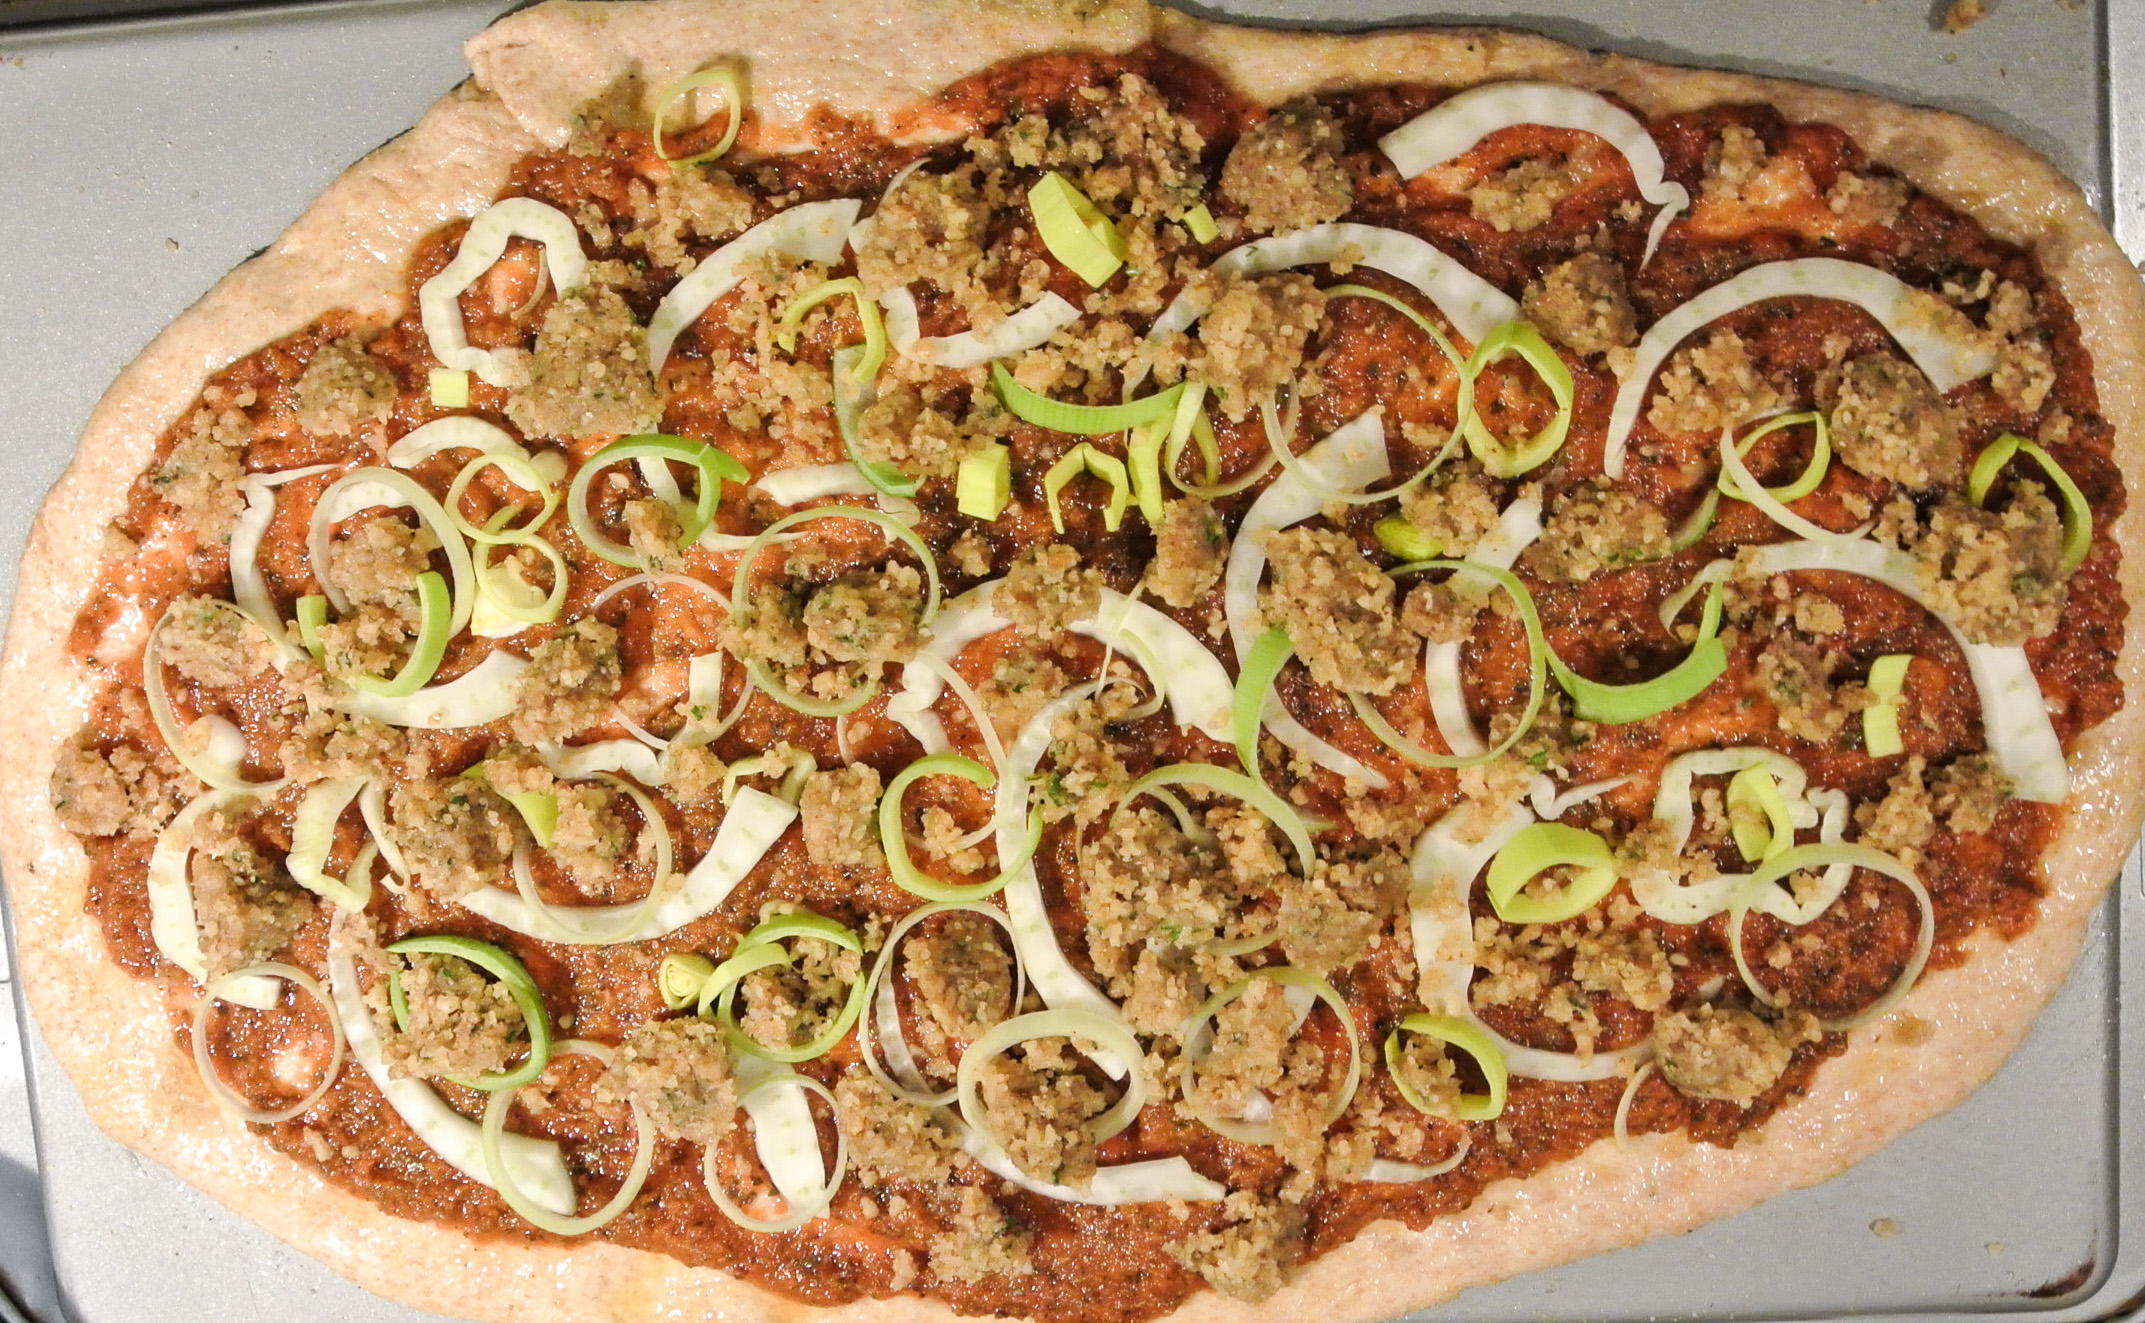
- “Sausage,” fennel, and leek atop marinara sauce (featured today)
- Ground “chicken” (crumbled tofu), black beans, corn, onions, and bell peppers atop BBQ sauce
- Zucchini, bell peppers, onions, pineapple, and cashews atop curry sauce
- Pears (or apples), pistachios, and rosemary atop pesto
NOTE: Plan pizza night well in advance. 🙂 I always have yeast in my pantry, but you may not if you haven’t—until now!—made your own bread or dough. You also need a number of ingredients for a sauce and toppings, so don’t wait until you’re starving to start a pizza adventure.
Also, this is a formula best executed as a team. You can do it alone, but with a dough and sauce to make from scratch, a whole bunch of toppings to chop, and an intricate prep and baking process, having an extra set of hands would help. Man, I can’t wait until Nolan is old enough to pitch in!
FINALLY (imagine chorus singing): Pizza you can feel good about! No grease, no cholesterol, and tons of nutrients. Enjoy!
FORMULA BASE: PIZZA
For the dough*:
- 3-4 cups of flour –> Travis recommends all whole wheat flour for a chewy crust, all bread flour for a crunchy crust, or half and half to achieve both textures.
- ½ tsp salt –> We use pink Himalayan sea salt.
- 1 packet rapid rise yeast
- 1 tbsp oil
- 1 ¾ cups very warm water (hot, but touchable)
- 1 tbsp sweetener (optional) –> Trav usually adds turbinado sugar to “feed” the yeast.
- Spices or herbs to taste (optional)
- Cornmeal and additional flour for dusting your workspace –> This prevents the dough from sticking to the pan later. Trav keeps cornmeal in a food storage container premixed with spices, flour, and a little salt to add even more flavor to the dough.
*If you need to see step-by-step pictures in making the dough, check out my bread post…
For the sauce:
See my pesto, curry, or alfredo formulas for unique inspiration, or use your own recipe for BBQ or marinara sauce. If you’re concerned about biting off more than you can chew your first time making pizza, use a high quality premade jarred or bottle sauce (just this once!) or ask Mom to make a little extra of her secret recipe for you to take home in a food storage container. 🙂 No matter your decision, you’ll need about 2 cups. I’ll do a more extensive post about homemade marinara sauces at a later date, but if you want to try making mine, you’ll need:
- 1 ½ pounds tomatoes –> I’m using about 7 medium to large romas.
- ½ of a small yellow or white onion –> I’m using yellow.
- 3 cloves garlic
- 2 tbsp sweetener –> I’m using turbinado sugar.
- 1 ½ tbsp dried fennel fronds
- 1 tbsp dried basil
- 1 tbsp dried oregano
- 1 bay leaf
- Salt and pepper to taste
For the toppings:
- 1 tbsp oil (for rubbing on the crust) –> I’m using olive.
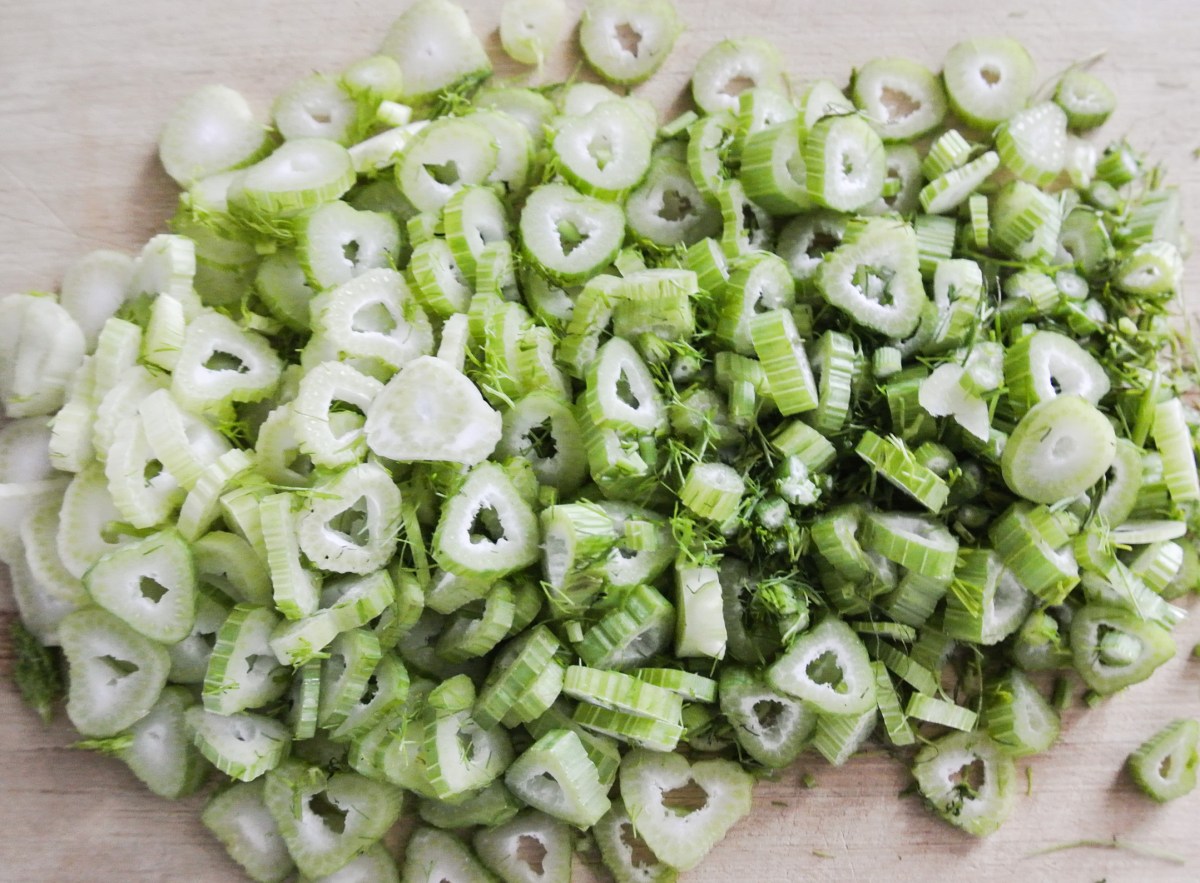
- 2 cups chopped/sliced raw or cooked protein and/or produce –> I’m using 1 cup homemade vegan sausage and ½ cup each thinly sliced raw fennel and leek.
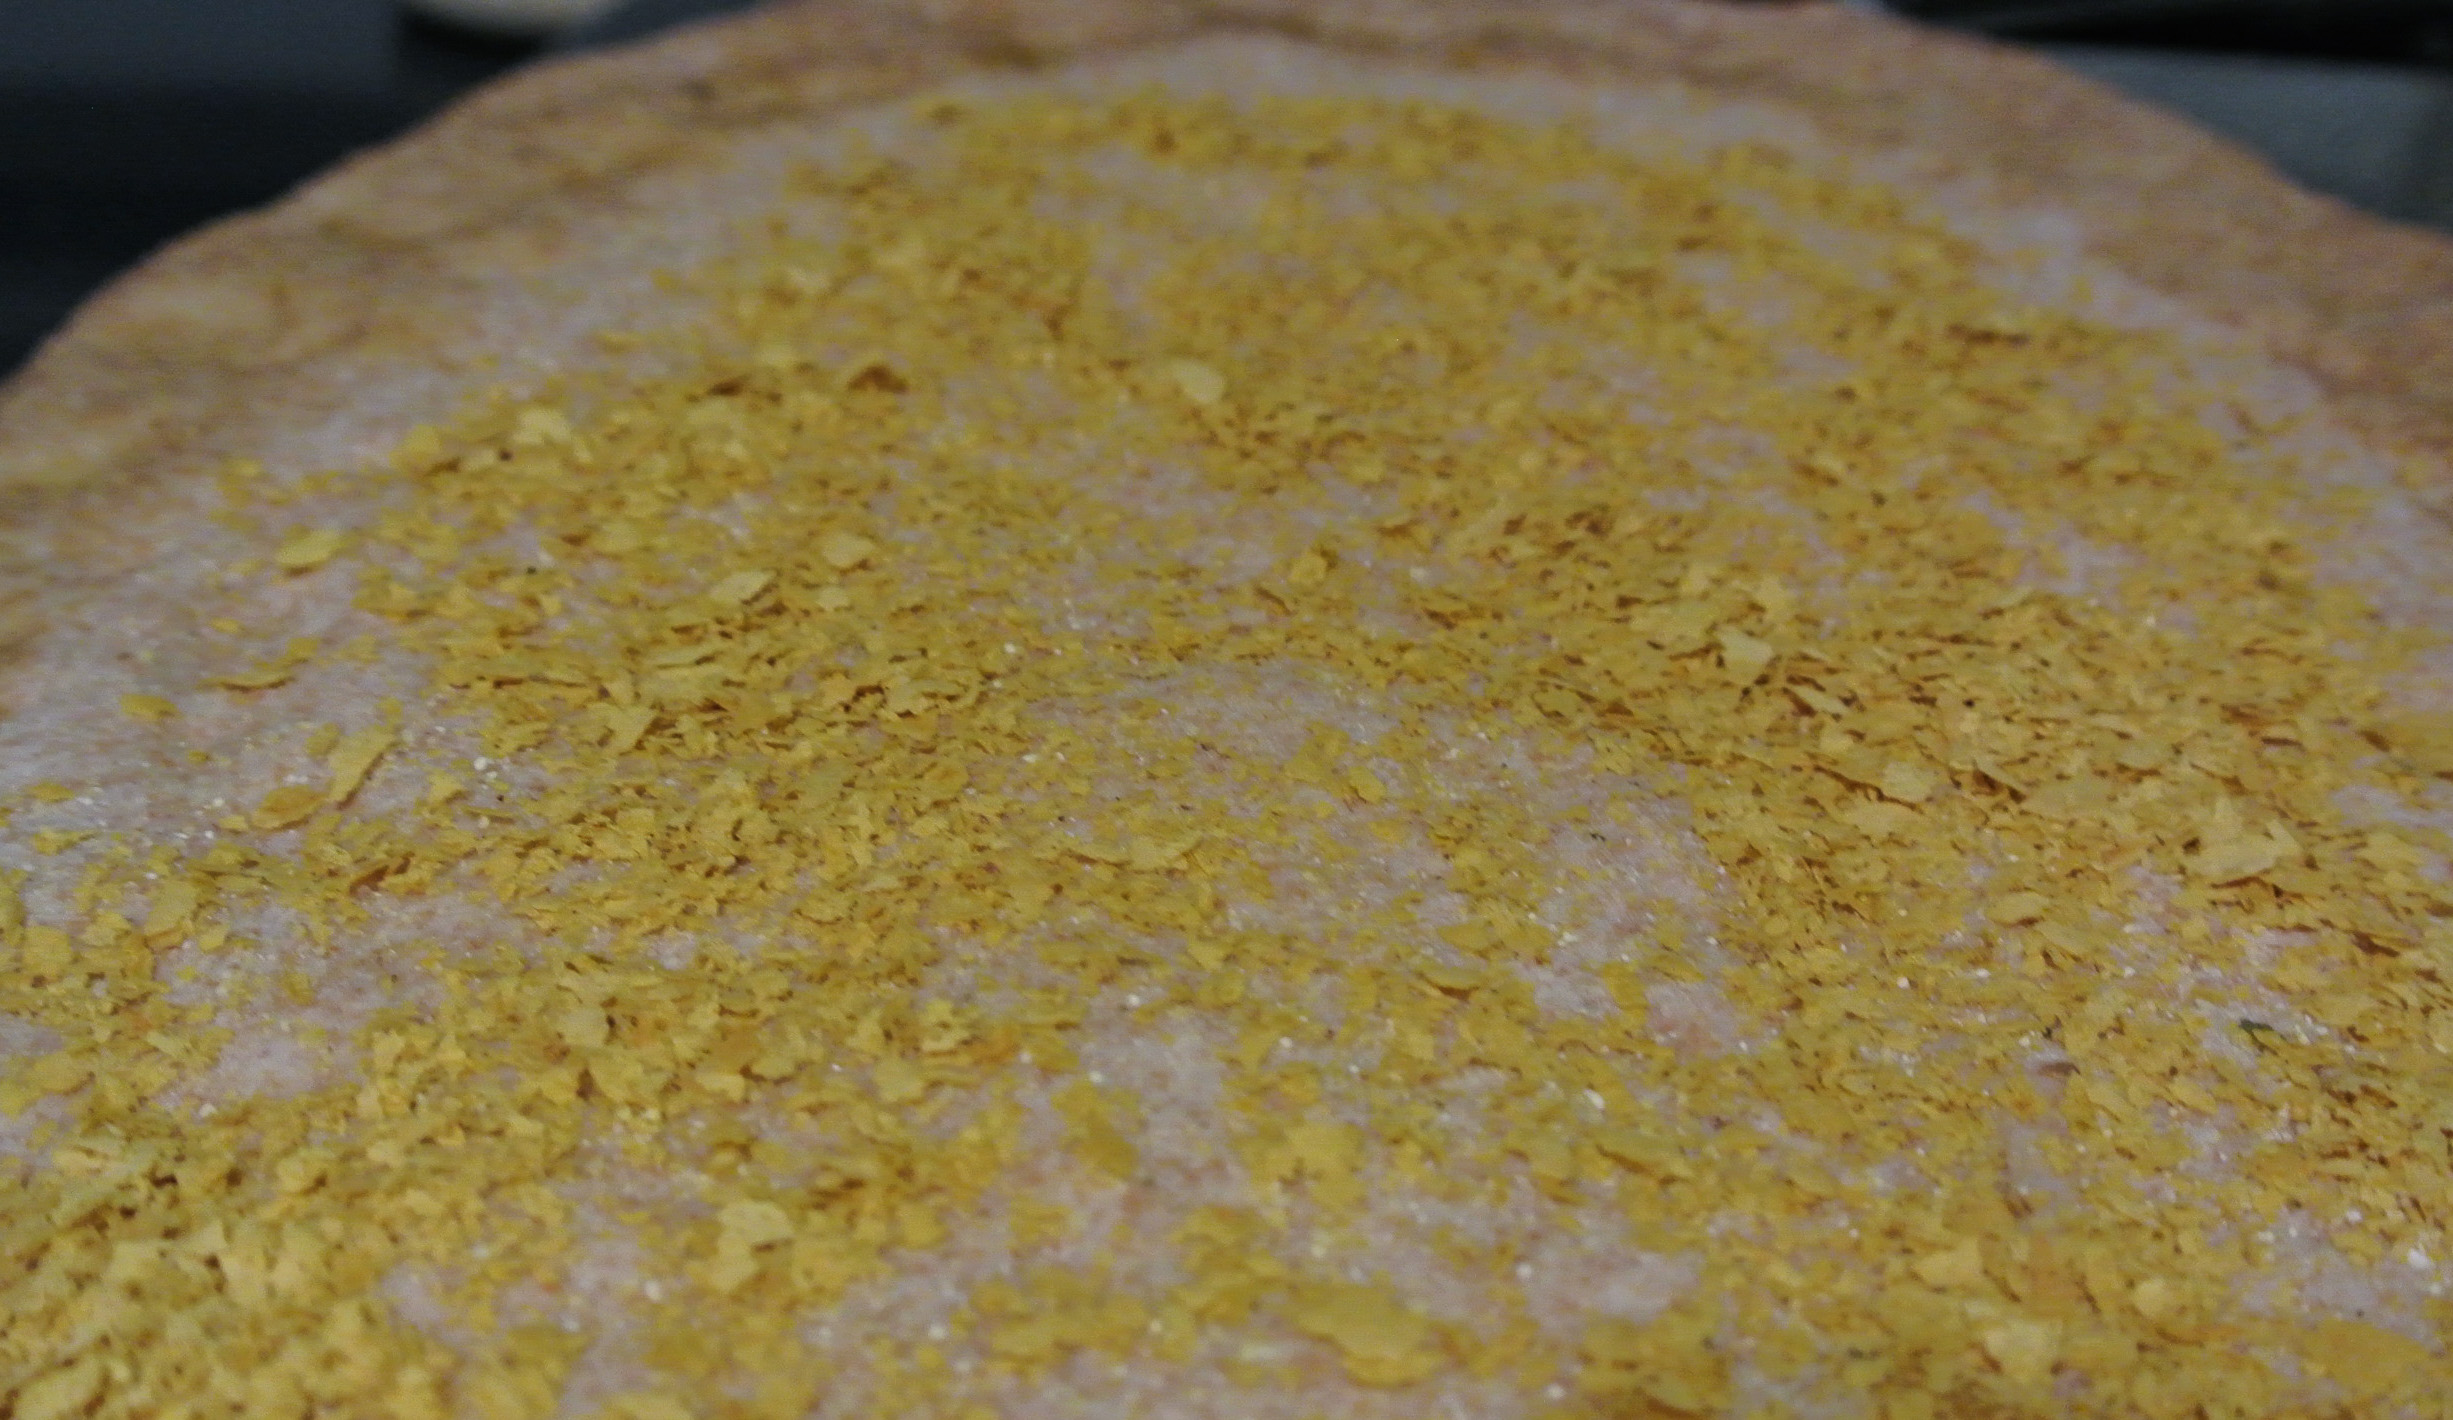
- Approximately 1-2 tbsps nutritional yeast (nooch)
- Homemade vegan cheese (optional) –> I’m new to this world, so I’m not using it today…another post, another day. 🙂
- Spices, herbs*, salt, and pepper to taste (optional)
*If you want to use fresh herbs, use these to garnish the pizza after it is cooked.
If you are making a sauce from scratch, get that started first. To make a homemade marinara, for example, as I’m doing today, very coarsely chop the tomatoes, onion, and garlic and puree them together in a blender or food processor. Pour into a sauce pan, add the remaining ingredients, and simmer on medium-low heat for 1-2 hours, or until the sauce has reduced by at least one third. Remove the bay leaf at this point.
 If you’re not making sauce from scratch, have it on standby to top your dough when it’s ready.
Next, attach a dough hook to your stand mixer. Thoroughly clean and dry your countertop and sprinkle with cornmeal. Lightly oil a large bowl.
Combine 3 cups of flour, salt, and yeast in the mixer on low. Add the sugar and any additional spices or herbs, if using. Add the water and oil to the dry ingredients and scrape down the sides of the mixing bowl before starting the mixer. Start on low speed and increase the speed as the dry ingredients become incorporated into the wet.
Add additional flour gradually until your dough forms a minimally sticky ball on high speed. I can tell that the dough is ready for kneading if it is still somewhat sticky to the touch, but does not stick to the mixing bowl itself when whipping around on a high speed. (See my bread post for more pictures.) Flour your hands, remove the dough, and place the dough onto your dusted countertop.
Knead the dough, adding small amounts of flour as necessary, until it makes a smooth ball. Knead for 5-7 minutes total and then place the ball into your oiled bowl. Cover with a clean towel and let it rise in a warm place for 45 minutes.
After 45 minutes, punch down the dough, and separate into two smaller balls of dough. Leave sitting uncovered on your workspace for about 15 minutes. About 10 minutes into this second rise, preheat your oven to 425 degrees. In the time that it takes the oven to preheat, you will roll out and top your dough.

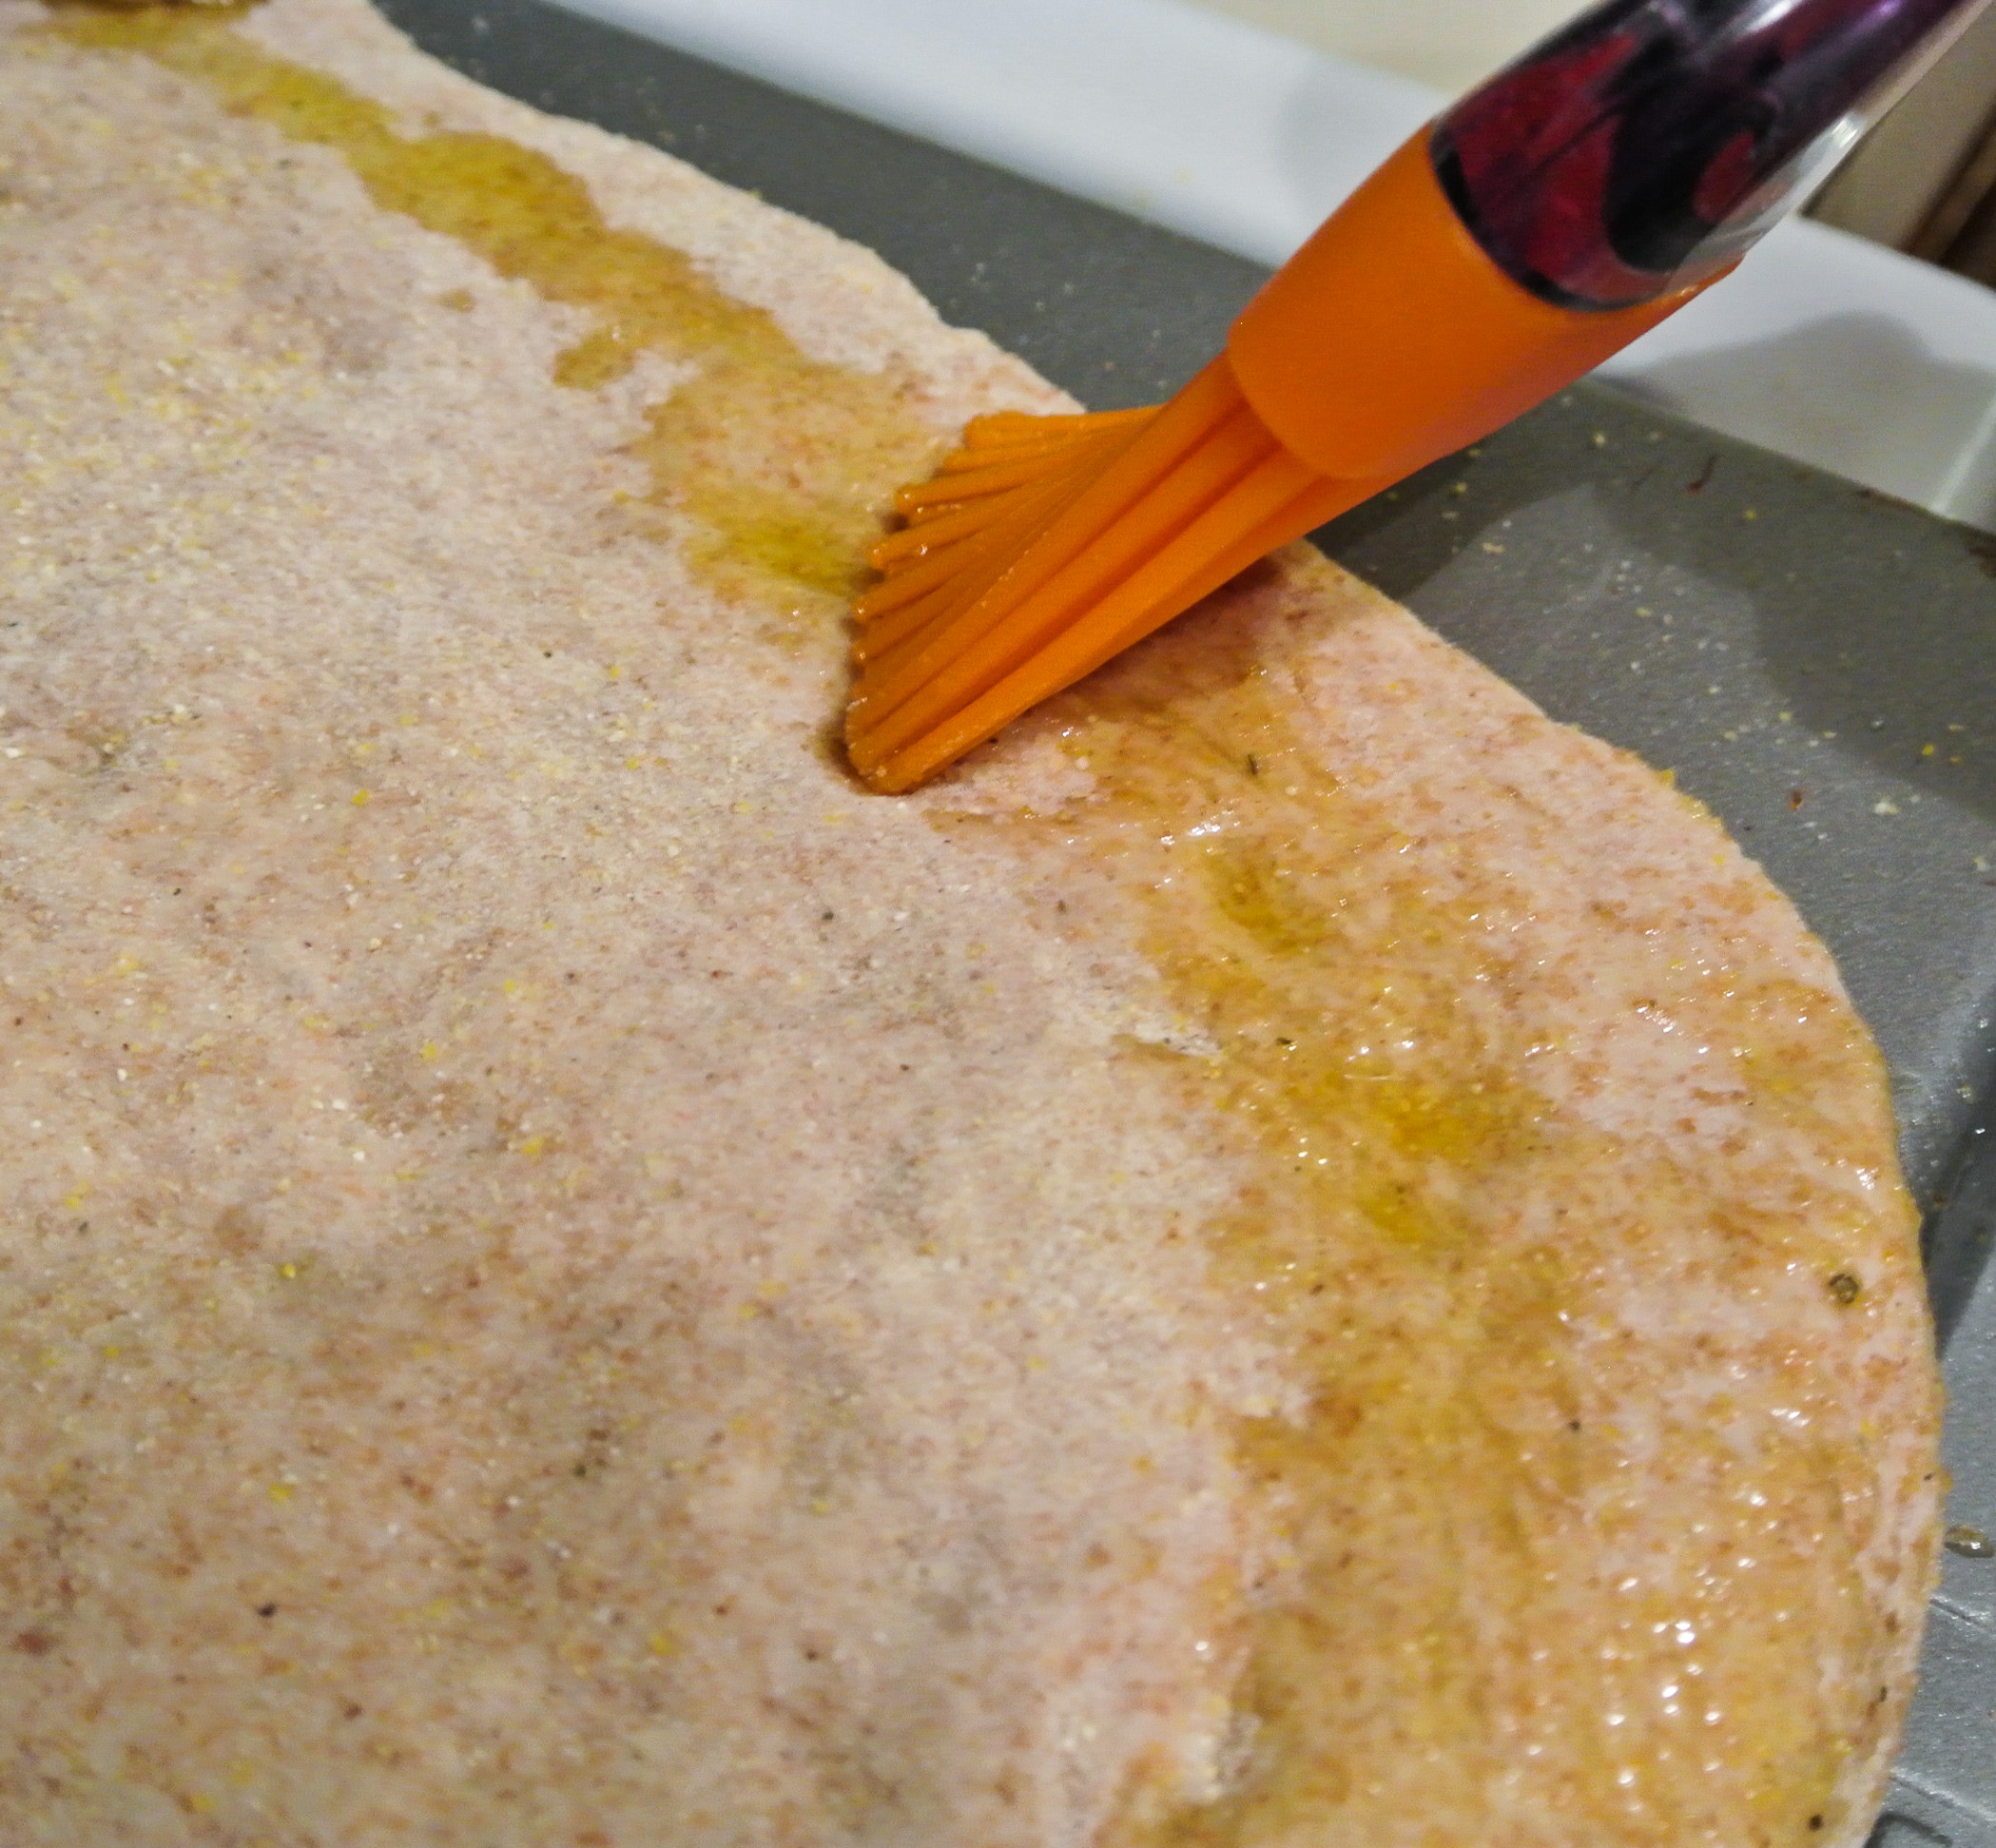
Just to keep the pizzas simple, albeit not the prettiest, we roll each of our dough balls into oval-ish shapes that fit perfectly on the BACK side of a cookie sheet (don’t want the lip of the sheet interfering with sliding the pizza off later). After you roll out each ball, make sure that the bottom has been freshly dusted with cornmeal and place the cornmealed side down on the back of your cookie sheet. Brush the crust with oil to keep some of the moisture in, sprinkle the entire middle with nutritional yeast, and top with sauce, etc. as you see fit.

 One at a time, your pizzas go into the oven atop the cookie sheet for 8 minutes. After 8 minutes, gently slide the pizza onto a pizza stone for an additional 6. The stone assists you in achieving a crunch to the bottom of the pizza, even if you are going for chewy inside. If you don’t have a pizza stone, bake the pizza atop the cookie sheet for approximately 15 minutes total. Either way, when the pizza is cooked, slide onto a large cutting board and slice. This shape won’t give you typical pie-shaped pieces, but it doesn’t matter how they look as long as they taste fantastic!
 Store in the fridge for 2-3 days, keeping in mind that without a thick layer of cheese on top to lock in moisture that the pizza will slowly dry out the longer that it sits.