Five-Year Reflection

January 4 marked five years since I started my plant-based journey (six, if you include the year that I gave up pork, red meat, butter, and eggs in an effort to lower my cholesterol…read more here).  Yay me!  Am I a perfect vegan?  No.  Never claimed to be.  I will say, however, that I am closer and closer to becoming a true vegan—lifestyle included—each and every day.

As you know, initially, my decision to forego eating animal products was strictly to live a healthier life.  Today, health is still my number one priority in practicing a plant-based lifestyle.  Throughout the years, however, the environment and animal ethics have come to play a role in how I live as well.

Over the course of the last year in particular, I’ve begun trying to consider where my makeup comes from or what cleaning products I’m using.  As cosmetics and cleaning supplies ran out, I replaced them with plant-based alternatives that include no animal products and that are not tested on animals.  Below you can check out a few of my favorite vegan beauty brands.  🙂  (NOTE:  I have not been paid to endorse any of these products.)

vegan-beauty

As a result of adopting other aspects of the lifestyle rather than just the diet, I find that plant-based living is becoming more complex in some ways.  Each time I use one of the leather purses that I was gifted or bought years ago, I feel a little guilty about it.  I’ve realized, however, that I can’t change the past, but I can control how I live my life moving forward.  That was my last leather purse!

Another valuable part of my experience with plant-based living has been mentoring.  Somehow, some way, I’ve inspired people to live healthier, more considerate lives.  THANK YOU!  I am not an expert by any means, but I’ve done the research and I continue to research.  I’m grateful that vegetarian and vegan diets are becoming THE way to nourish ourselves and protect the environment.  (Did you know that sales of cow’s milk have decreased by $1 billion?!)  I’ve had countless individuals reach out to me over the past five years looking to get started with their transformation and I’m honored to have been a part of their journey.  ❤

Finally, I’m at a place where the occasional “cheat” is becoming virtually nonexistent.  The first couple of years into my new diet, once or twice a year I would still treat myself to a piece of salmon or a handful of ribs; I now have no cravings whatsoever for even a once-a-year burger or chicken wing.  I would consider myself 100% vegetarian and 95% vegan.

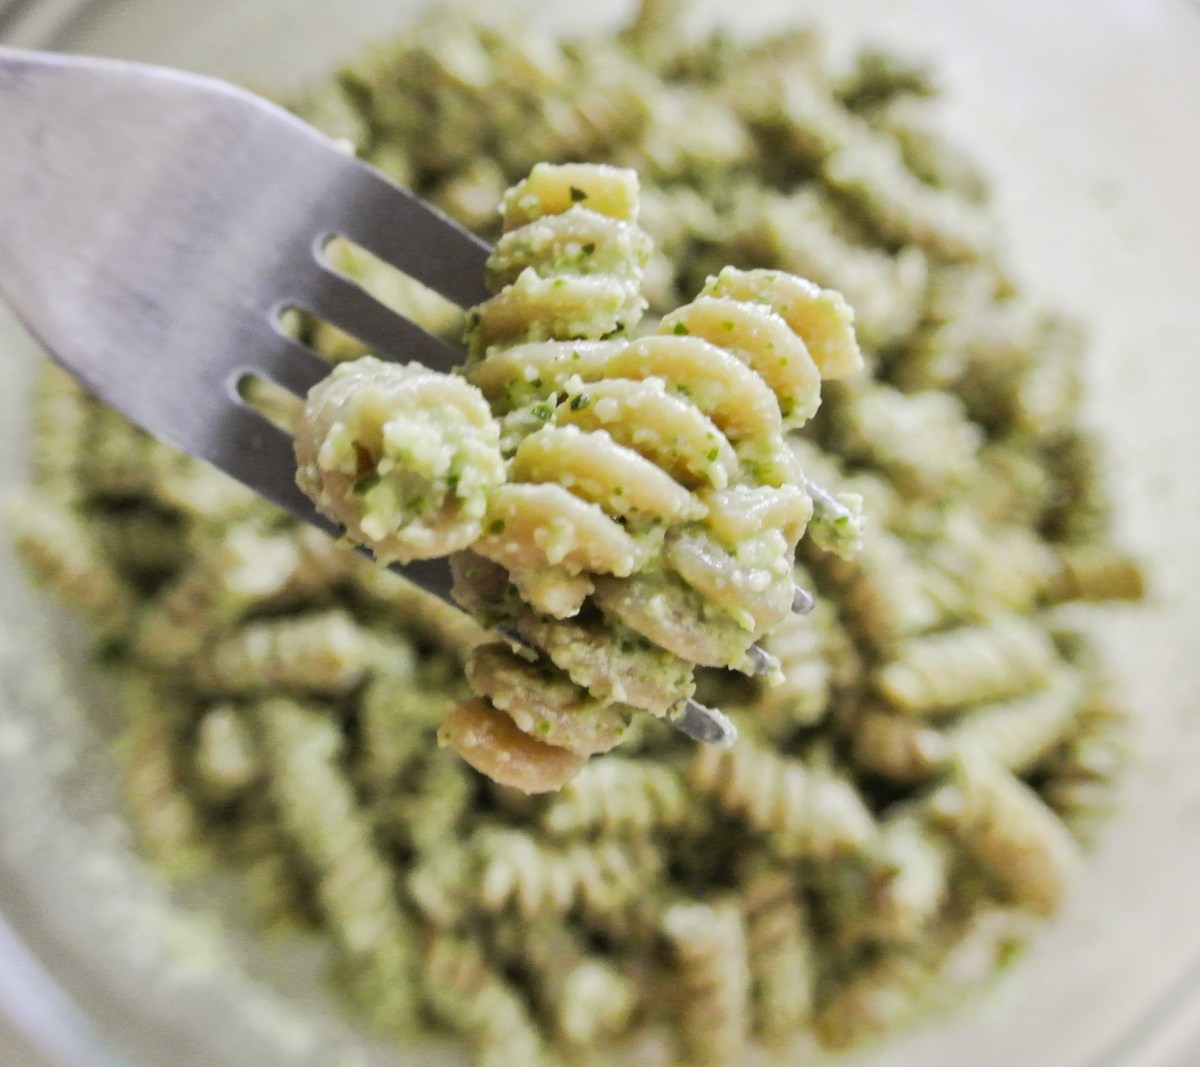
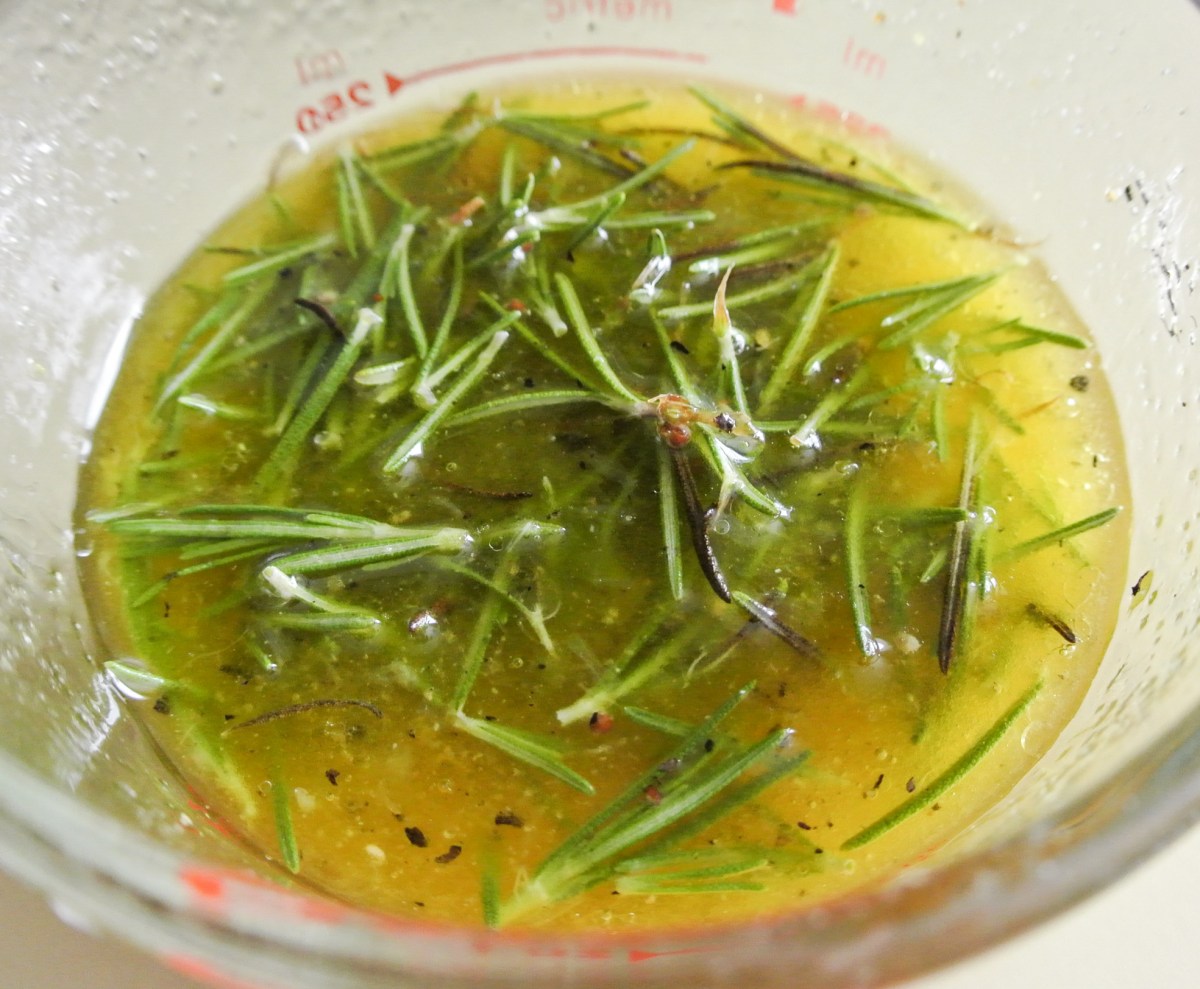
The pickings in our fridge were slim a few nights ago, so hubby suggested we order a pizza.  Like a “real” one, with actual dairy cheese.  The first few years into plant-based living—especially when I was pregnant and had all sorts of unusual cravings for crap food—I would have been all about that.  My desire for such items has become less and less.  We did order that pizza (vegetarian, but with cheese) and I told Travis that night that I think that that was the last time.  I don’t need it, I don’t crave it…and I make my own vegan pizza that’s fresh and delicious anyway!

I also used to go out to restaurants and pick out a salad on the menu and think to myself, “Ok, I don’t really eat cheese anymore, but there is goat cheese on this salad and they aren’t going to lower the price if I ask for it to be removed, so I am going to consume what I’m paying for.”  I’m proud to say that I don’t think that way anymore.  Now, I think about how I can request an easy substitution that would still allow me to get my money’s worth out of the salad and fill me up if I decide to omit an animal-based ingredient.  If there are cucumbers on the salad, for instance, I just ask the server if I can have extra cucumbers instead of cheese.  If the salad comes with ranch, I ask to sub a vinaigrette instead.  Always polite, I’ve never once been turned down.

If you’re interested in starting your plant-based journey, please reach out to me.  I’ve been at the starting line and am now well into the race a healthier person with a bigger heart and smaller carbon footprint.  It’s the gift to yourself, the environment, and the animals that keeps on giving!

Advertisement

If You’ve Gotta Have the Bubbles…

With 2017 having just begun, a number of us are reflecting on how this year will really be the best yet.  In general, I don’t do New Year’s resolutions, but I appreciate that many people like a date to mark the beginning of significant life change.  That date provides motivation and it has a personal meaning.  (Although it wasn’t planned, I even remember the date that I decided to pursue plant-based living over FIVE years ago, which I’ll be writing about next week.  Stay tuned!)

I published my first post to this blog on New Year’s Day 2015, so I truly understand the symbolism of a new year’s seemingly clean slate.  Although raising my two little ones has had more of an impact than I would like on how often I’m able to publish new posts, I’m keeping at it in my own time.  THANK YOU for sticking with me!  🙂

As 2016 dwindled down, I had a lot of people reaching out to me for guidance in diving into a plant-based diet or just eating more healthily in general.  Today’s post is inspired by one such inquiry. We are making over the beloved bubbly beverage soda!

Several months ago, a Facebook friend of mine was looking for a smarter alternative to soda, the one unhealthy item she just couldn’t seem to kick.  She isn’t the first person I’ve chatted with that can’t get enough of the bubbles; when she was getting married, my sister Petra—a longtime Coke lover—registered for a soda stream just to carbonate water in an effort to drink less cola.  I’ve also witnessed a number of friends throughout the years make the switch to diet sodas to hold on to the carbonation without the calories.

I’ve never been in to soda myself, but I definitely see the draw.  It isn’t so much the flavor or the sugar; it’s the bubbles.  They are tingly and refreshing and a welcome alternative to flat beverages like coffee, tea, and water.  I totally get it.  I can’t bear, however, watching people I care about continue to consume high fructose corn syrup, artificial flavors and dyes, and manmade sweeteners when I know that there is a better way to get that bubbly fix.

When I did consume soda (or pop, as we call it in Michigan) growing up, it was almost always Sprite.  The lemon-lime flavor is light and crisp and seems a perfect match for the bubbles.  So today, I’m making my own version of Sprite.

For starters, I’m using juice from a real lemon and a real lime.  As a result, my soda will be a bit cloudier than commercially produced versions, but I’m alright with that in the name of health.  Although highly dependent on the size of the fruit, the juice from one lemon contains roughly 15-20 calories and 50% of your daily recommended vitamin C and the juice from one lime contains roughly 10-15 calories and 30% of your daily recommended vitamin C.  Adding a couple of teaspoons of this freshly squeezed citrus juice to my soda is adding a negligible amount of calories and a noteworthy amount of vitamin C.  Yes!

soda-i

Secondly, I’m using an all-natural, plant-derived sweetener that is lower in calories than cane sugar.  You know that I don’t count calories (when you eat as healthily as I do, you certainly don’t have to), but knowing the facts is important when you’re trying to lose weight or tone up, so that’s why I’m sharing this information with you.  Xylitol is a sugar alcohol naturally occurring in the fibers of certain fruits and vegetables such as strawberries and cauliflower.  It contains 10 calories per teaspoon and does not have a significant impact on blood sugar levels.  So, we score again!  (If blood sugar, diabetes, or other issues related to sweeteners is of concern regarding your health and diet, make sure to do your own research on this or any product, of course!)

8 ounces of my lemon-lime soda contains roughly 30-35 calories and no artificial flavors or dyes.  8 ounces of Sprite contains 96 calories and the following ingredients: carbonated water, high fructose corn syrup, citric acid, natural flavors, sodium citrate, and sodium benzoate.  (Check it out on Coca Cola’s website if you need to see for yourself!)  I don’t know about you, but I like the idea of club soda, fresh juice, and xylitol better.

Have a soda stream?  Carbonate your own water and save yourself the sodium often found in club soda.  You could also get through the soda preparation more quickly by simply mixing your sweetener and water and dropping in one of my water infusers, which you’d already have on hand in your freezer.  Sweet!

And one final note, after many trials and tastes tests, I developed a soda formula that hits just enough of the sweet spot for me.  If you’re coming off of a serious soda addiction, you may need to start with a tad more xylitol until your taste buds adjust. 🙂 Enjoy!

FORMULA BASE:  SODA

  • 8 ounces carbonated water –> I’m using club soda.
  • 3 teaspoons freshly squeezed fruit juice –> I’m using 1.5 tsps lemon and 1.5 tsps lime.
  • 2.5 teaspoons natural, plant-derived sweetener –> I’m using xylitol.
  • OPTIONAL: pure extracts, spices, or herbs* to taste –> I’m not using any today.

*Can you imagine how delicious a sprig of fresh mint would be?!  Yum!

Combine all ingredients and stir until sweetener is dissolved.

Pour over ice.  If you make extra, be sure to stir before serving and keep in mind that like any soda, it may become flatter over time.

soda-v

Never Cook Oatmeal Again!

Oatmeal is one of my favorite breakfasts (I say “breakfast,” but typically don’t eat anything until about brunch/lunch time), but I often find that the moment I realize I want it, I don’t have any pre-prepared.  I then have to cook it right then and there and it is scalding hot afterward for what seems like an hour.  I don’t want to wait that long when I’m hungry.  🙂

I’ve recently gotten into the overnight oats trend.  There are a number of vegan bloggers that I’ve seen prepare oatmeal this way, which involves no cooking whatsoever.  The oats are soaked overnight and ready to eat the next morning!  In addition, if you’re trying to eat more raw plants—which are higher in nutrients and lower in calories—this take on classic comfort breakfasts is for you.

Now, if when you take your oats out of the fridge the next morning you don’t want to eat them cold, you’ll need to dish some up and leave them on the counter to get to room temp for a bit or pop them in the microwave.  Inevitably, they will cook a little if you opt for warmer oats, but you can control the heat level and cooking time of the microwave to minimize the loss of nutrients.  I have read in several places recently that microwaving food is the cooking method that removes the least amount of nutrients from food that enters in a raw state.  I’m still skeptical, but the research is certainly interesting…

Anywho, if you’ve played around with my traditional oatmeal formula, you’ll find that really the only difference is that you’re soaking the oats overnight rather than simmering them on the stovetop.  In addition, you can do this with steel cut oats, but you’d need a lot more liquid and probably time, too, so I stick with rolled.

This is a delicious, nutritious, and filling breakfast for you as well as a great ready-to-go breakfast for littles before school in the morning.  🙂  Enjoy!

FORMULA BASE:  OATMEAL

Serves 6-8

  • 4 cups uncooked rolled oats
  • ½ cup specialty ingredients + extra for garnishing (finely chopped raw fruit, dried fruit, raw nuts, raw seeds, etc.) –> I’m using ¼ cup each hemp and ground flax seeds.
  • 1/8-1/4 cup sweetener –>  I’m using just over 1/8 cup pure maple syrup.
  • ½-1 tsp extract (amount will depend on flavor intensity) –>  I’m using 1 tsp vanilla.
  • 1 tsp spices –>  I’m using 1 tsp ground cinnamon.
  • Liquid of choice for soaking (water or unsweetened plant milk) –>  I’m using unsweetened Ripple milk.*

*I’m typically a die hard almond milk fan, but I am trying to minimize nut exposure for my one-year-old for a little longer, so I’ve recently tried this brand.  Ripple milk is made from yellow peas and doesn’t taste much different than almond.  I found it at the Super Target by my house.

plant-milk

Place your oats in a large glass bowl with a lid.  Stir in all ingredients and fill the bowl with liquid enough to cover the mixture by about half an inch.

oatmeal-ingredientsovernight-oats

Cover and place the bowl in the fridge overnight.  In the morning, stir to combine any remaining liquid that may have settled on the top.  Store leftovers in the fridge for up to a week.

Crouching Basil, Hidden Kale

We can all eat more greens, but naturally, we often don’t want to.  Sometimes, as refreshing as it is, a big ‘ole salad just doesn’t fill us up the same as a bowl of mashed potatoes.  And smoothies are delicious, too, but what if I want something warm?  I could wilt my greens, but then, I’d have a plate of wilted greens (sorry ya’ll—that texture just doesn’t do it for me!).  How am I going to get my greens when I’m in the mood for comfort food?

Pasta to the rescue!  Growing up in an Italian family, pasta was a staple, and to this day, it is the comfort food I seek more than any other.  Pasta is also easy to prepare and extremely versatile.  Sometimes I toss it with my simple marinara, and other times, my creamy vegetable sauce.  You could even use my nacho cheese sauce to create your own mac.  Today, I’m revamping my pesto formula.

Fresh herbs make for one insanely flavorful pesto, but I’ve found that just about any raw greens will yield a bright and complex pasta sauce.  Thus, I’ve readapted my pesto formula to include the option of greens other than herbs.

Today’s rendition uses kale, which Nolan used to eat raw in a salad like a champ but wouldn’t even consider touching now if it isn’t blended up in a smoothie.  🙂  While smoothies remain my go-to for ensuring my toddler gets all of his nutrients on his pickier days, I’ve gotten creative with hiding vegetables.  Of course, hiding veggies in a bacon cheddar cheese omelet makes that effort moot, so I’ve had to work hard to make this game of hide-and-don’t-seek healthy.

If you need a change from hiding veggies in my super food muffins or smoothies, try out this new take on pesto.  Enjoy!

FORMULA BASE: PESTO

Makes about 1 ¾ cups 

  • 1 ½ cups fresh herbs or greens –> I’m using 1 cup kale and ½ cup basil.
  • 1 cup raw nuts –> I’m using cashews
  • 1/3 cup nutritional yeast
  • 5 cloves raw garlic
  • ½ cup citrus juice or water –> I’m using the juice of two lemons.
  • Additional spices (optional) –> I’m not using any.
  • Water/oil as needed for smoothness –> I’m adding water a tablespoon at a time as needed.

Combine all ingredients in a food processor and blend until smooth, adding water and/or oil as needed. The less oil used, the lower in fat the end product will be.  So flavorful, this pesto doesn’t even need salt!

pesto-pasta

Fudgy Brownie Bites

I’ve heard about people making brownies with black beans (I plan to try it out at some point), so that was the inspiration behind today’s truffle concoction.  I’ve recently become all about using beans in “desserts,” thus my cookie dough truffles made with white beans.  These brownie bites use my cookie dough truffle formula with a chocolatey twist!

Before I made the truffles with black beans, I really liked them and was pretty blown away by how much they taste like traditional cookie dough.  Now that I’ve subbed the black beans—which are high in protein, fiber, folic acid, and magnesium, and a solid source of potassium and iron—and tossed in some cocoa powder, I LOVE these truffles!  It’s kind of freaky how much they ended up tasting like ooey gooey fudgy brownies.

A true chocolate addict?  Up the cocoa powder, double the chocolate chips, or dip in melted dark chocolate.  Enjoy!

FORMULA BASE:  COOKIE DOUGH TRUFFLES

Yields 16-20 balls

  • 1 ½ cups cooked beans (e.g. garbanzo, great northern, cannellini, etc.) –> I’m using black.
  • ½ cup seed or nut butter (nuts/seeds ONLY) –>  I’m using peanut.
  • 1/8 cup+ liquid sweetener (e.g. agave syrup, maple syrup, etc.) –> I’m using ¼ cup agave.
  • ½-1 tsp extract (amount depends on flavor intensity) –> I’m using 1 tsp vanilla.
  • Pinch of pink Himalayan sea salt (optional) –>  I’m not using it.
  • ½ cup chips (e.g. chocolate, dried fruit, chopped nuts, etc.) –> I’m using 2 1/2 tbsps unsweetened cocoa powder and 1/4 cup mini-semi-sweet chocolate chips (vegan).

Combine all ingredients—except the chips—in a food processor and run until smooth. Transfer dough into a bowl and stir in chips.

dsc_3010

Using a melon baller or teaspoon, form into balls and roll in your hands until smooth. Ready to eat immediately! 🙂 Store leftovers in the fridge.

dsc_3014


Baby’s Banana Muffins

I have many readers that have shared with me that my super food muffins are among the first solids (after purees, of course) that they try with their babies.  (I’m flattered, amazing readers! <3)  I imagine this is because in addition to being loaded with super foods, they are easy to tear into small pieces and turn into mush in the mouth similarly to bread.  I typically make the muffins with a little bit of texture—shredded veggies or nuts, for example—but for all of the babies out there that might just be getting used to solids, I whipped up a batch that contains mashed banana as the star.

Don’t get me wrong, these are delicious and nutritious for anyone, and you could always throw in some chopped walnuts if you’re looking for a bit more texture yourself.  I’ve also played around with this formula and made some adjustments to reflect more experimentation in the kitchen.  If you have my original formula memorized like I do, you’ll notice the tweaks below.  🙂

A final note…

Ingredients like nuts, depending on whom you talk to, are not necessarily recommended for little ones.  I’ve read no nuts until age two.  I’ve also read eighteen months, and I’ve read that it might not even matter at all.  If you’re concerned about your baby consuming nuts, seeds, or plant milks made from such ingredients, always ask your child’s pediatrician first.  Then, enjoy!

FORMULA BASE:  SUPER FOOD MUFFINS

Makes 12 regular sized muffins

  • 1 cup flour –> I’m using whole wheat.
  • 1 cup cooked small grains (e.g. quinoa, kaniwa, millet, etc.) –>  I’m using millet.
  • 1/2 cup uncooked rolled oats
  • 2 tsp baking powder
  • 1 tsp baking soda
  • ¼ cup sweetener –>  I’m using light agave syrup.
  • 1/8 cup oil –>  I’m using coconut.
  • 1 cup raw (fresh or frozen) fruit or veggie –>  I’m using mashed banana.
  • 1-1 ¼ cups plant milk –>  I’m using almond.
  • 3 tbsps seeds (e.g. chia, hemp, poppy, flax, etc.) –>  I’m 1 tbsp each chia, hulled hemp, and ground flax.
  • ½-1 tsp extract (amount will depend on flavor intensity) –>  I’m using 1 tsp homemade vanilla.
  • ½-1 tsp spices –>  I’m using ½ tsp ground cinnamon.
  • ½ tsp salt (optional) –>  I’m not using any.

Preheat your oven to 350 degrees. Separately combine all of the dry ingredients and all of the wet ingredients (include the mashed banana in the wet).

muffin batter

Pour the wet into the dry and mix with a wooden spoon. The batter will be thick and lumpy, but you can always add more plant milk if it seems too dry or dough-like. Spoon the batter into a lined or greased cupcake pan and bake for 20-25 minutes. Use the toothpick test! Store in the fridge for up to two weeks.

Versatile Vegetable Marinade

Although the cellular structure of many fruits and vegetables is more difficult to penetrate than that of meat, it is still possible to marinate produce.  As with marinating meat, typically, the longer the better so that the produce can absorb as much flavor as possible. My marinade formula could certainly be used for meat, but of course, I prefer it on virtually any vegetable and some fruits.

In American cooking, marinating usually leads to grilling (or roasting), and today’s asparagus dish is no exception!  While I prefer to eat the majority of my produce raw, there are some items that are simply unpalatable in a raw state.  For me, asparagus is one of those, in most preparations.  I have had thin shavings of raw asparagus atop a salad before, but there’s quite a bit of work that goes into such a preparation and with the two littles always eat my feet, there isn’t always the time.  🙂

Thus, I’m using asparagus as the vehicle for my pre-grilling vegetable marinade.  When prepared al dente, asparagus—which comes in green, white and purple—is just delightful.  Too mushy and too raw = no bueno.  This fibrous vegetable is high in vitamin K and most notably, folic acid, which may ring a bell if you’ve ever taken prenatal vitamins.  Asparagus is a true super food!

asparagus

Hands down the best part of this marinade is that it need not be tossed once your veggies hit the grill.  Marinating meat leaves you with contaminated leftovers; marinating veggies leaves you with a delicious salad dressing.  Waste not, want not.

Lastly, while I use this marinade primarily on vegetables, you could also soak hearty fruits like pineapple to add a little sweetness to your kabobs.   Enjoy!

FORMULA BASE:  VEGETABLE MARINADE

Yields 1 cup marinade

  • 2 pounds raw vegetables (or fruit) –>  I’m using green asparagus.
  • ½ cup acid (i.e. freshly squeezed citrus juice, vinegar, mustard, etc.) –>  I’m using the juice of three lemons and one heaping tablespoon of whole grain mustard.
  • ¼ cup oil* –>  I’m using extra virgin olive.
  • ¼ cup liquid sweetener (i.e. agave syrup, maple syrup, etc.) –>  I’m using pure maple syrup.
  • ¼ fresh herbs** –>  I’m using rosemary.
  • Salt, pepper, spices, and/or dried herbs to taste –>  I’m using several grinds of black pepper and ½ tsp each garlic powder, onion powder, and pink Himalayan sea salt.

*When it comes to heating, not all oils are created equal.  Ideally, when grilling (or sautéing, frying, or roasting), you want to use an oil with a higher smoke point.  This allows you to optimally maintain nutrients and flavor when the oil is subjected to heat.  In addition, it is safer to cook with oils that contain primarily monounsaturated fats, although occasionally cooking with those primarily composed of polyunsaturated won’t hurt.  Today is one of those days for me as olive oil is not preferred for grilling, but it has the deeper flavor that I want.  Nine times out of ten, I use refined coconut or avocado oil.

**If you don’t plan to save excess marinade, it doesn’t really matter how finely your herbs are chopped.  (The bulk of my rosemary fell away in the grilling process and any excess leaves in the leftover marinade were easy to pick out.  Rosemary, in my opinion, does not have an enjoyable texture, even when finely chopped.)  If you do want to save the excess, however, finely chop your herbs so that you’ve got a more texturally appealing salad dressing when all is said and done.

Prepare your vegetables (peel, chop, etc.) and line them up in a 9 x 13 baking dish.  You can toss them right in or skewer them.

Mix together all marinade ingredients, starting with the wet.  I like to layer the ingredients in a single measuring up so that I don’t have to dirty multiple measuring cups.

pyrex

Pour the marinade over your veggies and let them soak for several hours, turning occasionally.  Once your vegetables are on the grill, drain any excess marinade and save in the fridge for salads.

cooked

Puppy Chow Remix

Today’s sweet treat is a cross between the classic American snack, puppy chow, and one of many special cookies that my mom makes every year for Christmas.  The happy marriage happened quite by accident.

When my dad was in town, he went over to my aunt’s for her famous chop suey, which she always tops with crunchy chow mein noodles.  Always the hostess with the mostest, she sent my dad back to my house with ample leftovers, including a huge bag of the chow mein noodles.

Now, while chow mein noodles aren’t particularly nutrient rich, this brand is vegan and not horribly unhealthy either.  Not one to waste food, I put my thinking cap on to transform them into a quick and easy snack, rich enough that one or two at a time will do you just fine.

chow mein noodles

My mom’s Christmas haystack cookies are named as such because they include chow mein noodles bathed in peanut butter and melted butterscotch chips, resulting in a small heap that looks just like the perfect home for a needle.  My intention was to replicate these—one of my favorite holiday treats she makes—the Fresh Formula way:  vegan.

There may be vegan butterscotch chips out there, but regardless, I didn’t have any on hand.  Just a couple of days before inheriting the chow mein noodles, I stocked up on some 85% dark chocolate in bulk.  I never tasted it when I bought it; the bitter smell alone told me that this chocolate was meant for melting and repurposing.  Thus, the idea for dark chocolate haystacks—or as Nolan calls them, “spiders”—was born.

dark chocolate

You can substitute any nut butter and any meltable chocolate to make this recipe your own.  You can also substitute any cereal—Chex is used in traditional puppy chow—crackers, pretzels, nuts, or chips for the chow mein noodles if you aren’t set on your heaps looking like hay.  As long as the combination tastes fantastic, the shape and appearance of the clusters doesn’t much matter.

The reason these treats ended up a cross between the haystacks and the puppy chow was because the 85% dark chocolate was much bitterer than I anticipated.  I enjoy 70% dark chocolate regularly and thought that 15% wasn’t substantially higher…but no, it is!  Even though, according to the ingredients listed on the bulk bin, there is sugar in the chocolate, I could barely taste it and practically puckered when I bit into the first haystack.  Travis thought of puppy chow and suggested I toss the haystacks around in powdered sugar to compensate for the lack of sweetness.  It worked enough for me—I’m so used to dark chocolate now that I don’t need my desserts oozing with sweetness—but Nolan said he would like “new spiders” with a little more sugar.  🙂  Lesson learned for next time.

Other tips…

This is the type of formula where having a kitchen scale really comes in handy.  I am getting better and better at eyeballing amounts and weights, but being precise is generally preferred in any recipe.  Using a simple kitchen scale, you can easily measure out the ingredients for today’s haystacks.

scale

Secondly, a roll around in powdered sugar is optional and I wouldn’t have done it had I not selected such a bitter chocolate that I made the mistake of not tasting first.  Oops!  If you like your desserts extra sweet, by all means, make it snow!  Just make sure to make your own powdered sugar (I use turbinado); remember, white, refined sugars are typically white as a result of bone char from cows.  Not vegan.  🙂

powdered sugar

You could also toss your haystacks in or top them with chopped nuts, sprinkles, or any other garnish that would add to the appearance or flavor.

You’ll love these yummy treats!  Assuming your little ones aren’t irked by spiders, they are bound to dig in, too!

FORMULA BASE:  HAYSTACKS

Yields 24 haystacks

  • 7 ounces unsweetened/minimally sweetened crunch (i.e. cereal, crackers, chips, pretzels, nuts, etc.) –>  I’m using chow mein noodles.
  • 12 ounces vegan chocolate (chips or bars) –>  I’m using 85% dark chocolate bars.
  • ¾ cup nut or seed butter (nuts/seeds only) –>  I’m using a combination of peanut and sunflower.
  • ¼ cup garnish (i.e. powdered sugar, sprinkles, chopped nuts/seeds, desiccated coconut, etc.) (OPTIONAL) –> I’m using homemade powdered sugar.

Using a double burner*, melt your chocolate and nut/seed butter together over medium high heat, stirring occasionally.

double burner

Once melted, pour the mixture over your crunch element and stir to combine.  If the combination seems too runny, you can always add more crunch.

mix

Use a spoon to dollop small heaps of the mixture onto baking sheets lined with silicone baking pads or parchment paper.  They will eventually solidify if left on the counter top, but the process is expedited in the fridge or freezer.

haystacks

Once solid, you can top your haystacks with or toss them in a garnish, if you wish.  Store in an airtight container at room temperature.

up close

*Don’t forget to protect yourself from steam that might escape your double burner.  I wear gloves start to finish in the process of melting chocolate and don’t remove them until I’ve poured the chocolate out of the melting vessel. 🙂

How to Keep an Omnivore Happy

I just said goodbye to my dad, who we lovingly nicknamed Papa Kale while he was visiting from Michigan.  My dad was raised in a typical American omnivorous family with meat and potatoes and good old comfort foods on the menu often.  In fact, I think a lot of us millennials were raised that way, too; research about plant-based living is relatively contemporary in the grand scheme of human existence.

Thankfully, amid overwhelming evidence that a plant-based diet is substantially healthier than an omnivorous one, it is becoming increasingly popular to ditch animal products.  Check out any menu at a respectable food establishment:  vegan—or at least vegetarian—items are popping up everywhere.  It’s never too late to eat healthier, to educate ourselves, and to educate generations prior.  I don’t try to convert anyone; I just share what I know when people come to stay with me.  You might eat hamburgers, but they’ll never be flyin’ off the grill chez Witzke.  🙂

My dad earned the title Papa Kale because he really embraced what he calls “how the other half lives.”  Ha!  Although skeptical at times, my dad cleaned his plate—and went for seconds whenever possible—of all of our vegan food.  I’m still new-ish to the plant-based eating scene (four and half years in), but for real, my food is delicious.  As you know, every party or get together we host at our house is 100% vegan…and no one goes hungry…ever.

papa kale

I’ve written before about how making the switch to a plant-based lifestyle takes time and patience, but truthfully, that’s much easier that pleasing those that have little or no intention of changing their diets long-term, but simply want to survive staying with you.  🙂  Whether you have out-of-town guests or are trying to convince a persnickety spouse or children to consume healthier foods, there are a few things to keep in mind:

  1. Don’t start with something extreme. Items like kale and tofu aren’t likely to win anyone over on the first try.  A green smoothie or edamame?  Same ingredients, different story.
  2. Offer variations of popular comfort foods. Classic dishes like chili and pizza (two of my dad’s favorites, vegan or not) are generally winners in everyone’s book.  Make a vegan version and blow minds.
  3. Dispel myths about how bland and boring vegetables are. Yes, frozen, crinkle-sliced carrots that are heated, salted, and served can certainly be unappealing.  In addition, I think that when Americans picture “salad,” they often see iceberg lettuce, shredded carrots, and ranch dressing.  Travis and I whipped up these two salads (above and below) for my pops and vegetables were the main event.  (The top salad is a combination of kale, cucumber, millet, red grapes, and slivered almonds.  The bottom includes fresh tomatoes, grilled corn, avocado, lime juice, green onion, and black beans.  Both salads were loaded with herbs/spices, too.)
  4. Have sweets on hand, too. I have literally never made a bad vegan dessert—I’m not just saying that!  So far, they have all turned out fabulously, despite the gambling I’ve done with substitutions for animal-based components.  My brownies are always a crowd pleaser and my dad enjoyed my first-ever dessert smoothie, which I make all the time, and not just for dessert.
  5. Most importantly, foster a supportive, judgement-free zone. Plant-based living isn’t totally effortless for anyone.  I’ve been very frank with you about occasionally splurging myself and it takes time to break those habits…IF they are ever totally broken.  No worries—making an effort to do better is what matters…and we can ALL do better.

Moral of the story?  I can’t prepare chicken or steak for my dad—or anyone—in good conscience now that I know what the potential consequences are.  So, I continue eating and living how I always do and end up keeping my guests full and happy in the process.  Good luck—not everyone is as easy to please as Papa Kale.  🙂  Miss you, Dad!

bean salad

2-to-1 Copycat Larabars

Let me start by saying that I think Larabars are absolutely fantastic.  I love the company’s transparency with ingredients and even better, I love how simple the ingredients are.  The truth of the matter is, to buy quick and easy snacks made with natural, whole foods and no preservatives is NOT cheap.  So, true to my Fresh Formula concept, I make my own.

Don’t get me wrong – it’s still somewhat expensive to make Larabars at home, but you save in not paying for packaging and you can tailor the formula to what is on sale in bulk (which is how I purchase all of my nuts and seeds for trail mix and more).  More importantly, you can customize the ingredients to perfect an already pretty darn delicious model.  Of course, I’ve created an easily adaptable formula that works with both nuts and seeds, if you’re concerned about any allergies.

In today’s rendition, I’m using a variety of raw nuts and pepitas.  The pepita is the kernel of the pumpkin seed, which you can see below.  If you checked out my original power bar recipe, you know that pepitas are a powerhouse of nutrition.  I put them in recipes like today’s and throw them atop salads, too.

pepitas

As far as the dried fruit in my Larabar formula is concerned, you’re going to get your easiest process with medjool dates.  When they are fresh, they are soft, creamy, and easy to blend.  Other dried fruits will do just fine, but you may need more of them to achieve the same effect as the dates.

My son (well, my whole family really!) LOVES these.  I pack them in his lunch for school and you can cut them into any shapes you want for your littles.  No added sugar, salt, or oil = delicious and nutritious.  Enjoy!

FORMULA BASE:  COPYCAT LARABAR

Makes 16-18 bars

  • 2 cups unsweetened dried fruit –>  I’m using pitted medjool dates.
  • 1 cup raw nuts and/or seeds –>  I’m using a mix of walnuts, pecans, almonds, cashews, brazil nuts, hazelnuts, and pepitas.

Blend all ingredients in a food processor until a thick, pliable dough forms.

dough

Press into an 8 x 8 pan lined with wax paper.  Flatten with your hands.  Cover the dough with an additional piece of wax paper and smooth out the dough (it need not be perfect).

pan

Let chill in the fridge for a couple of hours before cutting.  Store in the fridge for a firmer consistency.

This slideshow requires JavaScript.