Cookie Dough Truffles, Take Two

It’s been a while since my three-year-old ate beans other than in tofu. It’s also been a while since I whipped up a batch of my cookie dough truffles. Thankfully, I can solve both problems with one delicious and nutritious treat!

The first time I made these truffles, I used peanut butter and garbanzo beans as the base. This time, I’m using sunflower butter (which has also made appearances in my power balls and bars) and great northern beans. Like many beans, great northerns are jam-packed with fiber, protein, iron, and folate. Beans are a true super food and incredibly versatile. They’d have to be if I’m using them in dessert, right?!

DSC_2907

Please excuse the mushed appearance of these beans, which came from a can. Remember, always try to buy dry beans and soak and sprout/cook them yourself. I am working on finding a system that works for me, but for whatever reason, I have a terrible time digesting beans that I’ve prepared. They are the only item I buy canned, ideally organic and/or with no salt added whenever possible.

Anywho, today’s PSA aside, we are ready to roll, literally! These truffles make for an easy snack for humans big and small…

…or, dip them in melted dark chocolate, let harden, and bring to a party. I love seeing the look on people’s faces when they can’t get enough of my food and then I tell them it’s vegan. Since when is vegan food supposed to be repulsive?! 🙂 Enjoy!

FORMULA BASE: COOKIE DOUGH TRUFFLES

Yields 16-20 balls

  • 1 ½ cups cooked or sprouted white beans (e.g. garbanzo, great northern, cannellini, etc.) –> I’m using great northern.
  • ½ cup seed or nut butter (nuts/seeds ONLY) –> I’m using sunflower.
  • 1/8 cup+ liquid sweetener (e.g. agave syrup, maple syrup, etc.) –> I’m using pure maple syrup.
  • ½-1 tsp extract (amount depends on flavor intensity) –> I’m using homemade vanilla.
  • Pinch of pink Himalayan sea salt (optional) –> I’m opting out.
  • ½ cup chips (e.g. chocolate, dried fruit, chopped nuts, etc.) –> I’m using a heaping ¼ cup of mini-semi-sweet chocolate chips (vegan). This time around, my dough was a tad too sticky to roll, so I also added ¼ cup ground flaxseed and unsweetened desiccated coconut (I keep both on hand in my pantry at all times).

Combine all ingredients—except the chips—in a food processor and run until smooth.

DSC_2909

Transfer dough into a bowl and stir in chips. Using a melon baller or teaspoon, form into balls and roll in your hands until smooth.Ready to eat immediately! Store leftovers in the fridge.


Advertisement

Back-to-School Power Balls

Truthfully, these are anytime super food snacks, but I made them specifically to send Nolan off to summer camp at his new school, so alas, the title of this post.  If you’ve already tried making them, you know that my power balls are filling enough that two or three make for a solid snack, and sweet enough (but not too sweet) that they could practically pass for healthy truffles.  They are the ultimate school snack and one that I’m sure Nolan’s friends will have their eyes on.

There’s nothing unusual or new to report with this version, as these power balls include all ingredients you’ve seen in my previous posts.  The star today is sunflower butter—which made its first appearance in my dark chocolate sea salt power bars—since it is nut-allergy friendly.  Many schools have strict rules about peanuts on campus, making sunflower seeds an excellent alternative.

Using a melon baller, I made these power balls extra small so that they are bite-size for Nolan and easy to snack on between activities.  I’ll admit, whipping these up takes a lot more time than picking up a box of fruit snacks at the grocery store, but it’s well worth providing my kids the best nutrition possible to get through their busy days.

Looking for a different shape and slightly different formula?  Check out my power bars!

FORMULA BASE:  POWER BALLS

Makes 12-14 small balls (or 20-ish mini-balls)

For the dough:

  • 1 cup nut or seed butter (nuts/seeds only) –>  I’m using sunflower.
  • 1 cup uncooked whole grains –>  I’m using rolled oats.
  • ½ cup unsweetened dried fruit (without added oil) –>  I’m using 6 small pitted medjool dates.
  • 2 tbsps natural liquid sweetener –>  I’m using 1 tbsp agave syrup.*
  • 1 tbsp ground flaxseed
  • 1 tbsp unsweetened cocoa powder

Garnish ideas (approximately 4 tbsps):

  • Raw seeds -> I’m using 2 tbsps of ground flaxseed.
  • Raw finely chopped nuts
  • Unsweetened coconut flakes -> I’m using 2 tbsps of unsweetened, desiccated coconut.
  • Unsweetened cocoa powder
  • Finely chopped unsweetened dried fruit bits (without added oil)
  • Melted dark chocolate (which will re-solidify after dipping)

*I cut 1 tbsp of sweetener because the sun butter I happen to be using was pre-sweetened.  I never buy nut or seed butters that contain added salt, oil, or sugar, but the lady that used to watch my kids had an excess of sun butter that she was concerned would go to waste.  I’m not going to pass up free plant-based butters (which can be quite expensive), so I needed to adjust my formula today.  🙂

Turn your whole grains into flour using your food processor or blender. You could also use rolled oats as is. The texture of the balls will be different, but rolled oats are one of few grains soft enough to be palatable without becoming flour.

Combine the flour and your remaining ingredients in a food processor. Run until a thick, pliable dough forms. You will probably have to scrape down the sides of the processor with a spatula at least once.

Shape the dough into 1-1 ½ inch balls and roll in garnish.

garnish

Enjoy immediately or store in the fridge.

power balls

Dark Chocolate Sea Salt Power Bars

Nolan has decided that his favorite food is chocolate. “Chocolate is a good snack, Mom.” Nolan wants chocolate on or with almost everything he eats. Thankfully, his mama is hip to the word on dark chocolate, which is all he’s ever had. Like a lot of people, I grew up on milk chocolate, which I think most would agree is richer and more palatable. Dark chocolate is an acquired taste, but now that it’s all I eat, the rare instances when I have milk, my tastes buds are blown away by how cloyingly sweet it is.

Why make the switch from milk to dark? Many milk chocolate treats contain sugar and milk as their primary ingredients when it is the cacao bean that contains the powerhouse nutrients. Once you get past the slightly bitter and certainly less sweet taste of dark, you can now consume chocolate that provides true health benefits. Dark chocolate that is 72% cacoa or greater is jam-packed with protein, fiber, and antioxidants. It is heart healthy and can boost brain power, too. YUM!

DSC_2699

Of course, like all sweets, we can’t overdo it with even dark chocolate. Cacoa does contain fat and when made into a chocolate bar, for instance, also contains added sugar. Point is, a little bit of dark chocolate every day—yes, I eat it every day folks!—is not only not going to hurt you, but will provide you with powerful nutrients. Opt for fair trade whenever possible.

What do I say when Nolan wants chocolate? I give it to him. Not in unlimited quantities and only after or in conjunction with another snack or meal, but like me, he eats it every day. (For the parents out there who may be wondering about amount, if the average dark chocolate bar is three ounces, he has half an ounce or less in a day. Hopefully that helps you to visualize the quantity!)

Today’s rendition of my power bars also incorporates a touch of pink Himalayan sea salt, which is loaded with minerals. A little bit is ok. 🙂 If I didn’t sell you enough on giving dark chocolate a try, Travis said that these power bars are one of the best things I’ve ever made. So, there’s that. Enjoy!

FORMULA BASE: POWER BARS

Yields 9 square bars*

For the dough:

  • 1 cup uncooked whole grains –> I’m using ¾ cup wheat berries (learn about wheat berries by checking out my multi-grain salad formula) and ¼ cup ground flaxseed.**
  • 1 cup unsweetened dried fruit (without added oil) –> I’m using pitted medjool dates.
  • ½ cup nut or seed butter (nuts/seeds only) –> I’m using sunflower.
  • 2 tbsps natural liquid sweetener –> I’m using agave syrup.
  • Extract and/or spices to taste (optional) –> I’m using 1/8 teaspoon pink Himalayan sea salt.

Garnish ideas (up to ½ cup):

  • Raw seeds
  • Raw finely chopped nuts
  • Unsweetened coconut flakes
  • Unsweetened cocoa powder
  • Melted dark chocolate to pour over the top (which will re-solidify after chilling) –> I’m using 3 ounces of 72% cacoa + a sprinkle of pink Himalayan sea salt.

*Double the recipe to make double the bars, or, to achieve thicker bars.

**Yes, I know that flaxseed is not a whole grain. Just wanted to add a little texture and different nutrients to the bars today. 🙂

Turn your whole grains into flour using your food processor or blender (my Vitamix has a dry blade pitcher).

Then, combine the flour and your remaining ingredients, except the garnish. Run until a thick, pliable dough forms. You will probably have to scrape down the sides of the processor with a spatula at least once.

Turn the dough out into a mixing bowl. Use your hands to combine half of your garnish (unless it’s melted chocolate) and to break up any clumps of dried fruit and/or butter. Firmly press the dough into an 8 x 8 pan lined with wax paper.

DSC_2697

Evenly distribute the remaining garnish, pressing into/pouring onto the top of the bars.

To melt dark chocolate: Use a double boiler (not the microwave). Fill a sauce pan with about an inch of water and turn it up to medium high heat. Place a glass bowl containing your chocolate on top of the pan. Stir chocolate occasionally until it completely melts. BE CAREFUL OF ANY STEAM COMING UP FROM THE SAUCE PAN.

DSC_2703

Chill the bars for at least 2 hours before cutting into the desired size and shape. Store in the refrigerator.

DSC_2717


Make Smart Substitutions

DSC_1985

I am excited to share with you that I completed my first Fresh Formula publication outside of my blog.  🙂  I completed an article for the Adjunct Faculty Association spring newsletter, The Connection, and was among only five adjuncts selected to write in the health and wellness section.  Today, I thought I’d share that article with you.

If you’re a regular subscriber of The Fresh Formula, some of the article’s content won’t be new information, but a refresher never hurts.  I also included the recipe for my chocolate peanut butter banana smoothie, which was one of my first blog posts.  Click the link above to see the original article or read the text below:

On my plant-based living blog, The Fresh Formula, I share information and recipes for healthy eating.  One of the easiest changes we can make to our diets is to consider healthier substitutes for the items that we are using regularly.  Below, I have listed some examples of substitutions that I have made in my own kitchen:

  • White flour –> Whole wheat flour, spelt flour, graham flour
  • White granulated sugar –> Turbinado sugar, maple syrup, agave syrup, medjool dates
  • Iodized table salt –> Pink Himalayan sea salt

DSC_1980

  • Nut butters with additives –> Nuts-only nut butters
  • Eggs –> Chia seeds or ground flaxseed (mixed with water), bananas, steamed apple puree
  • Dairy milk –> Unsweetened almond, cashew, coconut, grain, and hemp milks
  • Canned beans –> Dry beans or unsalted canned beans (beans only)
  • White rice –> Brown rice, farro, quinoa, wheat berries, cracked wheat, barley
  • Prepackaged popcorn –> Bulk popping corn (made on the stovetop)

DSC_1982

  • Vegetable or canola oil –> Coconut, avocado, sesame, peanut, and olive oils
  • Boxed/canned stock/broth –> Unsalted homemade stock (can also be used as a flavorful substitute for water when cooking whole grains)

While many of these substitutions are more expensive, some are cheaper than their preservative-laden brethren; I believe that the health benefits are worth it either way.  I adopted a plant-based lifestyle because I had high cholesterol, so eggs, for example, were one of the first items to cross off of my shopping list.  Chia seeds, by contrast, are cholesterol-free sources of omega-3 fatty acids, protein, and calcium.

I have included my irresistible chocolate peanut butter banana smoothie recipe incorporating many of the aforementioned substitutions.  It is so decadent, it can serve as dessert, but is a healthy option for a meal or snack, too!

CHOCOLATE PEANUT BUTTER BANANA SMOOTHIE

Serves 2-3

  • 2 frozen bananas (or fresh bananas and a few ice cubes)
  • ½ cup peanut butter (nuts only)
  • 1 heaping tbsp of unsweetened cocoa powder
  • 1 tbsp chia seeds
  • 1 tbsp ground flaxseed
  • 2 pitted medjool dates
  • Unsweetened almond milk to achieve desired consistency (start with ½ cup)

Combine all ingredients in a blender and puree until silky smooth.

DSC_1505

For more valuable health tips, information on plant-based living and eating, and tons of delicious recipes, visit thefreshformula.com and subscribe for regular updates.  Cheers to good health!

Nothin’ Like the Smell of Freshly Baked Bread!

DSC_1804

I love bread (who doesn’t?!) and I insist on the absolute best if I’m going to buy it premade. I’m talking whole grain, organic, all natural, no preservatives, and loaded with extras like seeds and nuts. When it comes to bread, high quality will cost you; my favorite pre-made bread is $7.00 a loaf. Between me, Travis, and Nolan, that bread could easily disappear in less than five days.

I’m a big proponent of DIY and prefer, when I have the time, to go the extra mile and make food items from scratch that I could easily buy in the store. Travis and I have made our own plant milk, pasta dough, extracts, beer, wine…and the list goes on! I had been making quick breads for years, but knew when the price of my favorite pre-made yeast bread went up again that I had to learn how to make it myself.

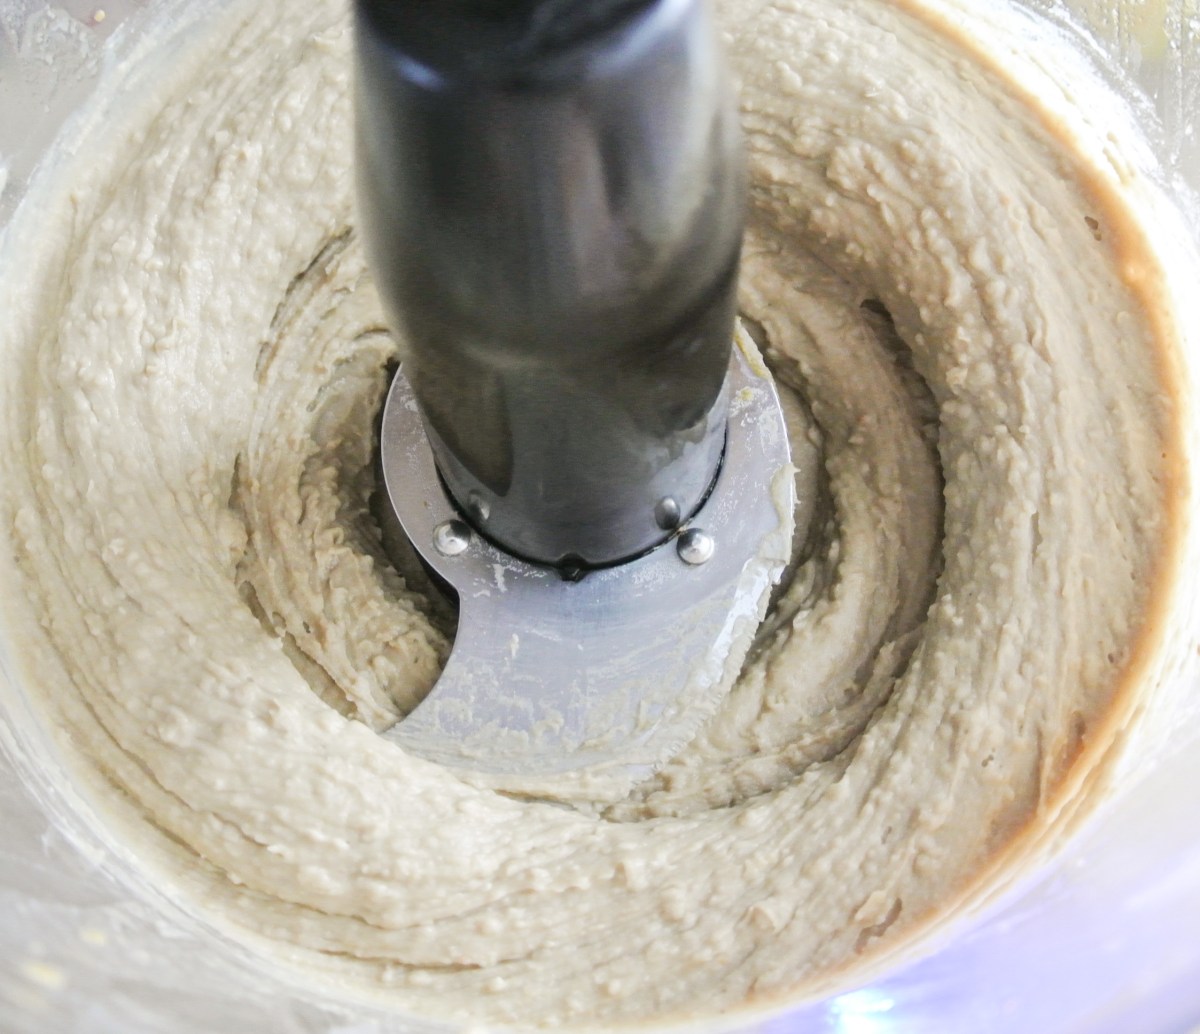
Making yeast bread, I found, it actually quite simple, but time-consuming. Thankfully, most of the time is spent waiting for the dough to rise, so I take the opportunity to do a short workout, clean the house, or do some more cooking during this time period. The best part? I can make my own bread, meeting all of the above criteria and loaded with extras, for about ONE THIRD of the price of my favorite $7.00 loaf!

Is yeast bread vegan? Yes, it is. It’s true that the yeast is “alive” when you go to make the bread, but it is a simple organism, incapable of pain, emotions, or thought, just like plants. At one point, the bananas on your counter and kale in your fridge were living, growing organisms as well. It is impossible to avoid eating something that was once living and any moral dilemma you may face with yeast certainly barely compares to that that you might experience with cows, pigs, birds, and fish. 🙂

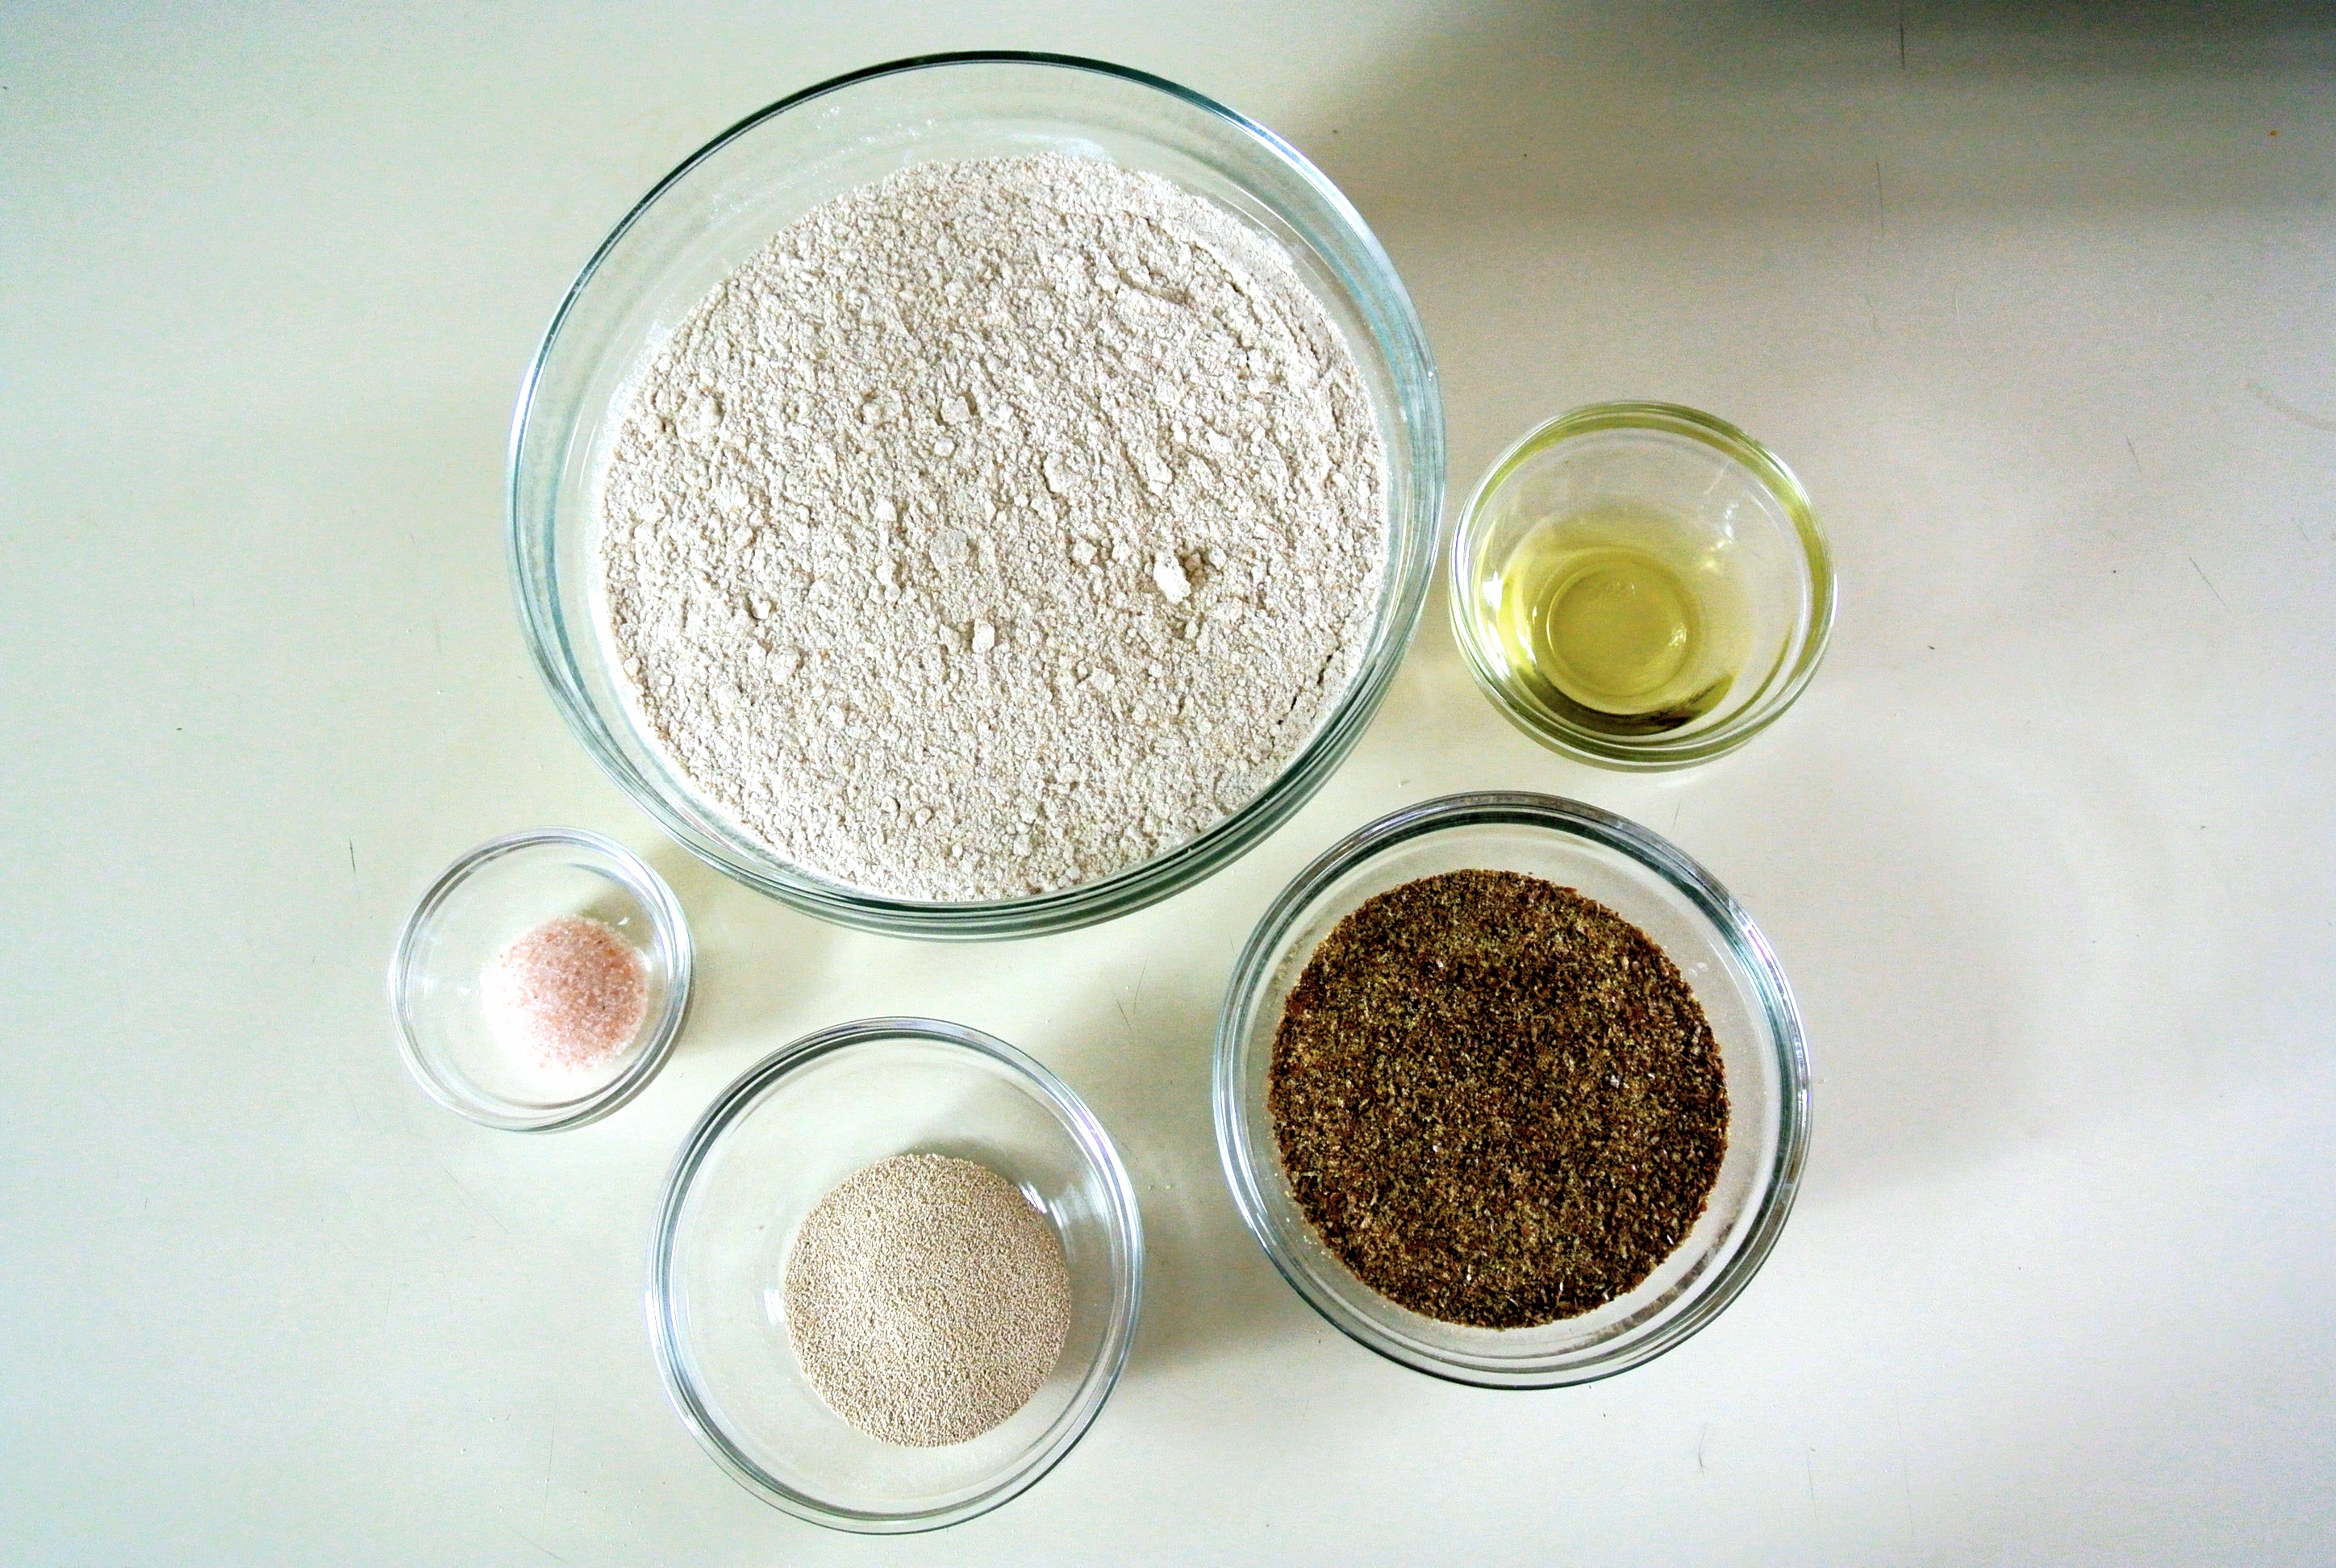
Let’s talk a little bit about some of the ingredients I’m using today, pictured below.

DSC_1781

SPELT FLOUR: Although I am a fan of whole wheat flour, spelt flour is even richer in vitamins and minerals, and more flavorful.

PINK HIMALAYAN SEA SALT: HSS is naturally high in iodine, among over eighty other vitamins and minerals, including iron. It contains less sodium per serving than iodized white table salt. I don’t use a lot of salt in my cooking in general, but I’ve made this bread with and without and it just doesn’t taste the same without.

YEAST: I use rapid rise yeast. It does the same job as active dry, but faster.

GROUND FLAXSEED: Flaxseed is a super food high in Omega-3 fatty acids, lignans, and fiber, and may even reduce the risk of major diseases like cancer and diabetes. NOTE: You must eat flaxseed ground in order to reap its nutritional benefits.

AVOCADO OIL: Avocado oil is high in vitamin E and potassium and contains more protein than any other fruit. It can lower blood pressure and increase absorption of carotenoids from other fruits and vegetables.

Like my other fresh formulas, I’m using what I have available on hand. You can substitute any flour or oil you have in your pantry. Enjoy!

FORMULA BASE: YEAST BREAD

Makes 1 standard size loaf

  • 3-4 cups of flour, plus more for dusting your workspace –> I’m using 2 ½ cups spelt and filling in as necessary with whole wheat.
  • ¼ cup ground flaxseed
  • ½ tsp salt –> I’m using pink Himalayan sea salt.
  • 1 packet rapid rise yeast
  • 1 tbsp oil –> I’m using avocado.
  • 1 ¾ cups very warm water (hot, but touchable)
  • Up to ½ cup specialty ingredients (optional) –> I’m using equal parts chia seeds, hemp seeds, and raw sunflower seeds.

Attach a dough hook to your stand mixer (you can make the bread entirely by hand, but it will be a little workout!).

DSC_1780 Thoroughly clean and dry your countertop and sprinkle with flour.

DSC_1784 Have any specialty ingredients of choice nearby to eventually knead into your bread dough. Lightly oil a large bowl and a loaf pan.

Combine 3 cups of flour, salt, and yeast in the mixer on low. Add any additional spices or sweeteners, if using. Add the water and oil to the dry ingredients and scrape down the sides of the mixing bowl before starting the mixer. Start on low speed and increase the speed as the dry ingredients become incorporated into the wet.

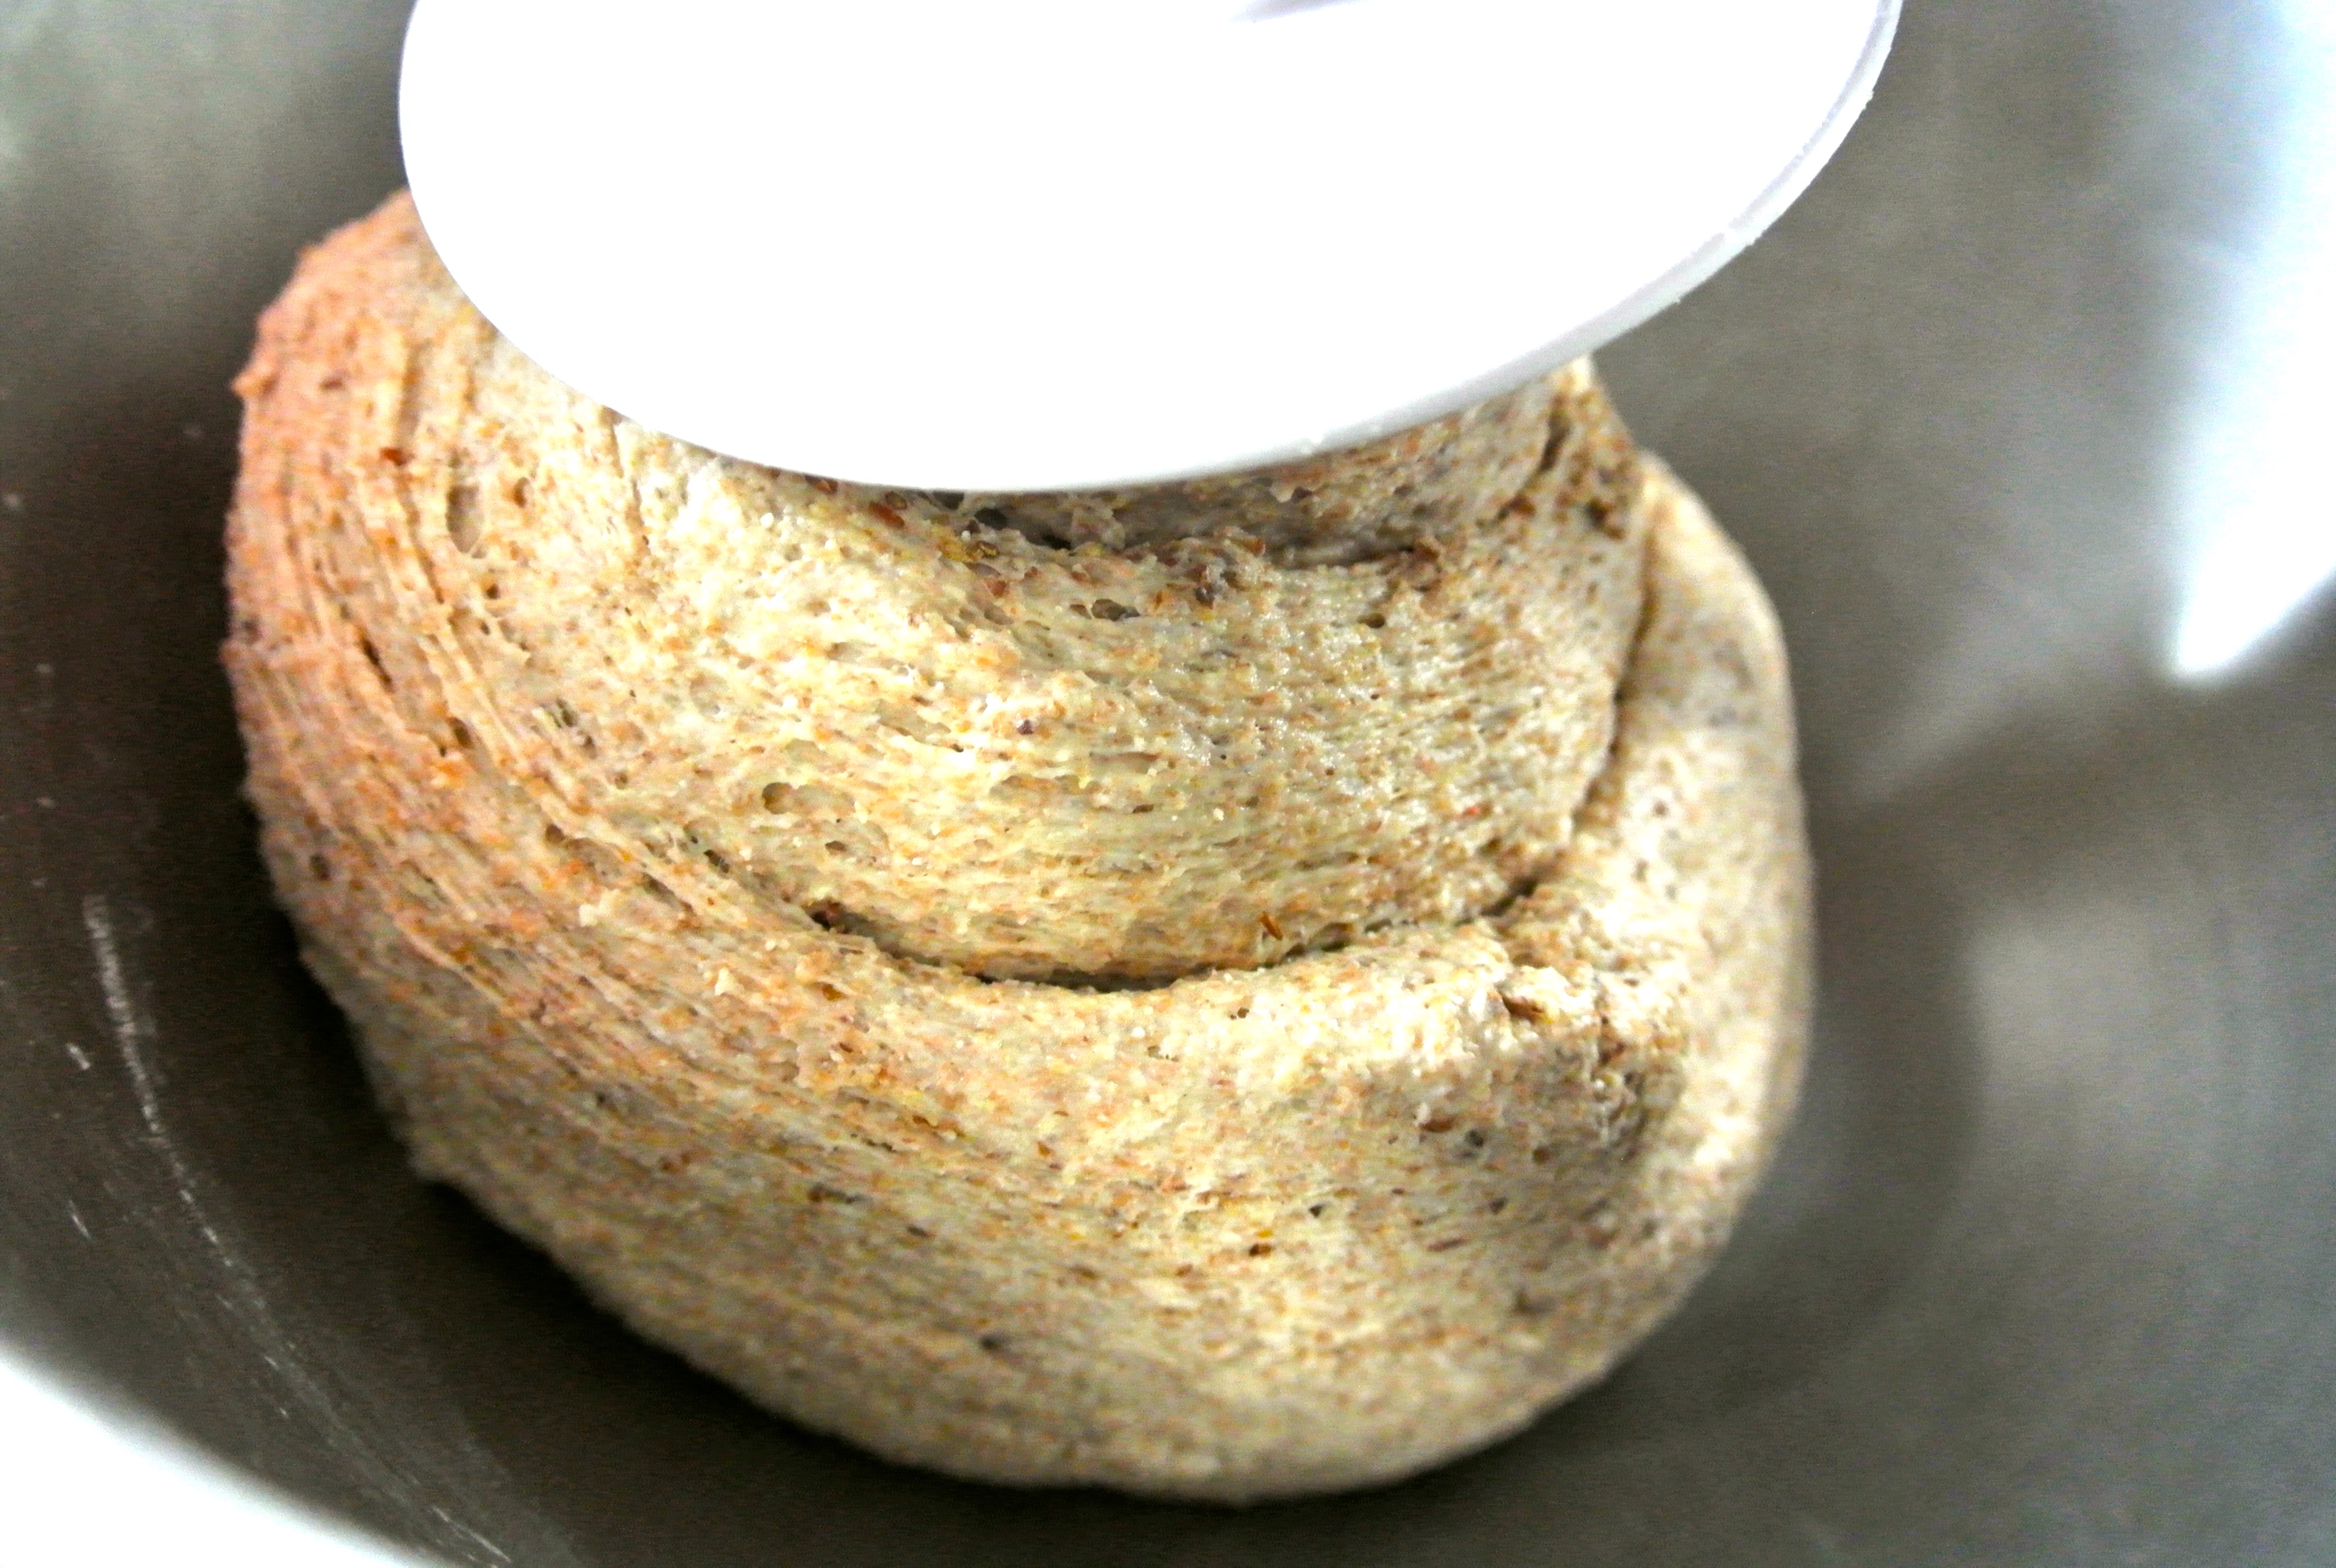
Add all of the flaxseed and then, additional flour gradually until your dough forms a minimally sticky ball on high speed. I can tell that the dough is ready for kneading if it is still somewhat sticky to the touch, but does not stick to the mixing bowl itself when whipping around on a high speed.

DSC_1792 Flour your hands, remove the dough, and place the dough onto your floured countertop.

Knead the dough, adding small amounts of flour as necessary, until it makes a smooth ball. If you are adding ingredients like dried fruit or seeds, stretch the dough open 3 times throughout the kneading process to sprinkle in ingredients before folding over the dough and kneading again.

DSC_1793 
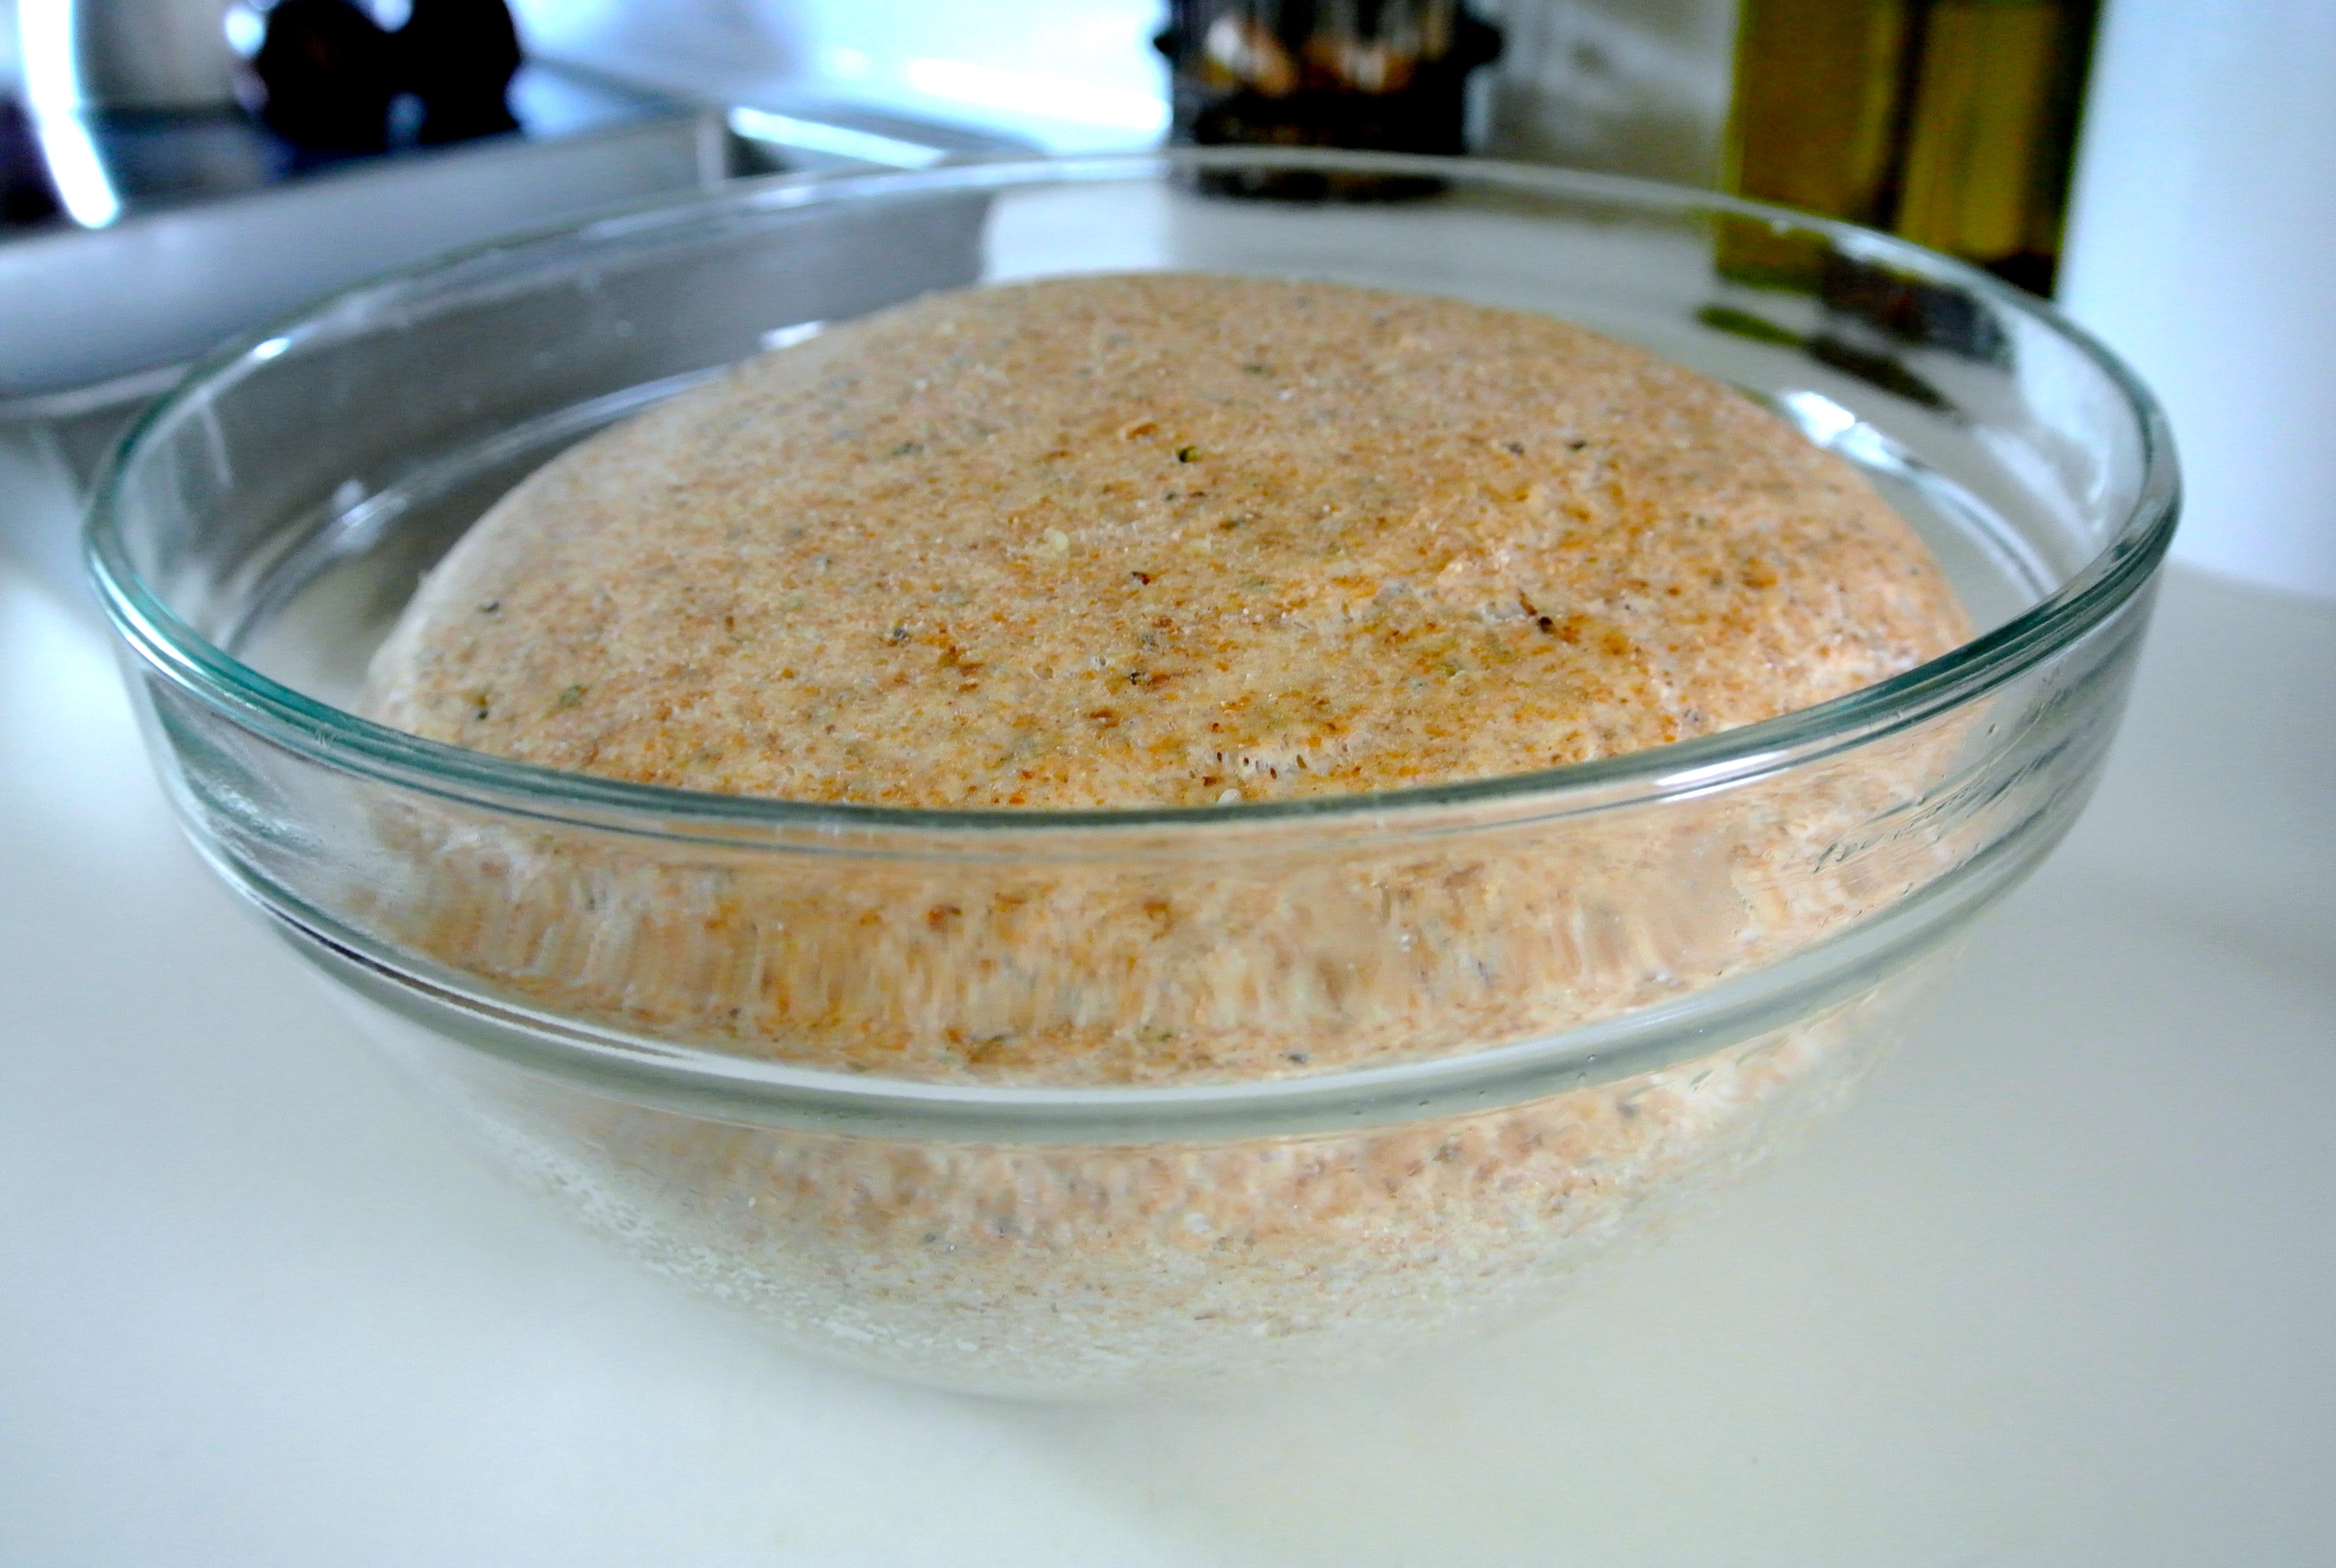
Knead for 5-7 minutes total and then place the ball into your oiled bowl. Cover with a clean towel and let it rise in a warm place for 45 minutes.

DSC_1794 DSC_1795 After 45 minutes, punch down the dough, reform into a loaf shape, and transfer it into your oiled loaf pan.

DSC_1798 Cover the dough and preheat your oven to 400 degrees. In the time that it takes the oven to preheat, your dough will rise again and then be ready for baking. Bake for 35 minutes. The bread should come out of the loaf pan fairly easily and onto a wire rack to cool.

DSC_1800