Fudgy Brownie Bites

I’ve heard about people making brownies with black beans (I plan to try it out at some point), so that was the inspiration behind today’s truffle concoction.  I’ve recently become all about using beans in “desserts,” thus my cookie dough truffles made with white beans.  These brownie bites use my cookie dough truffle formula with a chocolatey twist!

Before I made the truffles with black beans, I really liked them and was pretty blown away by how much they taste like traditional cookie dough.  Now that I’ve subbed the black beans—which are high in protein, fiber, folic acid, and magnesium, and a solid source of potassium and iron—and tossed in some cocoa powder, I LOVE these truffles!  It’s kind of freaky how much they ended up tasting like ooey gooey fudgy brownies.

A true chocolate addict?  Up the cocoa powder, double the chocolate chips, or dip in melted dark chocolate.  Enjoy!

FORMULA BASE:  COOKIE DOUGH TRUFFLES

Yields 16-20 balls

  • 1 ½ cups cooked beans (e.g. garbanzo, great northern, cannellini, etc.) –> I’m using black.
  • ½ cup seed or nut butter (nuts/seeds ONLY) –>  I’m using peanut.
  • 1/8 cup+ liquid sweetener (e.g. agave syrup, maple syrup, etc.) –> I’m using ¼ cup agave.
  • ½-1 tsp extract (amount depends on flavor intensity) –> I’m using 1 tsp vanilla.
  • Pinch of pink Himalayan sea salt (optional) –>  I’m not using it.
  • ½ cup chips (e.g. chocolate, dried fruit, chopped nuts, etc.) –> I’m using 2 1/2 tbsps unsweetened cocoa powder and 1/4 cup mini-semi-sweet chocolate chips (vegan).

Combine all ingredients—except the chips—in a food processor and run until smooth. Transfer dough into a bowl and stir in chips.

dsc_3010

Using a melon baller or teaspoon, form into balls and roll in your hands until smooth. Ready to eat immediately! 🙂 Store leftovers in the fridge.

dsc_3014


Advertisement

Puppy Chow Remix

Today’s sweet treat is a cross between the classic American snack, puppy chow, and one of many special cookies that my mom makes every year for Christmas.  The happy marriage happened quite by accident.

When my dad was in town, he went over to my aunt’s for her famous chop suey, which she always tops with crunchy chow mein noodles.  Always the hostess with the mostest, she sent my dad back to my house with ample leftovers, including a huge bag of the chow mein noodles.

Now, while chow mein noodles aren’t particularly nutrient rich, this brand is vegan and not horribly unhealthy either.  Not one to waste food, I put my thinking cap on to transform them into a quick and easy snack, rich enough that one or two at a time will do you just fine.

chow mein noodles

My mom’s Christmas haystack cookies are named as such because they include chow mein noodles bathed in peanut butter and melted butterscotch chips, resulting in a small heap that looks just like the perfect home for a needle.  My intention was to replicate these—one of my favorite holiday treats she makes—the Fresh Formula way:  vegan.

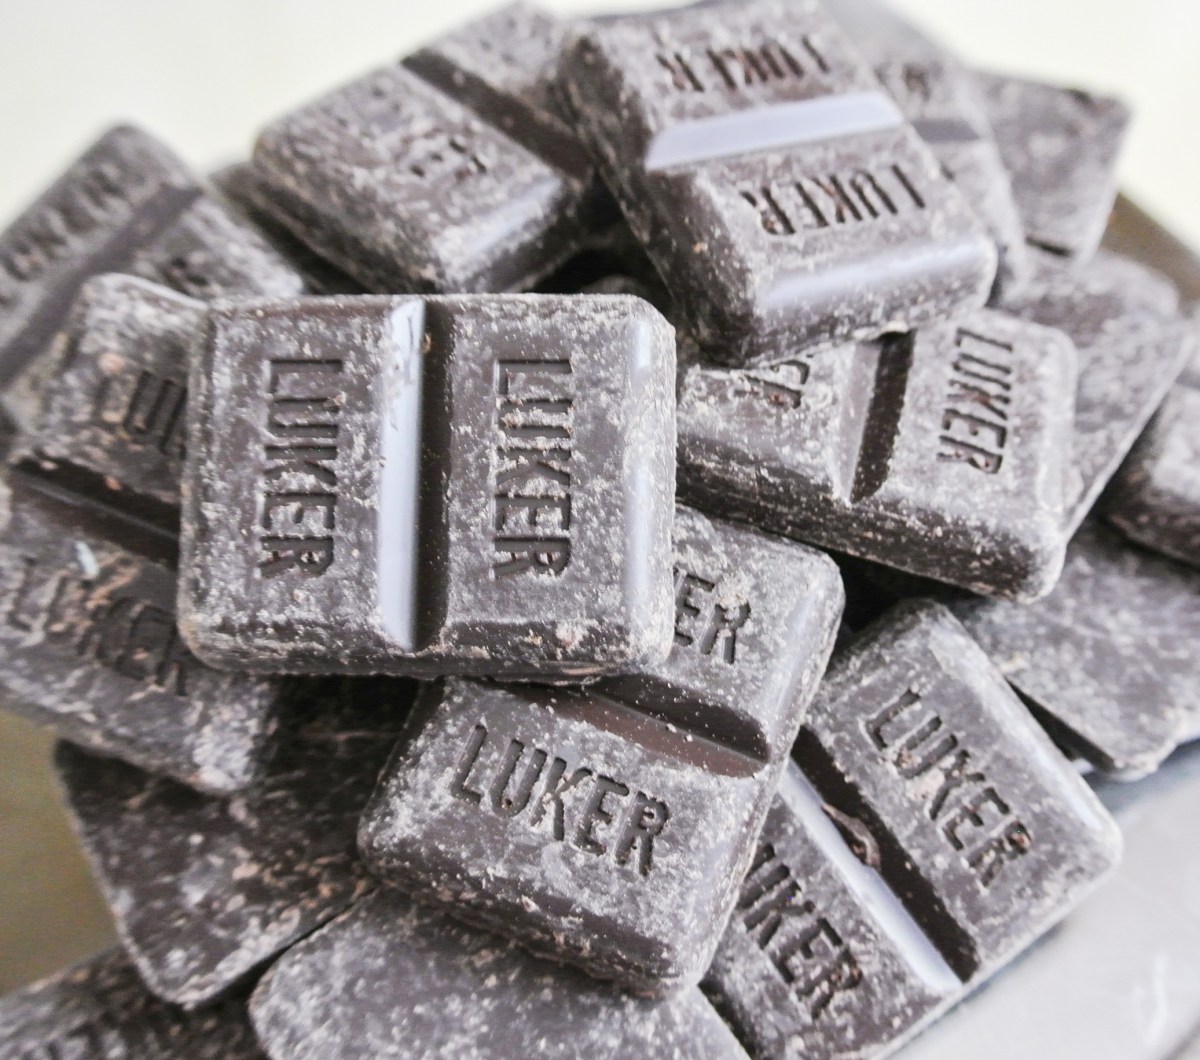
There may be vegan butterscotch chips out there, but regardless, I didn’t have any on hand.  Just a couple of days before inheriting the chow mein noodles, I stocked up on some 85% dark chocolate in bulk.  I never tasted it when I bought it; the bitter smell alone told me that this chocolate was meant for melting and repurposing.  Thus, the idea for dark chocolate haystacks—or as Nolan calls them, “spiders”—was born.

dark chocolate

You can substitute any nut butter and any meltable chocolate to make this recipe your own.  You can also substitute any cereal—Chex is used in traditional puppy chow—crackers, pretzels, nuts, or chips for the chow mein noodles if you aren’t set on your heaps looking like hay.  As long as the combination tastes fantastic, the shape and appearance of the clusters doesn’t much matter.

The reason these treats ended up a cross between the haystacks and the puppy chow was because the 85% dark chocolate was much bitterer than I anticipated.  I enjoy 70% dark chocolate regularly and thought that 15% wasn’t substantially higher…but no, it is!  Even though, according to the ingredients listed on the bulk bin, there is sugar in the chocolate, I could barely taste it and practically puckered when I bit into the first haystack.  Travis thought of puppy chow and suggested I toss the haystacks around in powdered sugar to compensate for the lack of sweetness.  It worked enough for me—I’m so used to dark chocolate now that I don’t need my desserts oozing with sweetness—but Nolan said he would like “new spiders” with a little more sugar.  🙂  Lesson learned for next time.

Other tips…

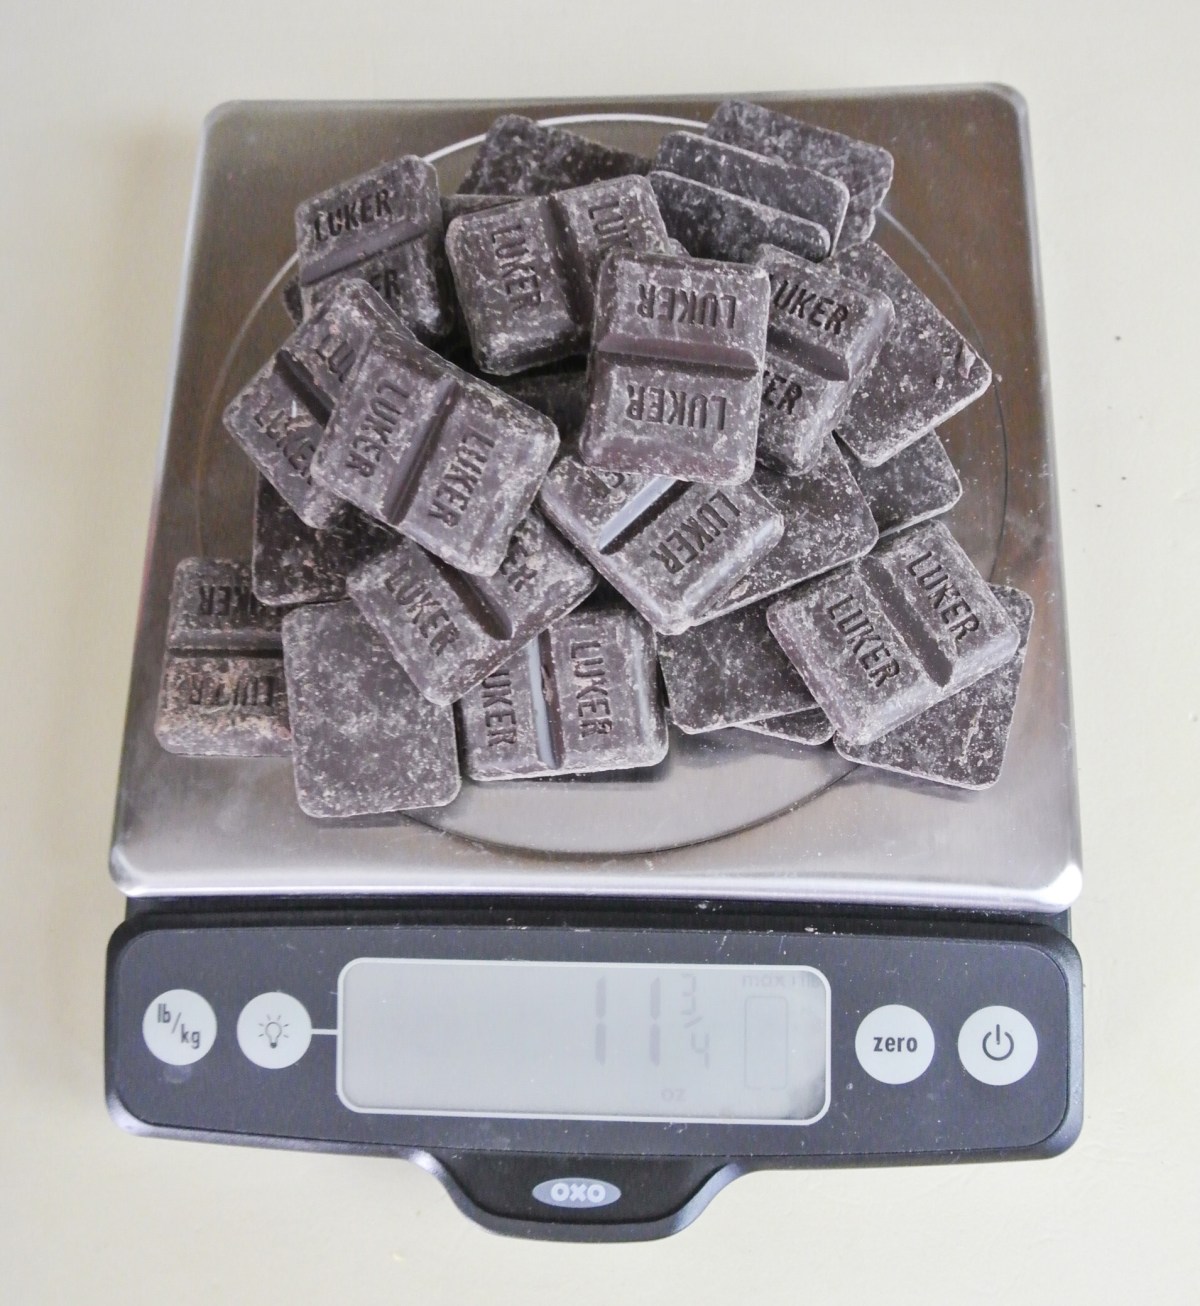
This is the type of formula where having a kitchen scale really comes in handy.  I am getting better and better at eyeballing amounts and weights, but being precise is generally preferred in any recipe.  Using a simple kitchen scale, you can easily measure out the ingredients for today’s haystacks.

scale

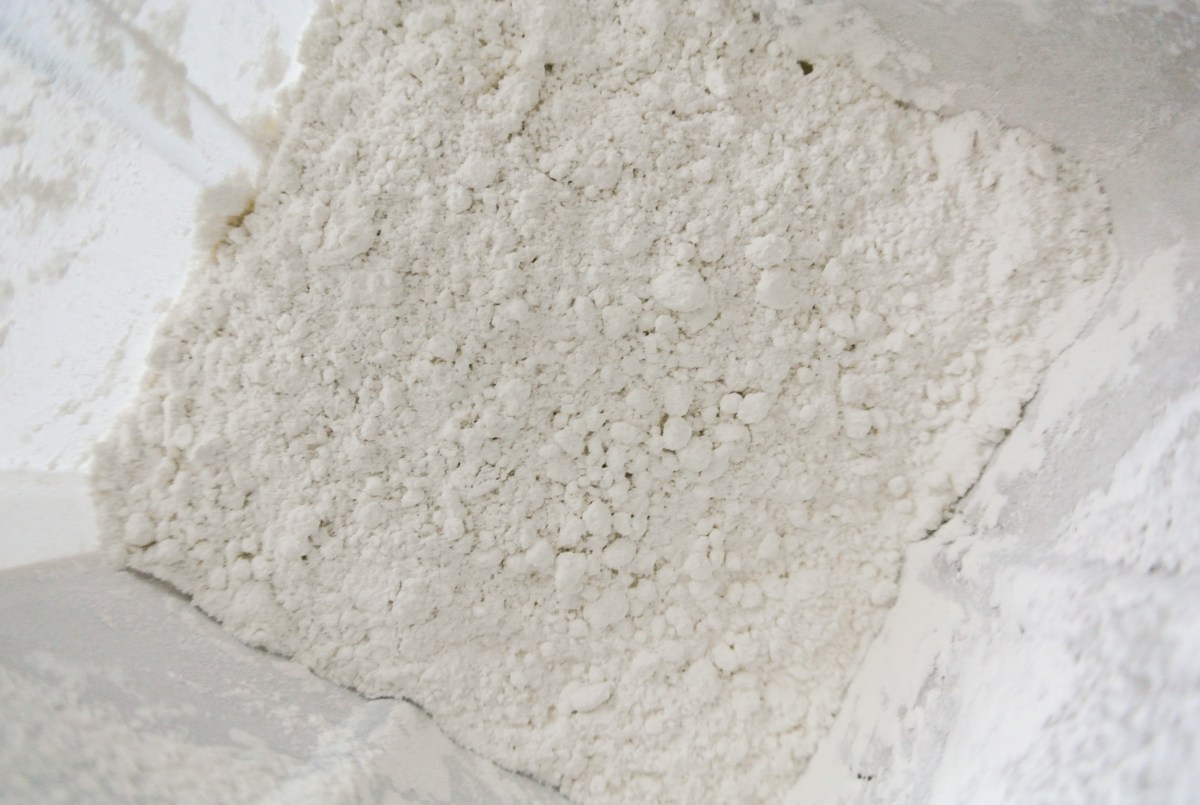
Secondly, a roll around in powdered sugar is optional and I wouldn’t have done it had I not selected such a bitter chocolate that I made the mistake of not tasting first.  Oops!  If you like your desserts extra sweet, by all means, make it snow!  Just make sure to make your own powdered sugar (I use turbinado); remember, white, refined sugars are typically white as a result of bone char from cows.  Not vegan.  🙂

powdered sugar

You could also toss your haystacks in or top them with chopped nuts, sprinkles, or any other garnish that would add to the appearance or flavor.

You’ll love these yummy treats!  Assuming your little ones aren’t irked by spiders, they are bound to dig in, too!

FORMULA BASE:  HAYSTACKS

Yields 24 haystacks

  • 7 ounces unsweetened/minimally sweetened crunch (i.e. cereal, crackers, chips, pretzels, nuts, etc.) –>  I’m using chow mein noodles.
  • 12 ounces vegan chocolate (chips or bars) –>  I’m using 85% dark chocolate bars.
  • ¾ cup nut or seed butter (nuts/seeds only) –>  I’m using a combination of peanut and sunflower.
  • ¼ cup garnish (i.e. powdered sugar, sprinkles, chopped nuts/seeds, desiccated coconut, etc.) (OPTIONAL) –> I’m using homemade powdered sugar.

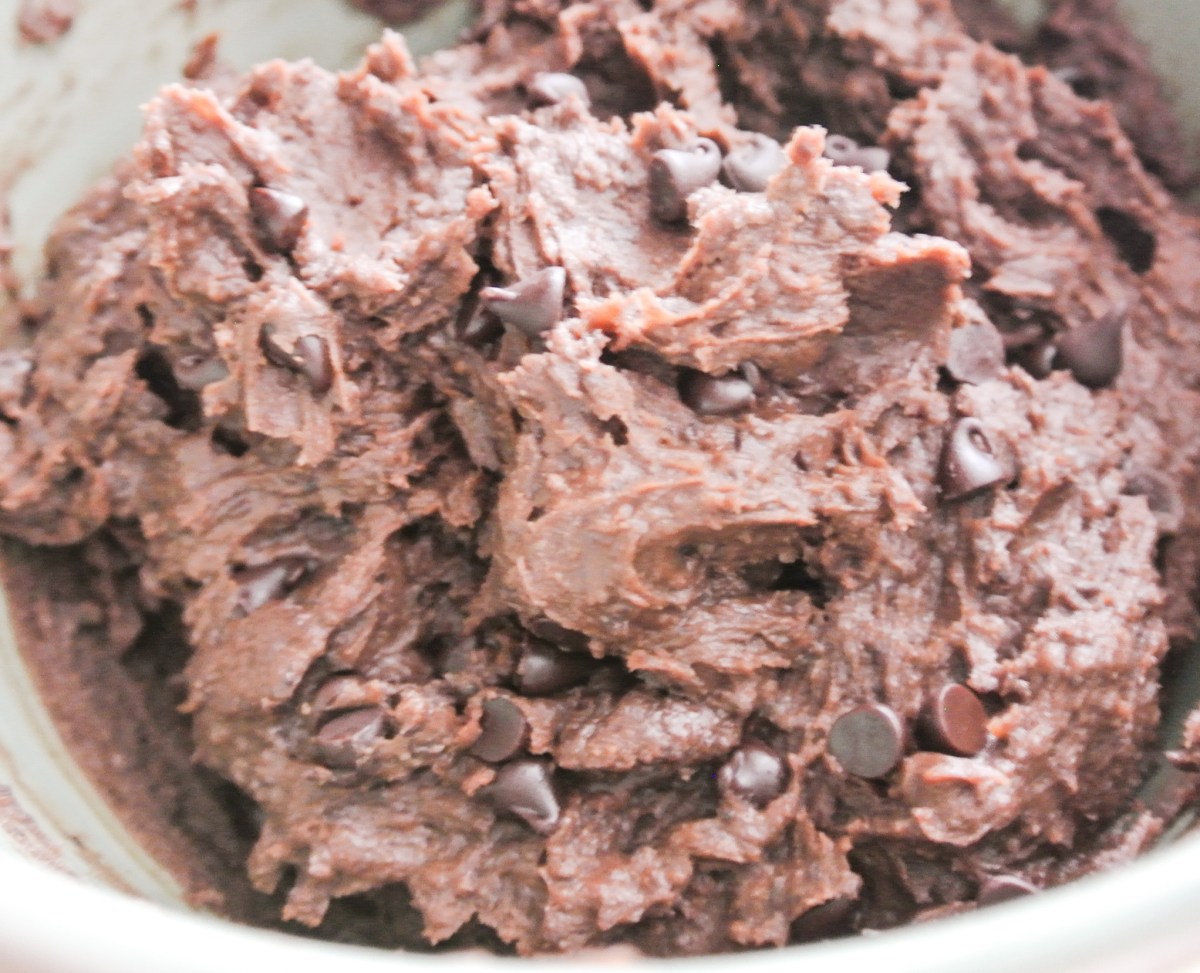
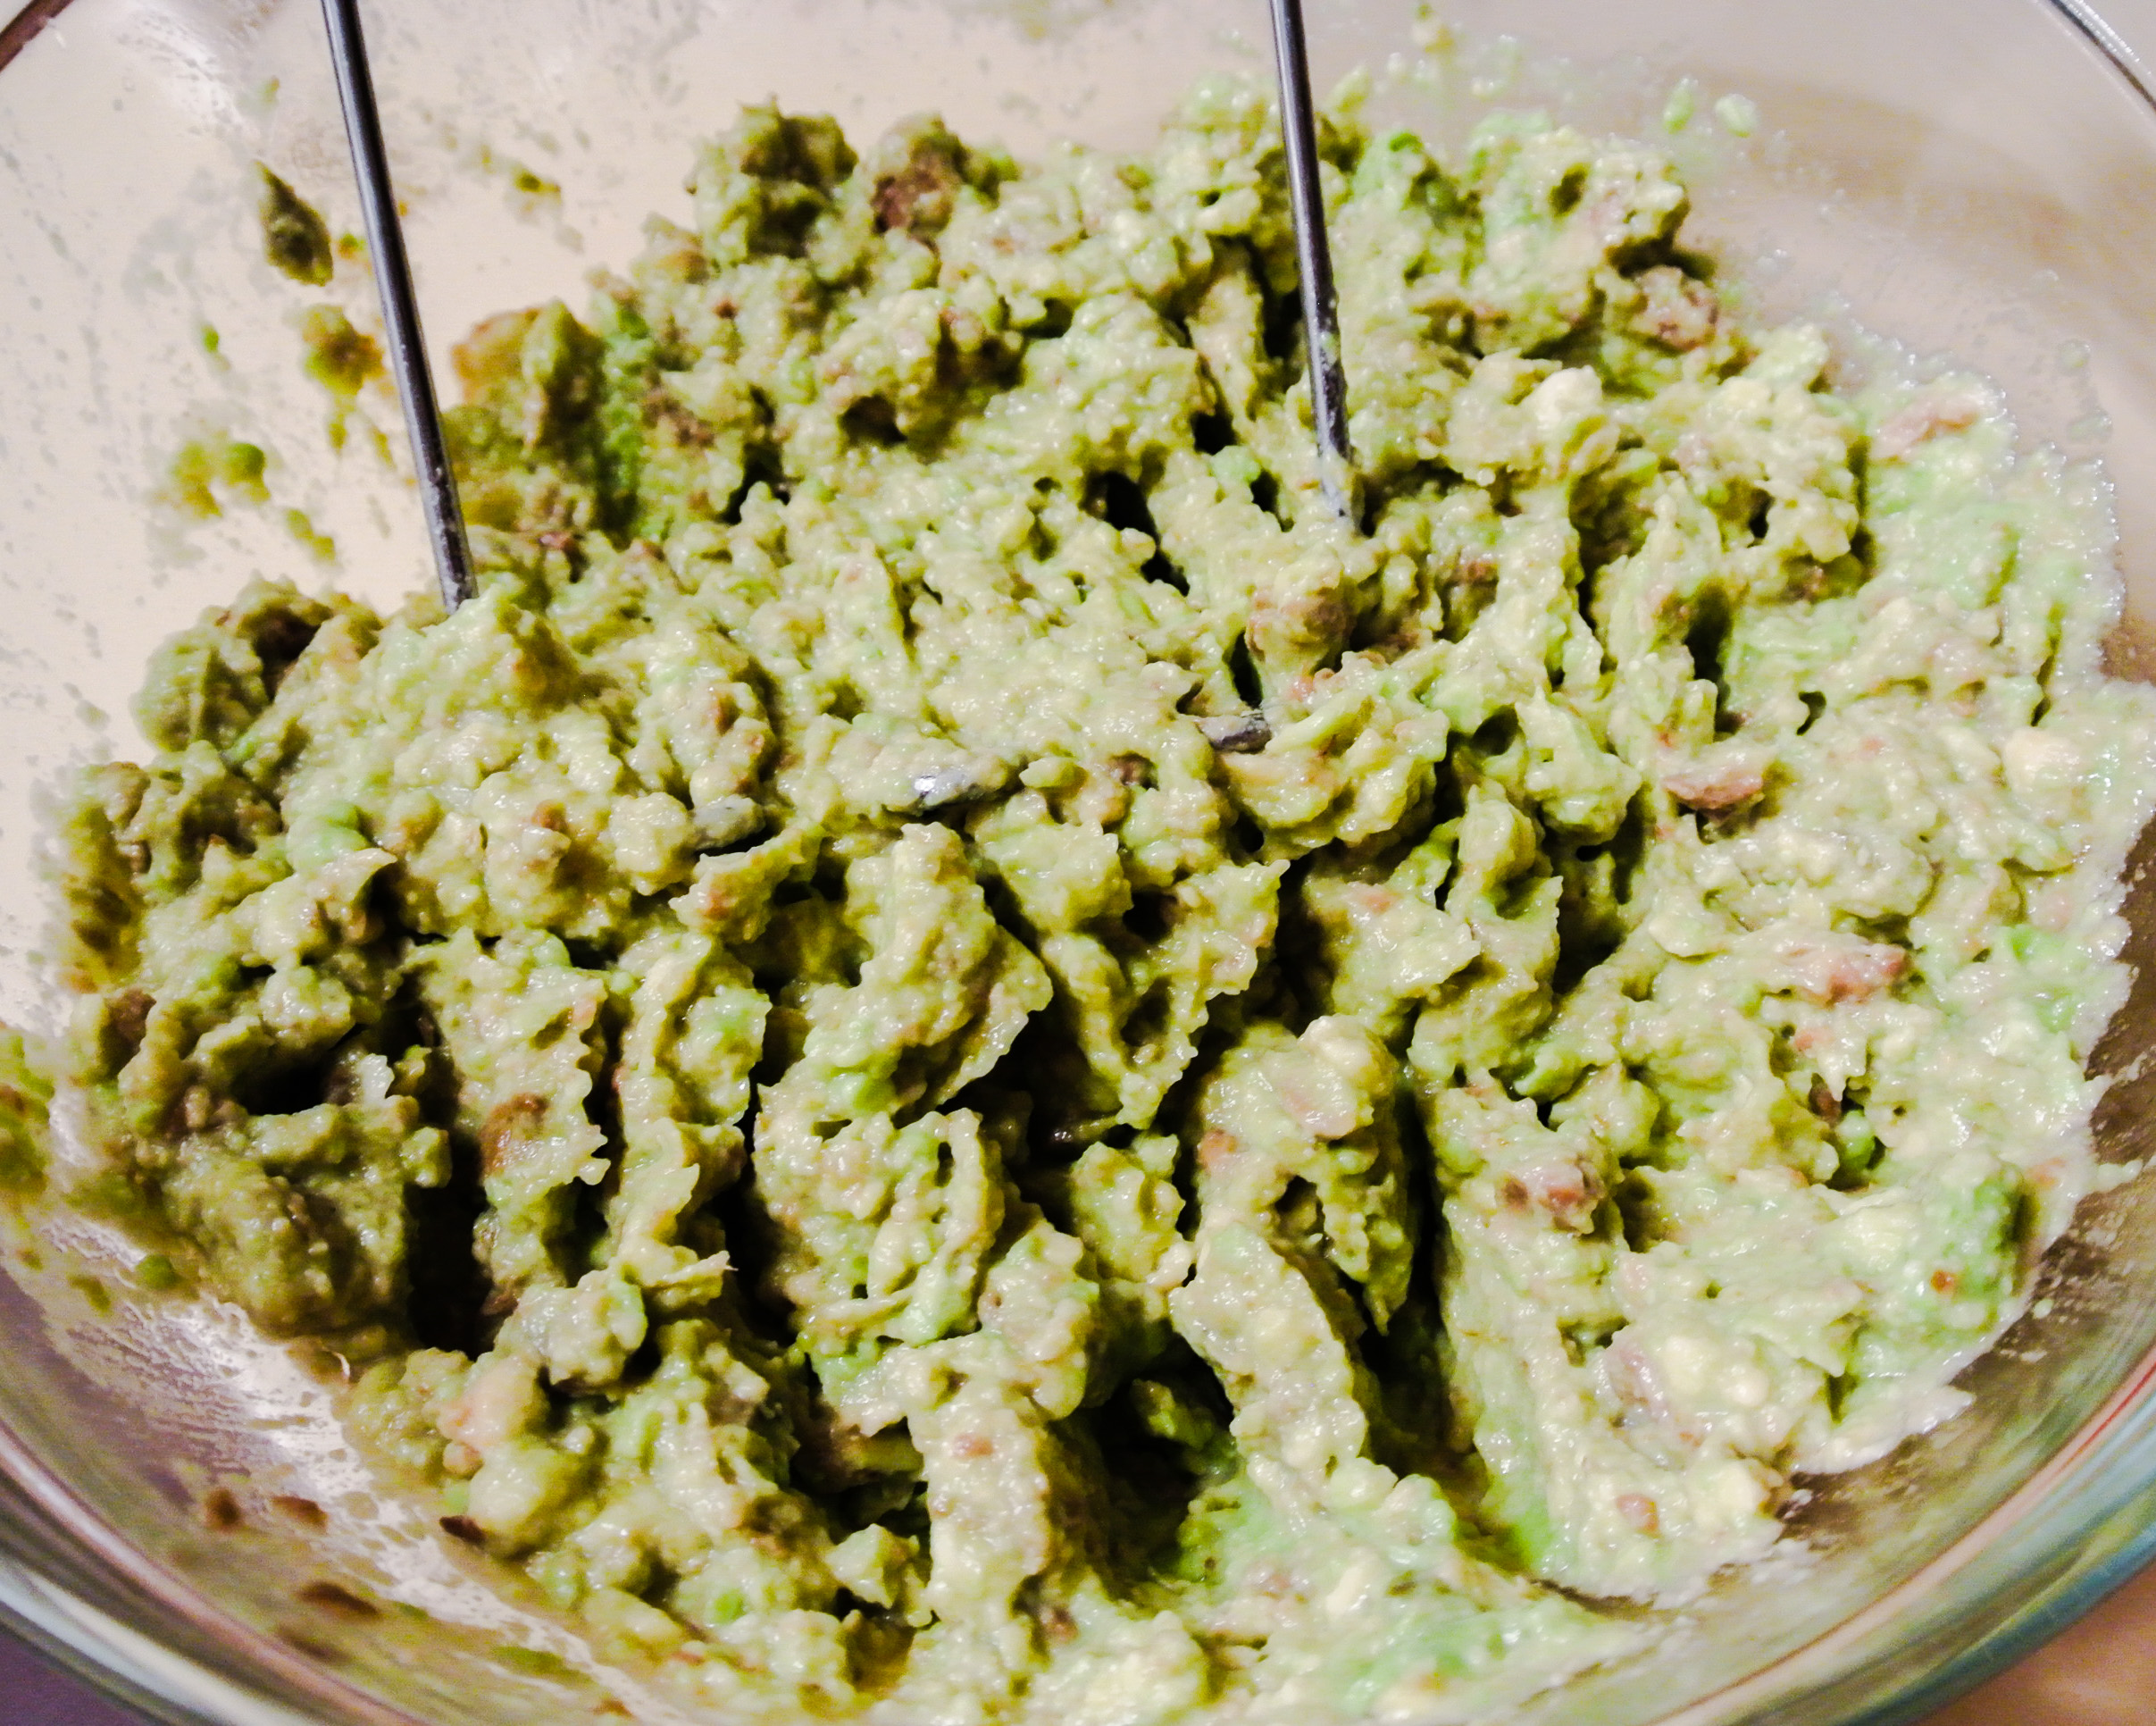
Using a double burner*, melt your chocolate and nut/seed butter together over medium high heat, stirring occasionally.

double burner

Once melted, pour the mixture over your crunch element and stir to combine.  If the combination seems too runny, you can always add more crunch.

mix

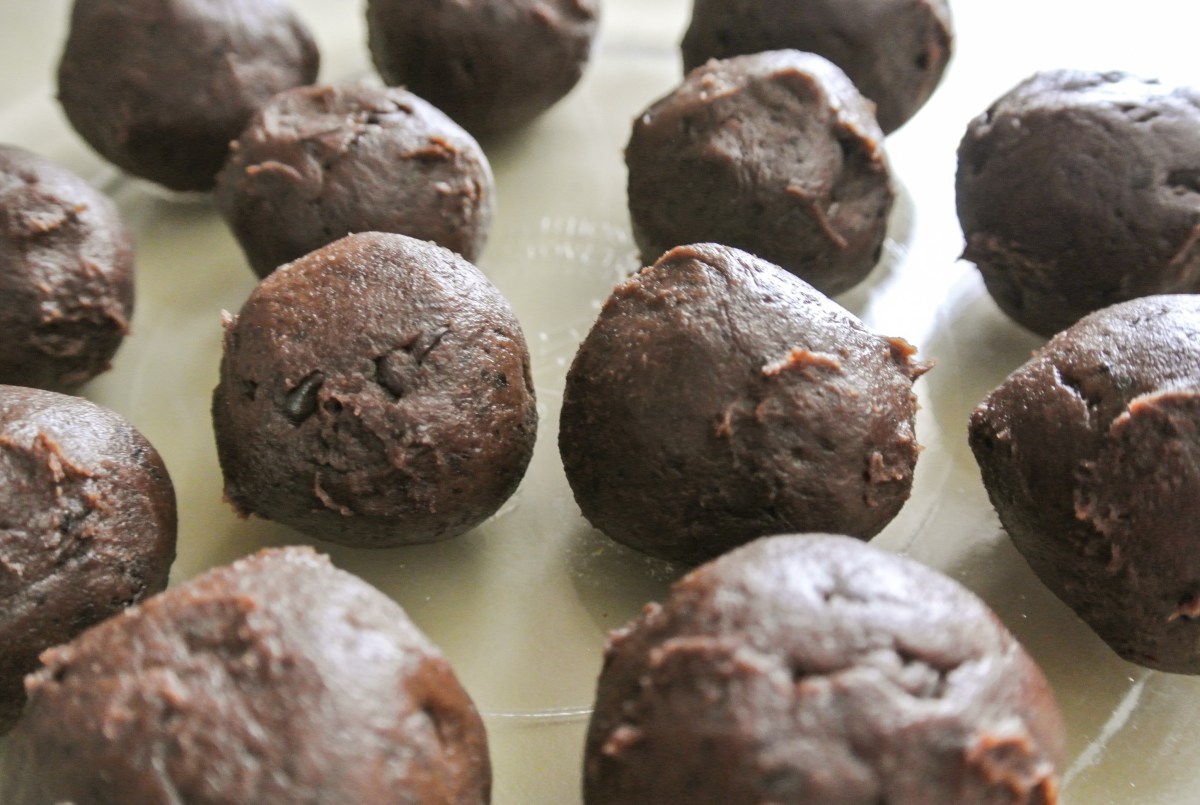
Use a spoon to dollop small heaps of the mixture onto baking sheets lined with silicone baking pads or parchment paper.  They will eventually solidify if left on the counter top, but the process is expedited in the fridge or freezer.

haystacks

Once solid, you can top your haystacks with or toss them in a garnish, if you wish.  Store in an airtight container at room temperature.

up close

*Don’t forget to protect yourself from steam that might escape your double burner.  I wear gloves start to finish in the process of melting chocolate and don’t remove them until I’ve poured the chocolate out of the melting vessel. 🙂

Dark Chocolate Sea Salt Power Bars

Nolan has decided that his favorite food is chocolate. “Chocolate is a good snack, Mom.” Nolan wants chocolate on or with almost everything he eats. Thankfully, his mama is hip to the word on dark chocolate, which is all he’s ever had. Like a lot of people, I grew up on milk chocolate, which I think most would agree is richer and more palatable. Dark chocolate is an acquired taste, but now that it’s all I eat, the rare instances when I have milk, my tastes buds are blown away by how cloyingly sweet it is.

Why make the switch from milk to dark? Many milk chocolate treats contain sugar and milk as their primary ingredients when it is the cacao bean that contains the powerhouse nutrients. Once you get past the slightly bitter and certainly less sweet taste of dark, you can now consume chocolate that provides true health benefits. Dark chocolate that is 72% cacoa or greater is jam-packed with protein, fiber, and antioxidants. It is heart healthy and can boost brain power, too. YUM!

DSC_2699

Of course, like all sweets, we can’t overdo it with even dark chocolate. Cacoa does contain fat and when made into a chocolate bar, for instance, also contains added sugar. Point is, a little bit of dark chocolate every day—yes, I eat it every day folks!—is not only not going to hurt you, but will provide you with powerful nutrients. Opt for fair trade whenever possible.

What do I say when Nolan wants chocolate? I give it to him. Not in unlimited quantities and only after or in conjunction with another snack or meal, but like me, he eats it every day. (For the parents out there who may be wondering about amount, if the average dark chocolate bar is three ounces, he has half an ounce or less in a day. Hopefully that helps you to visualize the quantity!)

Today’s rendition of my power bars also incorporates a touch of pink Himalayan sea salt, which is loaded with minerals. A little bit is ok. 🙂 If I didn’t sell you enough on giving dark chocolate a try, Travis said that these power bars are one of the best things I’ve ever made. So, there’s that. Enjoy!

FORMULA BASE: POWER BARS

Yields 9 square bars*

For the dough:

  • 1 cup uncooked whole grains –> I’m using ¾ cup wheat berries (learn about wheat berries by checking out my multi-grain salad formula) and ¼ cup ground flaxseed.**
  • 1 cup unsweetened dried fruit (without added oil) –> I’m using pitted medjool dates.
  • ½ cup nut or seed butter (nuts/seeds only) –> I’m using sunflower.
  • 2 tbsps natural liquid sweetener –> I’m using agave syrup.
  • Extract and/or spices to taste (optional) –> I’m using 1/8 teaspoon pink Himalayan sea salt.

Garnish ideas (up to ½ cup):

  • Raw seeds
  • Raw finely chopped nuts
  • Unsweetened coconut flakes
  • Unsweetened cocoa powder
  • Melted dark chocolate to pour over the top (which will re-solidify after chilling) –> I’m using 3 ounces of 72% cacoa + a sprinkle of pink Himalayan sea salt.

*Double the recipe to make double the bars, or, to achieve thicker bars.

**Yes, I know that flaxseed is not a whole grain. Just wanted to add a little texture and different nutrients to the bars today. 🙂

Turn your whole grains into flour using your food processor or blender (my Vitamix has a dry blade pitcher).

Then, combine the flour and your remaining ingredients, except the garnish. Run until a thick, pliable dough forms. You will probably have to scrape down the sides of the processor with a spatula at least once.

Turn the dough out into a mixing bowl. Use your hands to combine half of your garnish (unless it’s melted chocolate) and to break up any clumps of dried fruit and/or butter. Firmly press the dough into an 8 x 8 pan lined with wax paper.

DSC_2697

Evenly distribute the remaining garnish, pressing into/pouring onto the top of the bars.

To melt dark chocolate: Use a double boiler (not the microwave). Fill a sauce pan with about an inch of water and turn it up to medium high heat. Place a glass bowl containing your chocolate on top of the pan. Stir chocolate occasionally until it completely melts. BE CAREFUL OF ANY STEAM COMING UP FROM THE SAUCE PAN.

DSC_2703

Chill the bars for at least 2 hours before cutting into the desired size and shape. Store in the refrigerator.

DSC_2717


No-Bake Power Bars

Love my power balls formula? I think you’ll like my power bars even more! While I believe you could take the power ball dough and spread it into a pan to make bars, I decided to develop a formula that was even more specific to this alternative shape.

Additionally, personally, I’m looking for something different in the way of texture in a ball versus a bar. I enjoy the power balls with a softer, creamier center, like a truffle. I think that the bars are best with a crunch. Of course, with Fresh Formulas, there are no prescriptions—just guidelines—so it’s up to you to play around with the flavor and texture combinations that you enjoy best.

Today’s power bars will combine crunch and more fall flavors: cranberries and pumpkin seeds, to be precise. Surely you’ve heard that the cranberry does wonders for the urinary tract system and it is loaded with antioxidants, plus vitamin C and fiber. Pumpkin seeds are a less well-known super food, often in the shadows of flax, chia, and hemp seeds. These super seeds, however, contain an even higher protein content than the more talked-about seeds and are also packed with fiber, vitamins, and minerals…too many to list even! ‘Tis the season to find these amazing little nutrient powerhouses in abundance.

DSC_2529 DSC_2532

After carving our Halloween pumpkins, Travis immediately took to roasting the seeds (which can also be eaten raw). We put them in an airtight container in the pantry and he’s been eating a few here and there. I’ve found that I cannot digest whole (chewed, obviously) pumpkin seeds, so I am trying processing them into a flour to see if I have better luck. They are just too darn good for your not to get creative.

One other tidbit… This formula calls for unsweetened dried fruit (I would like to control the sweetener used in the bars), but my dried cranberries are sweetened. Unless you dry them yourself (I’m in the market for a fruit dehydrator, if anyone can recommend one!), you aren’t likely to find these sour mini-fruits unsweetened. So, I’m improvising and cutting out the two tablespoons of added liquid sweetener. I recommend tasting the bar dough as you go to ensure that it is palatable. We aren’t going for dessert, but some sweetness is part of what makes similar premade bars delicious enough to spend $3+ for just one. 🙂

Save money and control quality by making power bars yourself. From gathering ingredients to cutting the bars (not including chill time), it took me less than twenty minutes to make these while attending to the needs of two boys under the age of three. You can do it! Enjoy.

FORMULA BASE: POWER BARS

Yields 9 square bars*

For the dough:

  • 1 cup uncooked whole grains –> I’m using rolled oats.
  • 1 cup unsweetened dried fruit (without added oil) –> I’m using cranberries.
  • ½ cup nut or seed butter (nuts/seeds only) –> I’m using peanut.
  • 2 tbsps natural liquid sweetener –> I’m not using any.
  • Extract and/or spices to taste (optional) –> I’m not using any

Garnish ideas (up to ½ cup):

  • Raw seeds –> I’m using 1/8 cup roasted pumpkin (roasted only because Travis roasted them before I had this idea!) and 1/8 cup hulled hemp seeds.
  • Raw finely chopped nuts –> I’m using ¼ cup almonds.
  • Unsweetened coconut flakes
  • Unsweetened cocoa powder
  • Melted dark chocolate to pour over the top (which will re-solidify after chilling)

*Double the recipe to make double the bars, or, to achieve thicker bars.

Turn your whole grains (and in my case, the pumpkin seeds) into flour using your food processor or blender. Then, combine the flour and your remaining ingredients, except the garnish. Run until a thick, pliable dough forms. You will probably have to scrape down the sides of the processor with a spatula at least once.

Turn the dough out into a mixing bowl. Use your hands to combine half of your garnish (unless it’s melted chocolate) and to break up any clumps of dried fruit and/or butter. Firmly press the dough into an 8 x 8 pan lined with wax paper. Evenly distribute the remaining garnish, pressing into/pouring onto the top of the bars.

DSC_2535

Chill the bars for at least 2 hours before cutting into the desired size and shape. Store in the refrigerator.

DSC_2538

Protein-Packed Cookie Dough Truffles

Alright guys, today’s formula is something you need to taste to believe. I’m making cookie dough truffles that contain no eggs, no oil, and no flour, and that do contain garbanzo beans. What?! I know, I was skeptical, too, but these are seriously delicious and have the same texture as a traditional cookie dough. Just how does this work?!

First of all, let me start by saying that in my opinion, eating cookie dough is sometimes more satisfying than eating the baked cookies themselves. I know you were thinking the same thing, so I’m glad we got that covered. 🙂

I found this idea for a bean-based cookie dough on Instagram (@bestofvegan, @chiacathy), where I follow a number of vegan cooks, chefs, and bloggers. I immediately captured a screen shot so that I could easily come back to the idea when I was ready to incorporate beans into a dessert. Gotta wrap your head around that one…

Having heard of bakers sneaking black beans into brownies pretty well unnoticeably, I thought that this idea definitely held some merit. With thousands of likes on the picture (which looked just like cookie dough) and the recipe, I just knew that these had to be good. On top of looking and tasting delicious, loaded with beans and nuts, these truffles are a protein-packed sweet snack that is waaaaaaay better for you than that dough that comes in a log in the refrigerated section.

Due to their nutritional benefits and simplicity, these truffles remind me a lot of my power balls, which are always a success. I’ve now mastered many a flourless dough that yields a not-too-sweet, perfectly shaped little bite that pleases my whole family, satisfying their sweet teeth and providing them with a valuable source of protein at the same time.

DSC_2459

So, I took the recipe I found on Instagram and made it my own, into a Fresh Formula of course! I had Travis taste the first truffle and he said he would have liked it to be a tad sweeter, so you’ll see that reflected in the ingredients below. Since I opted for semi-sweet chocolate chips, the sweetness level was perfect for me, but certainly the type of chip you select will make a big difference.

Travis’s overall reaction to the garbanzo bean cookie dough bites? “I am kind of in shock.” He couldn’t believe how yummy such an unexpected combination of ingredients could be. Having made traditional chocolate chip now, I am already fantasizing about chocolate mint, lemon almond, and whole host of other cookie dough flavors. Give these little delights a try!

FORMULA BASE: COOKIE DOUGH TRUFFLES

Yields 16-20 balls

  • 1 ½ cups cooked white beans (e.g. garbanzo, great northern, cannellini, etc.) –> I’m using garbanzo.
  • ½ cup seed or nut butter (nuts/seeds ONLY) –> I’m using peanut.
  • 1/8 cup+ liquid sweetener (e.g. agave syrup, maple syrup, etc.) –> I’m using agave.
  • ½-1 tsp extract (amount depends on flavor intensity) –> I’m using homemade vanilla.
  • Pinch of pink Himalayan sea salt (optional) –> I’m opting out.
  • ½ cup chips (e.g. chocolate, dried fruit, chopped nuts, etc.) –> I’m using mini-semi-sweet chocolate chips (vegan).

Combine all ingredients—except the chips—in a food processor and run until smooth. Transfer dough into a bowl and stir in chips.

DSC_2461

Using a melon baller or teaspoon, form into balls and roll in your hands until smooth.

DSC_2463

Ready to eat immediately! 🙂 Store leftovers in the fridge.

DSC_2465

Simple Spiced Guacamole

Like my salsa formula, my guacamole formula is also no-salt-required.  Since it is likely being consumed with salty chips or layered in one of my burrito bowls, there really isn’t a need for added salt.

What I love about guacamole and salsa alike is that they are made with simple, fresh, raw ingredients.  I add a bit of dimension with the addition of spices, but you certainly don’t have to.

DSC_2452

The foundation of a solid guacamole is, of course, the avocado.  Avocados are rich in vitamins, fiber, and healthy fat (one of the few fats in my plant-based diet, in fact).  Their creamy texture makes them perfect for dips, pasta sauces, and even dessert bases!  I’ve seen people whipping up puddings, frostings, and smoothies with avocados, which are nicely disguised by sweet fruits.  No matter how you use them, you are adding a nutrient powerhouse to your dish.

DSC_2453

In addition, while guacamole traditionally contains cilantro and lime juice, I’ve substituted other herbs and citrus fruits when I’ve been out with great results.  Your guacamole will take on a totally different flavor with parsley and lemon juice, for example.  Experiment with what you like and enjoy!

FORMULA BASE:  GUACAMOLE

Serves 4-6 as an appetizer*

  • 2 lbs ripe avocados
  • ½ lb tomatoes, diced  –>  I’m using romas.
  • ½ of a small onion, finely diced  –>  I’m using red.
  • ½ cup finely chopped fresh herbs  –>  I’m using cilantro.
  • ¼ cup freshly squeezed citrus juice  –>  I’m using lime.
  • Minced garlic to taste  –>  I’m using 2 cloves.
  • Spices to taste (optional)  –>  I’m using ½ tsp each chili powder and paprika and ¼ tsp cumin.

*Halve the recipe to snack alone or with a friend.

Halve your avocados, remove the pits, and mash.  Mine are incredibly ripe, so they have a few brown edges – this is nothing to worry about!

DSC_2456

Stir in all remaining ingredients and dig in.

DSC_2457

It will keep in the fridge for several days, but it will brown in the process.  If you can’t get past the changed in color, I would eat the whole batch right away.  🙂

Snack Time: Low-Sodium Pickles

DSC_2129

When our Bountiful Basket yielded pickling cucumbers, I got right online and started to research how to make one of my favorite snacks:  pickles!  Pickles, thankfully, are an easy vegan snack, but they are often loaded with salt and/or sugar.  I’ve pooled my resources to develop a low-sodium, sugar-free pickle formula.

What does a pickling cucumber look like?  There are different varieties, but this one doesn’t look much different than a regular cucumber; it’s just smaller.  In my online research, I found that you can in fact use regular cucumbers to make pickles as well.  Perhaps the process just takes longer?  I’m not sure…

DSC_2118I also found that while many pickle recipes called for distilled white vinegar, there were many that utilized other types of vinegar too.  Thus, I selected apple cider vinegar.  Too much of any acid in the system is not good for the teeth or body, but ACV in particular has some health benefits worth considering.  Among a lengthy list, it can assist in detoxifying the digestive system and even improve your skin and hair.  Not bad!

Finally, below are the ingredients I used to season my pickles.  I prefer a savory pickle over a sweet, so I didn’t use any sugar, but you certainly could.  First, I have dried dill; dill is one of my favorite herbs and it pairs well with acid.  I’m using just a touch of pink Himalayan sea salt and black peppercorns; I like the flavor of both, but not in large quantities.  Finally, one whole clove of garlic and dried minced onions; I put both of these in a lot of savory dishes.  The minced onions have a less abrasive, more concentrated onion flavor than fresh onions, which I sometimes prefer.

DSC_2119Like my jam formula, this one can easily be doubled, tripled, etc. to make pickles in large batches.  In a nutshell, pickles can be made either with a lengthy or quick process, which I found one blogger dubbed “refrigerator pickles.”  That’s what I’m making today because I’m too impatient.  🙂  They are ready with minimal flavor in just 24 hours, but get better with time, and can keep for 3-4 months.

FORMULA BASE:  PICKLES

Makes one 12-ounce jar

  • Pickling cucumbers (enough to nearly fill one mason jar when sliced)
  • ¾ cup water
  • ¼ cup vinegar  –>  I’m using apple cider.
  • 2-3 tsps seasoning of choice (i.e. salt, sweetener, herbs, garlic, etc.) –> I’m using ½ tsp dried minced onions, 1 clove garlic, a few black peppercorns, ¼ tsp pink Himalayan sea salt, and ¼ tsp dried dill.

Slice your cucumbers in disks or long strips.  Place in mason jar, add all ingredients, and shake well to combine.  Store in the fridge for at least 24 hours before snacking.

DSC_2123 DSC_2125 DSC_2127

My Simplest Formula Yet: Salt-Free Salsa

DSC_2028Salsa is an excellent way to eat a mix of great-for-you raw fruits and vegetables. With the combinations being endless, it’s no wonder that so many people love to dip in in front of the TV or at a party or restaurant.

Salsa should be one of those snacks that you don’t feel guilty about. However, if you buy it premade, there’s a chance that it will be loaded with salt. My salsa formula is so simply flavorful that I don’t add any salt at all…not even a pinch.

Why? Chances are, you are eating your salsa with tortilla chips. Most chips are salted to some degree, some more heavily than others. Because consuming minimal salt is a major premise of my plant-based lifestyle, my palate has become very sensitive to foods that are overly salty. Thus, the salt from the chips is enough for me in boosting the flavor of my already delicious salsa.

I really like these chips, from Target’s organic product line. The ingredients are listed as follows: Organic blue corn, organic sunflower oil, organic flax seed, sea salt, lime. (NOTE: If you didn’t already know this, when reading a food’s ingredients on a nutrition label, they are written from greatest to least presence in the product.) True to its name, Simply Balanced, I haven’t found a better premade chip. They are heartier than your average tortilla chip and not too salty, which is perfect for me.

DSC_2029Moving along, today’s formula rendition includes a few fresh ingredients that offer a ton of health benefits. Let’s take a look:

CILNATRO: This common salsa staple is high in antioxidants and prevents oxidation, allowing foods that it is mixed with to stay fresh longer.

DSC_2017GARLIC: There’s a reason that you can buy garlic supplements in the vitamin aisle. Raw garlic, in particular, has anti-inflammatory effects and can lower cholesterol. Those of you who have read up on my health history know how important this is to me!

DSC_2021PINEAPPLE: Pineapple is nutrient-dense rather than energy-dense, meaning that it contains an abundance of nutrients for very few calories (I don’t count, but this may be important to you if you’re trying to lose weight). In one cup of pineapple, for instance, you can consume 40% of the recommended daily Vitamin C intake.

DSC_2023Since we’re on the subject, how do you cut a pineapple? Buying it precut or diced in a can is more expensive. Believe me, breaking it down yourself is easier than you’d expect. I have to give credit to Rachael Ray for my method, which I use for all melon-like fruits and also gourds. Follow these steps to cut a pineapple with ease in minutes:

  1. Lay the pineapple on its side.  Slice off the very bottom and the very top so that you are left with a cylinder that can easily stand flat on the cutting board in its upright position.
  2. While standing upright, take your knife around the perimeter of the pineapple and slice the skin off, top to bottom.  You’re essentially cutting it off in vertical strips until you’ve made it all the way around.
  3. Once the pineapple is peeled, remove the flesh surrounding the core.  While the pineapple is standing upright, put your knife close to the edge of the core and slice downward, effectively removing nearly half of the pineapple.  Repeat this process all around the core until you’ve done it a total of four times (the pieces will be uneven in size).  Your core should appear as a long, thin rectangle when all of the flesh is removed.
  4. Chop your pineapple according to its projected usage and discard the core.  If you happen to own a powerful juicer, you can juice it instead.

On to my simple salsa! Don’t like onions? Don’t use them and compensate with extra fruit and/or vegetables. Play around with different combinations, using your herb of choice as your guide. I’m envisioning a delicious cucumber mint with pita chips or strawberry basil atop crostini…Yum…

Serve as an appetizer or snack, or use it in a dish like my layered burrito bowl. Enjoy!

FORMULA BASE: SALSA

  • 4 cups diced raw fruit and/or vegetables –>  I’m using 2 ½ cups vine ripe tomatoes and 1 ½ cups pineapple.
  • ½ of a medium onion –>  I’m using yellow.
  • 1 large clove of garlic, minced
  • ½ cup finely chopped fresh herbs –>  I’m using cilantro.
  • ¼ cup acid (vinegar or citrus juice*) –>  I’m using the juice of two small limes.
  • Seasoning to taste –>  I’m using a dusting of chili powder, paprika, and cumin.

*Whenever possible, juice whole citrus fruits yourself. 🙂

DSC_2018

Chop your onion and garlic and get them soaking in your acid, just as you did in preparing my bean salad formula. The acidity will help to break them down so that their flavors are less abrasive and don’t monopolize the salsa.

Dice/chop all remaining ingredients, season, and stir. When it comes to salsa, I don’t typically measure seasonings. Once I have all of my produce in the bowl, I lightly sprinkle it with each of my preferred seasonings (if any) from one end of the bowl to another and that seems to work out nicely.

DSC_2024

Serve immediately or store in the fridge for a few days.

DSC_2026

Baked Veggie Fries

DSC_1730One of the dishes served at Nolan’s second birthday party was baked veggie fries, which were easily the crowd favorite of the evening. Today, I’m going to share with you how I make these delicious, un-fried fries.

The key to a baked fry that can stand up to shuffling on the pan, toddler squeezing, and condiment dipping is using hearty root vegetables. When we think of fries, our minds usually turn to good ‘ole russet potatoes. Nothing wrong with those guys, but fries can really be made out of nearly any root vegetable, be it parsnips, turnips, potatoes, carrots, radishes, etc.

Today’s snack (or side dish) formula features three of my favorite root vegetables, pictured left to right below: garnet yam, sweet potato, and carrot. Yes, that yellow/white-ish fry in the middle is in fact a sweet potato, which you may not have known is often actually this color, rather than orange. (For a more detailed explanation on the difference between sweet potatoes and yams, check out my post on veggie curry.)

DSC_1724These un-fried fries are sure to please adults, but are the ideal healthy snack for toddlers. Extremely low in oil and salt free (unless you can resist a little sprinkle of pink Himalayan sea salt), they are a snack that I never refuse little Nolan. They are so yummy, I doubt you’ll need a dip, but if you do, try to stay away from processed ketchup, as it is often composed of highly fructose corn syrup and other unnatural additives. 🙂  Enjoy!

FORMULA BASE: BAKED VEGGIE FRIES

Serves 4-6 (as a side dish)

  • 2-2 ¼ lbs root vegetables –> I’m using just over two pounds of garnet yams, sweet potatoes, and carrots.
  • 1 tbsp oil (+ 1 tsp for greasing your baking sheet) –> I’m using extra virgin olive oil (I’m a big fan of coconut oil, but love the flavor of olive in this case).
  • Spices and/or fresh herbs to taste –> I’m using 1 tsp each of paprika and garlic powder (no salt).

Preheat your oven to 400 degrees. Thoroughly wash and peel your root vegetables. (You can leave the peels on, but I like to save them for homemade veggie stock.) Cut into ¼ inch thick fries. In a large bowl, use tongs to toss the fries with your spices and oil.

DSC_1725 Grease a baking sheet and spread the fries out in a single layer. Bake for 20 minutes, turning halfway through. Turn the oven off and broil on high for an additional 2-3 minutes for a bit of crispiness. Store in the fridge for up to five days, reheating in the toaster oven if necessary.

DSC_1727