Update: Our Backyard Garden

DSC_2050

Here in Phoenix, temperatures will be over 100 degrees by the end of this week. This means the beginning of some summer crops, but the end of most, with temperatures eventually reaching the teens. Since I last updated you on our DIY backyard garden, we’ve had a few changes and one surprise.

As previously mentioned, growing your own garden allows you to control the quality (i.e. organic, for example) and saves you money on purchasing pre-grown produce. Unless you’re an expert and/or have a ton of available land with extremely fertile soil and/or live in a region with perfect gardening weather year-round, you probably can’t grow everything that your veggie heart desires, but there may be a few items with which you can find success.

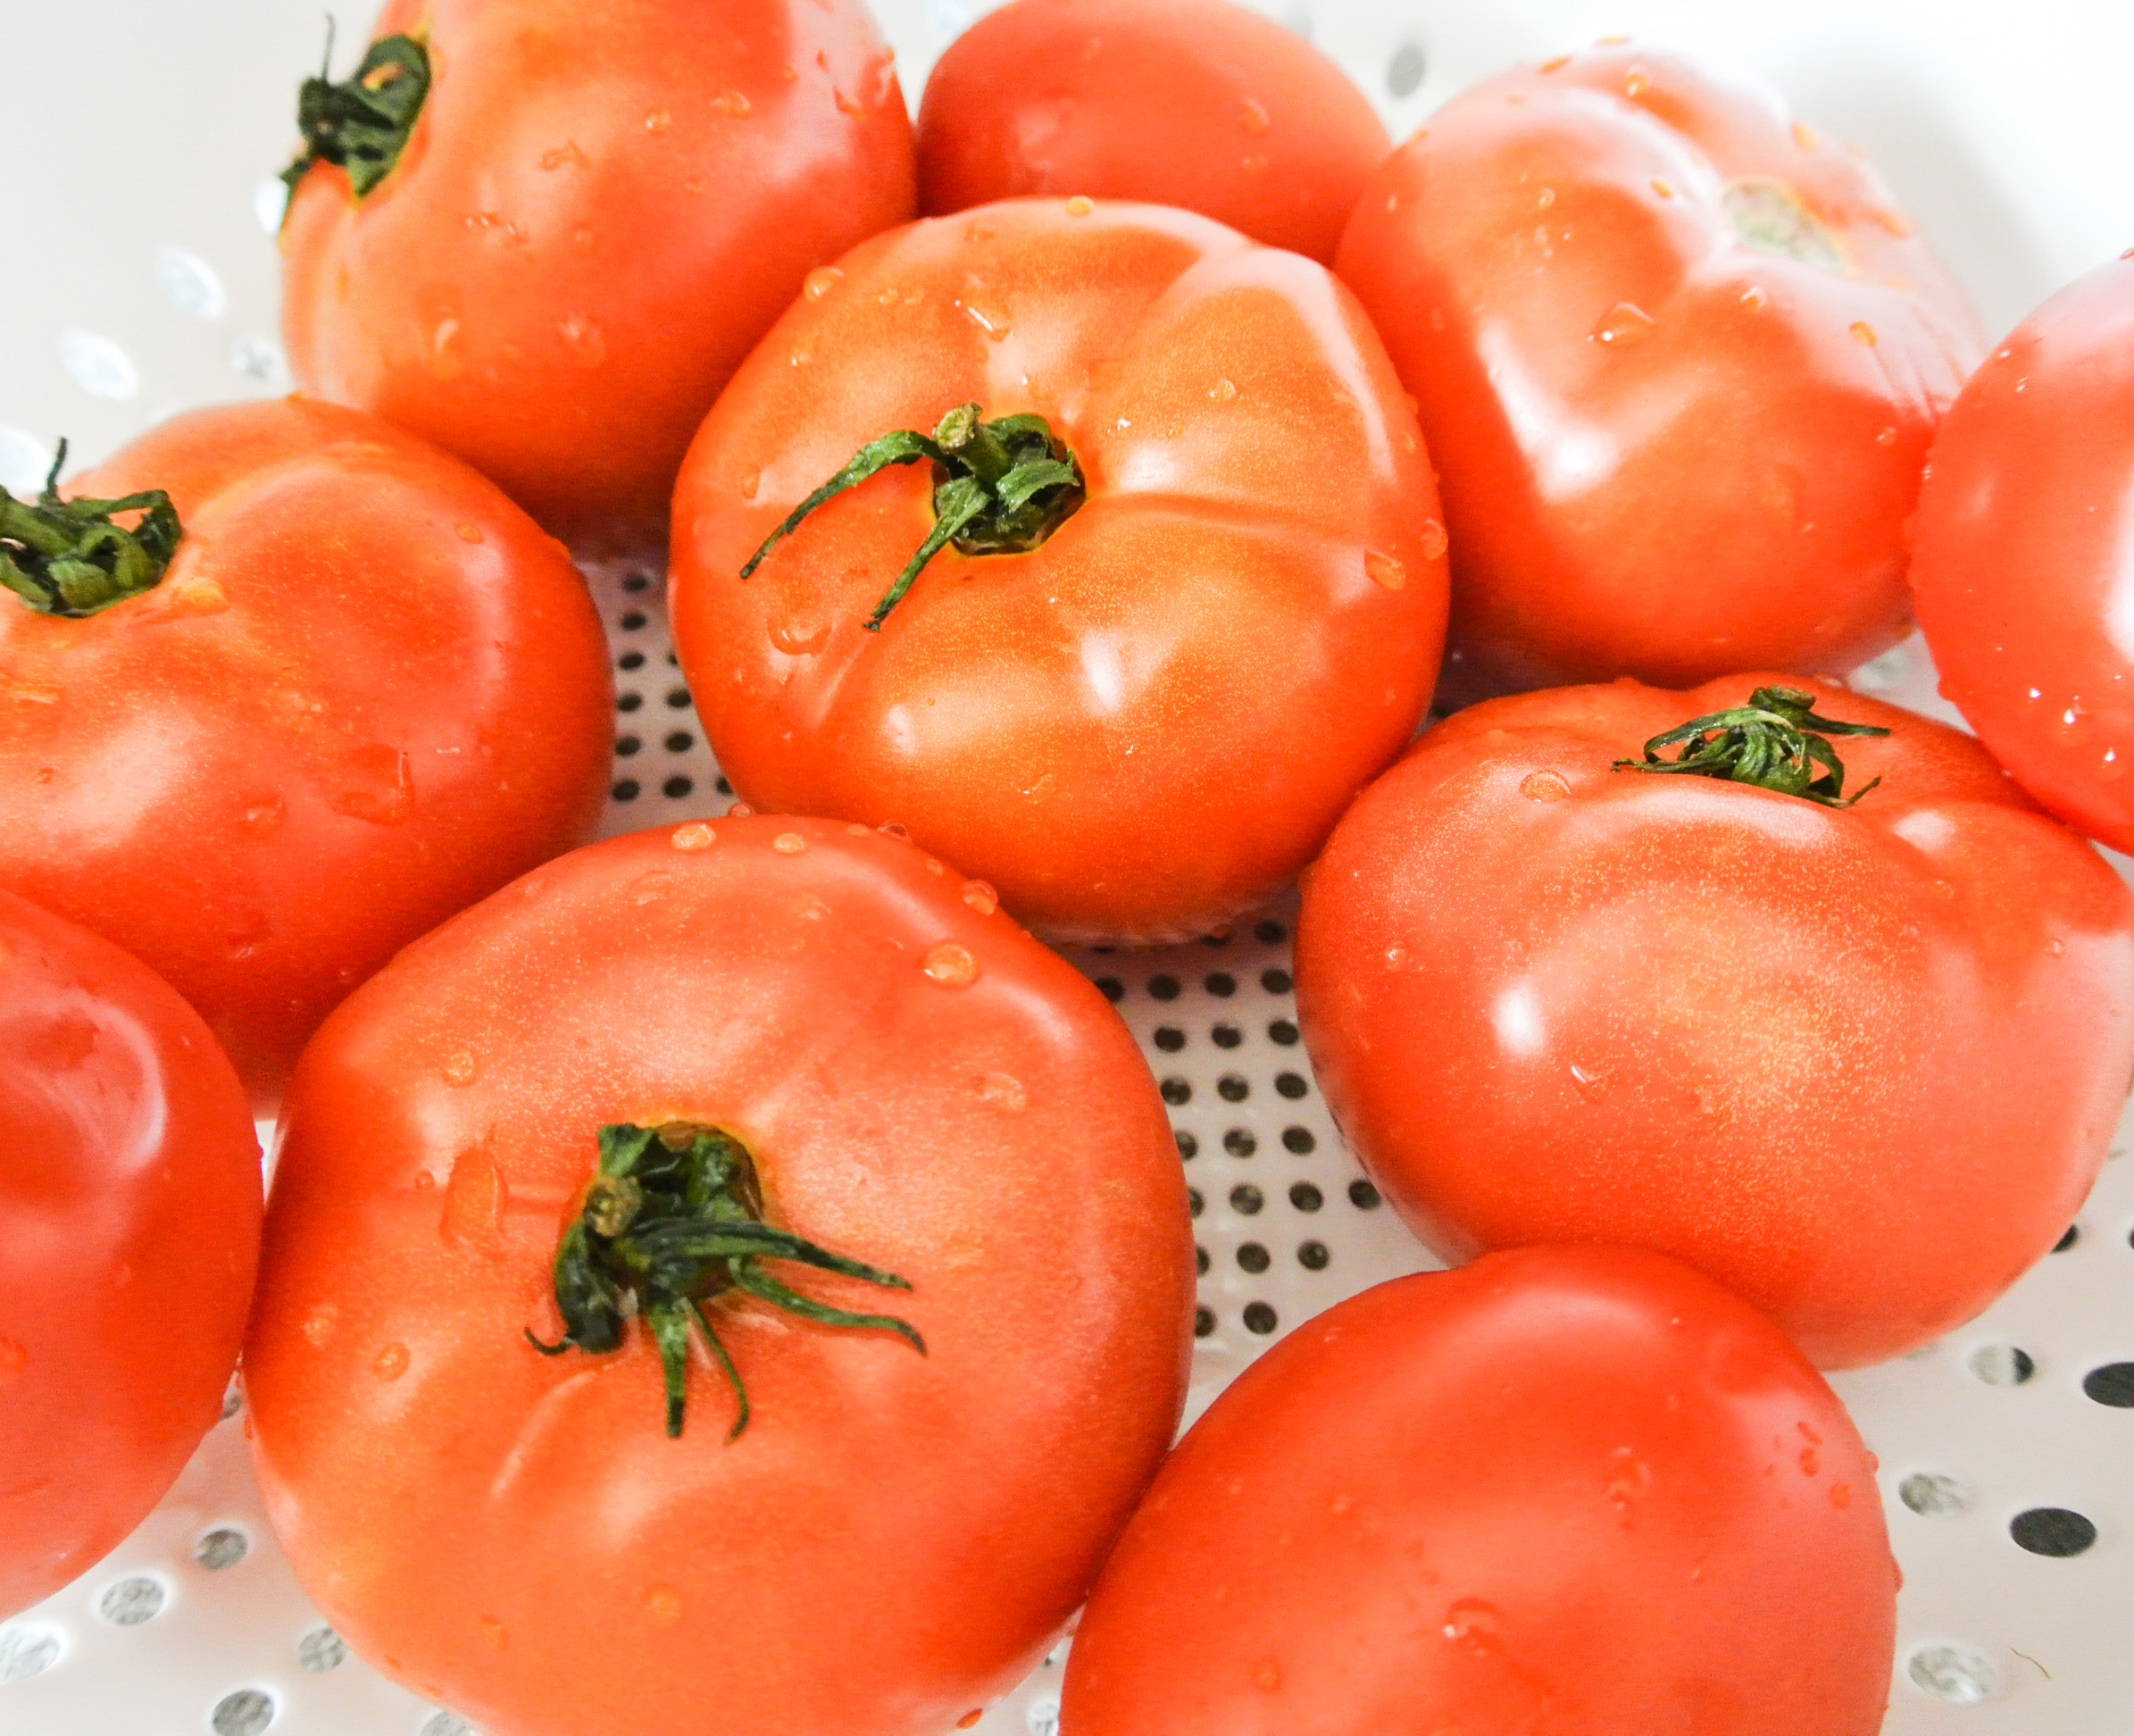
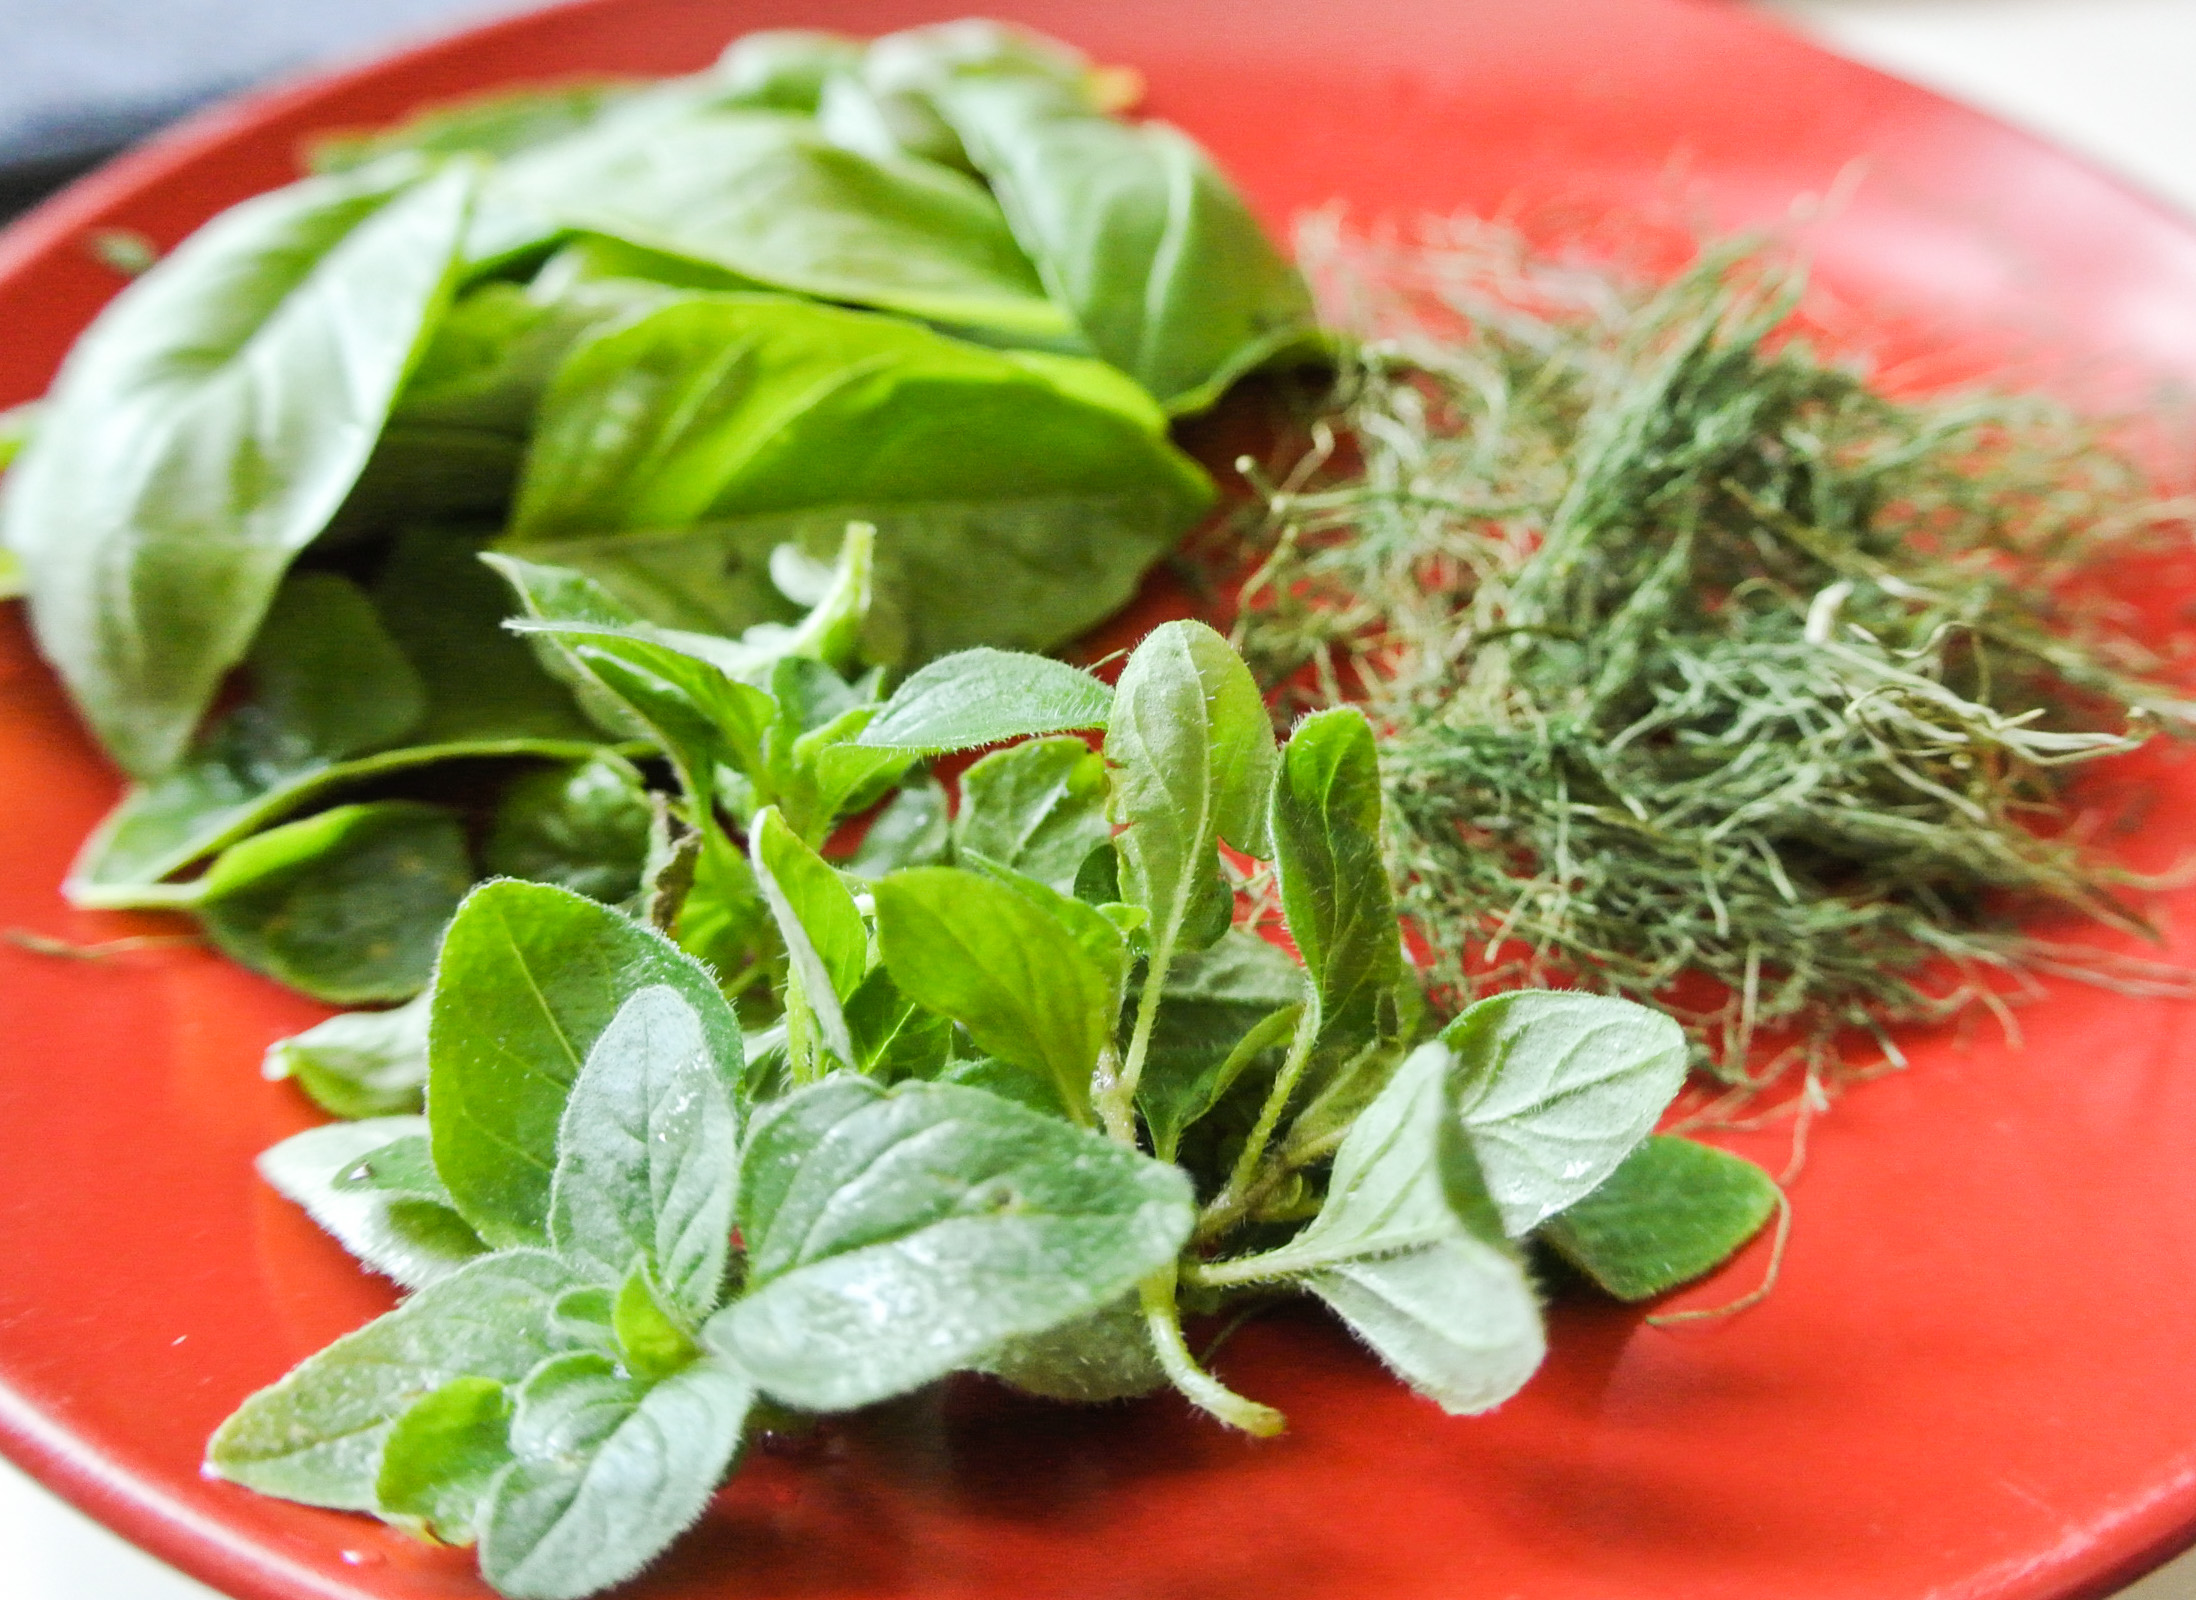
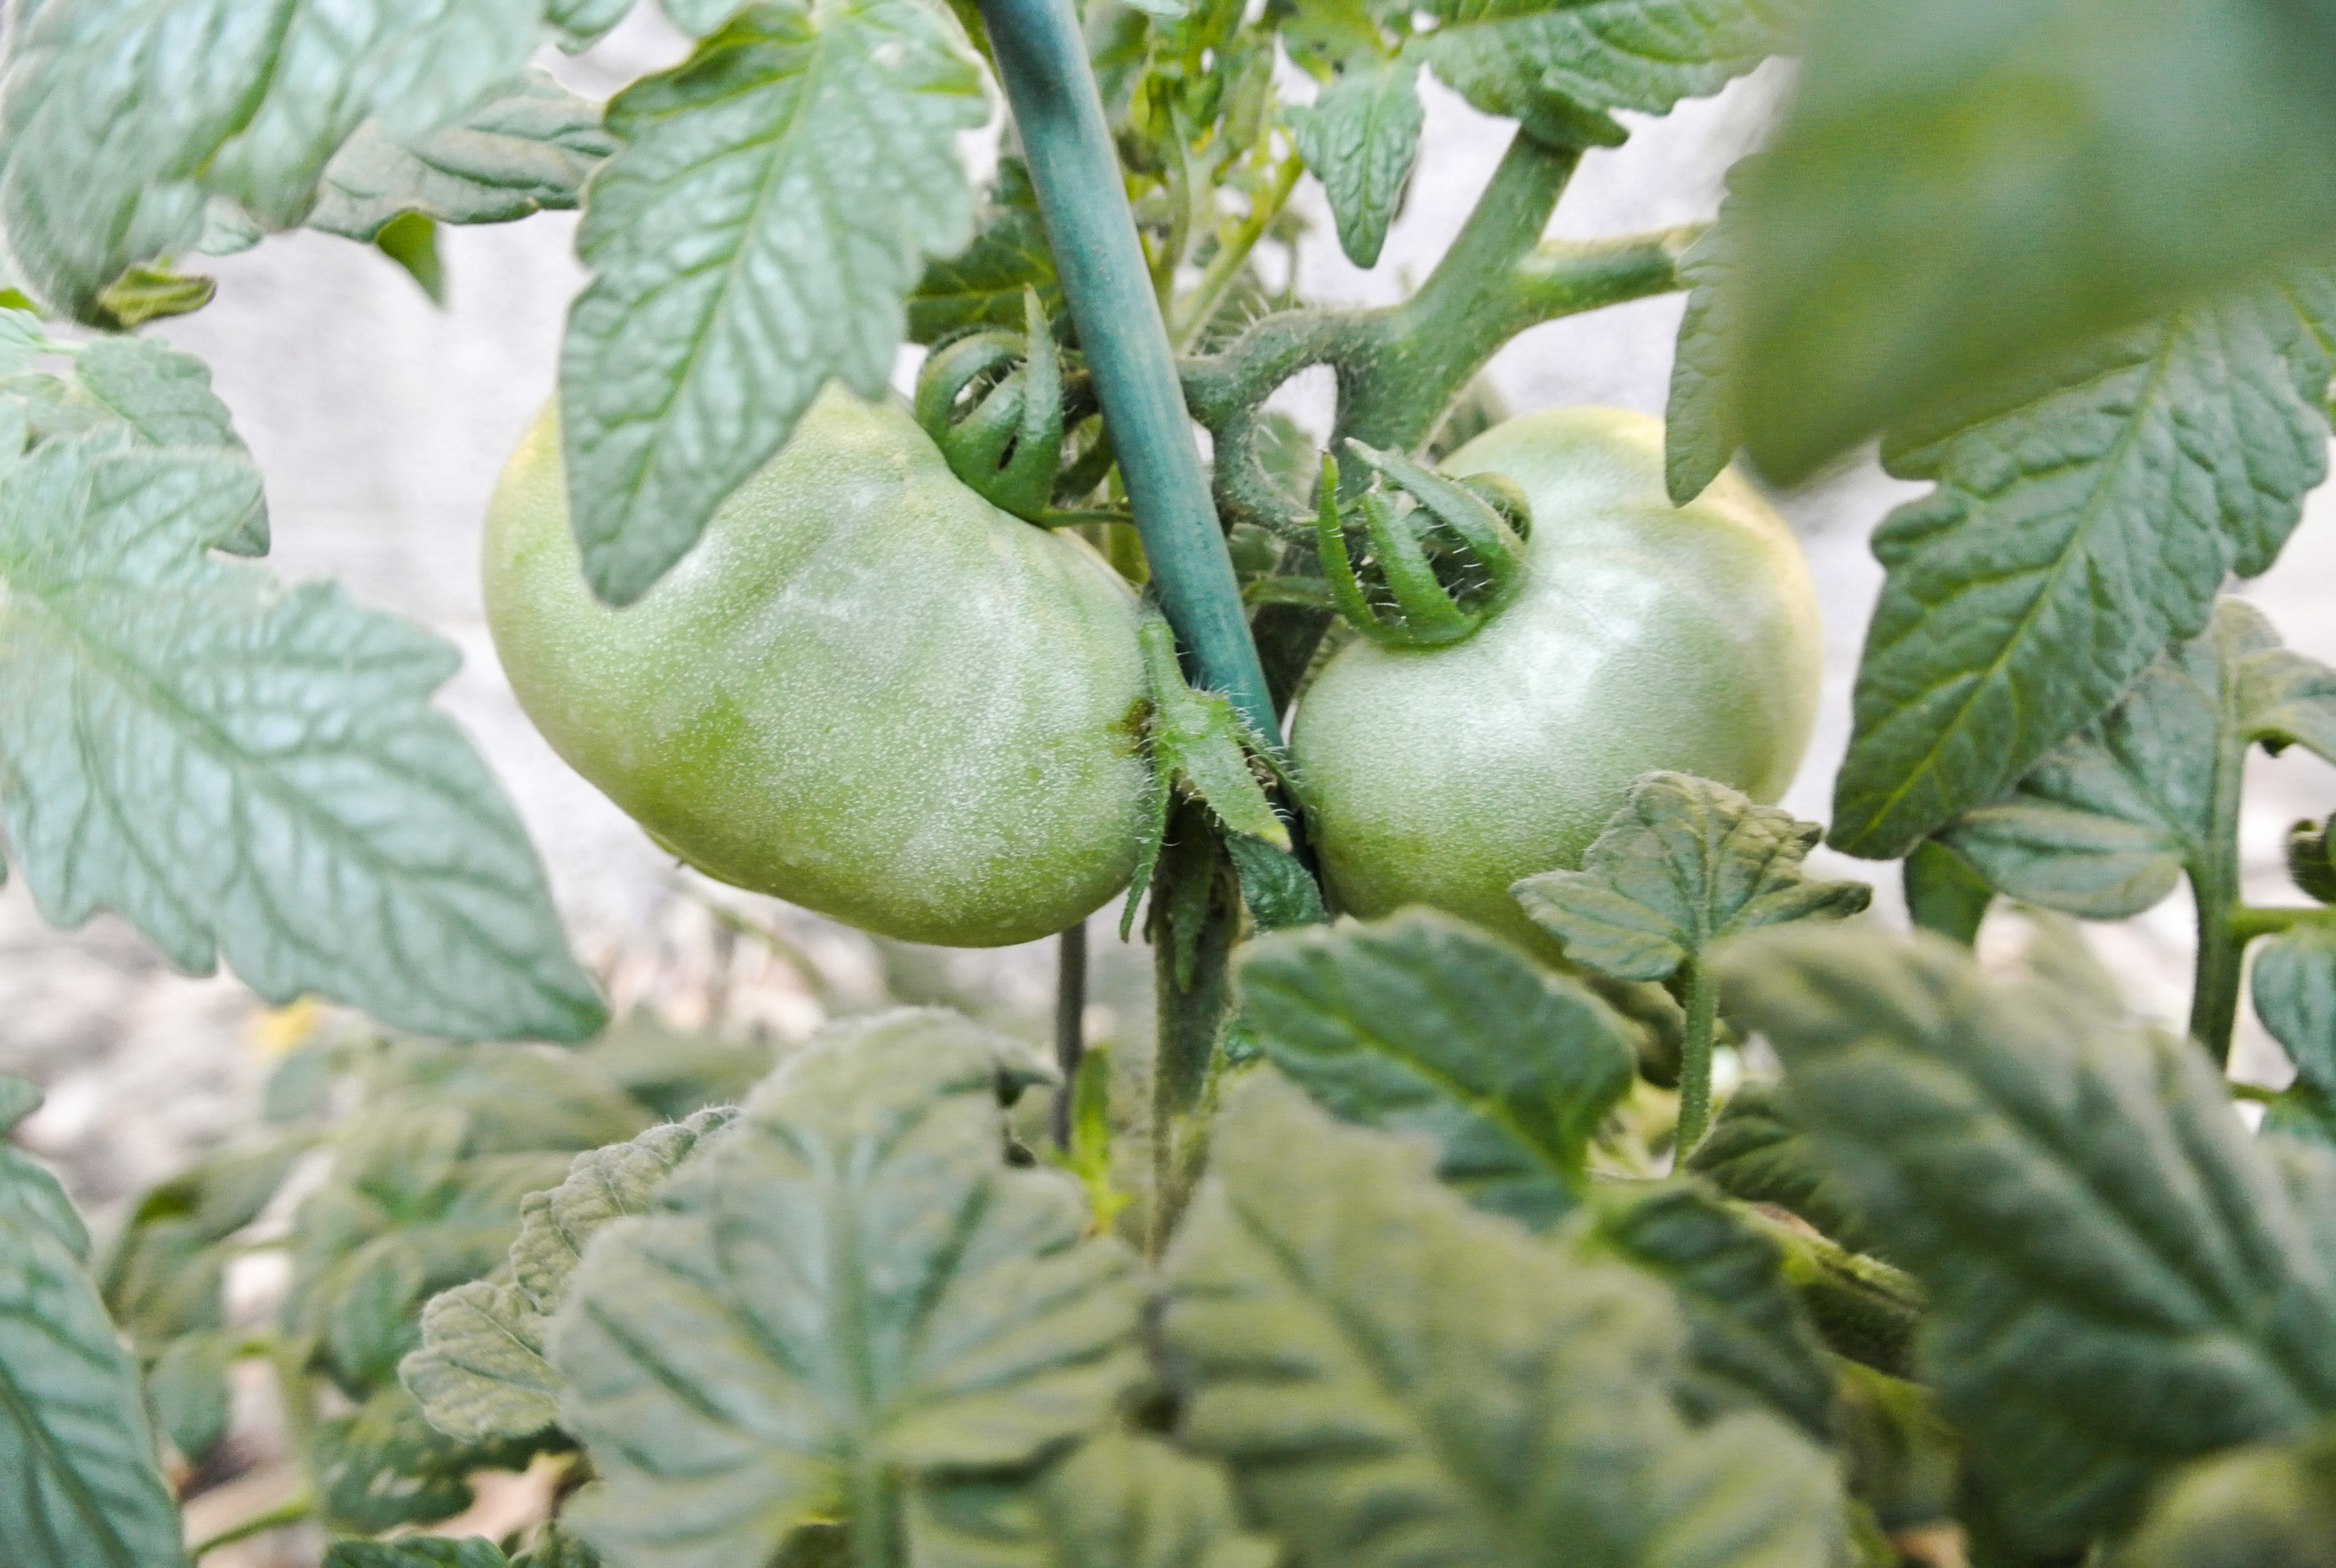
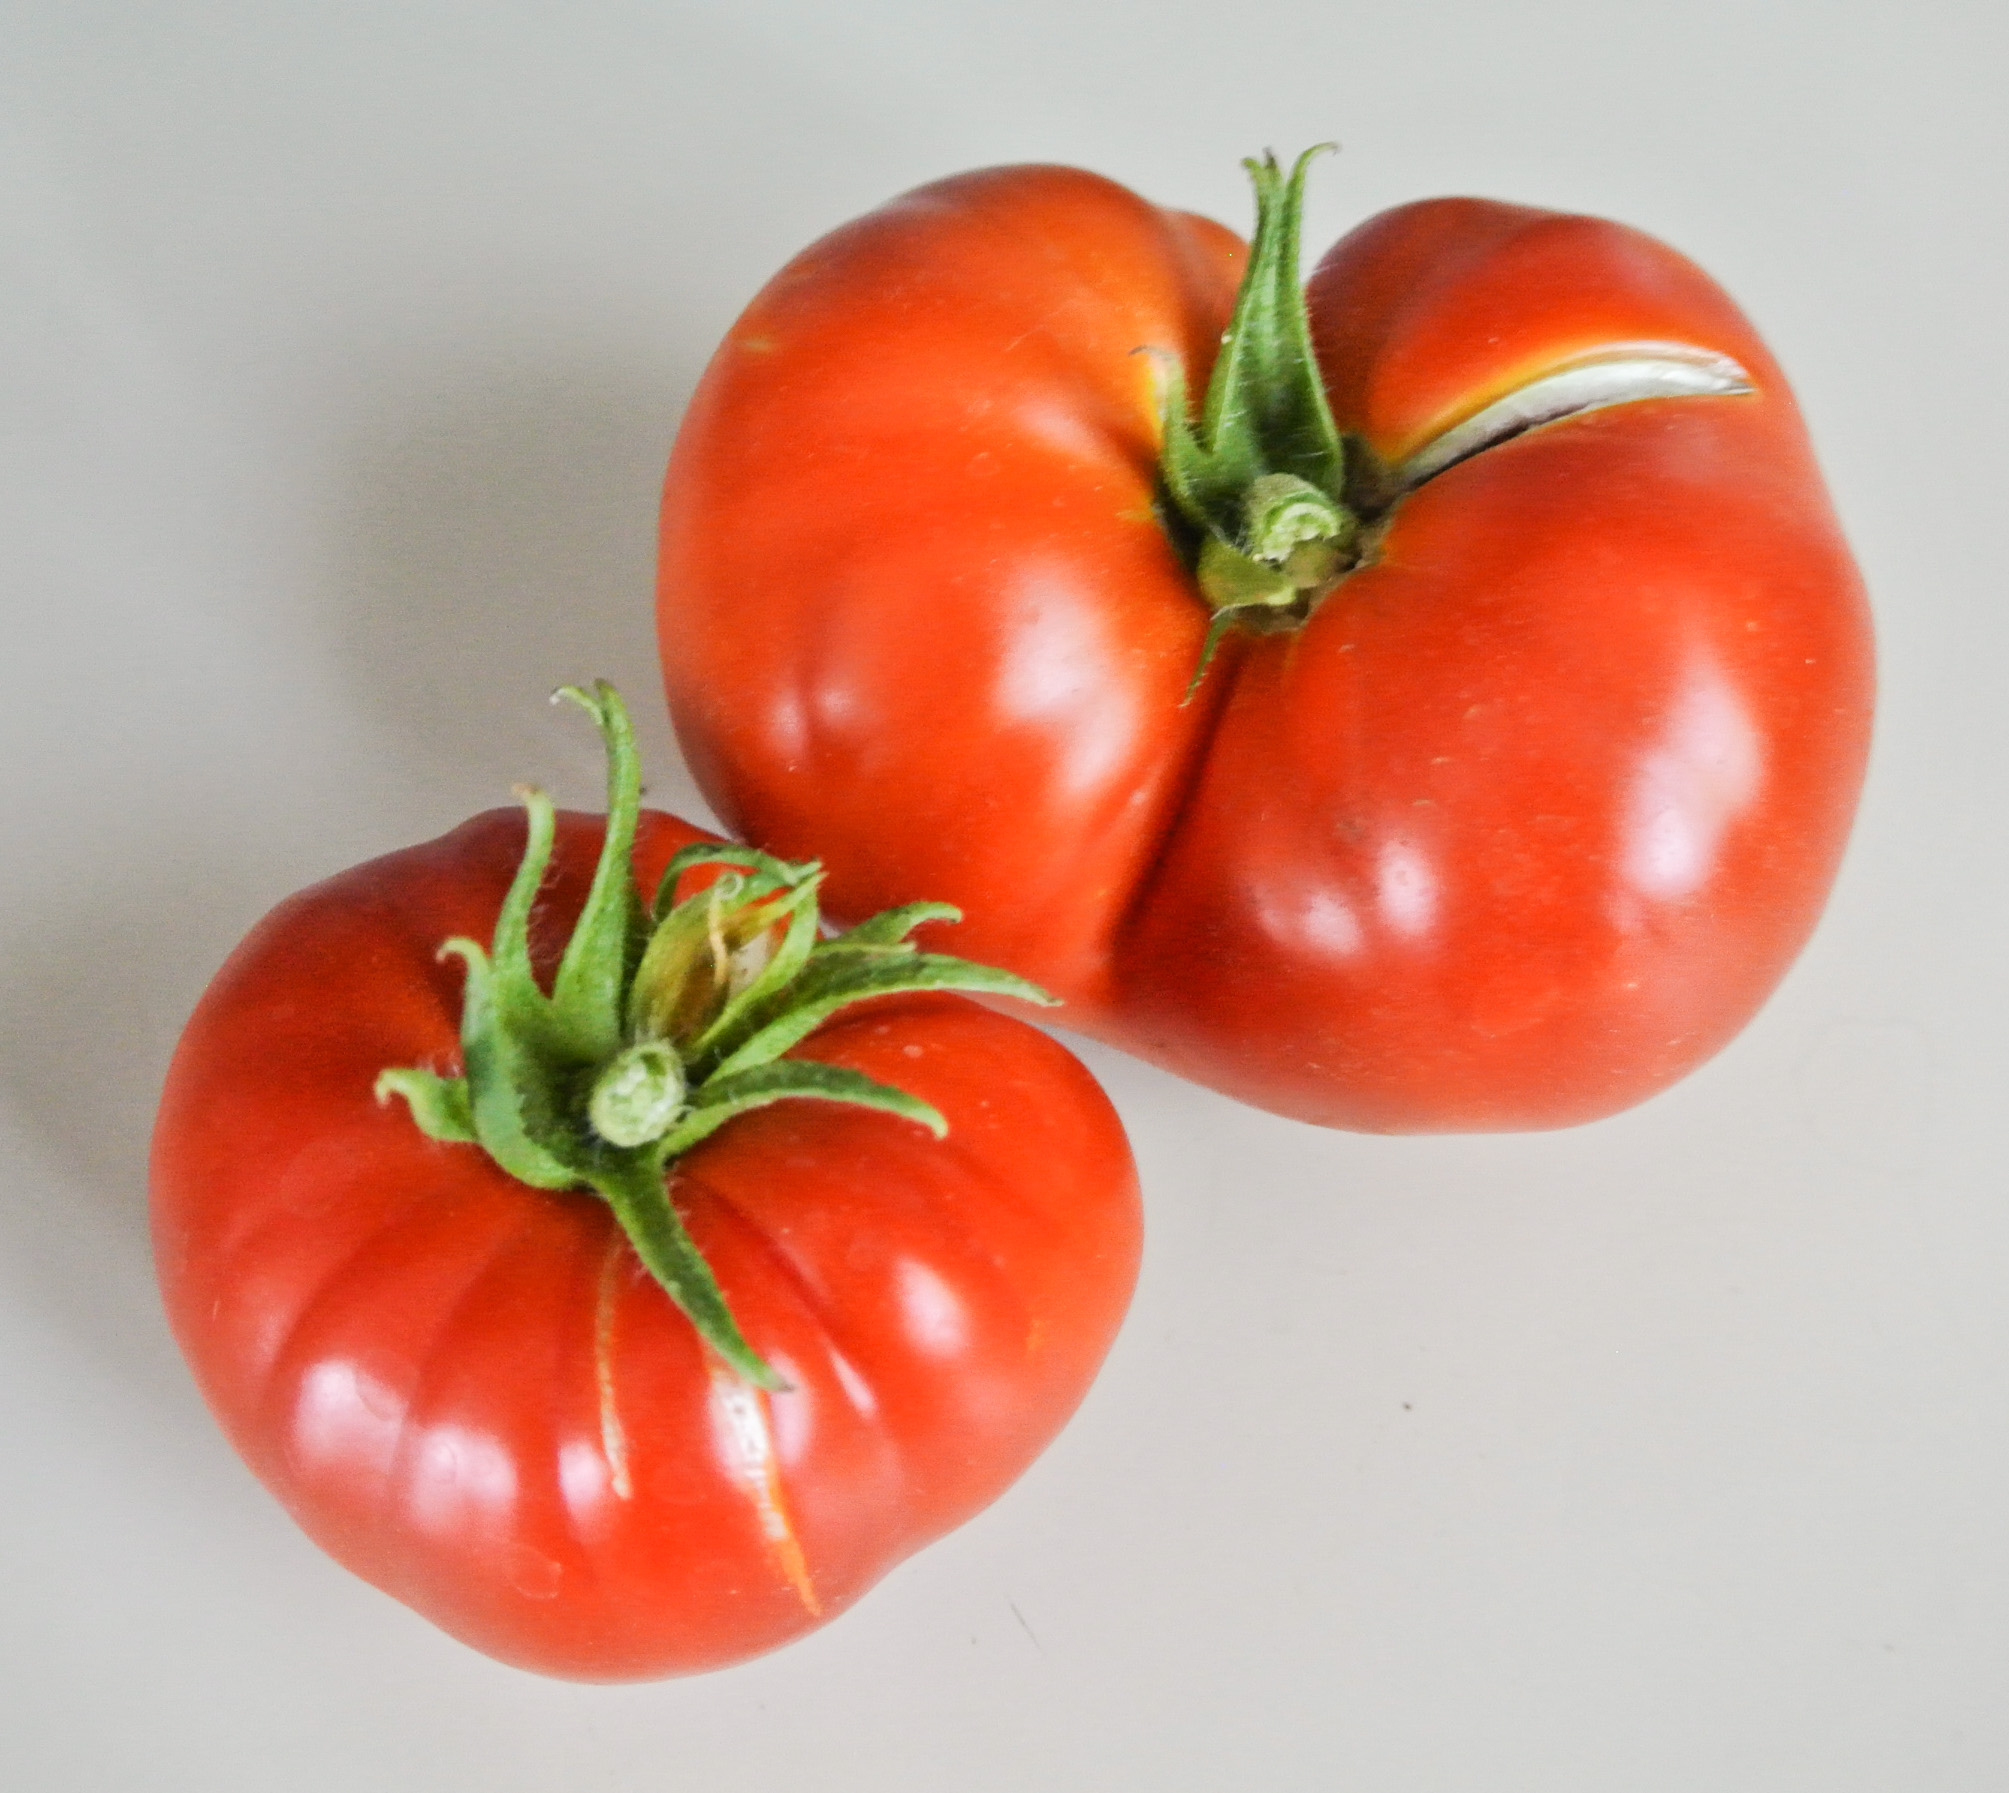
Other than our extensive herb collection—which, unfortunately, is starting to take a beating from the heat—our biggest success by far is tomatoes. We have at least four different varieties (that we’re aware of) growing in our garden, including these gorgeous beefsteaks (pictured above). Our plants are holding strong as summer approaches and we have 40-50 fit-sized tomatoes near maturity, including some sweet yellows and black rim.

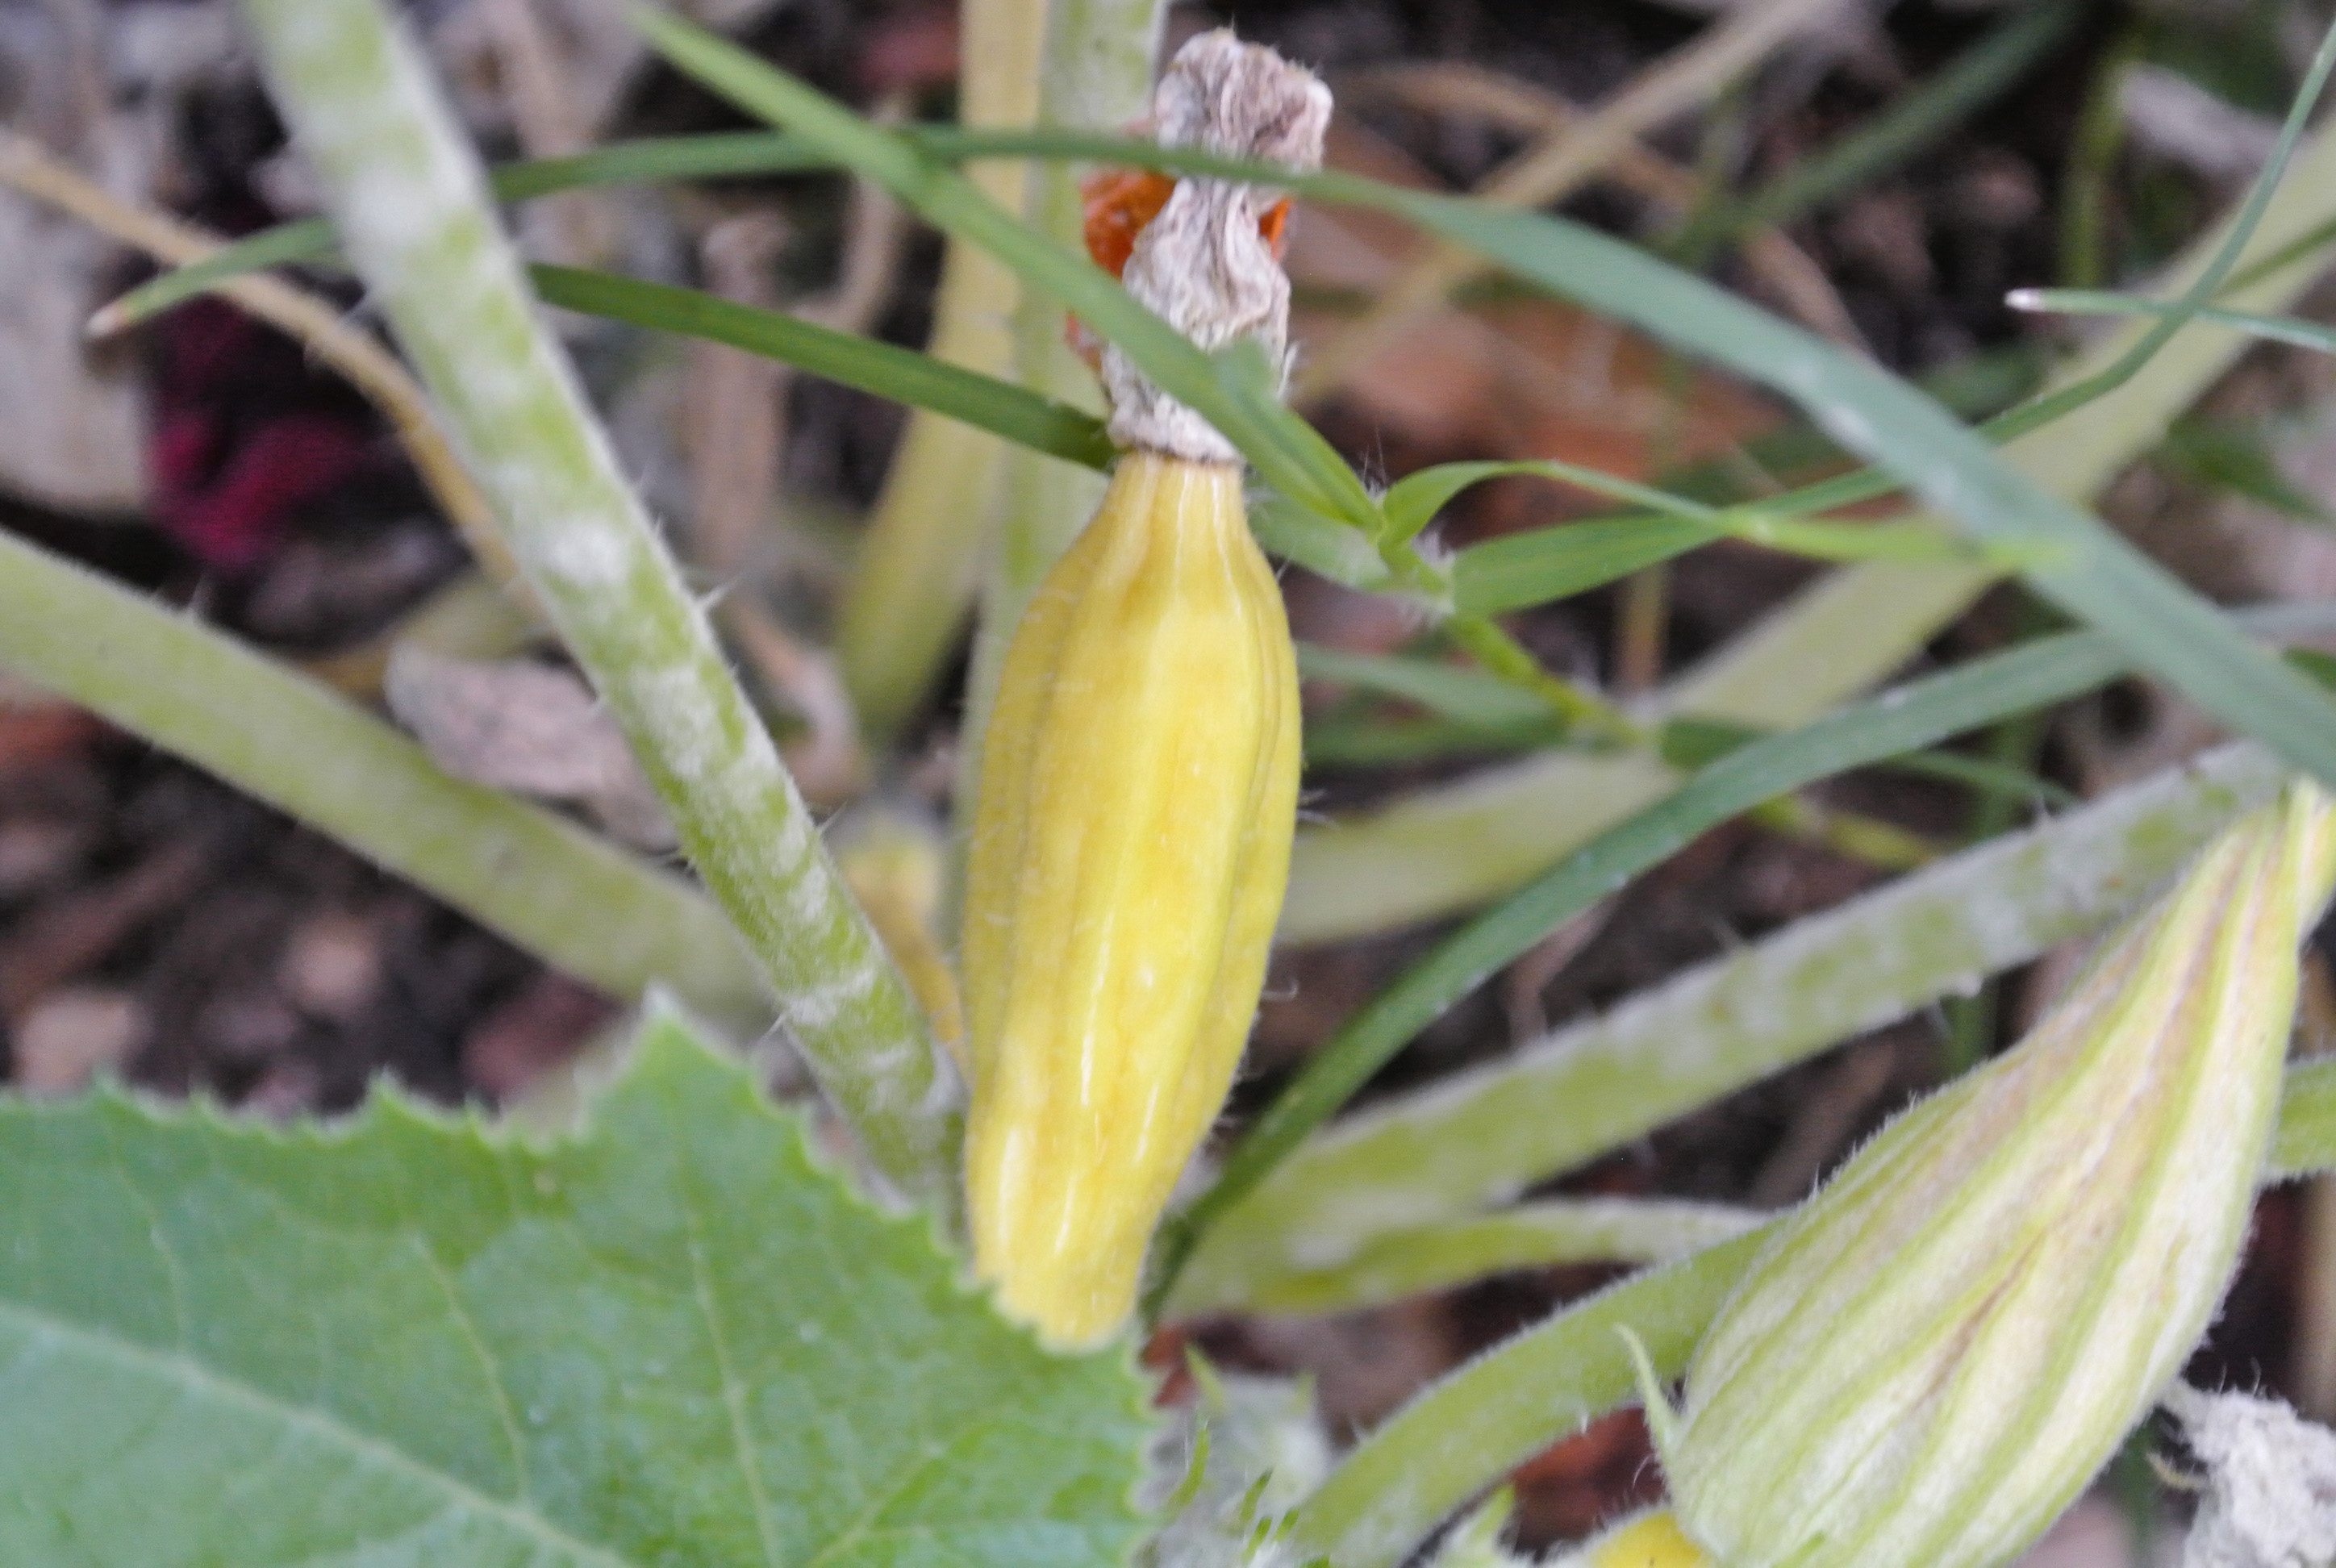
We have a few baby yellow summer squashes and leeks, too. We received leaks in our Bountiful Basket one week and thought we’d try planting it; months later, it’s going strong.

DSC_2045 DSC_2043Other successes (not pictured) include continued growth of our pomegranate trees, shrub-sized rosemary and lavender, and lemongrass that’s been going for well over a year. We have about five ears of corn with a couple of kernels each and green onions that we planted over two years ago that just keep on giving.

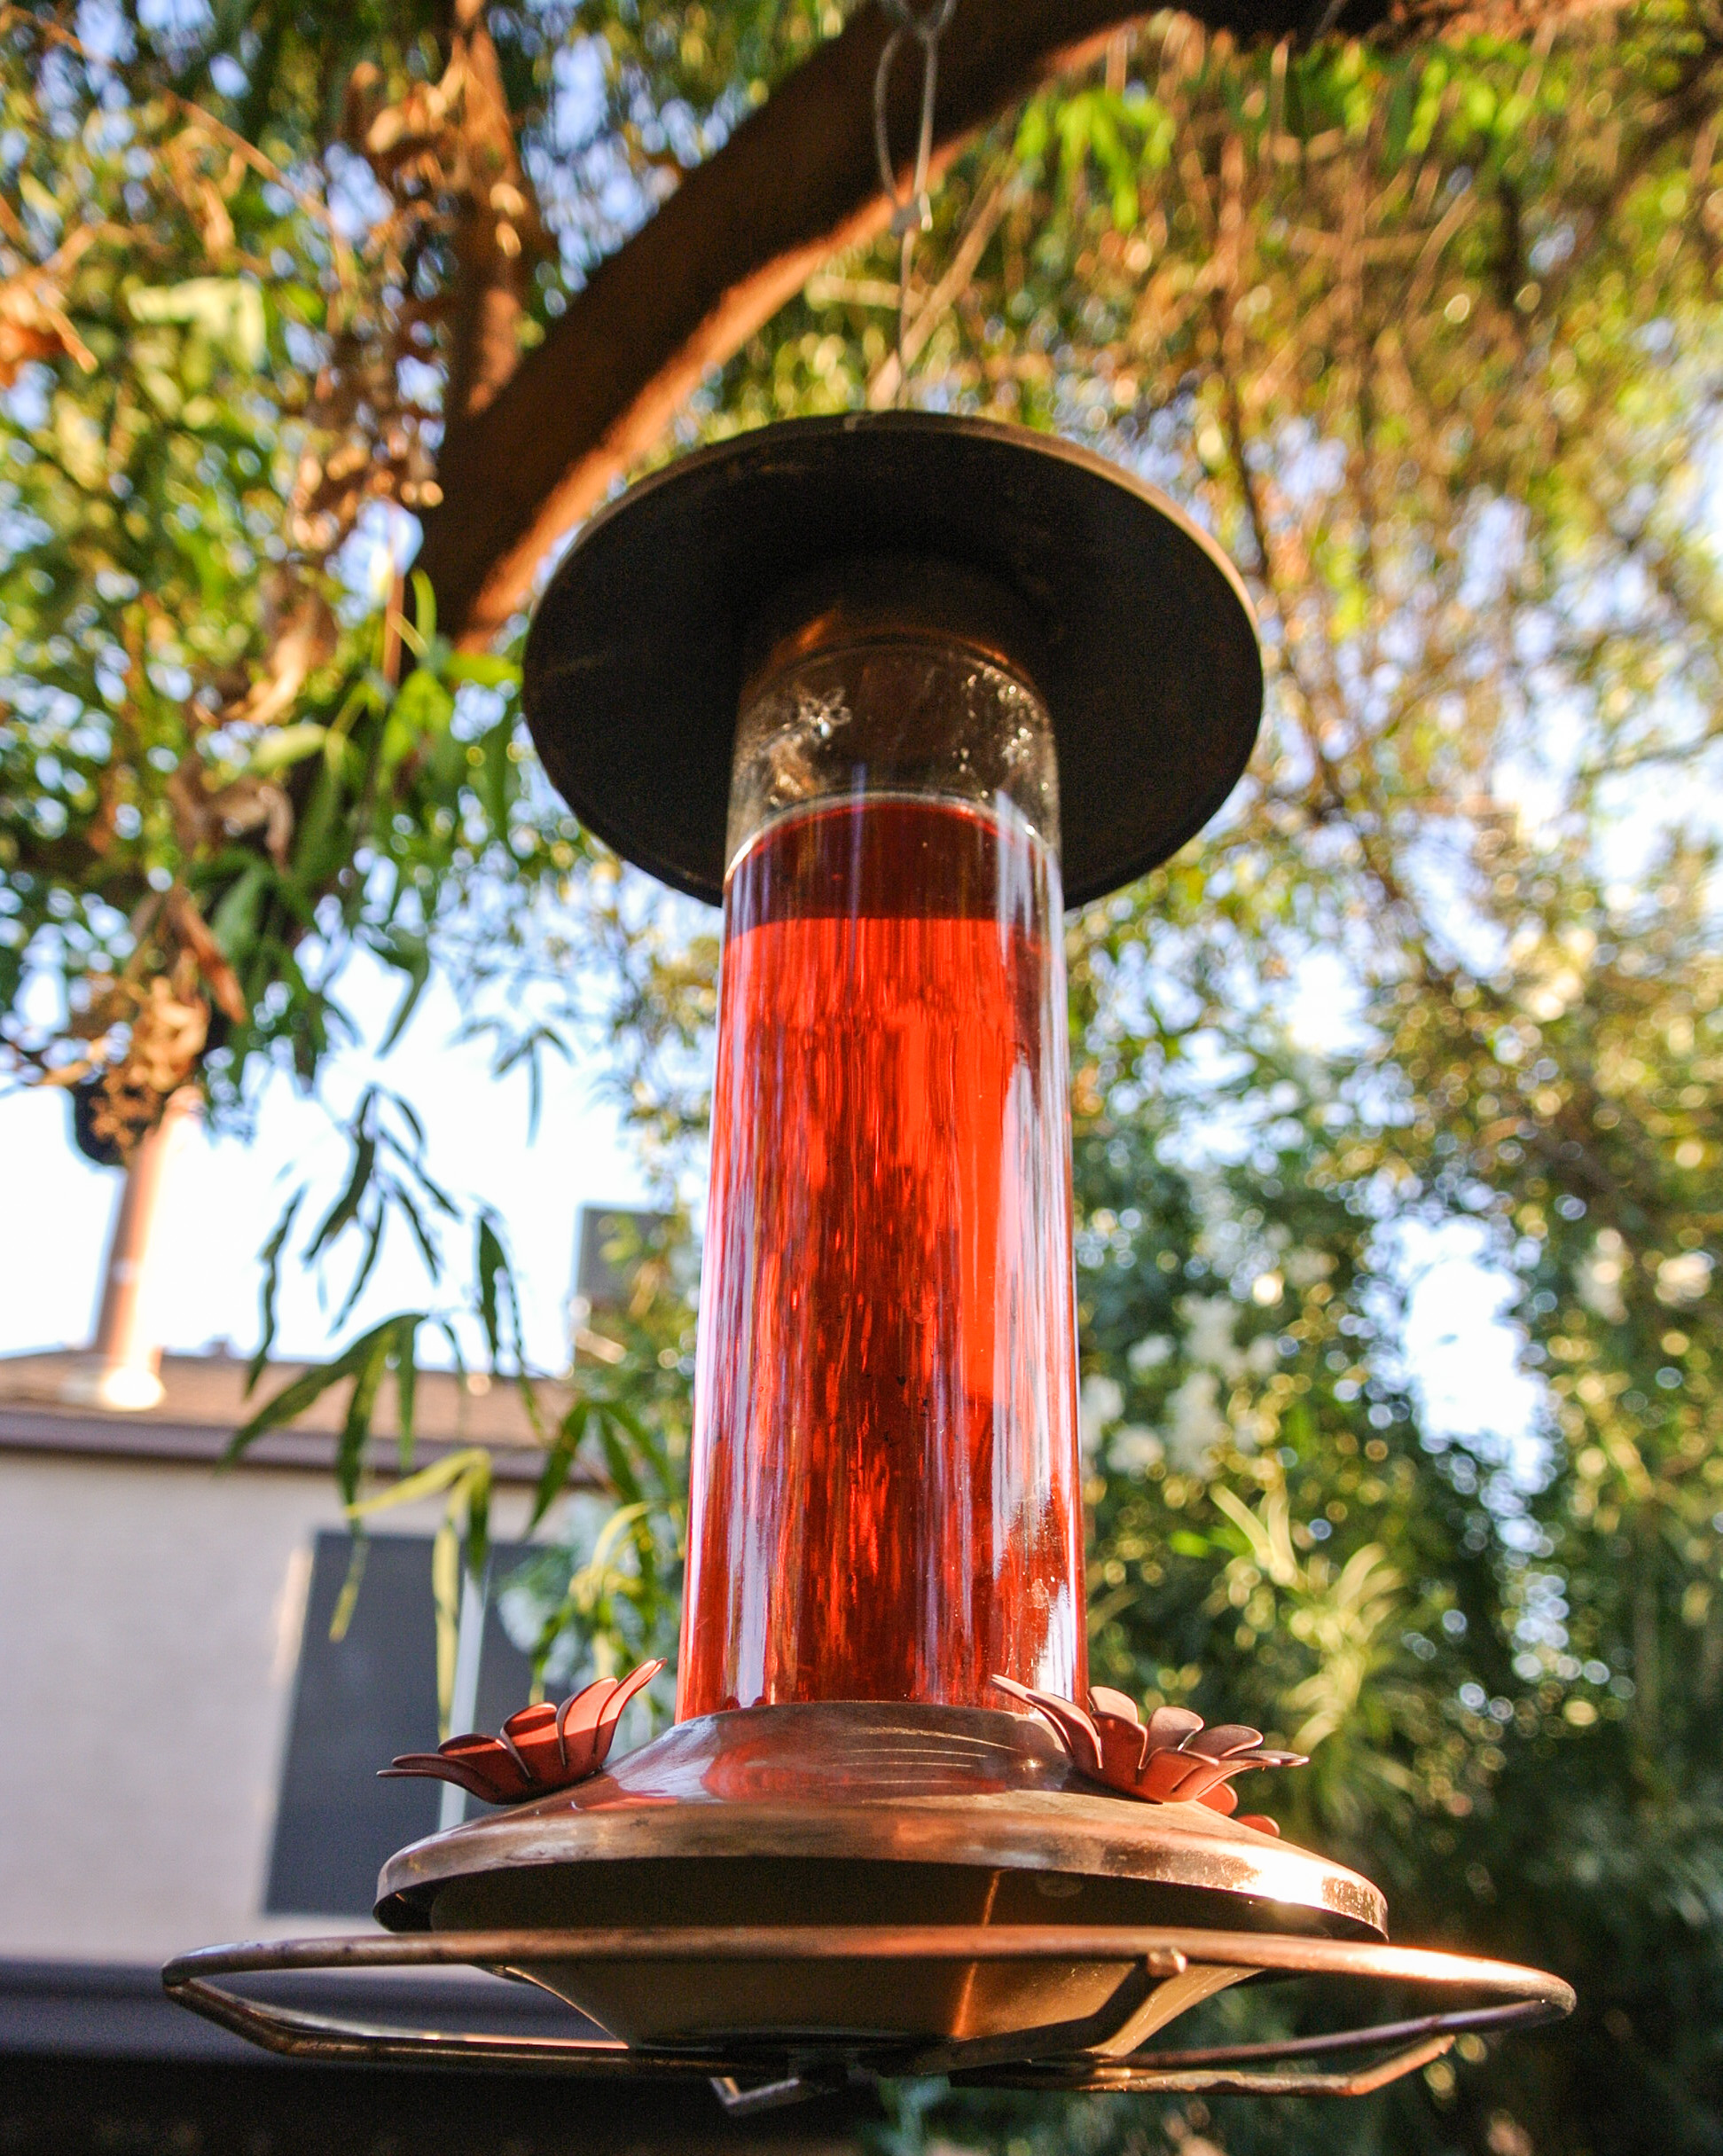
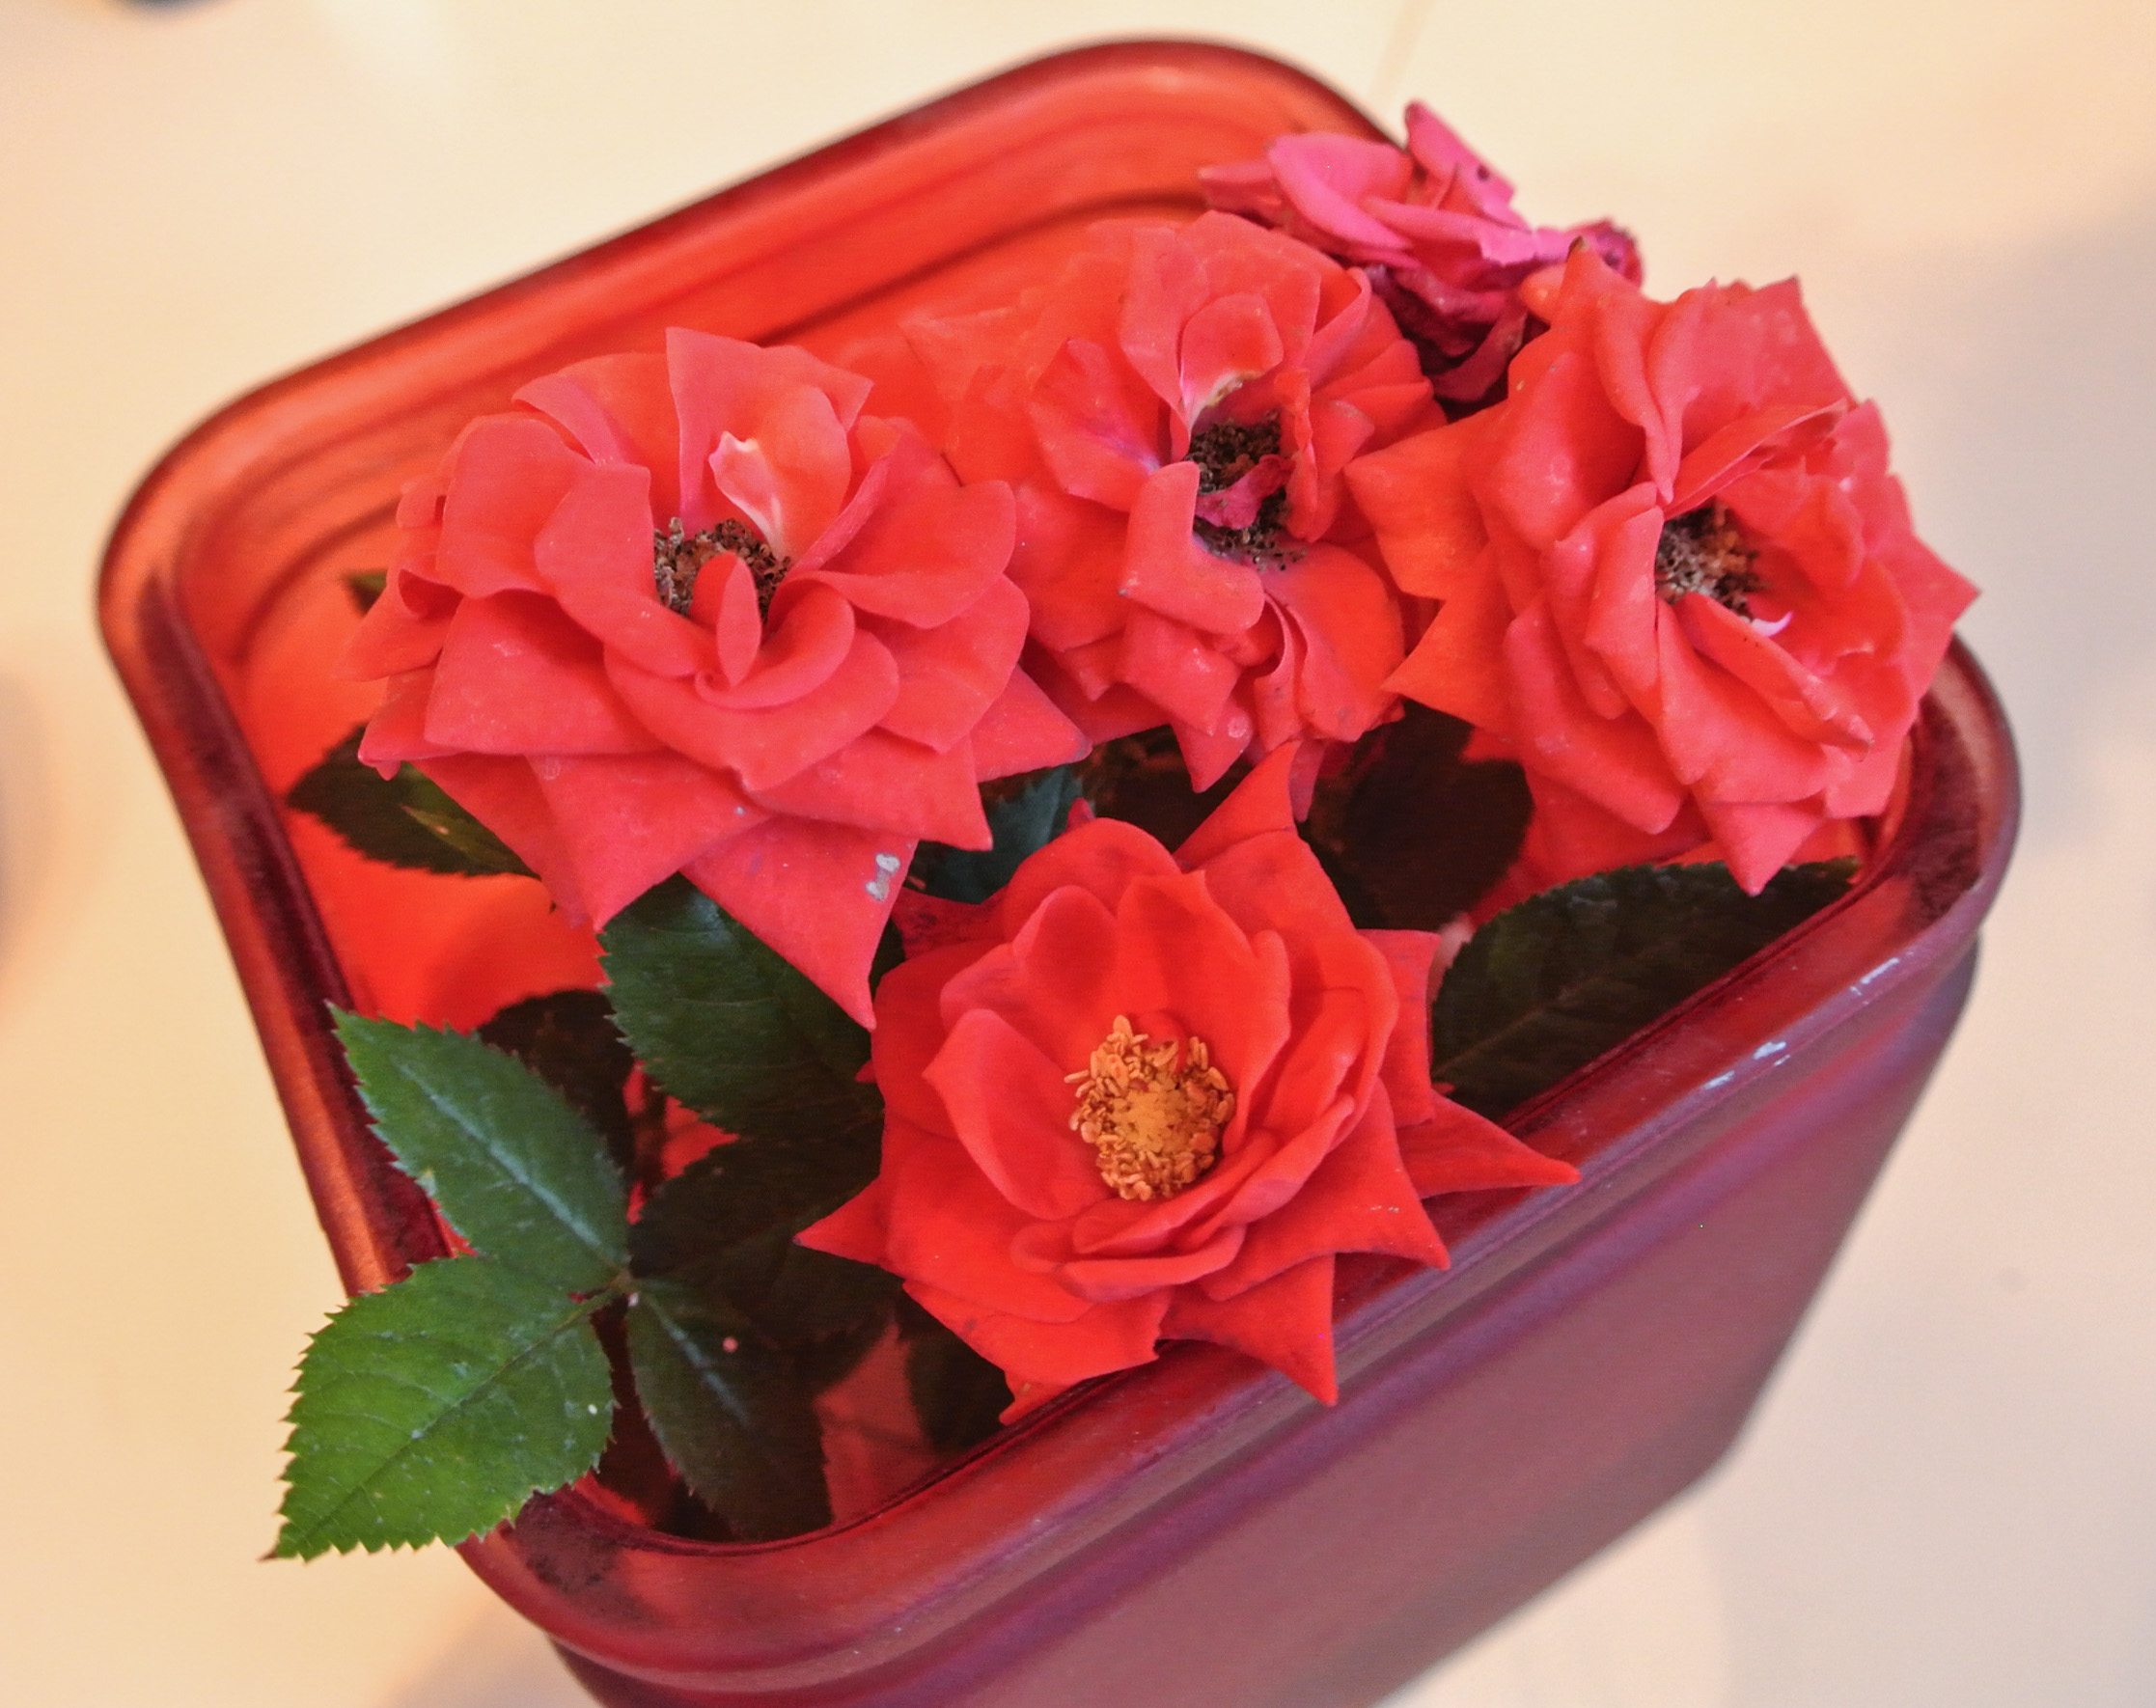
Our oleanders are in bloom, as well as a few different flower varieties. The mini-red roses below came from a “house plant” given to us nearly two years ago. It was near death living inside, so we took a chance and planted it outside and it has been in bloom since. Blooming flowers = birds and bees = new growth cropping up unexpectedly…

DSC_2051Surprise: We have wonderberries! It took us a while to research and name the mystery plant that has taken root in our yard, but we finally did it. Wonderberries, sometimes referred to as sunberries, look similar to blueberries. When they are green, they are poisonous. Once they turn black, they are edible. When the skin goes from shiny to dull, they are at their best, but never quite as sweet as other berries. They are commonly made into pies or jams where extra sugar can be added. I’ll let you know when we harvest ours and make something out of them.

DSC_2041Still feeling daunted? Again, start with windowsill herbs and work your way up to planting bigger crops. 🙂 Your organic palate and fuller wallet will thank you in the end!

Advertisement

My Simplest Formula Yet: Salt-Free Salsa

DSC_2028Salsa is an excellent way to eat a mix of great-for-you raw fruits and vegetables. With the combinations being endless, it’s no wonder that so many people love to dip in in front of the TV or at a party or restaurant.

Salsa should be one of those snacks that you don’t feel guilty about. However, if you buy it premade, there’s a chance that it will be loaded with salt. My salsa formula is so simply flavorful that I don’t add any salt at all…not even a pinch.

Why? Chances are, you are eating your salsa with tortilla chips. Most chips are salted to some degree, some more heavily than others. Because consuming minimal salt is a major premise of my plant-based lifestyle, my palate has become very sensitive to foods that are overly salty. Thus, the salt from the chips is enough for me in boosting the flavor of my already delicious salsa.

I really like these chips, from Target’s organic product line. The ingredients are listed as follows: Organic blue corn, organic sunflower oil, organic flax seed, sea salt, lime. (NOTE: If you didn’t already know this, when reading a food’s ingredients on a nutrition label, they are written from greatest to least presence in the product.) True to its name, Simply Balanced, I haven’t found a better premade chip. They are heartier than your average tortilla chip and not too salty, which is perfect for me.

DSC_2029Moving along, today’s formula rendition includes a few fresh ingredients that offer a ton of health benefits. Let’s take a look:

CILNATRO: This common salsa staple is high in antioxidants and prevents oxidation, allowing foods that it is mixed with to stay fresh longer.

DSC_2017GARLIC: There’s a reason that you can buy garlic supplements in the vitamin aisle. Raw garlic, in particular, has anti-inflammatory effects and can lower cholesterol. Those of you who have read up on my health history know how important this is to me!

DSC_2021PINEAPPLE: Pineapple is nutrient-dense rather than energy-dense, meaning that it contains an abundance of nutrients for very few calories (I don’t count, but this may be important to you if you’re trying to lose weight). In one cup of pineapple, for instance, you can consume 40% of the recommended daily Vitamin C intake.

DSC_2023Since we’re on the subject, how do you cut a pineapple? Buying it precut or diced in a can is more expensive. Believe me, breaking it down yourself is easier than you’d expect. I have to give credit to Rachael Ray for my method, which I use for all melon-like fruits and also gourds. Follow these steps to cut a pineapple with ease in minutes:

  1. Lay the pineapple on its side.  Slice off the very bottom and the very top so that you are left with a cylinder that can easily stand flat on the cutting board in its upright position.
  2. While standing upright, take your knife around the perimeter of the pineapple and slice the skin off, top to bottom.  You’re essentially cutting it off in vertical strips until you’ve made it all the way around.
  3. Once the pineapple is peeled, remove the flesh surrounding the core.  While the pineapple is standing upright, put your knife close to the edge of the core and slice downward, effectively removing nearly half of the pineapple.  Repeat this process all around the core until you’ve done it a total of four times (the pieces will be uneven in size).  Your core should appear as a long, thin rectangle when all of the flesh is removed.
  4. Chop your pineapple according to its projected usage and discard the core.  If you happen to own a powerful juicer, you can juice it instead.

On to my simple salsa! Don’t like onions? Don’t use them and compensate with extra fruit and/or vegetables. Play around with different combinations, using your herb of choice as your guide. I’m envisioning a delicious cucumber mint with pita chips or strawberry basil atop crostini…Yum…

Serve as an appetizer or snack, or use it in a dish like my layered burrito bowl. Enjoy!

FORMULA BASE: SALSA

  • 4 cups diced raw fruit and/or vegetables –>  I’m using 2 ½ cups vine ripe tomatoes and 1 ½ cups pineapple.
  • ½ of a medium onion –>  I’m using yellow.
  • 1 large clove of garlic, minced
  • ½ cup finely chopped fresh herbs –>  I’m using cilantro.
  • ¼ cup acid (vinegar or citrus juice*) –>  I’m using the juice of two small limes.
  • Seasoning to taste –>  I’m using a dusting of chili powder, paprika, and cumin.

*Whenever possible, juice whole citrus fruits yourself. 🙂

DSC_2018

Chop your onion and garlic and get them soaking in your acid, just as you did in preparing my bean salad formula. The acidity will help to break them down so that their flavors are less abrasive and don’t monopolize the salsa.

Dice/chop all remaining ingredients, season, and stir. When it comes to salsa, I don’t typically measure seasonings. Once I have all of my produce in the bowl, I lightly sprinkle it with each of my preferred seasonings (if any) from one end of the bowl to another and that seems to work out nicely.

DSC_2024

Serve immediately or store in the fridge for a few days.

DSC_2026

New Formula: Simple Marinara Sauce

DSC_1913

On my mom’s side of the family, I grew up eating authentic Italian cuisine. Buying premade, jarred sauce was sacrilege, and I am not going to be the one to disappoint.

I have clear memories of my mom’s red sauce bubbling away on the stovetop for hours before topping a pasta or filling up a lasagna. Her traditional sauce includes ground beef and although it is delicious, even as a child, I remember picking out the meat.

Today, I have my own totally vegetarian marinara recipe. When I met my husband of nearly four years, he expressed to me that he prefers his Italian cuisine without meat, too. I knew we were meant to be. 🙂 While he likes a sauce that is tarter, I have come to enjoy it best on the sweet side, as my mother adds a little bit of sugar when she’s making hers.

I used to make this recipe with canned tomatoes, simply because it’s quicker and will yield a slightly smoother sauce. After reading an article about the most dangerous foods you can put in your body and seeing canned tomatoes on the list, I have since opted for the path of more resistance. What’s so bad about canned tomatoes? Cans are lined with BPA, and while some canned products do not contain enough acid to leach very much of this chemical into the food itself, tomatoes do and they will.

DSC_1905

DSC_1907

So, I now puree my own tomatoes and the cooking process takes me a little longer. What’s the expression…Nothing that is worthwhile is easy? Something like that. Trust me, your sauce will be delicious and even though you are really really really starting from scratch, this recipe is still quite simple and will be ready in no time. Use this sauce with your favorite Italian dish or try it out with my vegan pizza. Enjoy!

FORMULA BASE: MARINARA SAUCE*

  • 1 ½ pounds tomatoes –> I’m using a combination of vine ripe and roma.
  • ½ of a small yellow or white onion –> I’m using yellow.
  • 3 cloves garlic
  • 2 tbsp sweetener (optional) –> I’m using turbinado sugar.
  • 1 ½ tbsp dried fennel fronds (or a small handful of fresh) –> I’m using dried.
  • 1 tbsp dried basil (or a small handful of fresh) –> I’m using fresh.
  • 1 tbsp dried oregano (or a small handful of fresh) –> I’m using fresh.
  • 1 bay leaf
  • Salt and pepper to taste

*Today, I’m making a double recipe, so don’t be discouraged that the amounts listed above don’t match the pictures. I’m just doubling everything. 🙂

Thoroughly wash your vegetables so that you can save the scraps for homemade veggie stock. Coarsely chop your tomatoes and onion. Throw them into a blender with your garlic, herbs (not the bay leaf), and seasoning and puree until smooth.

DSC_1908

DSC_1909

Pour into a pot on the stove, add your bay leaf, and simmer on medium low for 1-2 hours, or until your sauce reduces by approximately one third.

When I am just over the halfway mark, depending on what I’m going to be using the sauce for, I finely dice vegetables that I don’t anticipate my two-year-old being eager to eat and throw them in the pot. Today, I’m sneaking in some asparagus.

DSC_1910

I’ve pulled one over on Nolan a few times with great success. 🙂 You can skip this step if you want to keep this recipe extra simple.

Remove the bay leaf and your sauce is ready!

DSC_1912

If you’re feeling adventurous and like to plan ahead, quadruple the recipe and freeze in containers the perfect size for a box of pasta. When “there’s nothing to eat” strikes, you’re ready for a quick pasta dinner!

How to Start Your Own Garden

DSC_1883

I am often asked how Travis and I make a plant-based lifestyle affordable.  As I’ve mentioned before, although I spend less than I did in my omnivorous days, to purchase high quality, organic, GMO-free, all-natural, plant-based foodstuffs isn’t cheap, and that may be one of the reasons why more people don’t get on board.

First of all, let me reassure you that we are NOT perfect at this and I’m sure that there are some deals that we miss, but we are pretty diligent and creative.  In my post about Bountiful Baskets, I shared a few of the ways that we stock up and save for cheap.

Sometimes, we make compromises.  You can find lists in a number of places of the produce that is considered “dirty” if not purchased organic (we discovered one in a baby food cookbook ourselves).  These, we don’t compromise on; if the organic version of grapes is not available, we don’t buy them.  Other items, like bananas, we aim to buy organic, but if the organic is out, we will buy the non just because we love bananas so much and consider them crucial to our diet.

When I buy something that is processed—almond milk, for example—I try to avoid the “big” brands that are known for using GMOs.  The problem is, I don’t yet know what all of the those companies are, so I’m learning more and more each day that goes by.

One way that I can guarantee the quality of our foodstuffs is by growing it myself.  If you pay your garden adequate attention, you can produce a great amount of produce for pennies on the dollar.  In addition, your backyard will look and smell wonderful.  🙂

Travis and I maintain an all-organic garden in our yard.  We started small—with fresh herbs (basil pictured below)—and grew to planting larger produce that takes longer to grow.  We also have a compost pile in one corner from which a number of surprises have grown.  We once through butternut squash seeds out there and without even consciously tending or watering that area ate a few delicious squashes months later.

DSC_1870

If you’re interested in starting your own garden, begin with research.

  • What type of soil do you have where you live?
  • What grows best in it?  In what season?

Then, plan.

  • What space in your yard will you designate for gardening only?  (No dog poop, no kids playing, etc.)
  • Will you plant from seeds or small plants?
  • Will you install an automatic watering/drip system or water by hand?
  • How much shade vs. sun do you have available?
  • What types of critters come through your yard that might help or hinder your garden’s growth?
  • Do you have room for a compost pile?
  • Do you have someone that can (and wants to!) tend to your garden if you go out of town often?

Finally, start small.  Here are the steps that Travis and I took to creating a garden in our backyard:

  • We started growing herbs from seeds in small pots in our house, just to get a feel for our gardening abilities.  Hey, some people can’t keep a simple house plant alive, so we had to make sure we could do this before we committed.
  • Next, we designated gardening space in our backyard.  The perimeter of the yard was made up of landscaping rocks with periodic trees.  We left the trees, cleared out the rocks, and tilled the soil beneath it to prep for planting.  One corner of this perimeter is our compost pile and the rest is space for growing shrubs, trees, and produce.  The entire area is surrounded by a short fence so that the dogs don’t poop back there and Nolan doesn’t play.  🙂
  • Then, we planted flowers and flowering shrubs and installed a hummingbird feeder to attract the birds and the bees.  They are essential to pollinating crops and spreading seeds for new growth.

DSC_1875 DSC_1879

  • Finally, we researched what crops grow best in Phoenix soil in various seasons and got to planting.  Sometimes we start with seeds and other times small plants.  The herbs that we started growing inside eventually grew big enough to be transferred to larger pots and then, to the ground.

Since we started gardening, we have reaped nearly ten different herbs, cilantro and basil in particular in large quantities that come back on their own every season.  We have also reaped tomatoes, cauliflower, kale, carrots, potatoes, squash, green onions, and lemongrass.  We have pomegranate bushes (pictured below…pardon all of the leaves that have fallen from our tree!  Trav insists we let them stay once they’ve fallen because they trap moisture for the soil underneath, which is certainly critical in Arizona!) that are growing from a pomegranate that we opened and stuck in the ground.  They are still years away from producing, but are going strong!

DSC_1874Due to the increased influx of birds and bees, we have also seen the growth of new trees, shrubs, and flowers that we didn’t plant ourselves…they really hold up their end of the bargain if you provide them some pollen and sugar water!

Our garden is evolving all the time and we have had plenty of failures, but we are getting better and better at it and have saved tons of money on herbs alone, which are quite pricy to purchase fresh in much smaller quantities than what we can grow ourselves.

Don’t be daunted – start with windowsill herbs and build up.  You’ll be growing your own organic produce and saving money in no time!

DSC_1880

Is Your Spaghetti Missing Its Meatballs?

DSC_1857

I have met many vegetarians/vegans over the last few years. Although they can be categorized in a number of ways, when it comes to meat, I see only one: those that do not like the flavors and textures of meat and those that do, but don’t eat it for health and/or ethical reasons. Today, I’m offering a homemade meat substitute for those like me that did actually enjoy meat, but couldn’t bring themselves to eat it any longer.

Is this vegan sausage exactly like its pork, beef, or chicken-based counterpart? No. In my opinion, like vegan diary substitutes, it is different, but equally satisfying. In addition, this recipe is one that you can feel good about since it is not processed and prepackaged with excessive salt, preservatives, and other unnatural additives.

I so wish I could take credit for this Walnut “Sausage” recipe, but it belongs to the amazing Sage Kitchen, which I reviewed last month. Remember the “sausage and mozzarella” pizza I tried from owner Kita Centella’s menu? In reading through an issue of Green Living Magazine, I came across the recipe for that very sausage. It kind of felt like the stars aligned for a second, and as if I needed more proof that plant-based living works for me, that was it. 🙂

I am still working on a meat substitute formula, so for now, this is a stand-alone favorite vegan recipe. I was thrilled to see that the base of SK’s sausage is walnuts, which I don’t particularly enjoy raw unless they are mixed into something else. Although they can sometimes taste a bit bitter, I find ways to incorporate these nuts because they are known to fight and prevent many diseases, can assist in weight control, and contain fiber and omega-3 fatty acids.

DSC_1837This recipe also contains a number of fresh herbs and spices and a touch of “soy sauce or substitute.” I encourage you to try liquid amino acids as your substitute. My sister Petra, who works for eVitamins and is the author of the expat blog 100 Tacks, got me into these, pictured below. Bragg’s is a combination of soybeans and water, and contains no added salt, genetically modified organisms, or MSG. It is gluten-free and offers sixteen of the twenty amino acids (the building blocks of protein), nine of which cannot be produced in our bodies naturally.

DSC_1841

You will LOVE this sausage recipe! I’ve included the ingredients and directions exactly as published in GL, with a few of my notes alongside. Enjoy!

SAGE KITCHEN’S WALNUT “SAUSAGE”

Ingredients

  • 2 ½ cups walnuts
  • 1 ½ tbsp nutritional yeast flakes (found at specialty markets) –> To learn more about “nooch,” check out my pesto formula!
  • ¼ tbsp soy sauce or substitute –>  I’m using Bragg’s Liquid Aminos.
  • ½ tsp ground flaxseed
  • 1/8 tsp Chakra 4 cayenne powder, 35K –>  Chakra 4 is the brand from the tea shop next to SK.  If you don’t have this brand on hand, you could substitute another.
  • ¼ tsp Chakra 4 ground caraway seed
  • 1 tsp Chakra 4 ground fennel seed
  • 1 ½ tbsp lemon juice
  • ¼ tsp mineral salt –>  I’m using pink Himalayan sea salt.
  • 2 ½ tbsp fresh parsley, minced
  • 1 tbsp fresh thyme, minced
  • ½ tsp fresh oregano, minced
  • ¼ tsp fresh rosemary, minced
  • ½ tbsp. fresh sage, minced

Directions

Place walnuts in food processor and pulse until finely chopped. –>  I followed these directions exactly, but next time, I would process the nuts until they are paste-like.

DSC_1839

Combine all other ingredients together in a mixing bowl. –>  Use a mortar and pestle to grind down your seeds before adding to the other ingredients.

DSC_1846 DSC_1848

Slowly fold in chopped walnuts until fully incorporated.

For a raw vegan dish, serve this blend fresh.

It can also be heated to serve as crumbles, or formed into “meatballs.” –>  SK served it sliced in discs atop pizza when I tried it.  Look for my pizza formula using this sausage next week.  🙂

Store in refrigerator for up to seven days or freeze for up to six months.

New Formula: Pesto

DSC_1811

Pesto is easy to make and super flavorful. While it is quite commonly a sauce for pasta dishes, it can also be used as a spread for sandwiches and wraps or a dip or marinade for vegetables. Depending on the application, pesto may be best used immediately as it will change in consistency once it goes into the fridge. This is a result of the oil within solidifying. If you’re looking for the pesto to be “pourable,” use it right away. Otherwise, it can easily keep in the fridge for up to a week.

There are endless combinations that make pesto delicious and versatile. The flavor depends largely on the herbs selected. Thus, I believe that pesto follows a basic formula and although often made with cheese, I’ve found a way to make it “cheesy” and vegan at the same time.

DSC_1806 The “cheesiness” comes from a couple of places. First of all, some nuts have flavors that mimic the nutty quality of cheeses like parmesan. My favorite parm substitute is cashews, which I grind finely and sprinkle on top of pasta often. The other cheesy element to this pesto is nutritional yeast, also known as “nooch.”

DSC_1808 Ummm…what is nooch (pictured above)?! Originally named “nutritional yeast,” it is a member of the fungi family and not the same as say, brewer’s yeast or baking yeast. This strain of yeast has a cheesy, nutty taste and adds a lot of flavor to dishes in small amounts. Most importantly, it is called nutritional yeast for a reason. Nooch is loaded with B-vitamins, protein, zinc, folic acid, and selenium. To sweeten the deal, some brands specifically contain the highly sought out vitamin B12.

Be creative in experimenting with my pesto formula. You could make a cilantro version to spread inside burritos or tacos, a basil version for Italian cooking, or even a mint version to use with falafel. The possibilities are endless. Enjoy!

FORMULA BASE: PESTO

Makes about 1 ¾ cups 

  • 1 ½ cups fresh herbs –> I’m using 1 cup parsley and ½ cup basil.
  • 1 cup raw nuts –> I’m using cashews
  • 1/3 cup nutritional yeast
  • 5 cloves raw garlic
  • ½ cup citrus juice –> I’m using the juice of two lemons.
  • Additional spices (optional) –> I’m using 1 tsp onion powder.
  • Water/oil as needed for smoothness –> I’m going for a thicker dip/spread, so I won’t need any extra liquid today.

Combine all ingredients in a food processor and blend until smooth, adding water and/or oil as needed. The less oil used, the lower in fat the end product will be. 🙂 So flavorful, this pesto doesn’t even need salt!

DSC_1810

What’s in YOUR Kitchen?

DSC_1420

Welcome back! As plant-based living may be new for you – or perhaps you just need new ideas – I thought it would be helpful to give you a tour of my kitchen so that you can see the types of produce I buy and some of the nonperishables that I regularly keep on hand.

The photo that you see at the top of this post is a shot of my countertop, which is often overflowing with produce that does not require refrigeration. I maintain a plentiful stock of bananas, as I use them in many of my recipes and they are among my son, Nolan’s, favorite fruits for snacking. This time of year, I also have an array of citrus, much of which I obtain from neighbors for free. Citrus fruits are ripe for the picking during Arizona’s winter.

You’ll also see in this photo that I have fresh vanilla beans on hand to use in various recipes and to make homemade extract. The basic formula for an extract is the flavor agent plus vodka and involves a long soaking period (another post, another day). Moral of the story? If you have the opportunity to make your own extracts, you’ll find that they are purer and higher in quality than many of the store-bought, imitation varieties. I digress…

Next, we move into my fridge, where you can spy everything from a batch of homemade veggie stock (located under Basic Formulas), to black-eyed peas that have been soaked and are ready for further cooking, a bowl of triple berry togurt (located under Breakfast Formulas), and of course, more produce. We always have a ton of it and get the biggest bang for our buck with a local food co-op called Bountiful Baskets. Through this organization, weekly, we have the opportunity to pay a flat rate of $25 to obtain approximately $50 worth of organic produce. The offerings are seasonal and often local and the contents of the basket are always a surprise. Check out the bountifulbaskets.org or conduct a web search to see if your state offers a similar program.

DSC_1421

On to my spice cabinet, which is my husband, Travis’s, pride and joy in our kitchen! Although the spices and herbs sometimes get misplaced during quick cooking, my hubby generally has them organized by ethnic application (e.g. Italian, Mexican, etc.) or other similarities. For example, mace is located on the exterior of the nutmeg shell; although different spices, they are part of the same fruit and often used together in cooking/baking, so they are grouped together. Yea, I know – our cabinet organization is a bit over-the-top, but with over 60 spices and herbs to choose from, it does well to have them arranged in a way that allows for easy selection.

DSC_1422

When we travel we stock up on herbs and spices that are native to the area and end up saving a ton, as those in jars in the supermarket can be pricey. We are still using, for instance, cinnamon sticks that we purchased during our honeymoon on the British Virgin Island, Tortola, in July of 2011, and turmeric that we bought the following summer when touring a spice farm in Zanzibar, an island off of the coast of Tanzania in East Africa.

Finally, here’s a look into my pantry. First, you can see a variety of oils, vinegars, and sweeteners. It is amazing what these products can do in the way of flavor, even in very small amounts. On the two shelves below those you’ll find staples like beans (dried and canned, no sodium added), seeds, and grains. While I always have quinoa and oats, for example, regardless of price, more expensive items like nuts, dried fruits, and dark chocolate I purchase and stock up on when they are on sale. The flexibility of my formulas and my willingness to experiment with new combinations allow me to create a delicious bite out of whatever I obtain. The very top shelf (not pictured) includes standard baking supplies like cornstarch and baking powder.

DSC_1424

If your kitchen needs a plant-based makeover, consider starting with one or two target areas and make changes slowly, especially if you’re trying to get a meat-and-potatoes spouse or some picky little ones on board. When Travis and I decided to start eating more healthily, the first item we did away with was cow’s milk, which we replaced with almond. Travis, who was a diehard whole milk drinker for years, now swears by almond and I, being lactose intolerant, couldn’t have found a better milk match. Nolan is even more adventurous, drinking coconut and oat milks on a regular basis. If those do not appeal to you, you could try soy, flax, rice, grain, cashew, sunflower, etc. There are lots of options that don’t include added sugar, hormones, or cholesterol and are often higher in calcium than the dairy variety. Plus, you can easily make your own plant milk (we’ll cover that another day, too)!

I hope that a private tour of my humble cooking headquarters has given you some ideas and inspiration so that you are prepared to tackle my formulas (and plant-based living in general) head on. Happy shopping and stocking!