15-Minute Waffles

Breakfast for dinner, anyone?  Or, breakfast for breakfast, lunch, or snack?  Any time of day, you can make these waffles in fifteen minutes…or less!  You can also use this formula for pancakes, but those will take a little longer.  🙂

My first pregnancy, I wanted all things savory; this pregnancy, it’s all about the sweet.  Logically, I know that I can’t have dessert for dinner (at least not all the time…), so I’ve had to get my sweet fix in ways that are healthier and still, unfortunately, limited.  High blood sugar = problematic pregnancy.

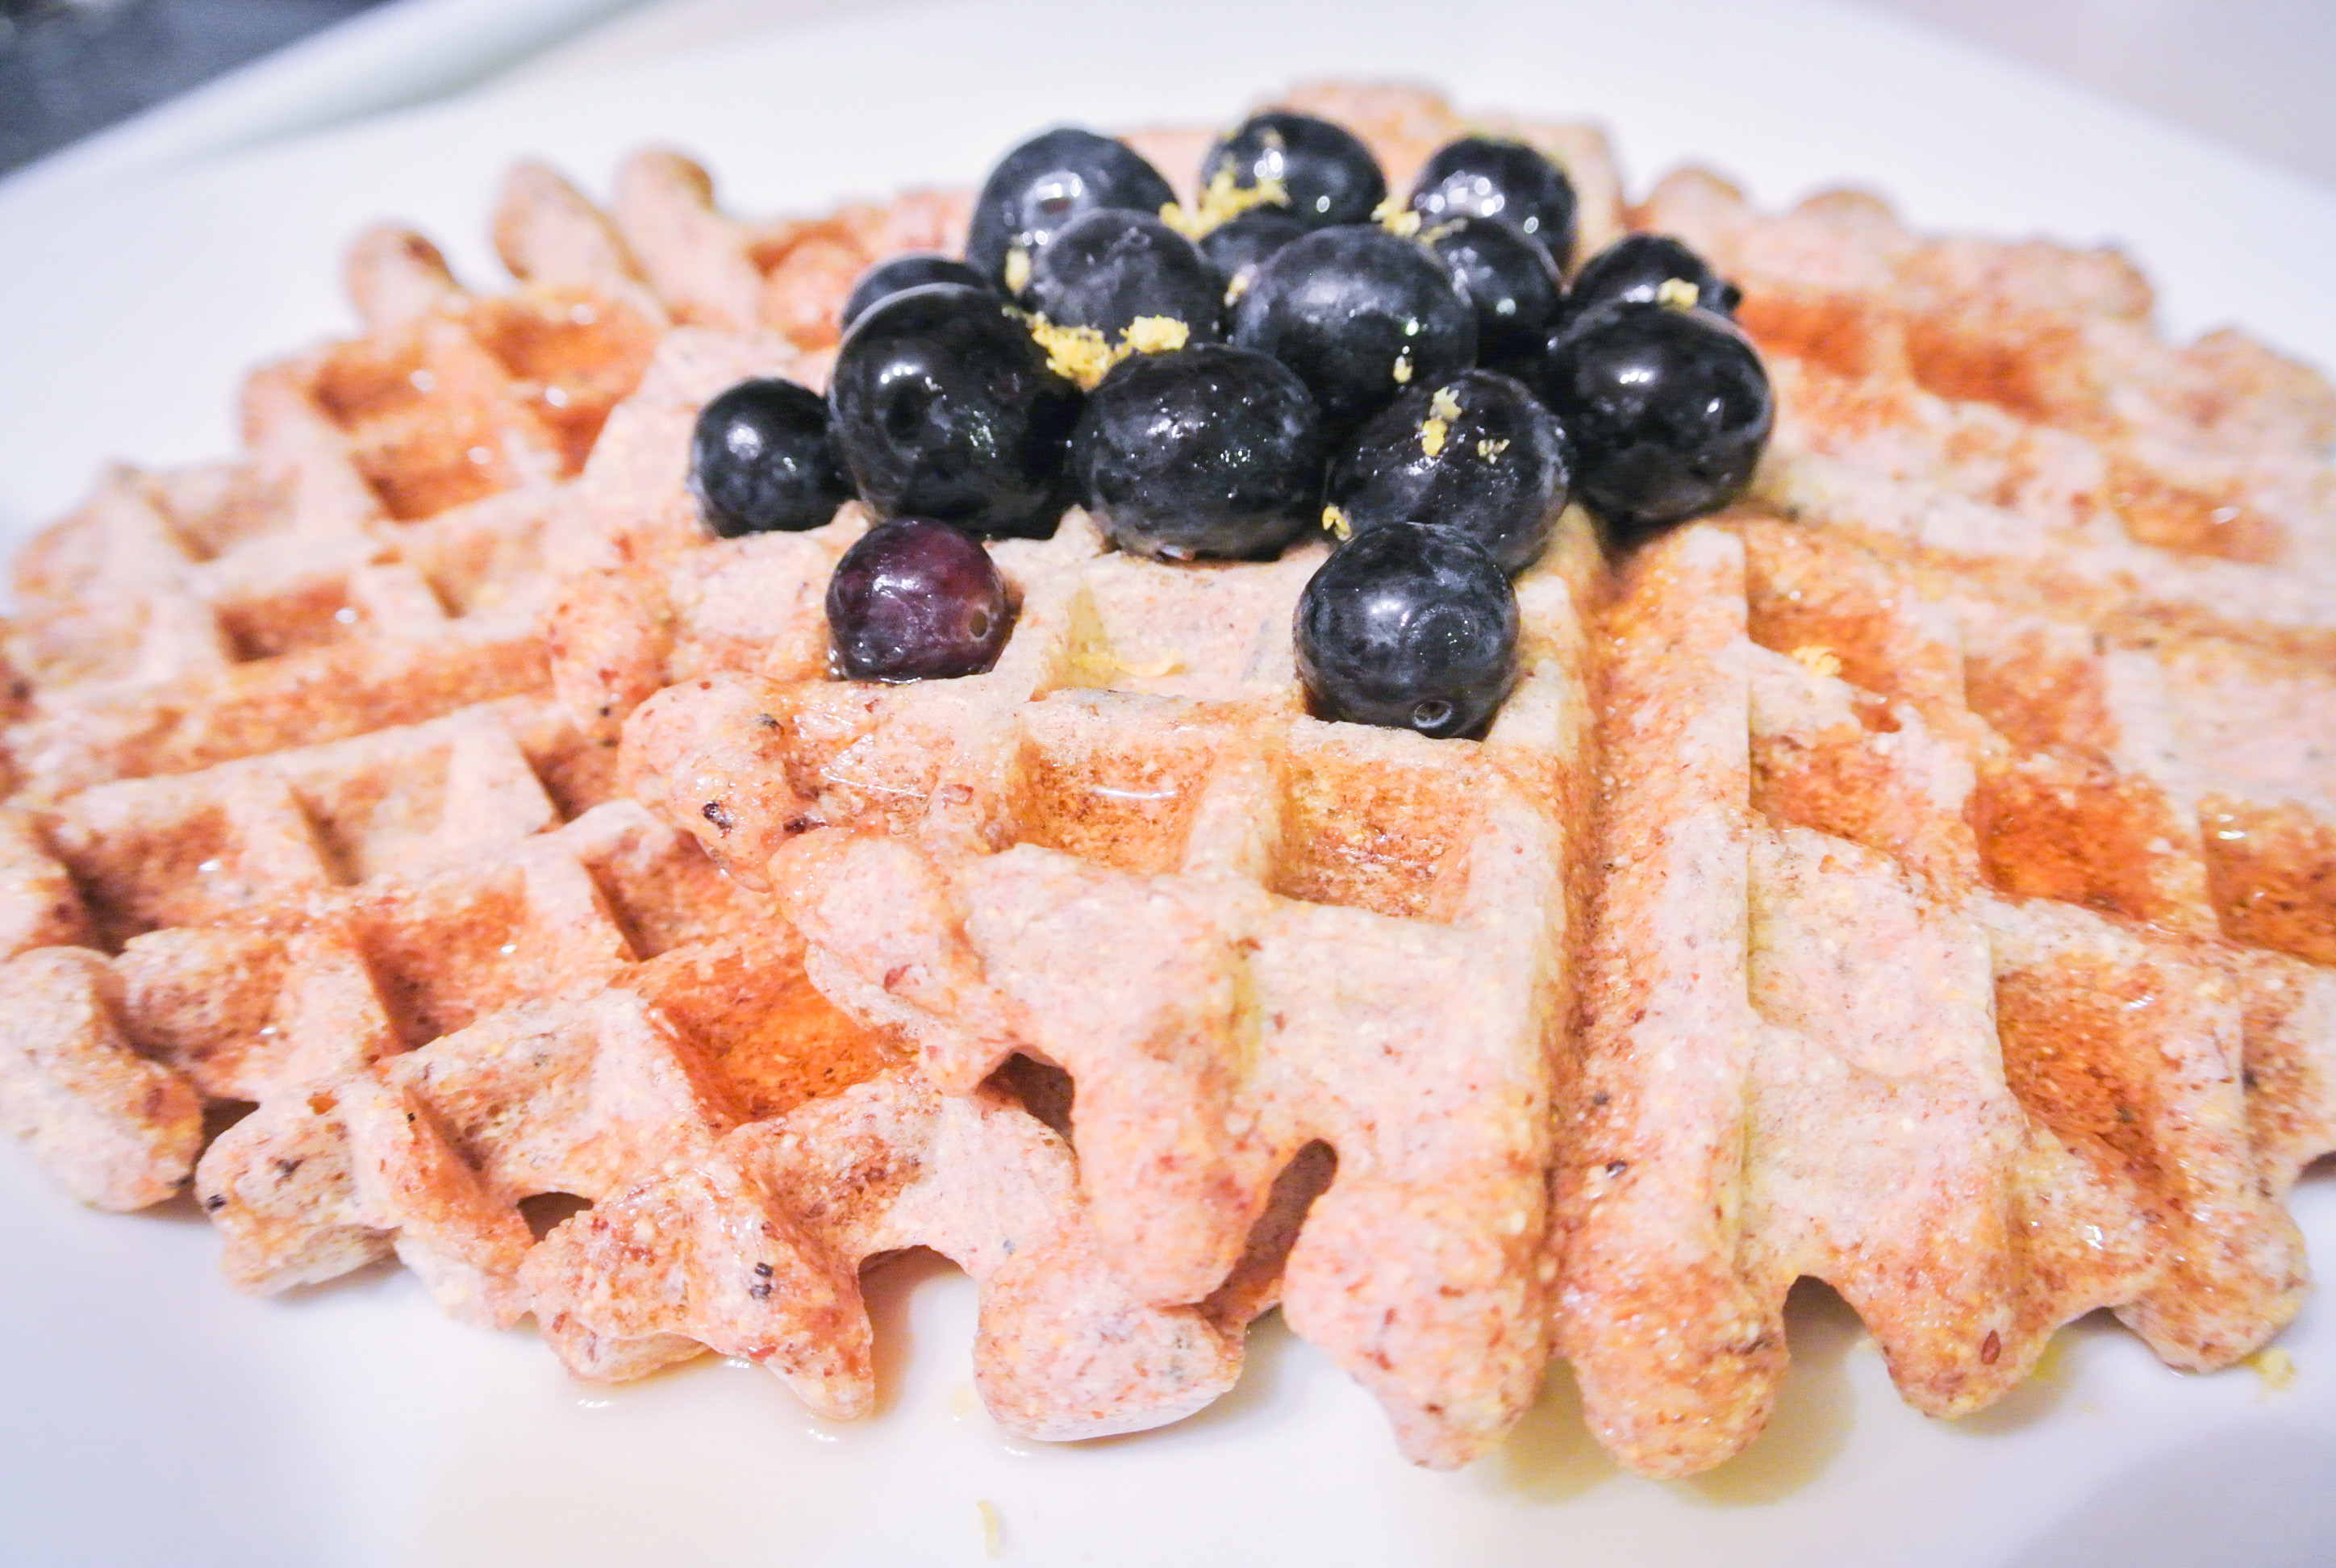
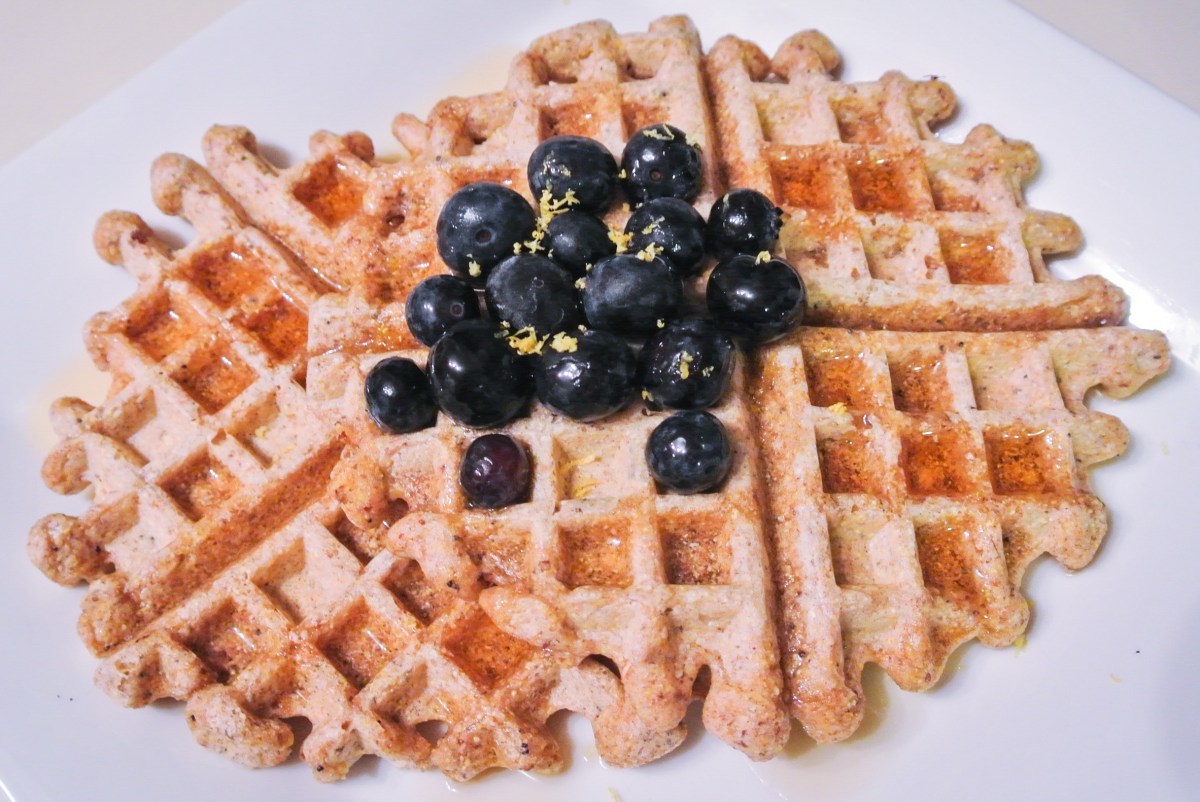
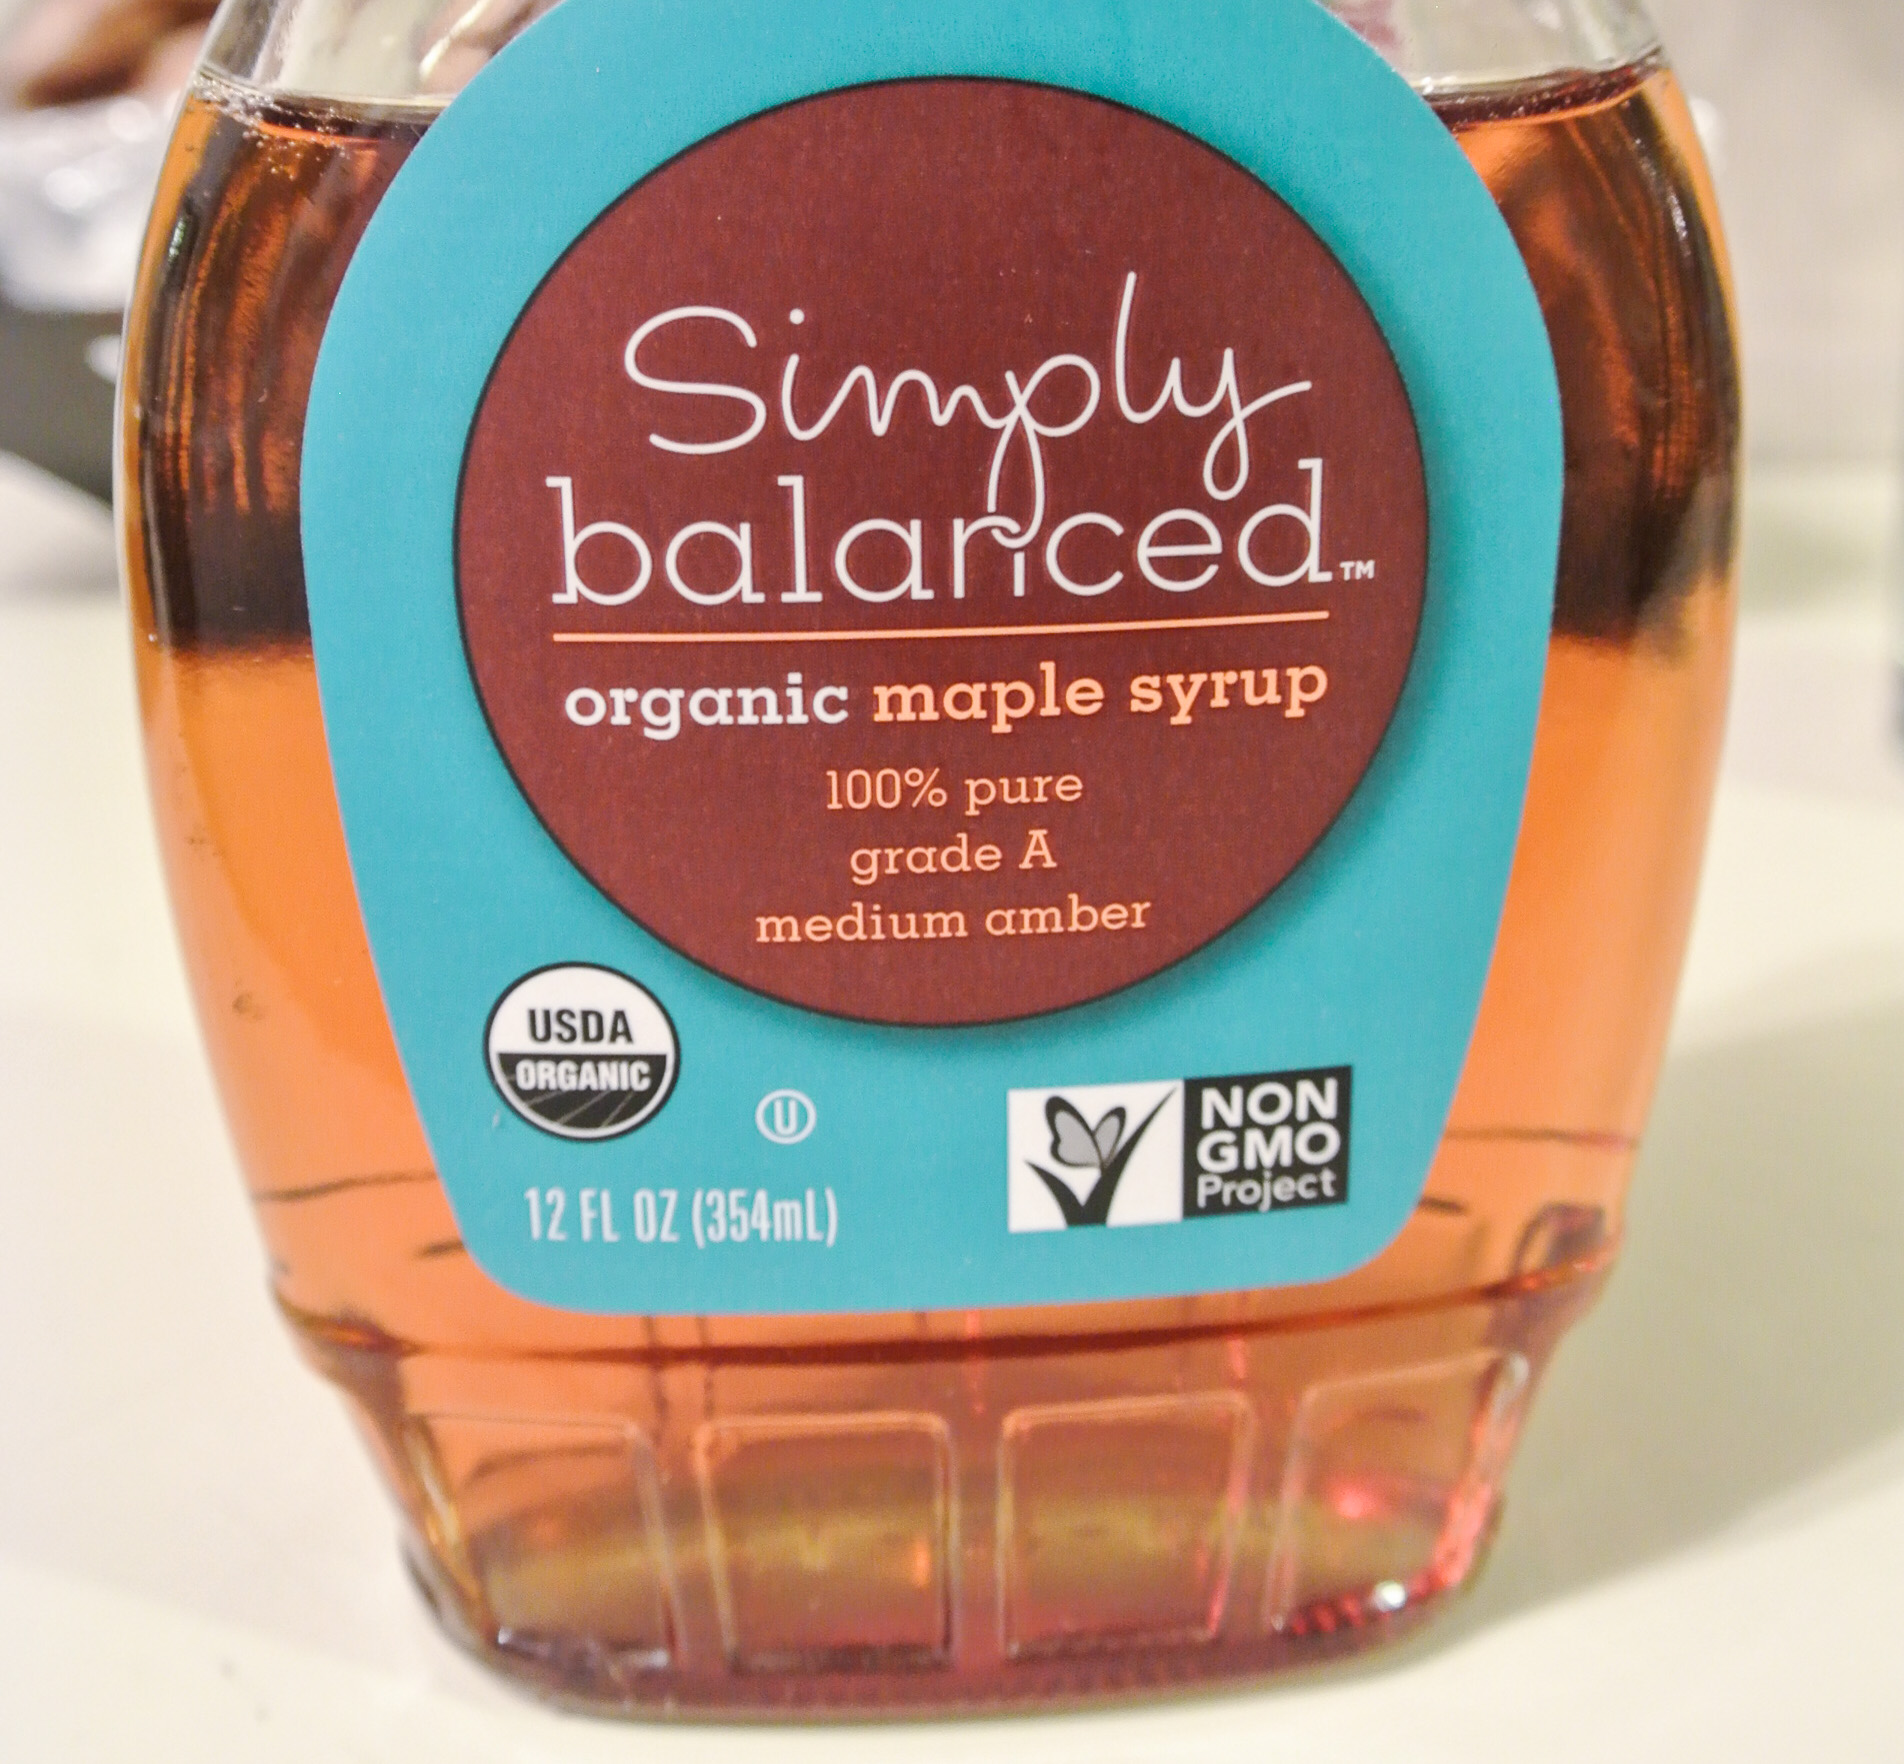
Last night, I decided on waffles.  My formula includes no sweetener added to the batter itself and I top them with pure maple syrup.  This rich, gooey breakfast essential is packed with antioxidants, manganese, zinc, and calcium.  In addition, for the tree huggers out there (pun intended), harvesting maple syrup does not harm the tree or negatively impact its natural lifespan.  I love this brand of pure maple syrup, which is organic and GMO-free.

DSC_2194

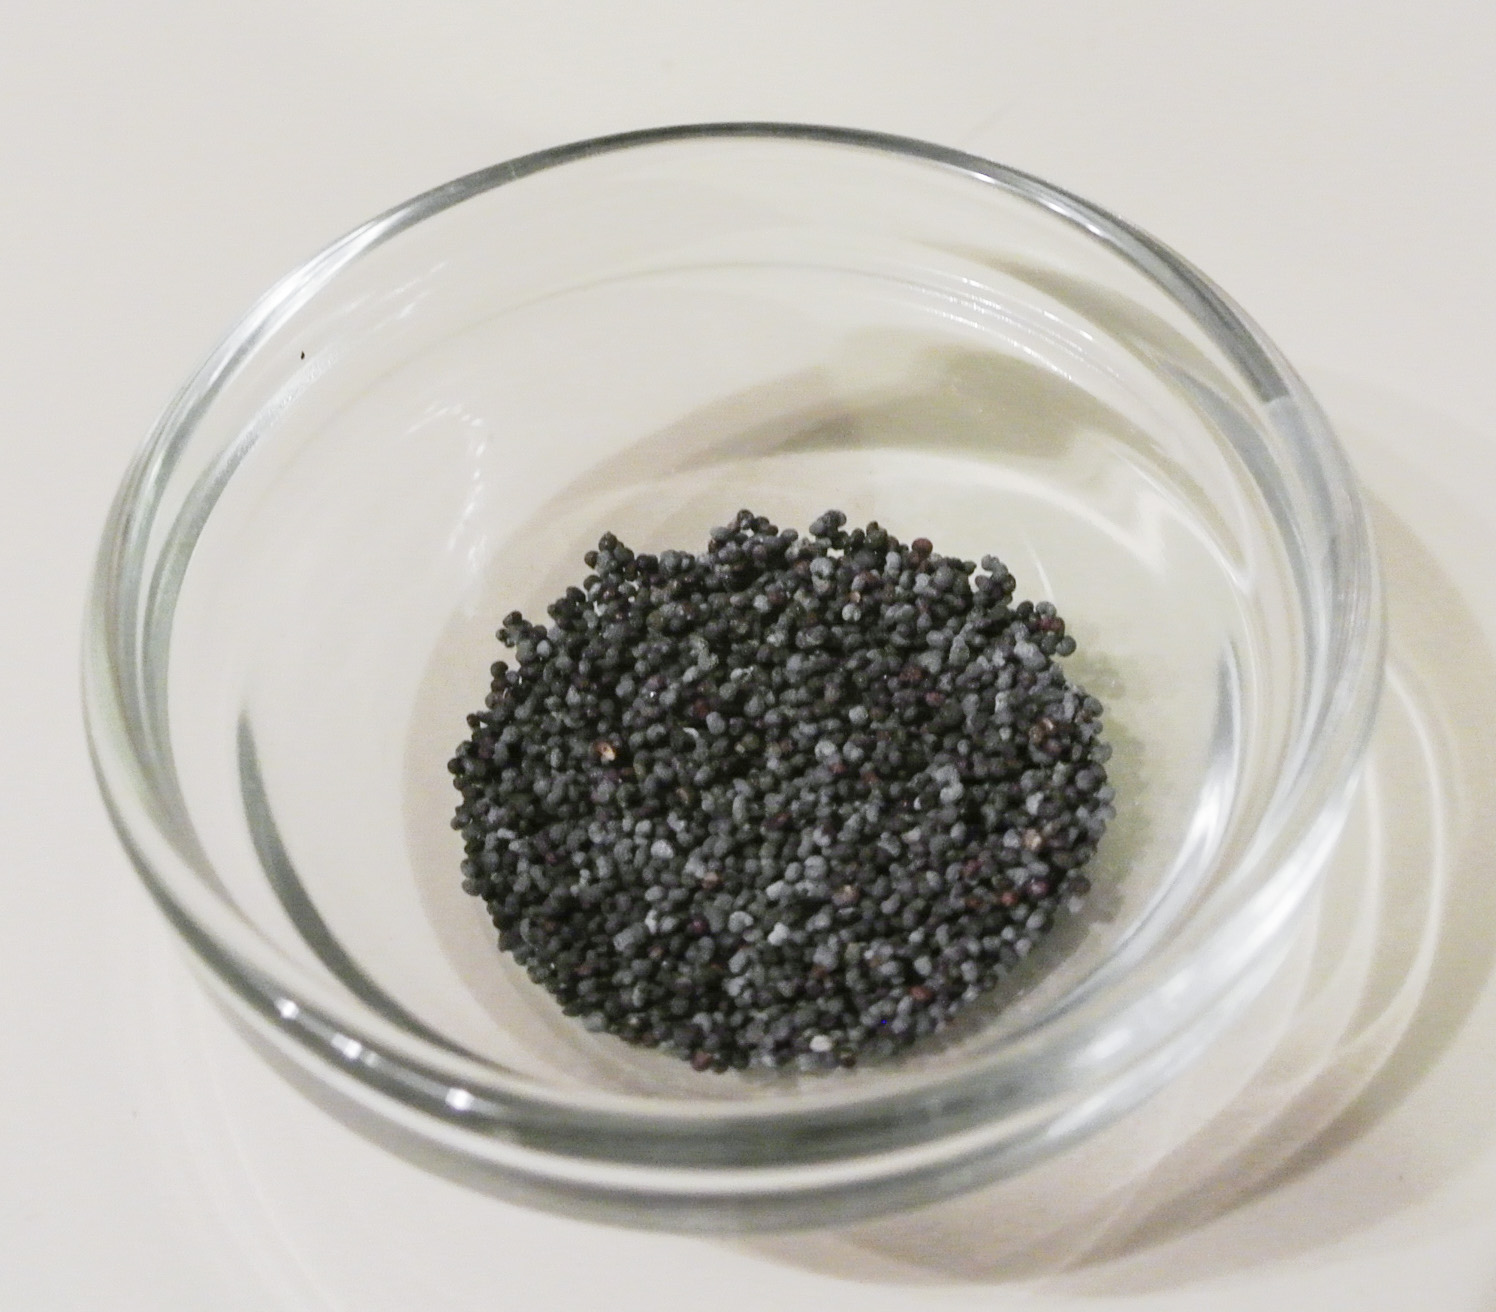
Tonight’s waffles will be of the lemon poppy seed variety.  Poppy seeds are loaded with fiber and are good sources of calcium and copper.  They are easy to add to smoothies, salad dressings, and baked goods.  I often bake bread with poppy seeds and throw them into muffins and other breakfast items, too.

DSC_2179
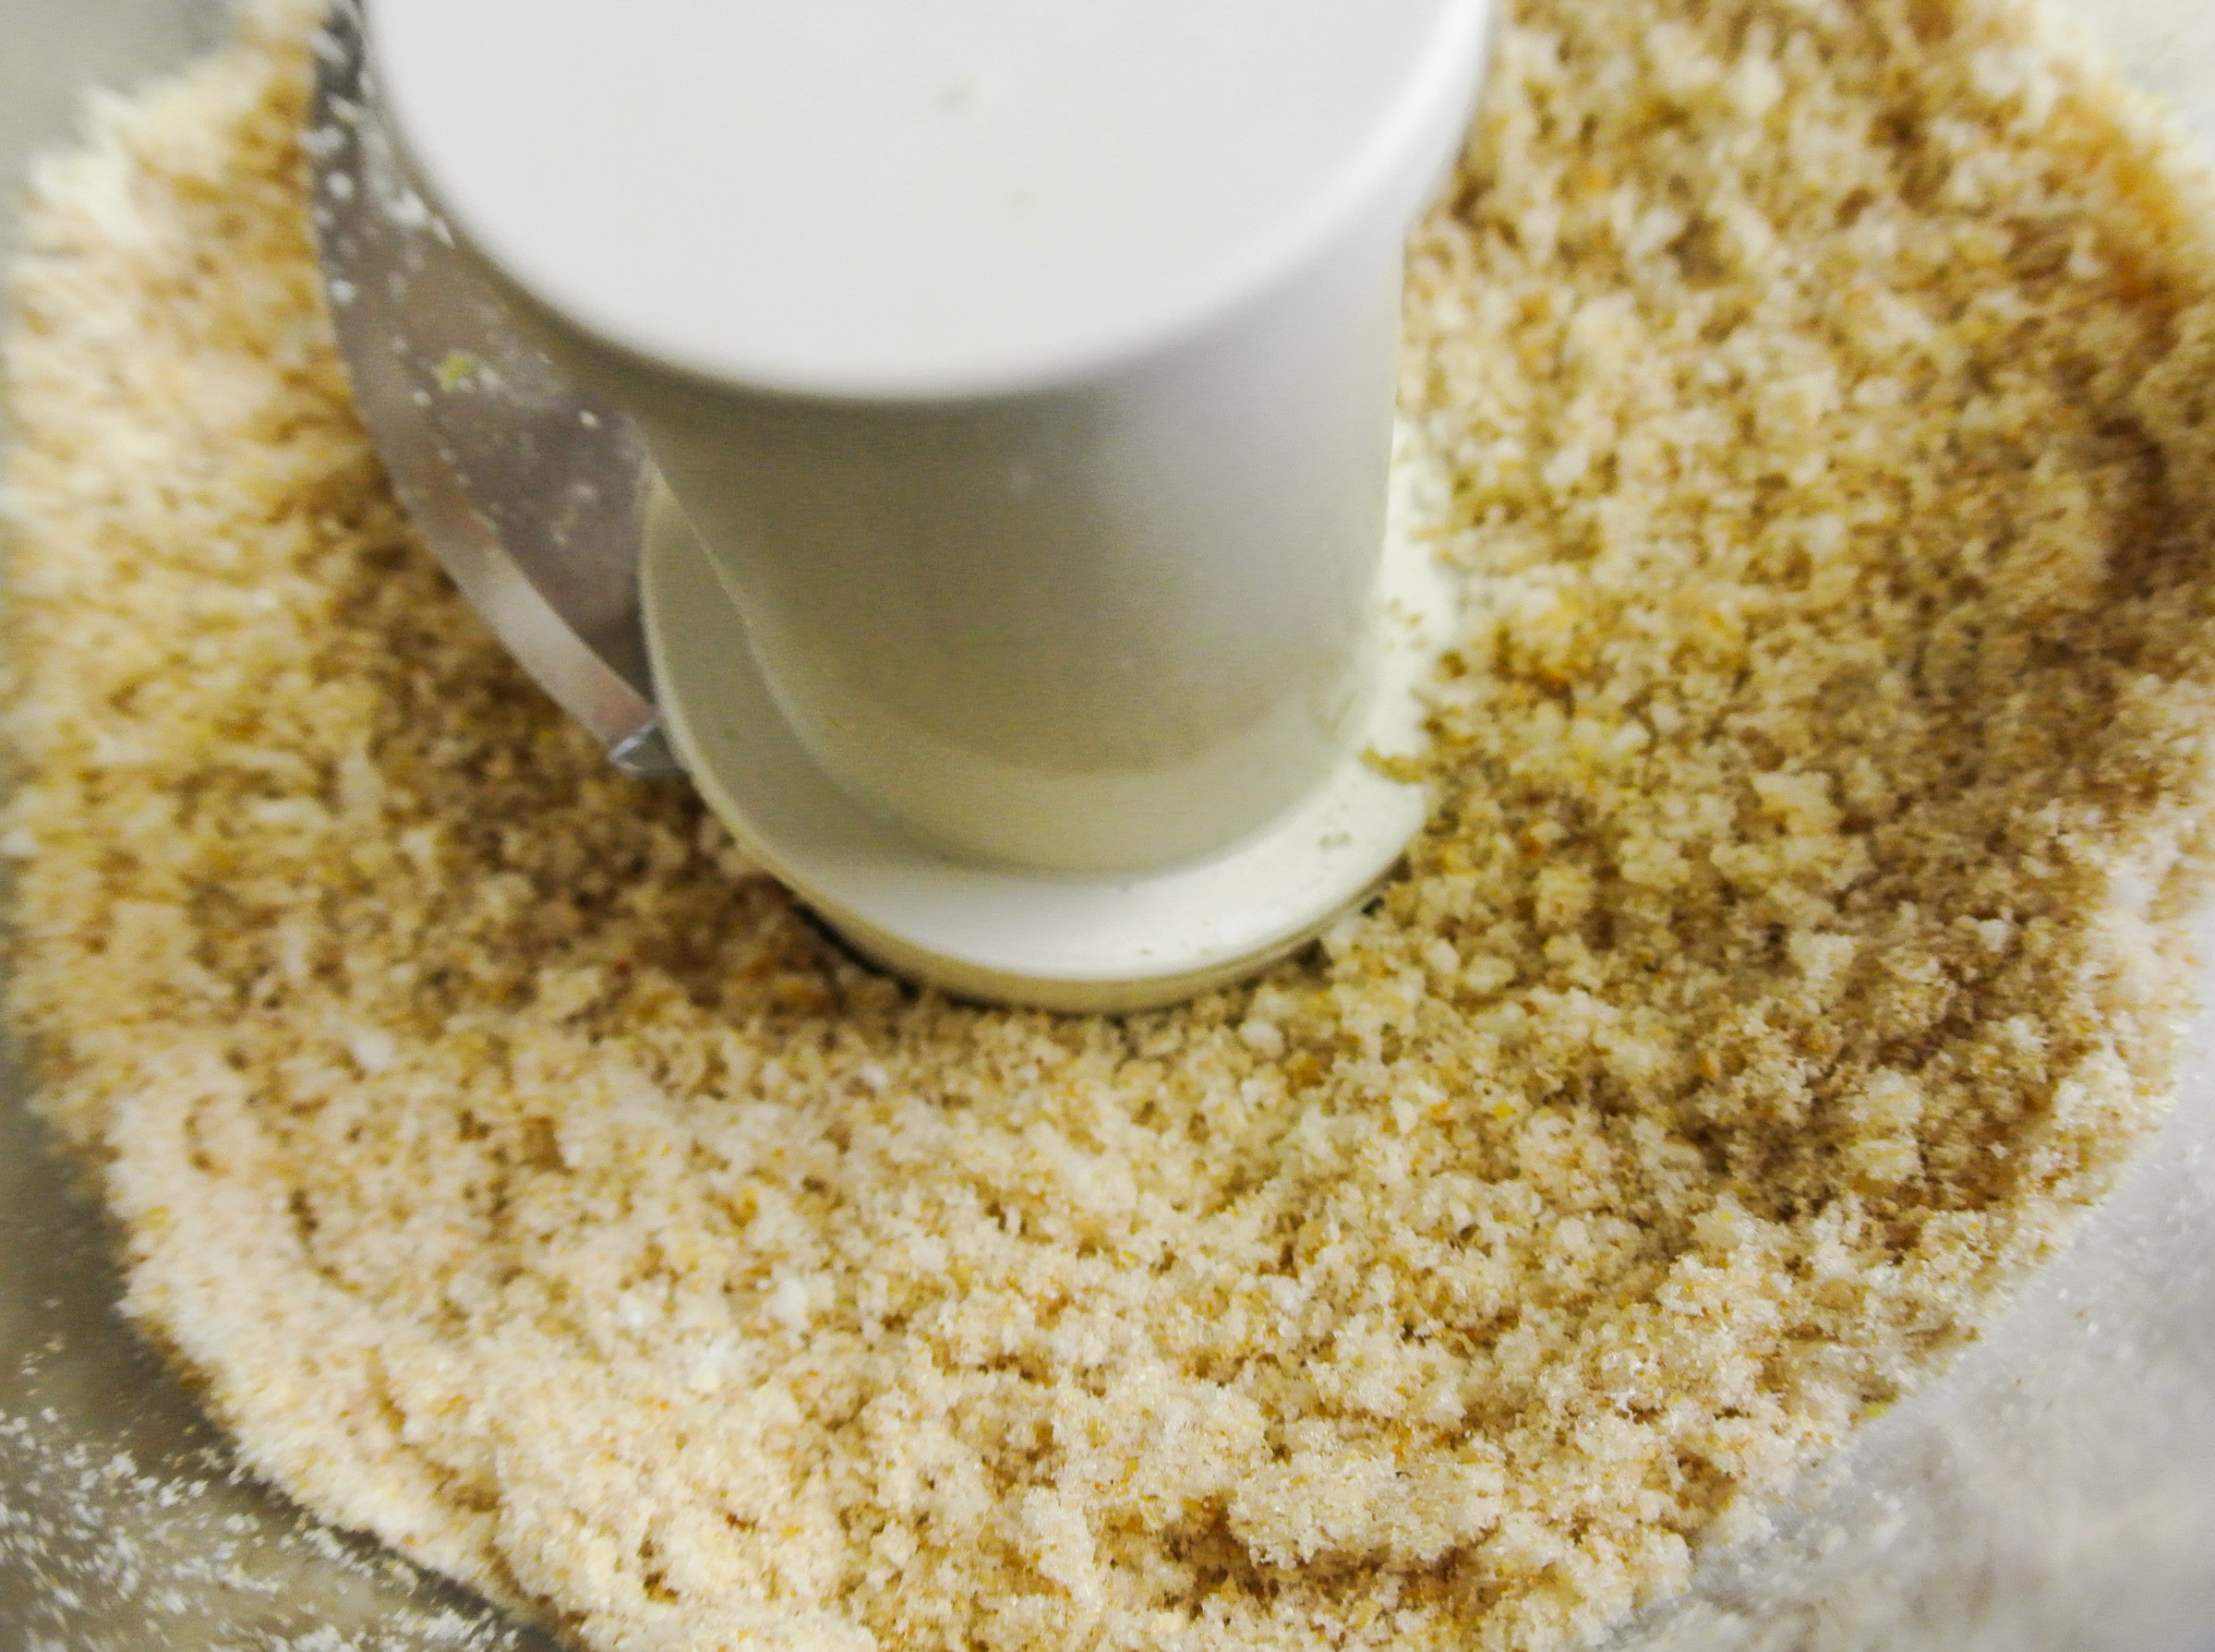
I’m also including rolled oats (see my granola formula) and cornmeal in my batter for a variation in texture.  Cornmeal is an excellent source of protein and fiber and also contains substantial quantities of iron, zinc, and niacin.  Too much cornmeal will leave your waffles/pancakes tasting gritty, but I always add a little to the batter.  I also dust the bottom of my pizza crust to add texture and prevent sticking.  And of course, I use it in making cornbread (another post, another day).

DSC_2178Who said a quick breakfast (or lunch, dinner, or snack!) can’t be delicious, flavorful, and special?  I eat more raw plants than anything else—the ultimate fast food—but like many people, believe that variety is the spice of life!  Believe it or not, I can make these waffles in less time than it takes me to peel and chop my favorite fruits and veggies for a salad.  They are a guilt-free, healthy alternative to my typical diet.

Additionally, this formula would be easy to double, triple, etc. for a big crowd.  If you have some helping hands in the kitchen, you could feed a crowd in no time.  Enjoy!

FORMULA BASE:  WAFFLES (OR PANCAKES)

Makes 5 large waffles

  • 1 cup flour  –>  I’m using whole wheat.
  • ½ cup textured grain (i.e. quinoa, oats, cornmeal, etc.)*  –>  I’m using ¼ cup rolled oats and ¼ cup cornmeal.
  • 1 ¼ cups unsweetened plant milk**  –>  I’m using almond.
  • 2 tbsps flax or chia seeds  –>  I’m using flax.
  • 2 tbsps oil  (just 1 tbsp for pancakes) –>  I’m using coconut.
  • 1 tsp baking powder
  • ½ tsp baking soda
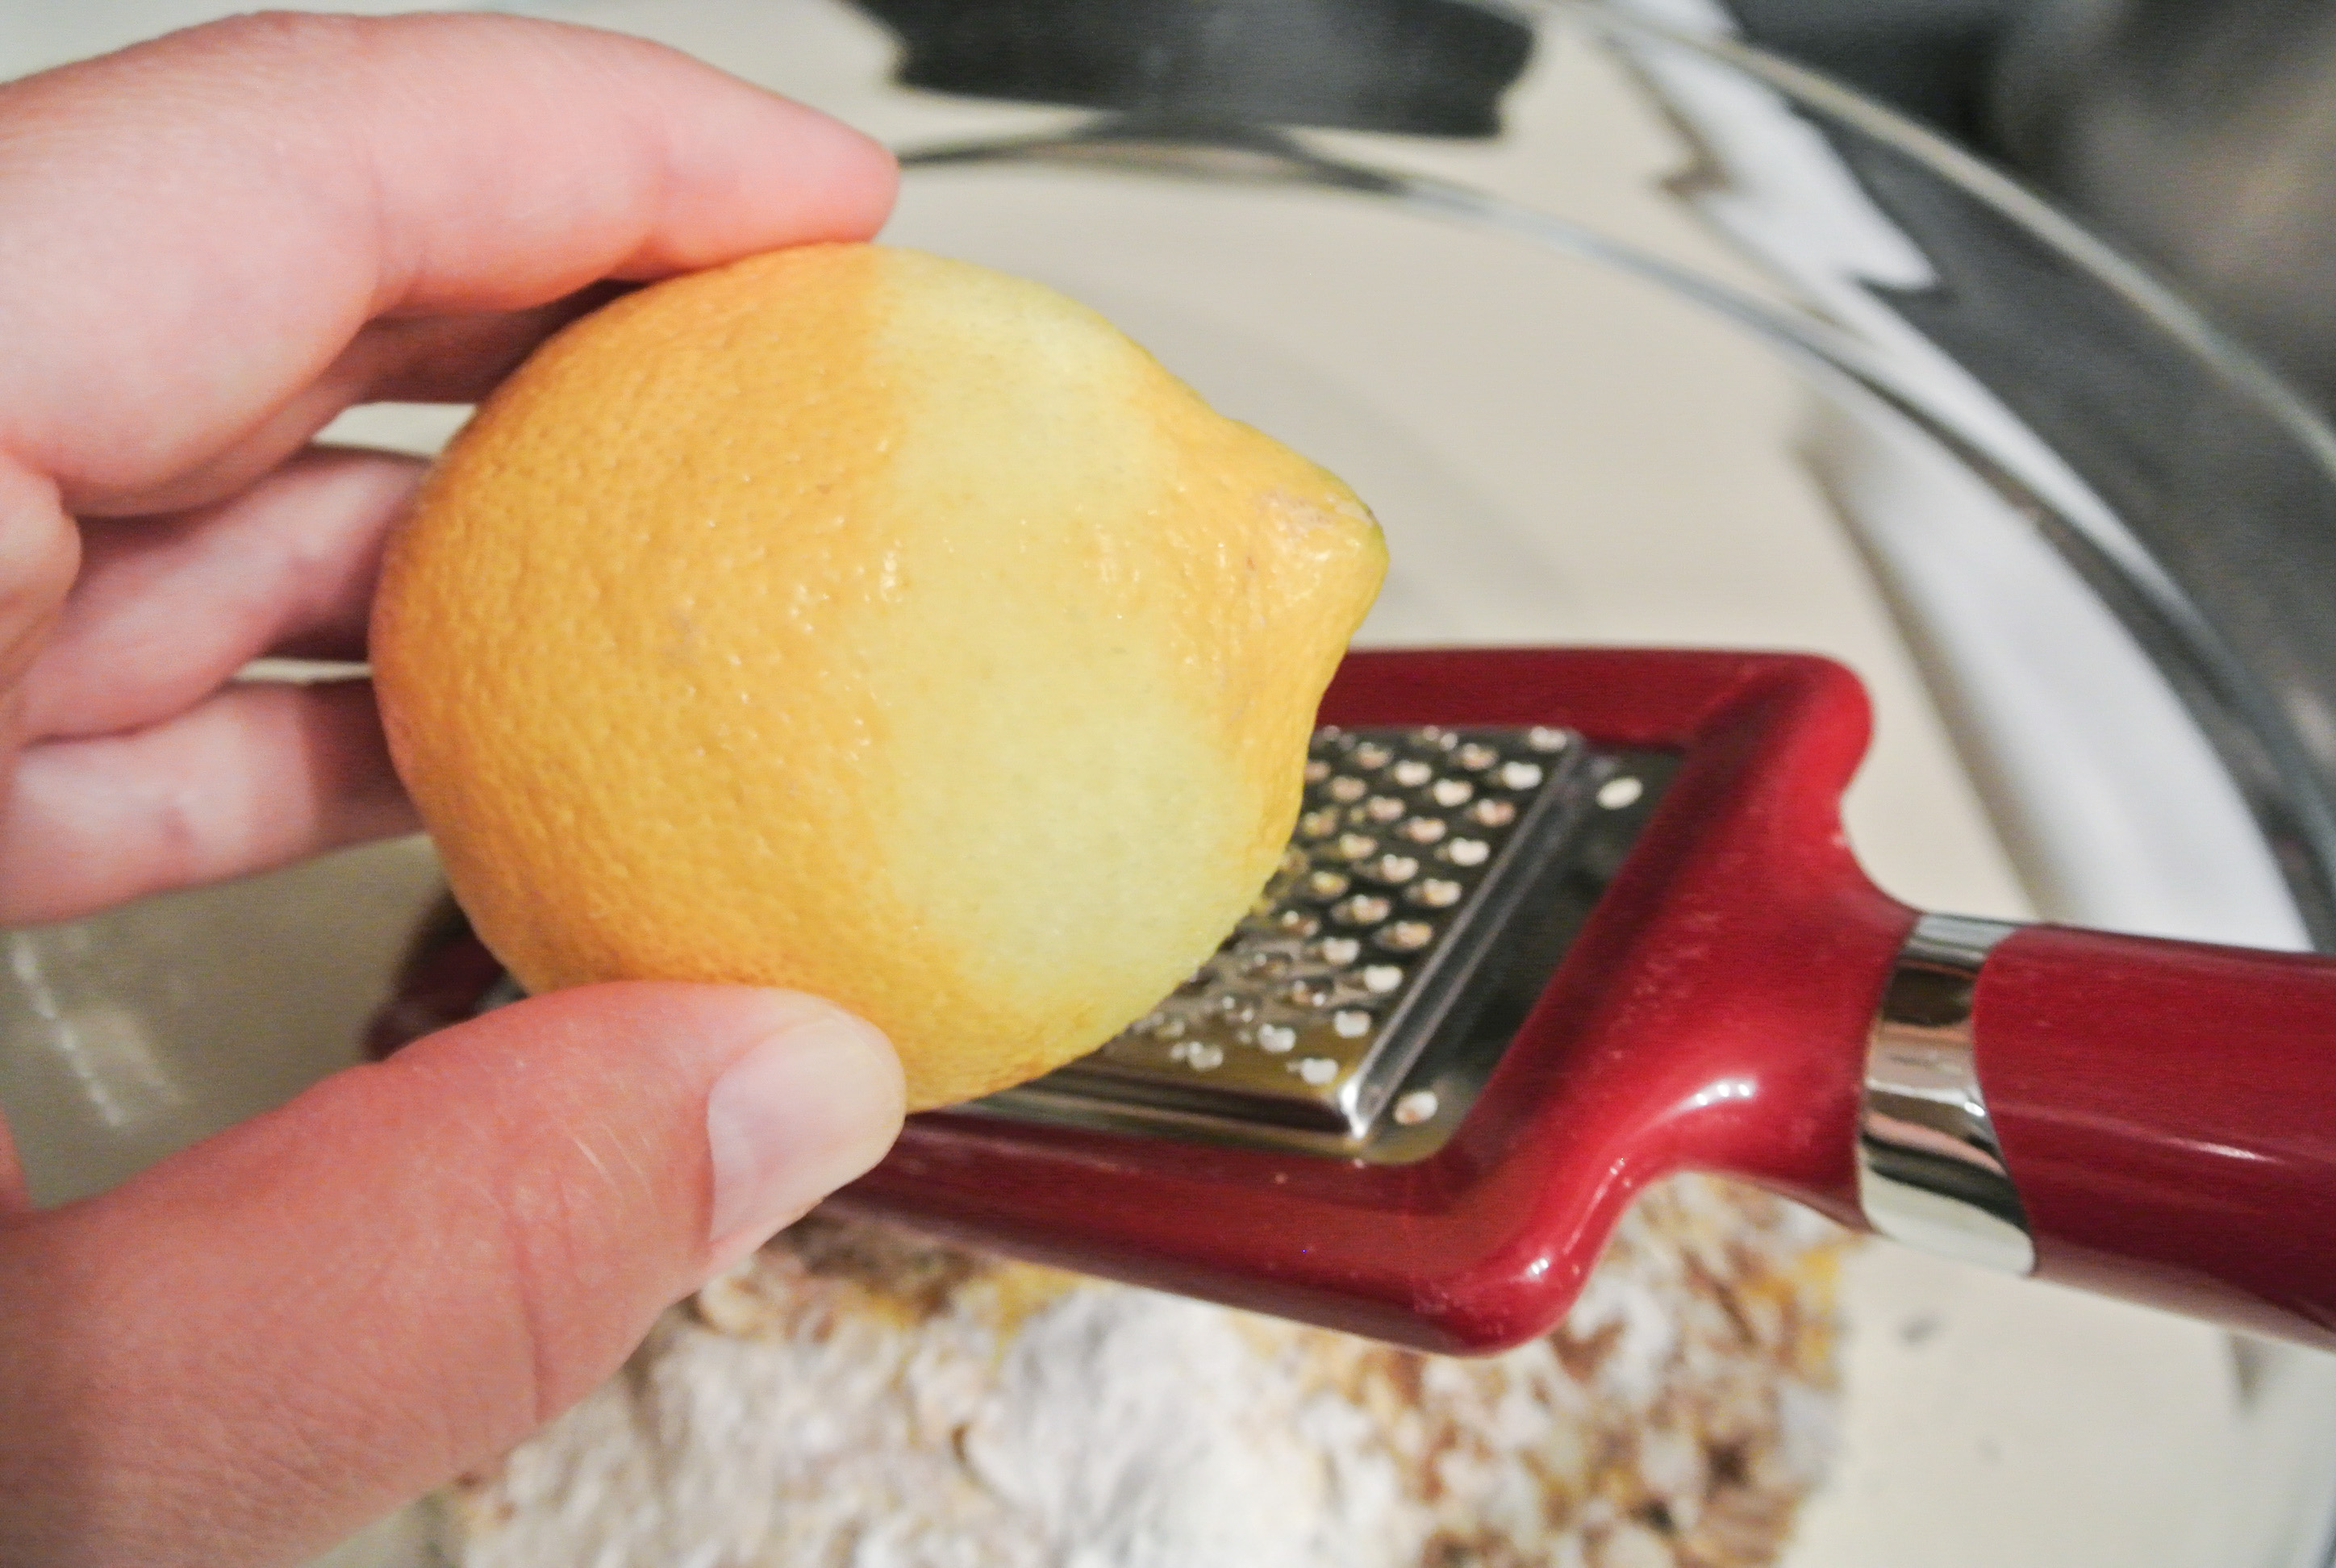
  • 1-2 tbsps citrus juice  –>  I’m using the juice of 1 small lemon (approximately 2 tbsps).  This ingredient adds brightness, but won’t really add flavor unless you use the full amount and the zest.  I want to taste the lemon, so I’m using the juice and zest of the whole fruit.
  • EXTRAS (optional):  raw seeds, nuts, fruit***, etc.  –>  I’m using ½ tsp poppy seeds.

*Don’t want to alter the texture?  Just use extra flour.  🙂

**Since pancakes take longer to make, you will want to keep extra milk nearby to thin the batter as necessary throughout cooking.

***I find that putting fruit into the batter causes a lot of sticking in my waffle maker; I use fruit to top waffles instead, but would put it directly into the batter to make pancakes.

Preheat your waffle iron.  If you are zesting citrus, be sure not to go past the top layer.  The white pith underneath is bitter.

DSC_2186

Combine all ingredients with a whisk.

DSC_2187

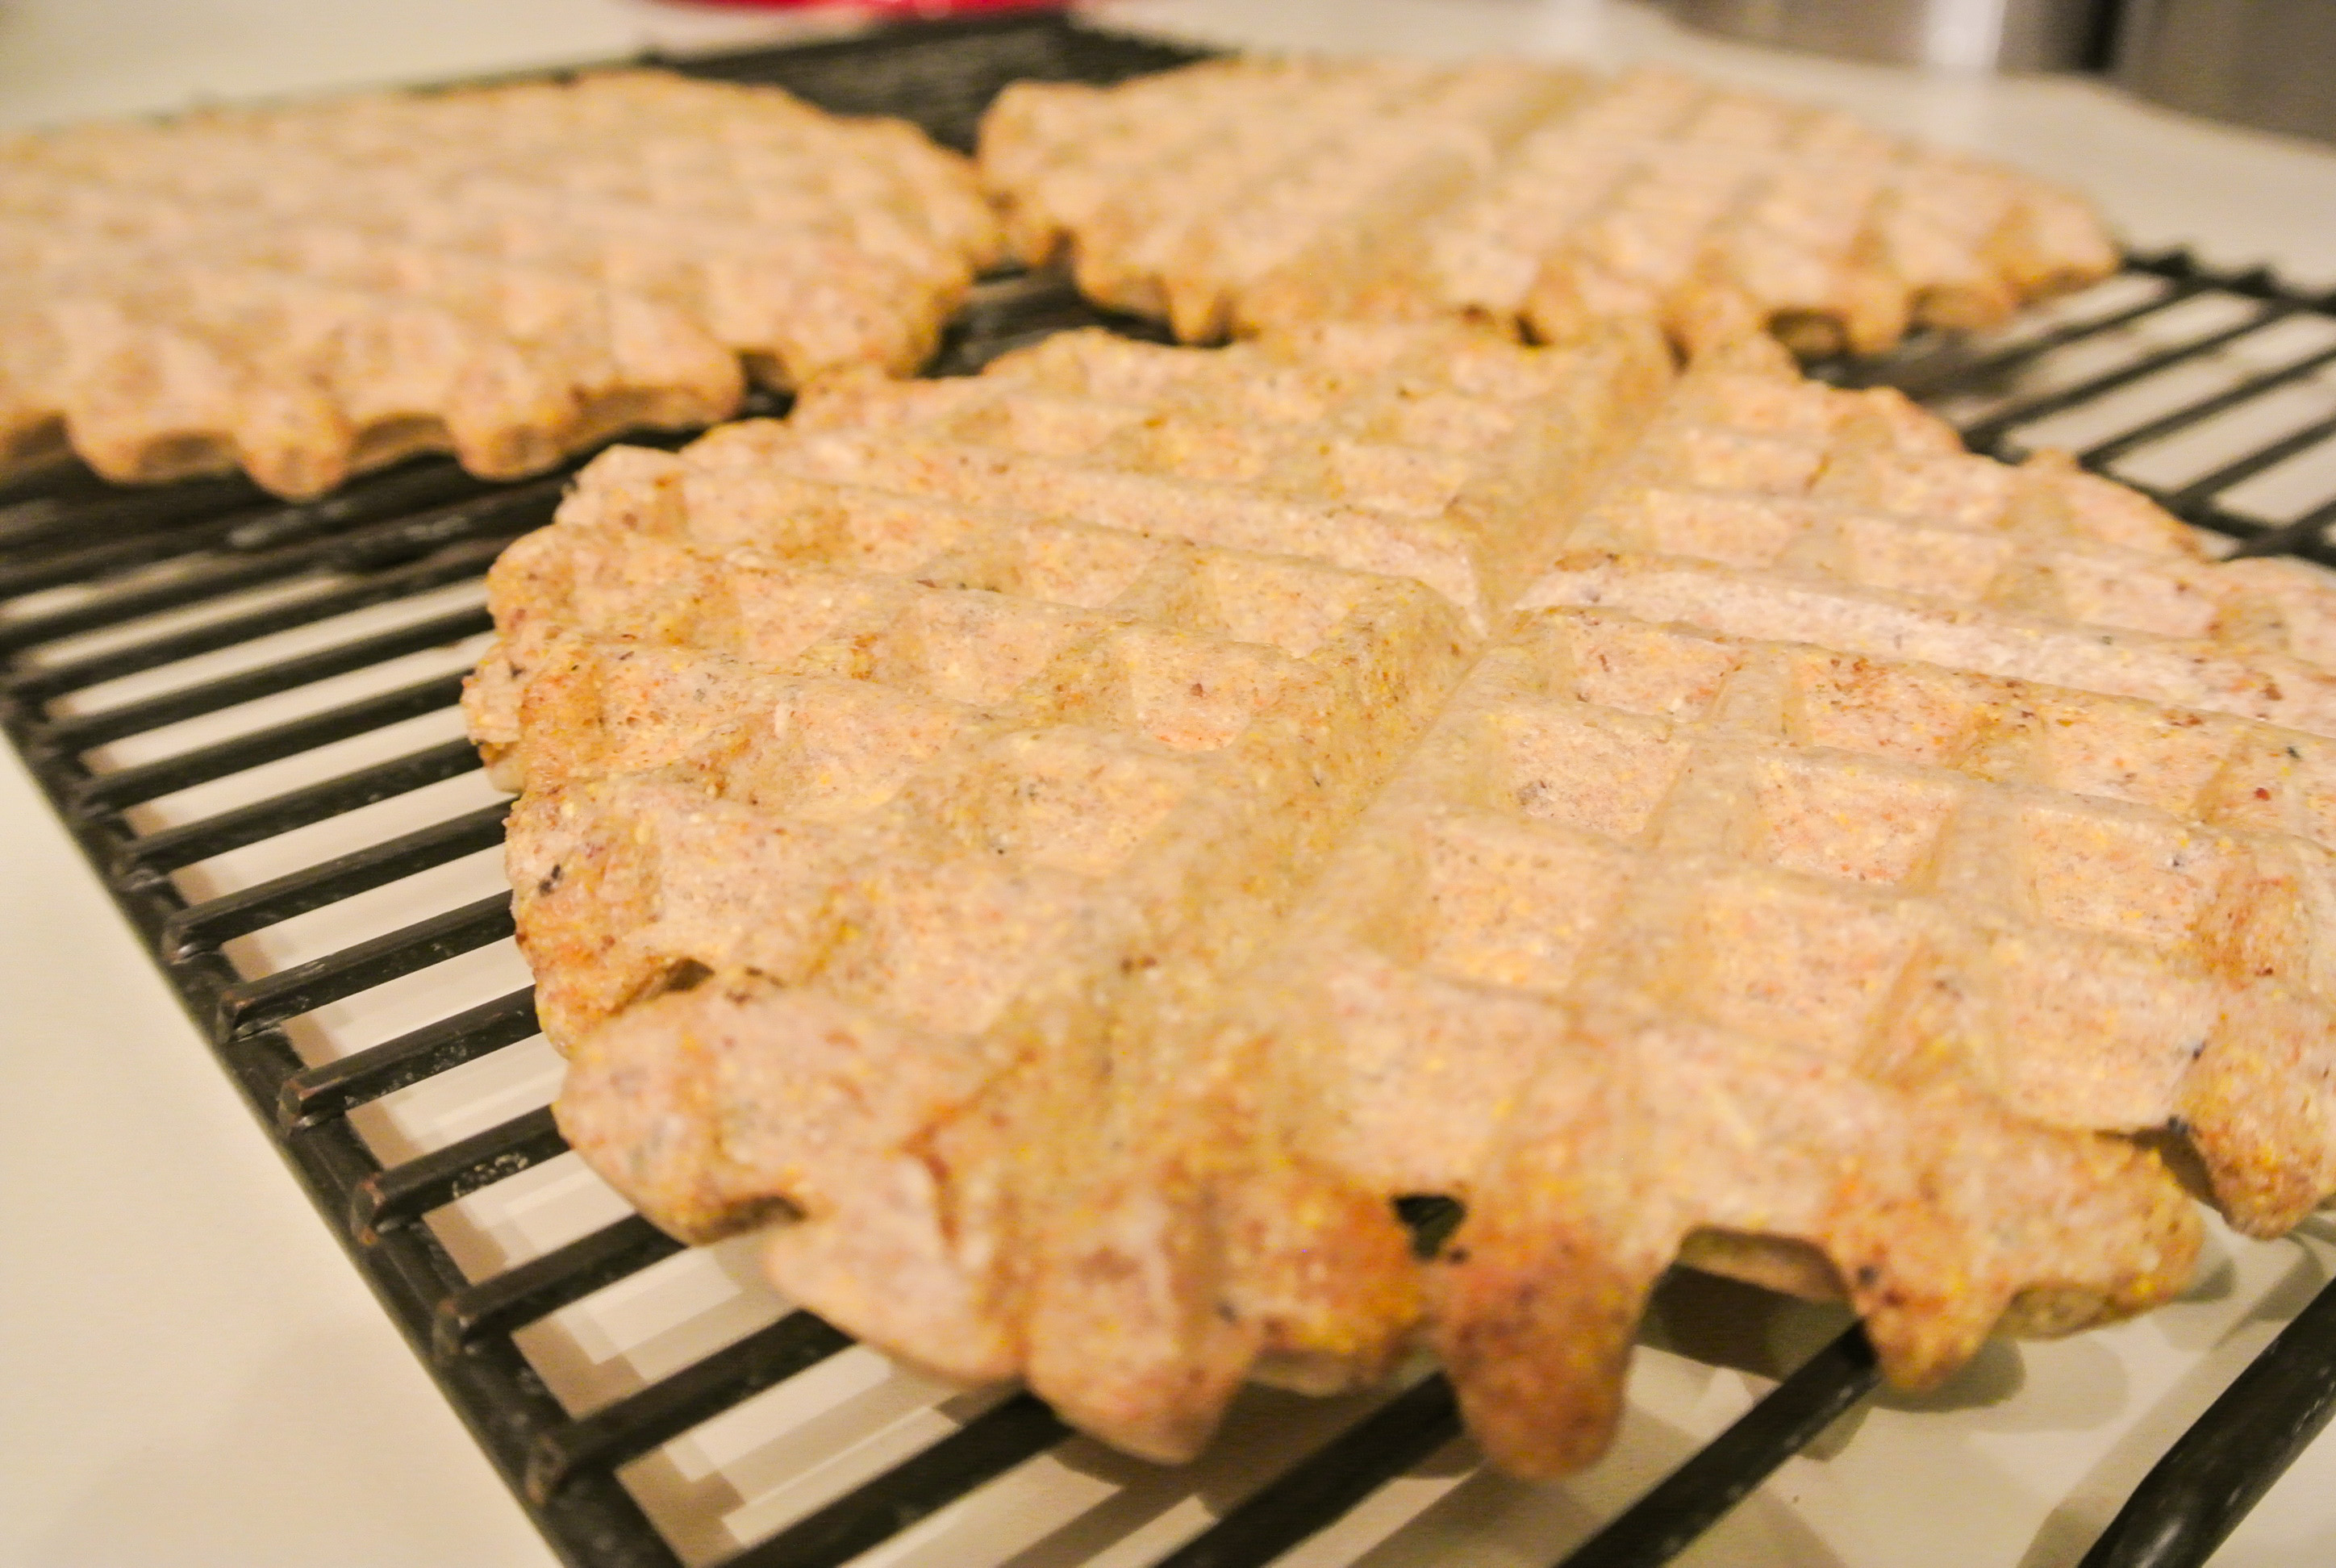
Prepare waffles according to iron directions.  Place on a cooling rack to prevent sogginess on the bottom of the waffles if they won’t all be consumed immediately.

DSC_2195

Top with fresh fruit, raw nuts or seeds, maple syrup, etc.  Leftovers keep well in the fridge, but will likely lose their crispiness.

DSC_2197

My First Fresh Formula Request: Lettuce Wraps

WARNING:  There will not be leftovers.  🙂

These lettuce wraps—really made amazing by the marinade I developed—are hands down, one of the best dishes I’ve ever made, including the animal-based dishes of my past.  Lettuce wraps are easy, nutritious, and great for entertaining or just dinner.

I was so excited to receive my first reader request a couple of weeks ago.  An old friend of mine, who recently started experimenting in the kitchen, contacted me for a recipe for chicken lettuce wraps.  I told her that I would create a formula that allowed her sub in chicken if she wanted, but that my version, of course, would be vegan.

I’d like to start by describing some of the ingredients I’m using in today’s rendition.  For my wraps, I’m using butter lettuce.  The leaves make for perfectly cup-shaped vessels that can easily be folded up.  (An alternative would be using endive to make lettuce “boats.”)  Butter lettuce is low in calories (for those counting) and rich in vitamin A and phosphorous.

DSC_2161

Next up, mini-sweet peppers.  These are fantastic for snacking—you can dip them right into hummus or munch by themselves—and taste just like bell peppers.  They happen to be cheaper than bells at my grocer and I love the color variety for food presentation.  They are loaded with vitamins A, C, and E, as well as beta-carotene.  They are delicious and very palatable raw.

DSC_2162The “meat” of today’s lettuce wraps takes the form of mini-portobello mushrooms.  Like meat, these fungi are a source of protein, as well as an even richer source of copper, selenium, and vitamin B6.  They are also among one of the only natural sources of vitamin D, although in small amounts.  Portobello mushrooms are an ideal meat substitute for those still trying to kick the stuff.  (PS:  The large caps make for excellent burgers!  PPS:  That’s a crockpot of my three-bean chili in the background, which would also be delicious with mushrooms!)  You can certainly eat the stems, but I remove them and save them for homemade veggie stock.

DSC_2153

Finally, a word about green onions.  As I mentioned in my bean salad formula, you want to try and power through with consuming some raw onions in your plant-based diet.  They are great for skin elasticity and pack a lot of flavor.  The green onions you see here were purchased years ago.  I’m sorry…what?  YEARS ago?  That’s right.  We bought a bunch of green onions a couple of years ago and continue to regrow them.  You can place them in a cup like this in your window sill until they become large and then transfer them to a pot of dirt or garden.  Once they are even larger, harvest, consume, and continue the cycle.

DSC_2158

My absolute favorite part about this formula is that my lettuce wraps can be consumed completed raw or mostly raw.  As you know, most fruits and vegetables are at their optimal nutrition level in a raw state, so I try to cook as little as possible.  Mushrooms, in particular, do not need to be cooked, but should you consider another protein sources for these wraps, such as beans, there will be necessary cooking involved.

Today, I will be lightly cooking my portobello mushrooms just to reinforce their meaty texture and reduce the marinade.  Everything else will be raw.

Travis and I polished off the entire batch of these lettuce wraps in one sitting; I imagine you will do the same.  🙂  Enjoy!

FORMULA BASE:  LETTUCE WRAPS

Makes approximately 10 wraps/cups/boats

For the marinade/sauce:

  • ½ cup room temperature seed or nut butter (seeds/nuts only) –> I’m using peanut.
  • ¼ cup soy sauce or liquid amino acids* –> I’m using liquid amino acids.
  • ¼ cup acid (citrus juice, vinegar, mustard, etc.) –> I’m using ¼ cup rice wine vinegar + an additional tbsp of whole grain mustard.
  • ¼ cup liquid sweetener (agave syrup, maple syrup, etc.) –> I’m using light agave.
  • 1 clove minced raw garlic
  • 1 tbsp herbs and/or spices (optional) –> I’m using freshly grated ginger.
  • 2+ dashes of hot sauce (optional) –> I’m using the minimum. 🙂

*See my profile of Sage Kitchen’s walnut sausage recipe for an explanation.

For the filling:

  • 4-5 cups finely chopped protein (beans, lentils, mushrooms, tofu, tempeh, etc.) –> I’m using mini-portobello mushrooms.
  • 2 cups finely chopped raw vegetables –> I’m using about a 1/3 cup thinly sliced green onions and 1 ½ cups tri-color mini-sweet peppers.
  • ½ cup finely chopped “crunch” (raw seeds, nuts, etc.) –> I’m using unsalted blanched peanuts.

Make your marinade by mixing all ingredients with a small whisk.  Set aside.

DSC_2150

Precook your protein if necessary (beans/lentils).  Finely chop your protein and mix with approximately ½ of your marinade.  Cover and place in the fridge for an hour.

DSC_2155During the hour that your protein is marinating, prepare your wraps/cups/boats, vegetables, and crunch element.  When the hour is nearly up, heat a sauté pan over medium high heat, if you are planning to cook or heat your protein source.

DSC_2165If you are not cooking your protein, assemble your wraps according to taste preferences and add additional sauce if necessary.  If you are cooking your protein, sauté it over medium high heat just long enough to reduce/thicken the marinade.  Stir often to prevent sticking.

Let your protein cool for a few minutes in order to prevent wilting the lettuce.  Assemble wraps accordingly.  Save any leftover sauce to marinade other vegetables or use as a flavorful salad dressing.

DSC_2169 DSC_2175

Back-to-School Brownies

This summer, I’m teaching a one-month ENG102 course that meets four times a week for two hours a day.  At this point in my pregnancy, I need to eat at some point in the two hours, even if it is just a little nibble.  So, I thought I would start a snack sign-up for the students, bringing a snack for them on the first day so that they knew I meant business.  🙂

Brownies are a decadent, sweet, rich treat that seems to please even the pickiest of eaters.  Because these are Fresh Formula brownies, you can additionally expect my version to be healthier than the boxed variety or even those homemade with animal products.

The health benefits of what makes a brownie a brownie—cocoa powder—are numerous, and detailed in my chocolate peanut butter banana smoothie post.  Before we get to baking, I am going to cover two other featured ingredients:  pecans and coconut oil.

Pecans, besides being easy to chop and chew, are buttery and delicious.  Pecans are notably high in fiber and magnesium, which has anti-inflammatory benefits.  While pecans are high in fat, they boast healthy fatty acids, such as oleic acid (also found in olive oil), and contain no cholesterol.  Nut allergies?  Don’t worry – this formula does not require nuts to work.  I just really enjoy them for their protein content and yummy crunch!

DSC_2139Speaking of fat, coconut oil is loaded with it…but a lot of other amazingness, too.  Brownies rely on some fat to achieve their fudgy texture and glistening appearance, but you can make smart choices about what type of fat and how much you are going to use.  Coconut oil is everywhere in health news of late.  It can be used as sunscreen, hair conditioner and even toothpaste!  When it comes to ingesting it, it doesn’t contain many health benefits, per se, but can withstand a higher cooking temperature than many other oils, lessening your exposure to free radicals or carcinogens.  And of course, it doesn’t contain cholesterol.

DSC_2141

Whichever oil you choose, keep it mind that some will affect the flavor of the brownies; I found that coconut oil did not.

Finally, brownies are an excellent canvas for all kinds of chips.  Like my classic chip cookie formula, “chips” here can be a lot of things:  chocolate, nuts, seeds, dried fruit, etc.  My chips for today’s take on the formula are pecans.

As I’ve mentioned before, dessert is dessert and it won’t be the healthiest item you put into your mouth all day, vegan or not, but we can always strive to do better.  For me, they really are a special treat, popping out of my oven only two or three times a year.  Oh, and in case you were wondering, my students gobbled these up…even after they learned they were vegan.  Plant-based victory!

FORMULA BASE:  BROWNIES

Fills a 9 x 13 pan with approximately ¾-inch thick brownies

  • 2 cups flour –> I’m using all whole wheat except for the last 1/3 cup; I ran out and used brown rice flour to fill in the rest.
  • 1 cup plant milk –> I’m using unsweetened, unflavored almond.
  • 1 cup sweetener –> I’m using turbinado sugar.*
  • ¾ cup unsweetened cocoa powder
  • ½ cup oil –>  I’m using coconut.
  • 1 tbsp ground flax or chia seeds + 3 tbsp hot water (“egg”) –> I’m using flax.
  • 1 tsp extract –> I’m using homemade vanilla.
  • ½ tsp baking powder
  • ½ tsp pink Himalayan sea salt
  • OPTIONAL:  ½-1 cup chips

*What’s this?  See my cake formula.

Preheat your oven to 350 degrees.  In a large bowl, mix your dry ingredients, sans sweetener.  In another bowl, mix your wet ingredients, plus sweetener.  This includes your “egg,” which should be prepared separately before adding it to the rest of the wet ingredients.

Slowly mix your wet ingredients into your dry until a dough forms.  That’s right, this mixture will likely be more dough-like than batter-like, although different sweeteners and oils may change the consistency slightly.  Point is, don’t be concerned if what you expected to be a drippy batter turns out thick.  🙂

DSC_2144Mix in your chips or save them to sprinkle on top.

Lightly grease a 9 x 13 backing pan or dish (I prefer glass).  Spread your dough evenly throughout and top with chips, if you’d like.  Lightly press any toppers into the dough with a spatula before heading into the oven.

DSC_2145

Bake for 20-22 minutes for a fudgy brownie or 23-25 minutes for a cakey brownie.  Enjoy!

Ice Cold Water, Tea, & Smoothie Infusers

Today’s post features an idea I took from my sister, Petra, author of lifestyle blog 100 Tacks.  She has admitted to me on several occasions that she just doesn’t drink enough water, sometimes even forgetting to stay hydrated in the hustle and bustle of everyday life.  While she doesn’t “dislike” the taste of plain old water, she’d rather drink other varieties.  Petra bought a Soda Stream not to make soda, but to carbonate her water.  Sometimes she drinks mineral water.  Other times, she infuses her water with fruit or herbs.

Infusing water has become increasingly popular, especially for those like Petra.  She told me that she will freeze ice cube trays with lemon juice and pop them into ordinary water for a slow release of added flavor.  Today, I’ll be making ice cube infusers that include citrus juice and herbs, whole fruits, and veggies.  When the cube melts, you can eat the “prize” inside!  🙂

For these cubes, I use citrus juice that comes from fruit I would never consider eating whole.  For instance, while you could make these cubes with orange juice, I’d rather just eat an orange; I’m never, however, going to chow down on a lemon or lime, so their juice makes for great infuser cubes.  Let’s take a look at some of the health benefits of these super foods:

LEMON:  Loaded with vitamins and antioxidants, lemon juice can prevent/fight many diseases and ailments, such as cancer, diabetes, kidney stones, constipation, and indigestion.  Lemon juice also promotes healthy hair, teeth, and gums, can ease pain, fade scars, and more.  Although unrelated to nutrition per se, lemon juice is a popular all-natural household cleaning product if you’re trying to use fewer chemicals.

LIME:  Lime juice is also packed with vitamins and antioxidants, and like lemon juice, can assist with constipation and indigestion.  It can also relieve oral ulcers, congestion, nausea, and body odor, and rejuvenate hair.  It protects eyes, aids in weight loss, and is instrumental in preventing/fighting diseases such as scurvy and heart disease.

You can freeze lemon and lime juice—ideally with as much of their pulp as possible—alone, but I like to take the flavor profile up a notch by adding in yummy extras like fresh mint, cucumbers, or fruit.  As the cubes slowly melt, their flavors will release into your water or iced tea.

DSC_2130

I also love the idea of dropping these into piping hot tea to get it to a more drinkable temperature more quickly…and with more flavor!  And smoothies need some icy element, right?  While I typically freeze fruit to avoid needing to use ice, these infusers would be an extra punch of flavor and nutrition in the blender, too.

A few tips:

  1. Buy/grow/obtain more citrus fruit than you think you’ll need.  I ended up juicing two lemons and seven limes to make just one ice cube tray’s worth of infusers.
  2. Check your juice for seeds or seed particles than may have fallen through the grates of the juicer.  The seeds are bitter.
  3. Don’t make too many of one infuser combination unless you’re 100% certain you’re going to like it; it would be a shame to waste the cubes!
  4. Play around with flavors that appeal to you, inspired by combinations you already know you like or think that you will like.  Consider fruit salads, cocktails, mocktails, and teas that you’ve tasted.

Hopefully, these flavor infusers will help you on your quest to drink more water.  I always have a glass around and don’t even leave the house without filling up a bottle.  Cheers!

FORMULA BASE:  WATER INFUSERS

Makes 1 ice cube tray of infusers

  • Approximately 1 ¼-½  cups freshly-squeezed citrus juice  à  I’m using lemon juice for some cubes and lime for the majority (I just happen to have more limes!).
  • 1 cup additives (i.e. fruits, veggies, herbs, etc.) (optional)  à  I’m using strawberries and blueberries in my lemon cubes and two different combinations in my lime cubes:  cucumber + mint and mint + blueberry.

Juice your citrus fruits and check for seeds or seed particles.  Place any additives that you’re using, if any, in the ice cube tray compartments.  Fill the compartments the rest of the way with juice.

DSC_2133 DSC_2136

Freeze and enjoy in fresh water, iced tea, hot tea, or smoothies.

DSC_2137

Snack Time: Low-Sodium Pickles

DSC_2129

When our Bountiful Basket yielded pickling cucumbers, I got right online and started to research how to make one of my favorite snacks:  pickles!  Pickles, thankfully, are an easy vegan snack, but they are often loaded with salt and/or sugar.  I’ve pooled my resources to develop a low-sodium, sugar-free pickle formula.

What does a pickling cucumber look like?  There are different varieties, but this one doesn’t look much different than a regular cucumber; it’s just smaller.  In my online research, I found that you can in fact use regular cucumbers to make pickles as well.  Perhaps the process just takes longer?  I’m not sure…

DSC_2118I also found that while many pickle recipes called for distilled white vinegar, there were many that utilized other types of vinegar too.  Thus, I selected apple cider vinegar.  Too much of any acid in the system is not good for the teeth or body, but ACV in particular has some health benefits worth considering.  Among a lengthy list, it can assist in detoxifying the digestive system and even improve your skin and hair.  Not bad!

Finally, below are the ingredients I used to season my pickles.  I prefer a savory pickle over a sweet, so I didn’t use any sugar, but you certainly could.  First, I have dried dill; dill is one of my favorite herbs and it pairs well with acid.  I’m using just a touch of pink Himalayan sea salt and black peppercorns; I like the flavor of both, but not in large quantities.  Finally, one whole clove of garlic and dried minced onions; I put both of these in a lot of savory dishes.  The minced onions have a less abrasive, more concentrated onion flavor than fresh onions, which I sometimes prefer.

DSC_2119Like my jam formula, this one can easily be doubled, tripled, etc. to make pickles in large batches.  In a nutshell, pickles can be made either with a lengthy or quick process, which I found one blogger dubbed “refrigerator pickles.”  That’s what I’m making today because I’m too impatient.  🙂  They are ready with minimal flavor in just 24 hours, but get better with time, and can keep for 3-4 months.

FORMULA BASE:  PICKLES

Makes one 12-ounce jar

  • Pickling cucumbers (enough to nearly fill one mason jar when sliced)
  • ¾ cup water
  • ¼ cup vinegar  –>  I’m using apple cider.
  • 2-3 tsps seasoning of choice (i.e. salt, sweetener, herbs, garlic, etc.) –> I’m using ½ tsp dried minced onions, 1 clove garlic, a few black peppercorns, ¼ tsp pink Himalayan sea salt, and ¼ tsp dried dill.

Slice your cucumbers in disks or long strips.  Place in mason jar, add all ingredients, and shake well to combine.  Store in the fridge for at least 24 hours before snacking.

DSC_2123 DSC_2125 DSC_2127

Protein-Packed Comfort Food

DSC_2117

Of all of the vegan dishes that I make, of this one, I am exceptionally proud. For me, it ticks so many boxes, from nutritional value to great leftovers to toddler likability. It isn’t easy to reinvent classic comfort foods—many of which are comforting as a result of fat, sugar, or salt—but I’ve managed to do it with my take on the classic, Chicken Divan.

CD is a chicken and broccoli casserole with a creamy sauce. As much as it is delicious, it is loaded with fat and cholesterol, two no-no’s in my world. My recipes are certainly not all fat free (you will see there is a little bit in today’s concoction), but most are low in fat and definitely don’t contain cholesterol, which only exists in animal products. A positive of the original CD is the protein found in chicken. Thankfully, protein can be found in tons of plants, and often, in much greater quantities per serving.

Today, CD becomes TD: Tofu Divan. Yea, tofu (and all soybean products) should be consumed sparingly, according to some research. But then, I visit Japan, with its ultra-healthy, lean population, and see tofu everywhere. So, who knows!  Tofu is an EXCELLENT source of protein that is low in fat, free of cholesterol, and adaptable into both savory and sweet applications. (Check out my togurt and chocolate mousse formulas for more tofu ideas!) I eat tofu in some capacity once or twice a month…nothing to worry about.

Side note: My TD utilizes a block of silken (or soft) and half a block extra firm. What am I going to do with the other half? Since Nolan was just beyond pureed baby food, I’ve been cutting it into cubes, and tossing it with just a splash of amino acids or soy sauce and a little bit of agave syrup. He’s been popping the cubes for over a year and a half now and couldn’t be happier with this easy and baby-friendly snack. He even learned how to use a fork with these tofu cubes.

DSC_2113Ok, back to the TD. I’m using broccolini, or baby broccoli, but you could really use any vegetable you’d like. You can also use any grains you’d like. This is a Fresh Formula, after all. 🙂 Tradition CD doesn’t contain grains, but if I’m going to make a cooked dish, I like to include them, since the bulk of what I eat is typically raw.

DSC_2100My grain of choice today is primarily wheat berries, with a little bit of quinoa I had left over from making Nolan his favorite breakfast: my quinoa muffins. When Travis and I selected our Bountiful Basket offerings last week, we added twenty-five pounds of wheat berries. They aren’t as easy to find as other grains and I love the crunch that they maintain, even after cooked. Now, I just need to find some ways to use them, which is one of my goals today! I first introduced you to wheat berries in my multi-grain salad formula, another one of my go-to favorites.

DSC_2095 DSC_2096The nutrients derived from the produce, grains, and tofu in my TD are unmatched by its animal-based cousin, CD. This dish is delicious right out of the oven and also makes for satisfying leftovers. Mostly importantly, my two-year-old loves it. Still not keen on many veggies as is (although he’ll eat them all day in smoothies), TD is a great way for me to “hide” finely chopped vegetables that he eats without question.

Finally, you’ll see that the casserole is topped with breadcrumbs. Typically, I’d use some of my own freshly baked bread, but with none on hand at the moment, I’m getting creative and using rice cakes! I love this brand. They make for a great snack as is, or smothered in peanut butter and jam. Yum-o!

DSC_2101Bear in mind that making tofu divan takes about ninety minutes, start to finish, depending on what type of grains you use. While brown rice can cook in about thirty minutes, wheat berries need an hour. Just FYI if you’re in a hurry. 🙂 Enjoy!

FORMULA BASE: TOFU DIVAN

Serves 6-8 

  • 5-6 cups homemade veggie stock
  • 3 cups uncooked grains –>  I’m using 2 cups wheat berries and 1 cup white quinoa.
  • 2 cups finely chopped vegetables –>  I’m using broccolini
  • 1 cup breadcrumbs –>  I’m using two tamari and flax seed rice cakes.
  • 1 block silken tofu
  • ½ block of extra firm tofu
  • ½ cup liquid to blend with silken tofu (more veggie stock, water, plant milk, etc.) –>  I’m using unsweetened, unflavored almond milk.
  • ½ of a small onion –>  I’m using yellow.
  • 2-4 cloves garlic –> The more the merrier in my book. 🙂
  • 1 tbsp nutritional yeast
  • 1 tbsp oil –> I’m using olive.
  • 1 tsp paprika
  • 1 tsp dried minced onion
  • 1 bay leaf
  • ¼ tsp ground nutmeg
  • Salt and pepper to taste –> I’m using pink Himalayan sea salt and fresh ground black pepper in both the sauce and in the sauté pan.

Thoroughly rinse your grains before cooking. Add to a rice cooker or stovetop pot with veggie stock. If you’re using a variety of different grains, stagger their addition to the cooker/pot based on cook times. Wheat berries, for instance, need much longer to cook than quinoa.

While the grains are cooking, put the silken tofu in a blender with your liquid of choice and puree until smooth. Put in a small sauce pan on medium low heat with all spices, the bay leaf, and salt and pepper to taste. Leave the sauce to simmer, stirring occasionally. If it gets too thick (should be thicker than milk, but thinner than a milkshake), thin out with water, plant milk, or veggie stock.

DSC_2104Heat up a sauté pan on medium high heat with ½ tbsp of the oil. Dice your onion, mince your garlic, crumble your extra firm tofu, and sauté until the onions are almost translucent and the tofu is slightly browned. If you have a starchy vegetable, such as carrots, throw them into the sauté pan, too. Otherwise, finely chopping and adding to the casserole mix before it goes into the often should suffice.

DSC_2112Finally, pulse your bread, crackers, etc. in a food processor to make breadcrumbs.

DSC_2102The grains should have absorbed all of the liquid by the time they are cooked, but drain them if they haven’t. In a large mixing bowl, combine grains, onion, garlic, tofu, vegetables, and silken tofu sauce, sans bay leaf. I am strategic about how I do this. The veggies go on the bottom if they have not been precooked, topped next by the hot grains, which will par-cook the vegetables for me, finishing them off in the oven.

Mix your breadcrumbs with nutritional yeast and the other ½ tbsp oil. Once the other ingredients are combined and spread in a 9 X 13 baking dish, top with breadcrumbs. Put under the broiler on low for 4-5 minutes, or until the breadcrumbs are golden brown.

DSC_2114

Classic Chip Cookies

Notice that I didn’t title this post chocolate chip cookies?  That’s because the chip concept—a true Fresh Formula—lends itself to way more than just chocolate.  “Chips” can also include such yumminess as chopped nuts, seeds, dried fruit, candy, and even, shredded veggies (a la carrot cake, etc.).  Obviously, some choices are healthier than others.

Today, I’m making a classic chip cookie, inspired by a recipe from Thug Kitchen (you know I love these two vegan chefs!).  I’ve taken their chocolate chip almond butter cookie recipe and adapted it to a formula; not everyone likes chocolate, some people have nut allergies, etc.  You could even make these cookies gluten-free.

For my chips, I’m using dark chocolate covered ginger.  Travis bought me a bag of these ginger treats at the beginning of my pregnancy.  Ginger aids with nausea, just FYI.  🙂  Although tasty, they were the size of large malted milk balls; that’s just too much ginger for me to pop into my mouth at once.  I’ve been hanging on to them in hopes of thinking of some other way to use them.  So, I decided to chop them up and use them in lieu of traditional semi-sweet chocolate chips.

DSC_2083The “egg” in this formula is made possible with ground flax seeds, although chia will likely work as well.  I haven’t tried that, but let me know if you do!

I did, however, make two batches of my new formula, trying different mixing methods with the exact same ingredients.  The first time I made these cookies, I used an electric hand mixer to incorporate every single ingredient except the chips, which I stirred in by hand.  The result was a deliciously smooth batter that made for thin, crisp cookies.  The second time, I mixed the dough by hand, using the electric hand mixer only after all ingredients except the chips were mixed by hand, just to smooth it out a little.  What resulted was a slightly lumpier dough and fluffier cookie.

I also think that the density of the dough would differ if nut/seed butter were used in place of oil.  Experiment until you get the cookie texture that you prefer.  No matter what, these vegan delights promise to be delicious.  Enjoy!

FORMULA BASE:  CHIP COOKIES

Makes 24-30 small cookies

  • 1 ½ cups flour –> I’m using whole wheat.
  • ¾ cup unsweetened plant milk –> I’m using almond.
  • 2/3 cup sweetener –> I’m using turbinado sugar.*
  • ½ cup oil or nut/seed butter –> I’m using coconut oil.
  • 2 tbsps flax or chia seeds –> I’m using flax.
  • ½-1 tsp extract (depending on flavor intensity) –> I’m using 1.5 tsps homemade vanilla extract.**
  • ½ tsp baking powder
  • ½ tsp baking soda
  • ½ tsp pink Himalayan sea salt
  • 2/3 cup chips –> I’m using chopped dark chocolate covered ginger.

*See my cake formula for an explanation of this sweetener.

**Pictured below is the vessel that I use to bottle homemade extracts (another post, another day).

DSC_2084Preheat your oven to 350 degrees.  Combine all wet ingredients in a large mixing bowl.  Slowly incorporate the dry ingredients, mixing as you go.  Lastly, stir in your chips.  Grease 2-3 baking sheets or line with parchment paper.  Place heaping spoonfuls of cookie dough approximately a 1.5 inches apart.

DSC_2087

Bake 15-18 minutes, or until the cookie edges are slightly golden brown.

DSC_2088 DSC_2089

Wonderberries Turned Homemade Triple-Berry Jam

DSC_2075

When I updated you on the progress of our garden, I shared a photo of the wonderberries (AKA sunberries) that had mysteriously begun growing there.  By the time we returned from Michigan on Sunday, they were ready to harvest.  Not naturally very sweet, we knew we were going to use them to make jam.

DSC_2065As you know, I’ve been craving peanut butter and jelly this pregnancy.  Between my PB&J smoothie, PB&J atop rice cakes and graham crackers, and good old PB&J sandwiches, I’ve got my cravings covered!  The downside to many jellies and jams, however, is that they are loaded with sugar.  Today, I’m making a triple-berry jam—inspired by our wonderberry harvest—that is low in added sweetener.

First, a few definitions that will help us along the way:

PECTIN:  A natural gelling agent found in the cell walls of plants.  You can purchase pectin in powdered form to make vegan jelly, jam, or jello.  (Gelatin, which is not vegan, comes from animals, and is found in such items as gummy bears and marshmallows.)  This pectin brand is available at Whole Foods.

DSC_2066

JELLY:  A smooth pectin-based mixture that contains fruit juice (or, unfortunately, artificial flavors that mimic real fruit) and no chunks of actual fruit.

JAM:  A less smooth pectin-based mixture that contains mashed, pureed, or whole fruits.

Of course, I am making jam.  As mentioned in a previous post, I try to keep my consumption of juice to a minimum; whole fruits contain more fiber, which aids in preventing the conversion of sugar to fat.  For my sweetener, I’m using light agave syrup, which I first introduced to you with my coleslaw formula.  Compared to many (if not most) store-bought jams, mine contains very little added sugar and no artificial sweeteners of any kind.

I must warn you, despite containing few ingredients, making jam does contain quite of few steps, including several rounds of boiling.  Having a helper in the kitchen makes a big difference, and you can make jam in bulk to save time later on.  🙂  This jam keeps at room temperature for one year, but should be refrigerated and consumed in three weeks once a jar is opened.  Enjoy!

FORMULA BASE:  JAM

Makes 2 small jars or 1 large*

  • 2 cups raw or precooked fruit**  –>  I’m using ½ cup wonderberries, ½ cup raspberries, and 1 cup blackberries.
  • 2 tbsps sweetener  –>  I’m using agave syrup.
  • 1 tsp pectin
  • 1 tsp calcium water (prepare according to package directions)

*You can find mason jars at many retailers including dollar or 99 cent stores.

**A hard fruit like apples will be easier to mash or puree if it has been precooked, but a softer fruit like raspberries will mash easily in a raw state.

Fill a pot with water enough to completely cover your mason jars in standing position and bring to a boil.  Add both the jars and their lids.  After the jars have boiled for a few minutes, turn the heat on low and keep the jars in the hot water.

Next, peel and precook your fruit, if necessary.  Place your raw and/or cooked fruit in a bowl and mash, or, puree in a blender or food processor.

DSC_2072Combine your mashed fruit and calcium water in a pot and bring to a boil.  While you are awaiting the boil, combine your pectin and sweetener in a separate dish.

DSC_2073Add the mixture to the boiling fruit and stir an additional 1-2 minutes, until the pectin is dissolved.  Remove from the heat.

Using tongs, remove your hot jars from the other pot and bring the water to a boil again.  While you are waiting for yet another boil, pour the jam into the jars, approximately ¼ of an inch from the top.  Wipe the rims clean and seal.  Once the water is boiling, submerge the jars in an upright position and boil for 10 minutes.

Use tongs to remove the hot jars and place on the countertop to cool.  Refrigerate once opened.

DSC_2077 DSC_2081

I’m Bringing Coleslaw Back, Sans Mayo

DSC_2060

I used to have lukewarm feelings for mayo-based coleslaws, but once I made slaw with a vinaigrette dressing, I enjoyed it so much more.

Coleslaw gets a bad rap. It is often presented in ways that are unappealing, slopped down as an unwanted side dish with ribs, burgers, or fish and chips. No matter how good it tastes, it’s always overshadowed by other elements on the dish, and perhaps rightly so…until now. I’m bringing slaw back – and you won’t be satisfied with just that tiny plastic cup.

While slaws are traditionally made with cabbage as the main ingredient, you can certainly use any hearty leaf that will hold up to being dressed and transported to a backyard barbeque. Today, I’m starting with the basics. Cabbage is high in vitamin K and anthocyanins, which aid mental function and concentration.  It is also a rich source of vitamin C and sulfur, which helps the body to remove toxins and improve skin.  Cabbage has number of other health benefits and can even assist in getting rid of that nasty hangover!

DSC_2053Another super food that I’m using in today’s slaw rendition is broccoli, which is in the same family as cabbage.  Thus, it also a powerhouse of vitamins K and C and contains detoxifying properties.

DSC_2057Finally, in my dressing, I’m using, for lack of a better description, a watered-down version of agave syrup.  Thankfully, this sweetener is all-natural, containing small amounts of juices from other fruits that amount to fewer calories.  Again, I don’t count calories, but what appeals to me about this sweetener over pure agave syrup is that it has a lighter, more refreshing quality about it, which I think pairs perfectly with a slaw like this one.  As you’ve seen in my other formulas, I use full-fledged agave syrup all the time, but I like this one best in this application.

DSC_2061So, I beseech you to consider giving coleslaw another chance.  My formula yields a crunchy, crisp dish that I would eat as more than a measly side.  If I’m hungry enough, I’ll eat at least half of the bowl myself.  🙂  Enjoy!

FORMULA BASE:  SLAW

Serves 4-6 as a side; 2-3 as the main event

  • ½ head or 1 bunch hearty leaves (cabbage, kale, collard greens, rainbow chard, etc.)  –>  I’m using green cabbage.
  • 2 cups chopped raw fruit and/or vegetables  –>  I’m using broccoli.
  • ¼ cup “crunch” (raw seeds, nuts, etc.)  –>  I’m using sunflower seeds.
  • ¼ garnish (green onions, chives, fresh herbs, etc.)  –>  I’m using green onions.
  • Homemade dressing of choice*

*Today, I’m using a combination of 2.5 tbsps white wine vinegar, 1 tbsp olive oil, 1 tbsp agave syrup, and salt and pepper to taste.

Chop or shred your leaves; it isn’t important that they are perfectly uniform in size or shape.  If you’re using cabbage—or a vegetable like it—cut around or otherwise remove the tough core.  If you’re using a green with ribs—such as a kale—cut around or otherwise remove those as well.

DSC_2054Finely chop your vegetables, crunch, and garnish (if needed) and add to your slaw base.  Mix your dressing separately and pour over the slaw.  Toss and serve.  Holds up well in the fridge for a few days.

DSC_2059

I’m Pregnant, and I want PB&J!

DSC_2037

If you haven’t heard via one of my social media accounts (follow me on Twitter and Instagram @jackiewitzke or on Tumblr, TheFreshFormula), I am pregnant with baby #2! We have lovingly named our mini-us Baby Dos, since we aren’t finding out the sex until birth. I’m happy to report that I’ve been feeling well overall, especially now that the exhaustion of the first trimester has passed.

When I was pregnant with Nolan, I craved macaroni and cheese, which doesn’t exactly bode well for my plant-based lifestyle. This pregnancy, I’m thankful to be craving something animal-free: good ‘ole peanut butter and jelly! So long as jelly doesn’t contain gelatin, it is naturally vegan. I buy nut butters containing only nuts, so they’re as natural as you can get, too. And as you know, I also make my own bread, so PB&J is generally a pretty healthy snack for me…

…except for the excess of sugar found in some jelly brands. I’ve handled this a couple of ways. If I purchase premade jelly, I look for all-natural varieties that do not contain high fructose corn syrup. Travis and I have also made our own jellies and jams in the past, allowing us to control the amount and quality of sweetener that goes in.

Regardless of how well I shop or prepare homemade jellies and jams, sugar is sugar. Not only does the average person need to avoid consuming an excess, but certainly a pregnant woman should. I have solved this problem by turning to an old standby: my dessert smoothie formula.

Yes, it’s here: the no-sugar-added PB&J smoothie! I derive all of the sweetness in this treat from raw fruit and medjool dates (as needed). But wait, doesn’t fruit contain sugar? Yes – thankfully, it is coupled with fiber to slow the body’s absorption and prevent the conversion to fat. A dietician that I follow (as mentioned in this previous post) eats primarily raw fruit in her vegan diet and claims that you cannot consume too much of natural sugar in this form (juice, of course, is another story, which I wrote about in the same post). So, not to worry PB&J lovers!

My favorite jelly is that of raspberries, which I’m including in today’s formula adaptation. Raspberries (as with many other berries) happen to be low in sugar, for those concerned, and contain more fiber than any other fruit. Pretty awesome, huh?!  These pictured below are frozen, not moldy.  🙂

DSC_2033Like my chocolate peanut butter banana smoothie, you can enjoy this one for dessert, but it would make for a well-balanced breakfast or snack, too. Enjoy!

FORMULA BASE: DESSERT SMOOTHIE

Serves 2-3

  • 2 frozen bananas (or fresh bananas and ice)
  • ½-1 cup specialty ingredients –> I’m using ¾ cup frozen raspberries and ¼ cup peanut butter.*
  • 1 tbsp chia seeds
  • 1 tbsp ground flax seeds
  • 1 tbsp hulled hemp seeds
  • ¼-½ tsp extract of choice (optional, and amount depends on flavor intensity) –> I’m not using any.
  • Pitted medjool dates as needed for sweetness –> I’m not using any.
  • Juice or plant milk until desired consistency (start with 4 oz) –> I’m using almond.

*You could use any combination of berries and nut/seed butter.  🙂

Place all ingredients in a blender and puree until smooth, adjusting specialty ingredients as necessary.

DSC_2034 DSC_2036