Cashew Cream Potato Salad

I see vegan cooks using cashew cream as a substitute for dairy in both sweet and savory applications all over the place lately, so much so that I knew I just had to try it for myself. After making my first batch of the stuff, I really couldn’t believe how smooth and decadent it was. I immediately thought to the russet potatoes I had sitting on my counter and thought of trying my hand at a creamy potato salad.

Potato salad typically gets its creaminess from mayo, which I find transforms into an unappealingly oily consistency the longer that it sits. Yes, if you’ve ever been to a good old American barbeque or cookout, you know that potato salad tends to sit…for a while. Even if everyone has a healthy helping, there always seems to be tons of it left over.

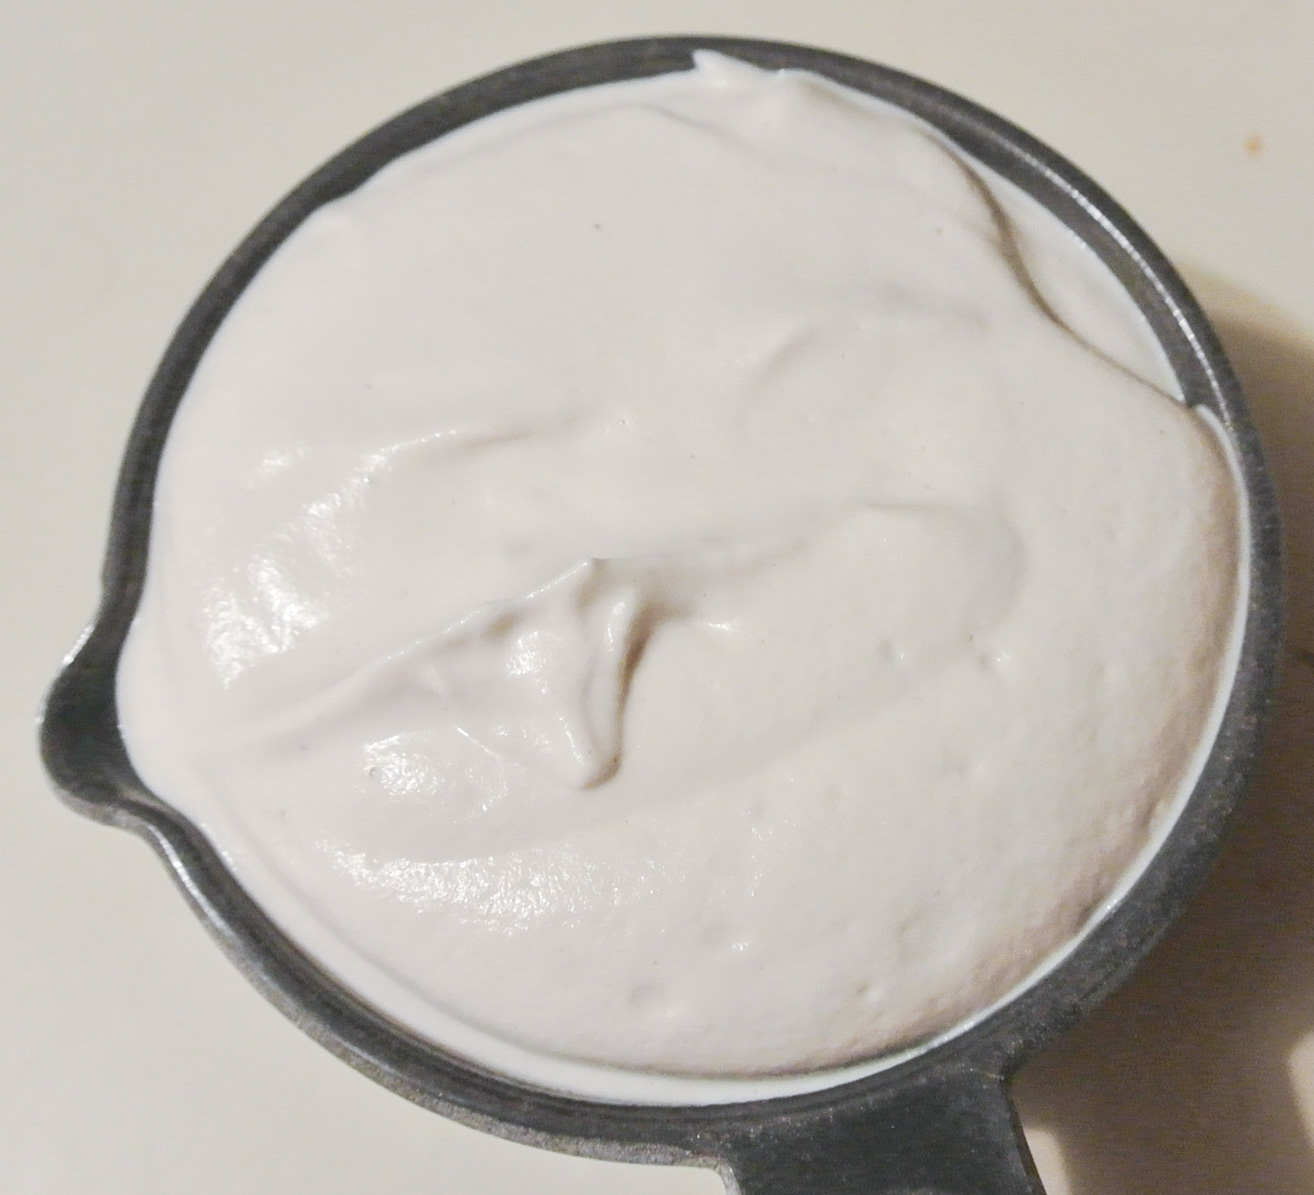
I’m happy to report that using cashew cream in lieu of mayo will keep your potato salad leftovers fresh and creamy. In addition, cashews are nutritious and versatile. These super nuts contain an abundance of antioxidants, are excellent sources of copper and vitamin K, and can even help to lower blood sugar and cholesterol. They can be used in everything from trail mix to brittle to vegan cheesecake (a future blog post) and today, as “mayo.” Just blend raw cashews with water; it’s that simple!

DSC_2305 DSC_2308

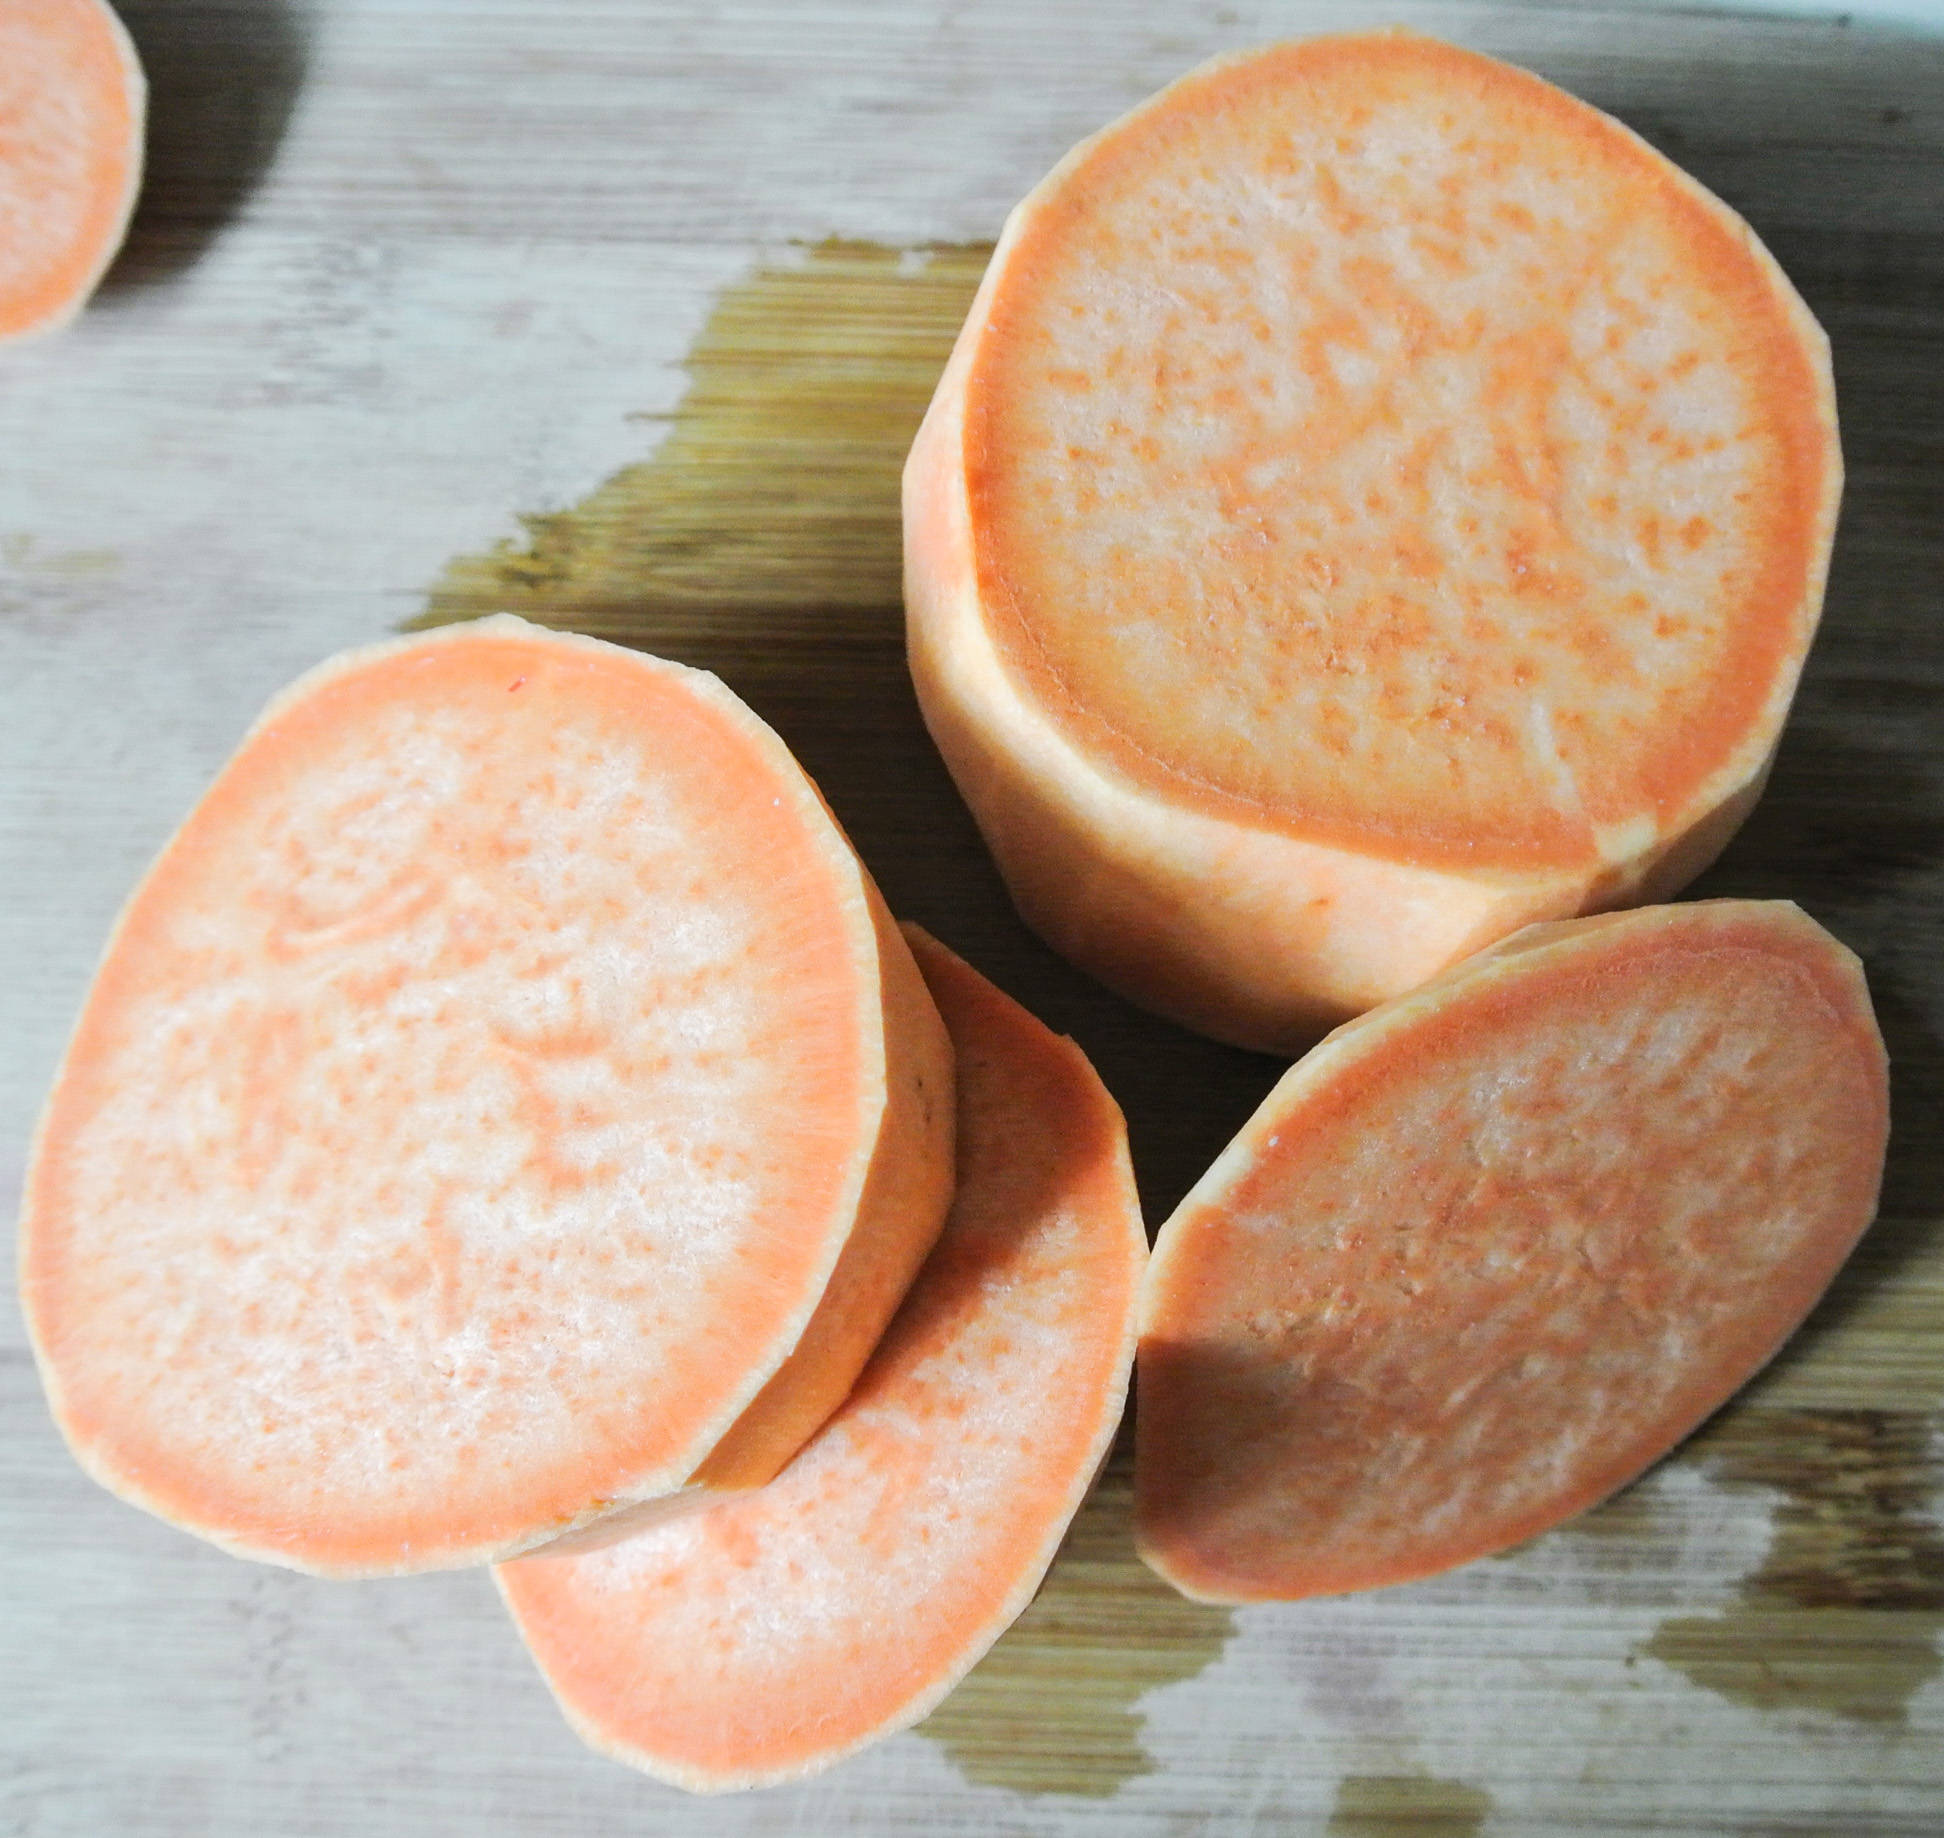
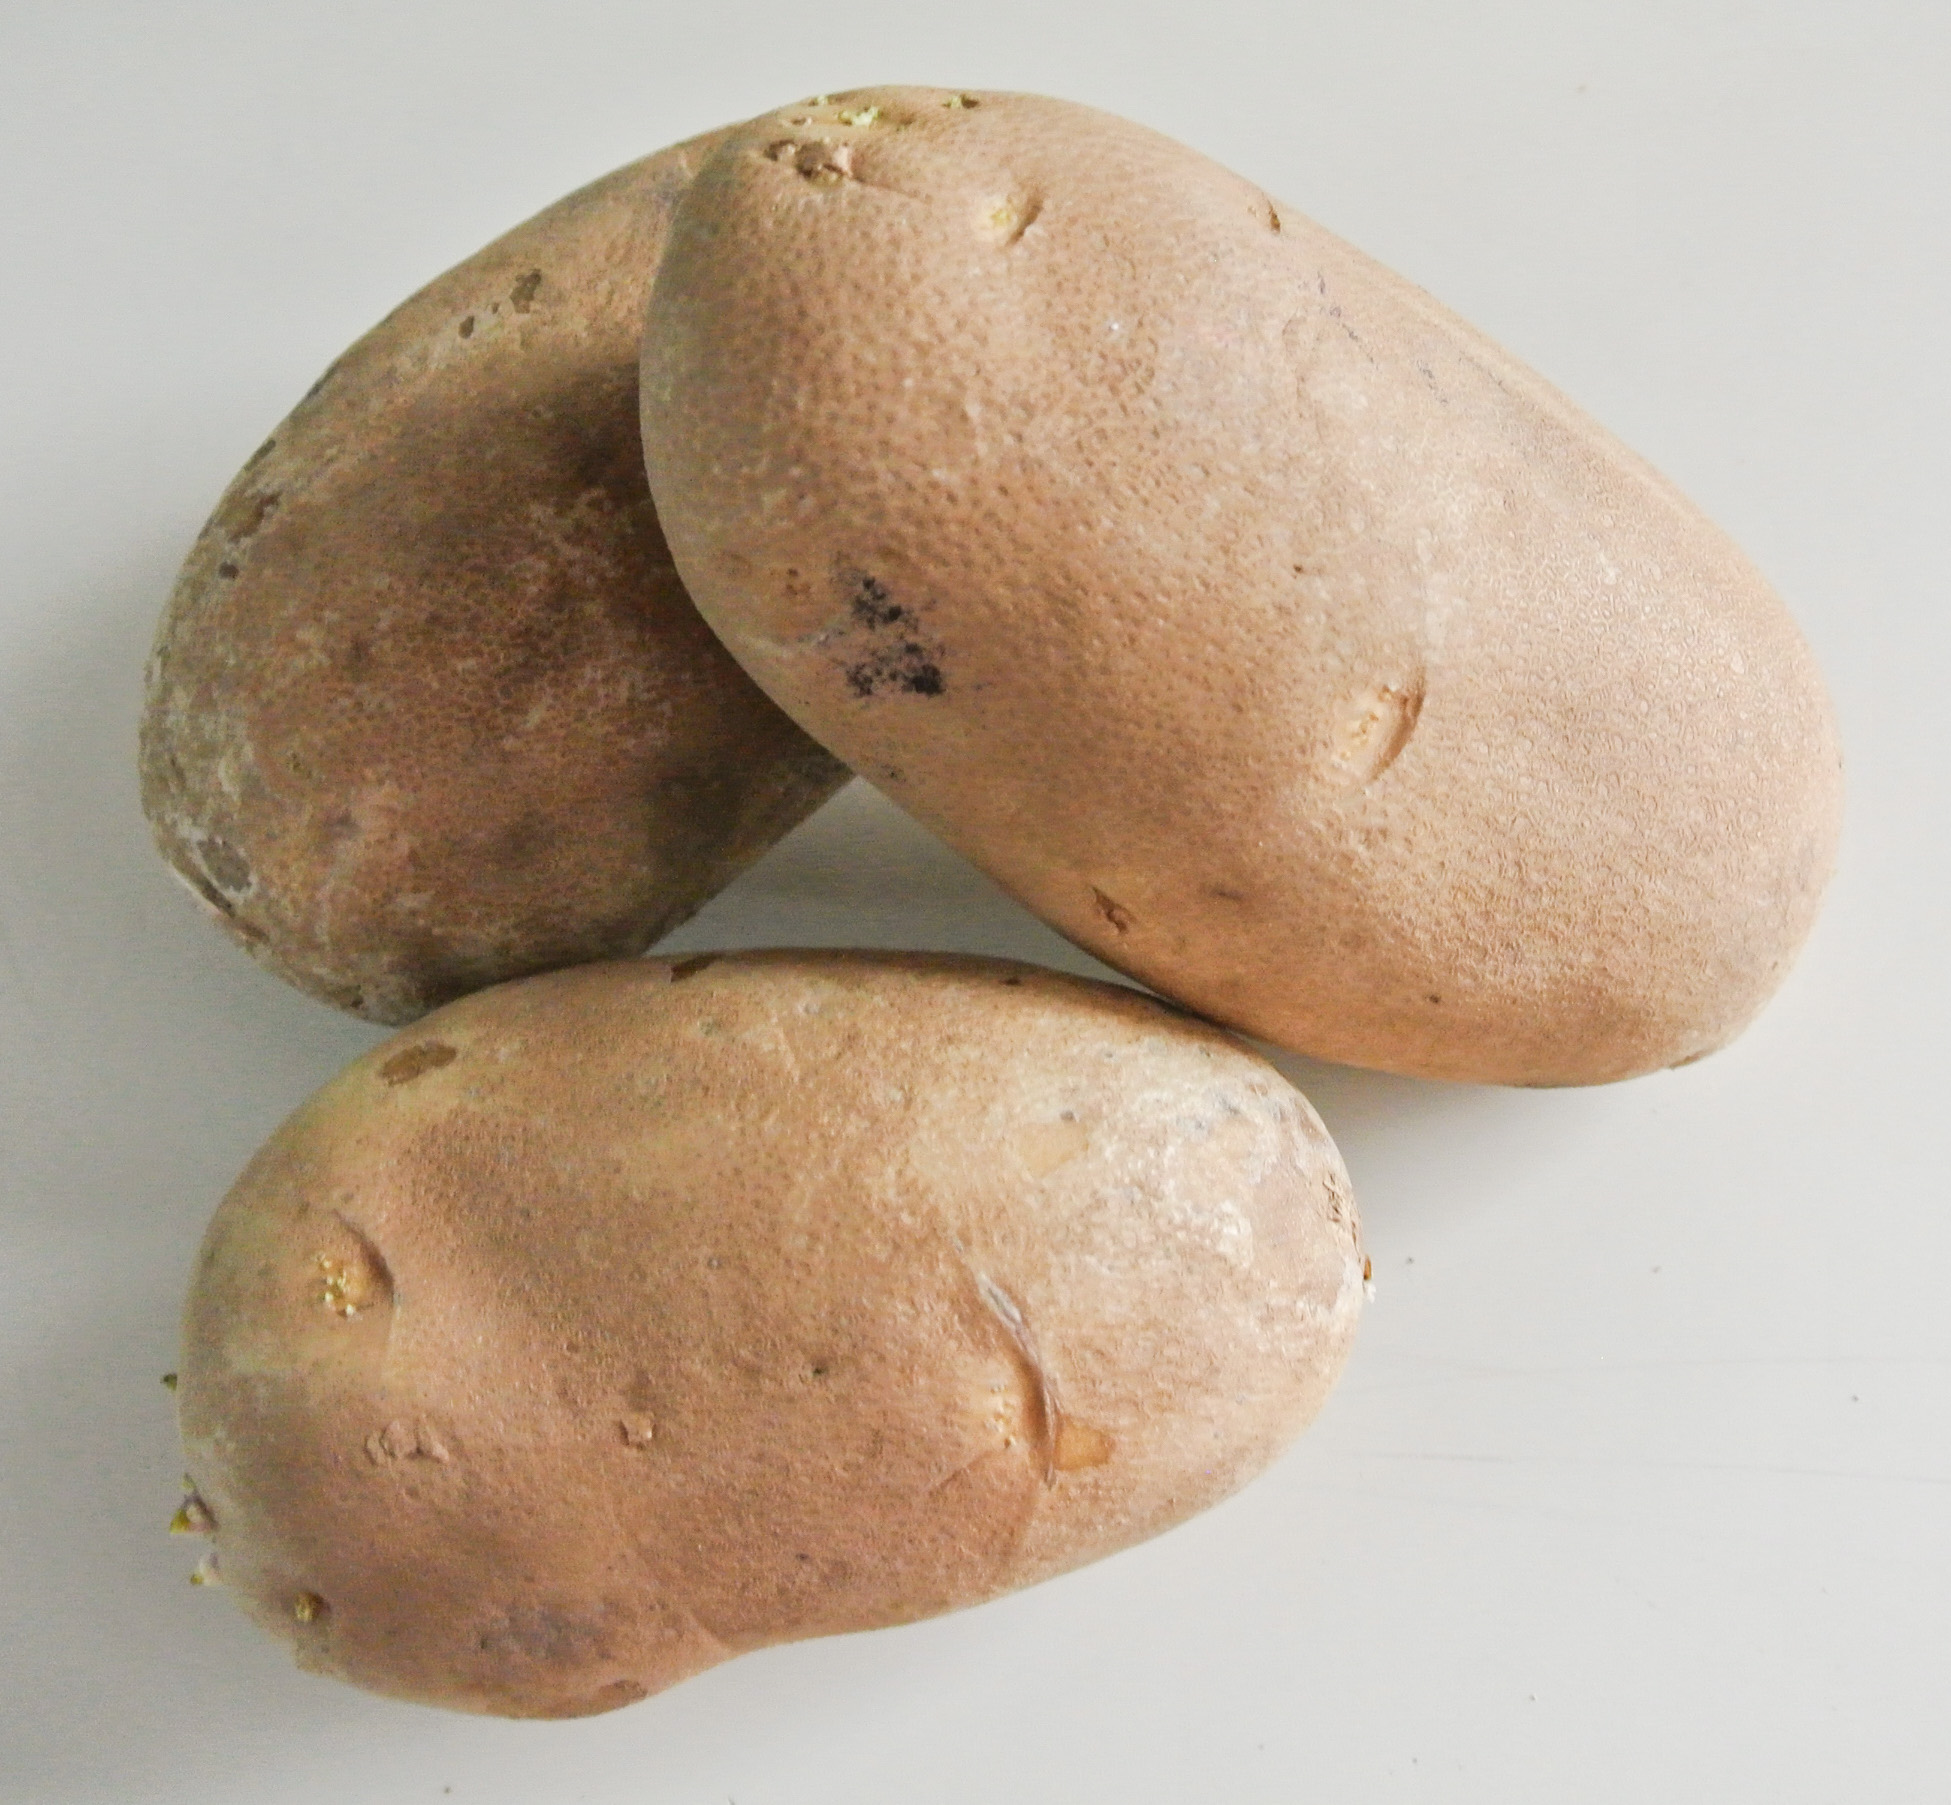
The other major component of my potato salad is, naturally, the potato. Today, I’m using russets so that I have a blank flavor palate to start with, but you could certainly use a sweet potato, yam, or potato of a different color or texture. Because, in America at least, the russet potato is often used in relatively unhealthy dishes like fries and chips, it has developed a poor reputation. The reality, however, is that the russet is quite the super food.

One large russet contains about a third of your recommended daily intake of vitamin C, niacin, magnesium, and phosphorous. It’s low in calories, high in fiber, and the perfect canvas for endless kitchen experiments. Want to maximize the nutritional benefits of your russets? Leave the skin on! Roast it and it becomes crispy, or, in today’s potato salad, hide it almost entirely in our cashew cream.

DSC_2304Since I touted my rendition of creamy potato salad for its ability to hold up at the family picnic, you should know that it tastes even better the second day. 🙂 Enjoy!

FORMULA BASE: POTATO SALAD

Serves 4-6

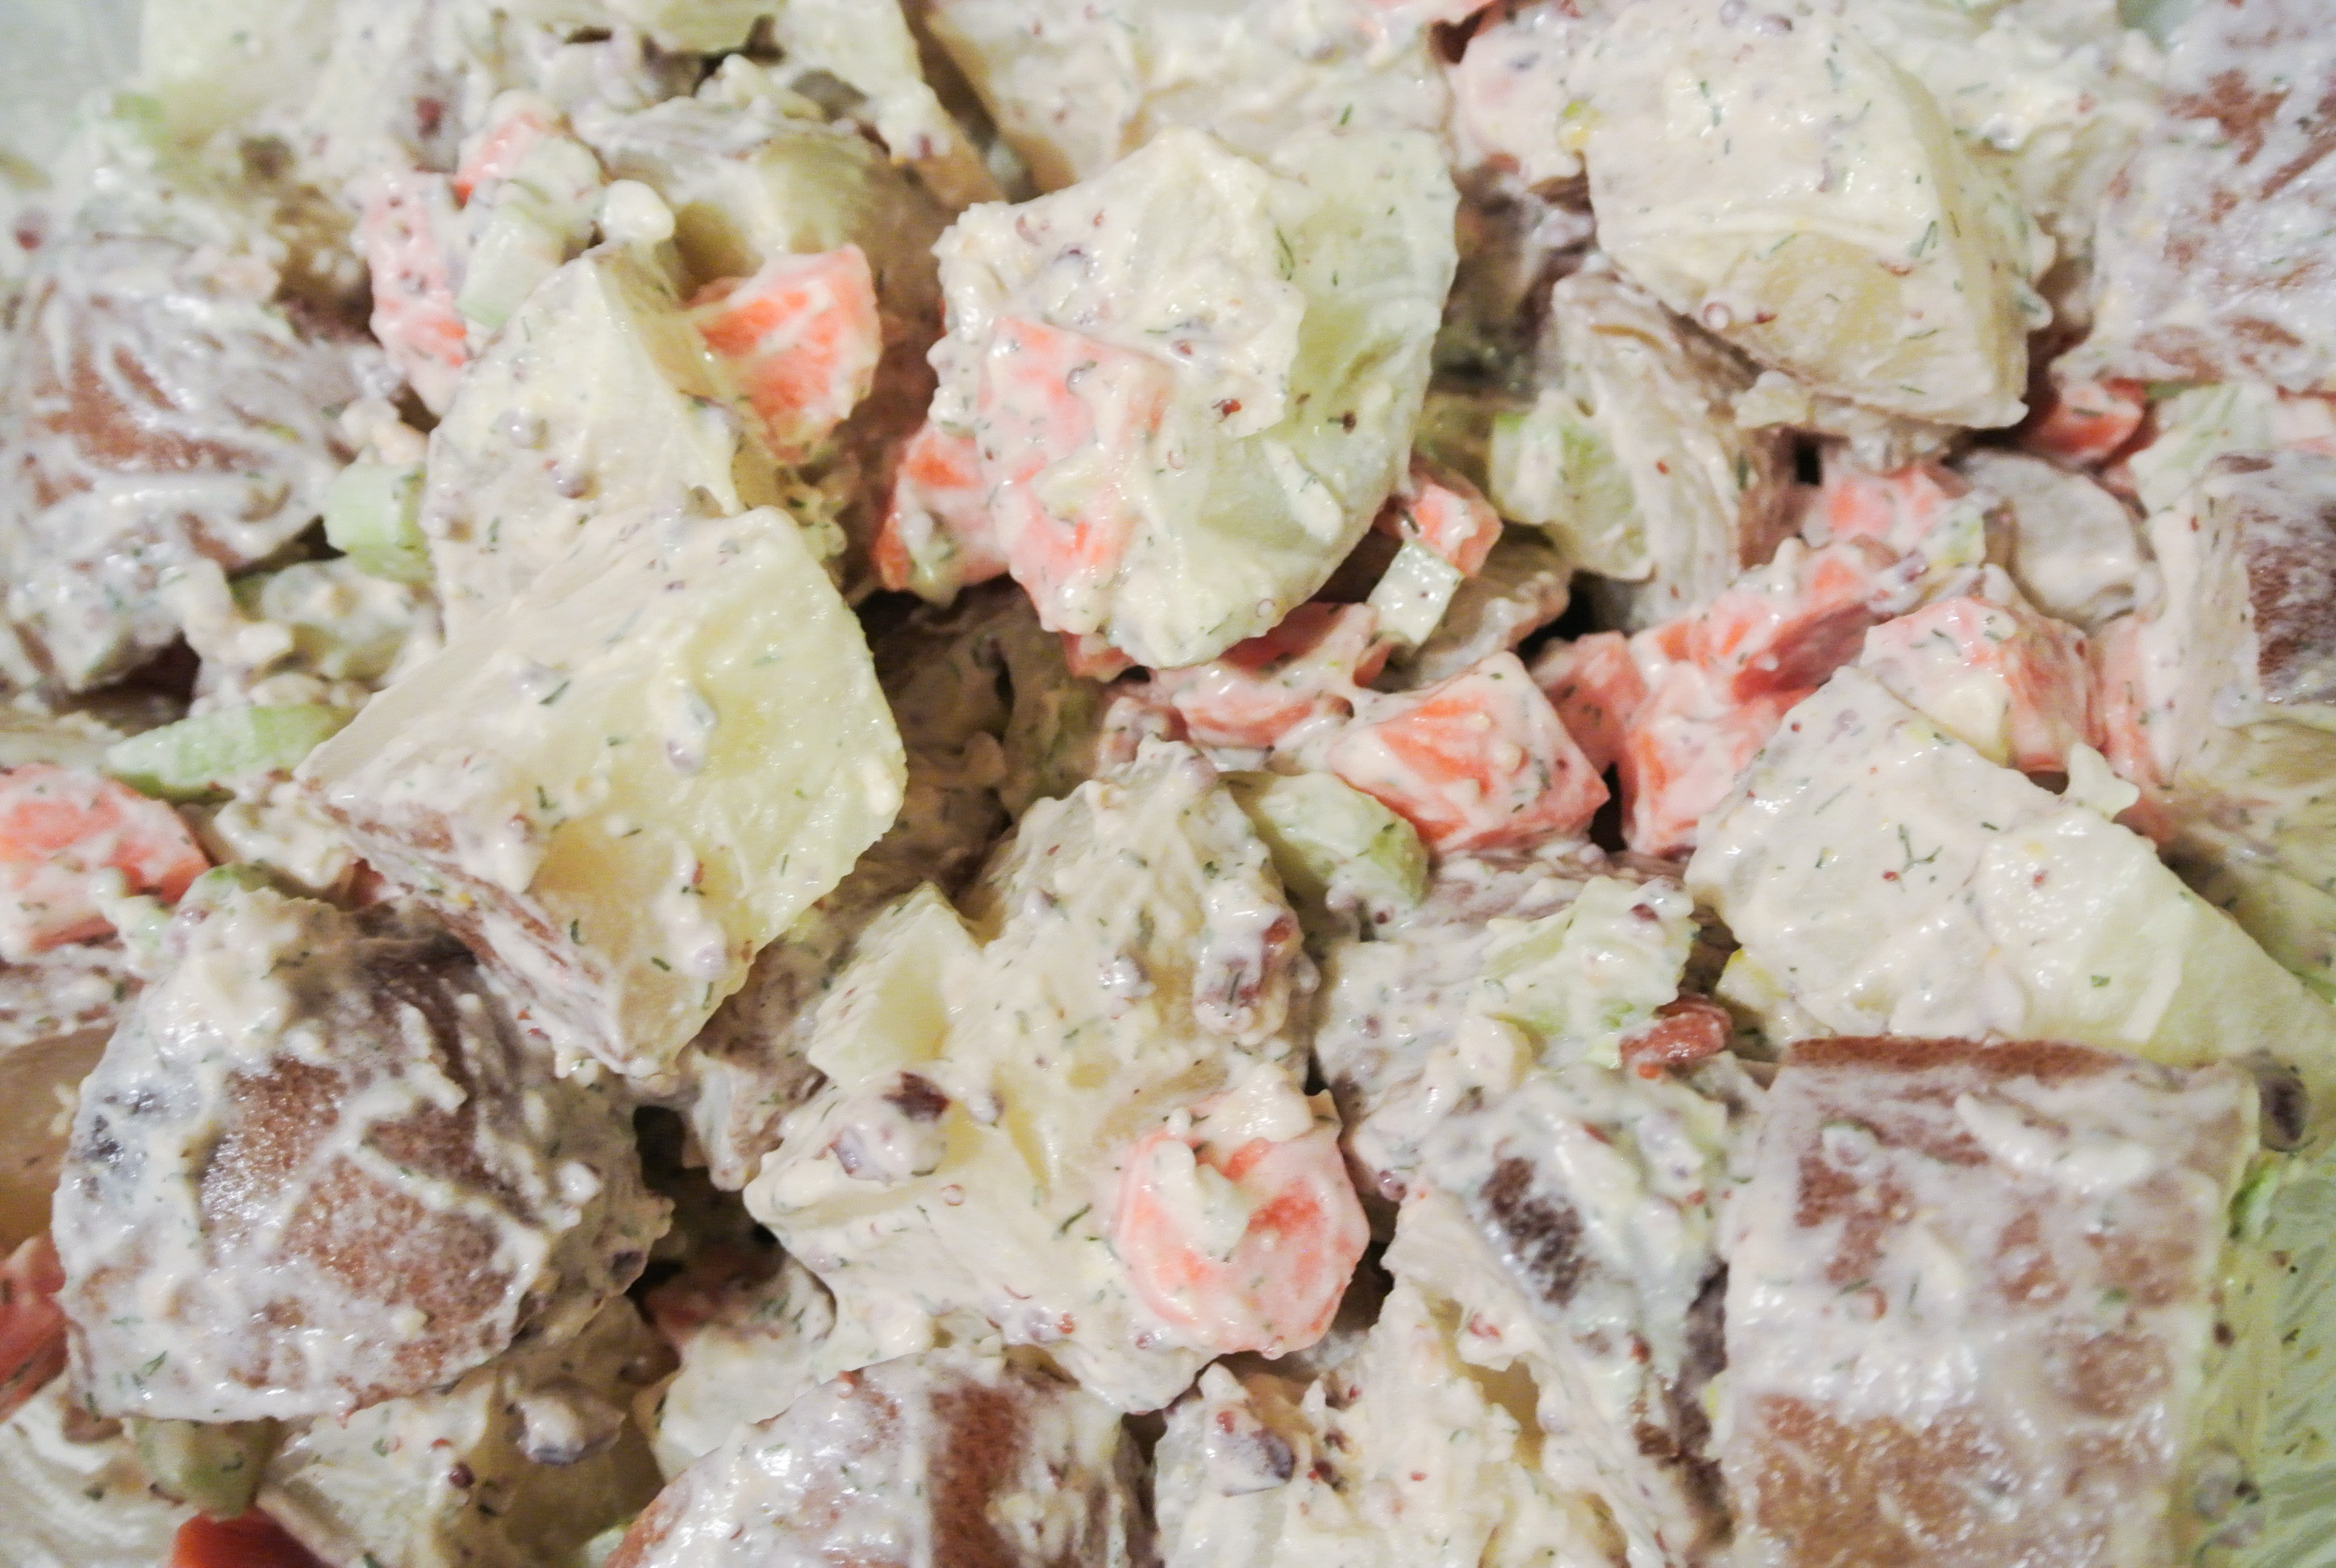
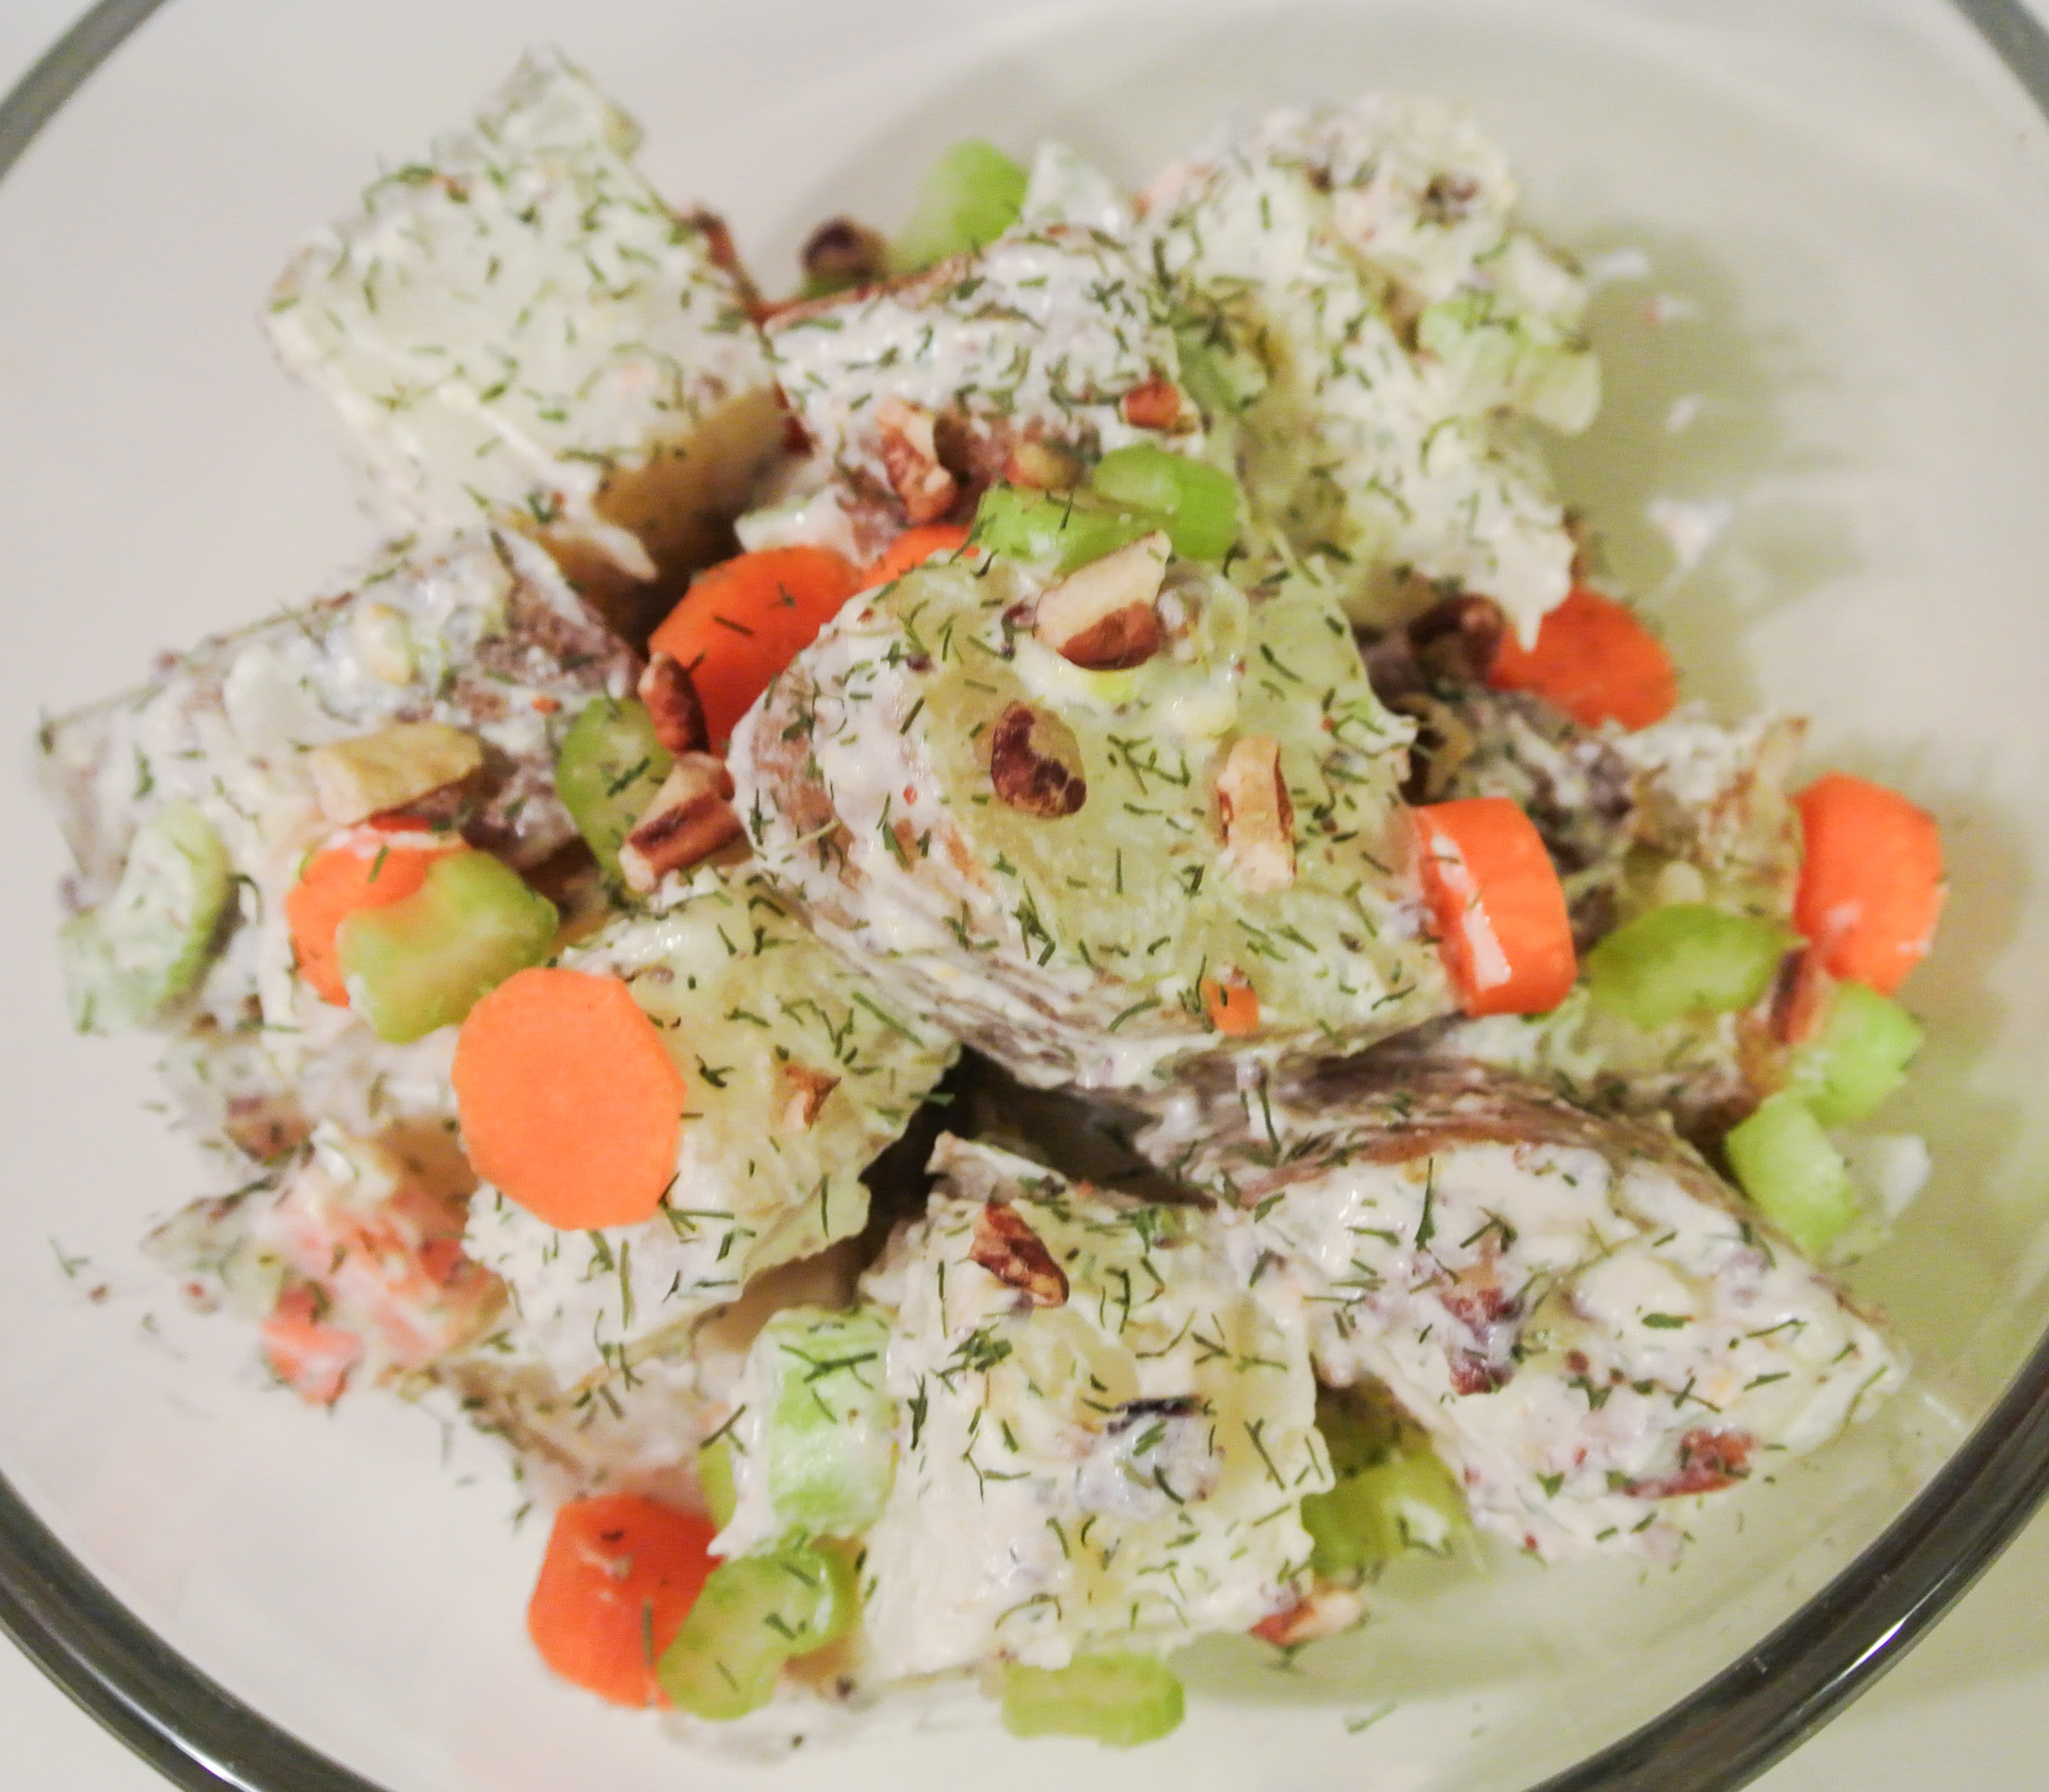
  • 2 pounds potatoes –> I’m using russets.
  • 2 cups diced raw vegetables –> I’m using 2 medium carrots and 2 large ribs of celery.
  • A double batch of my creamy salad dressing (see below)
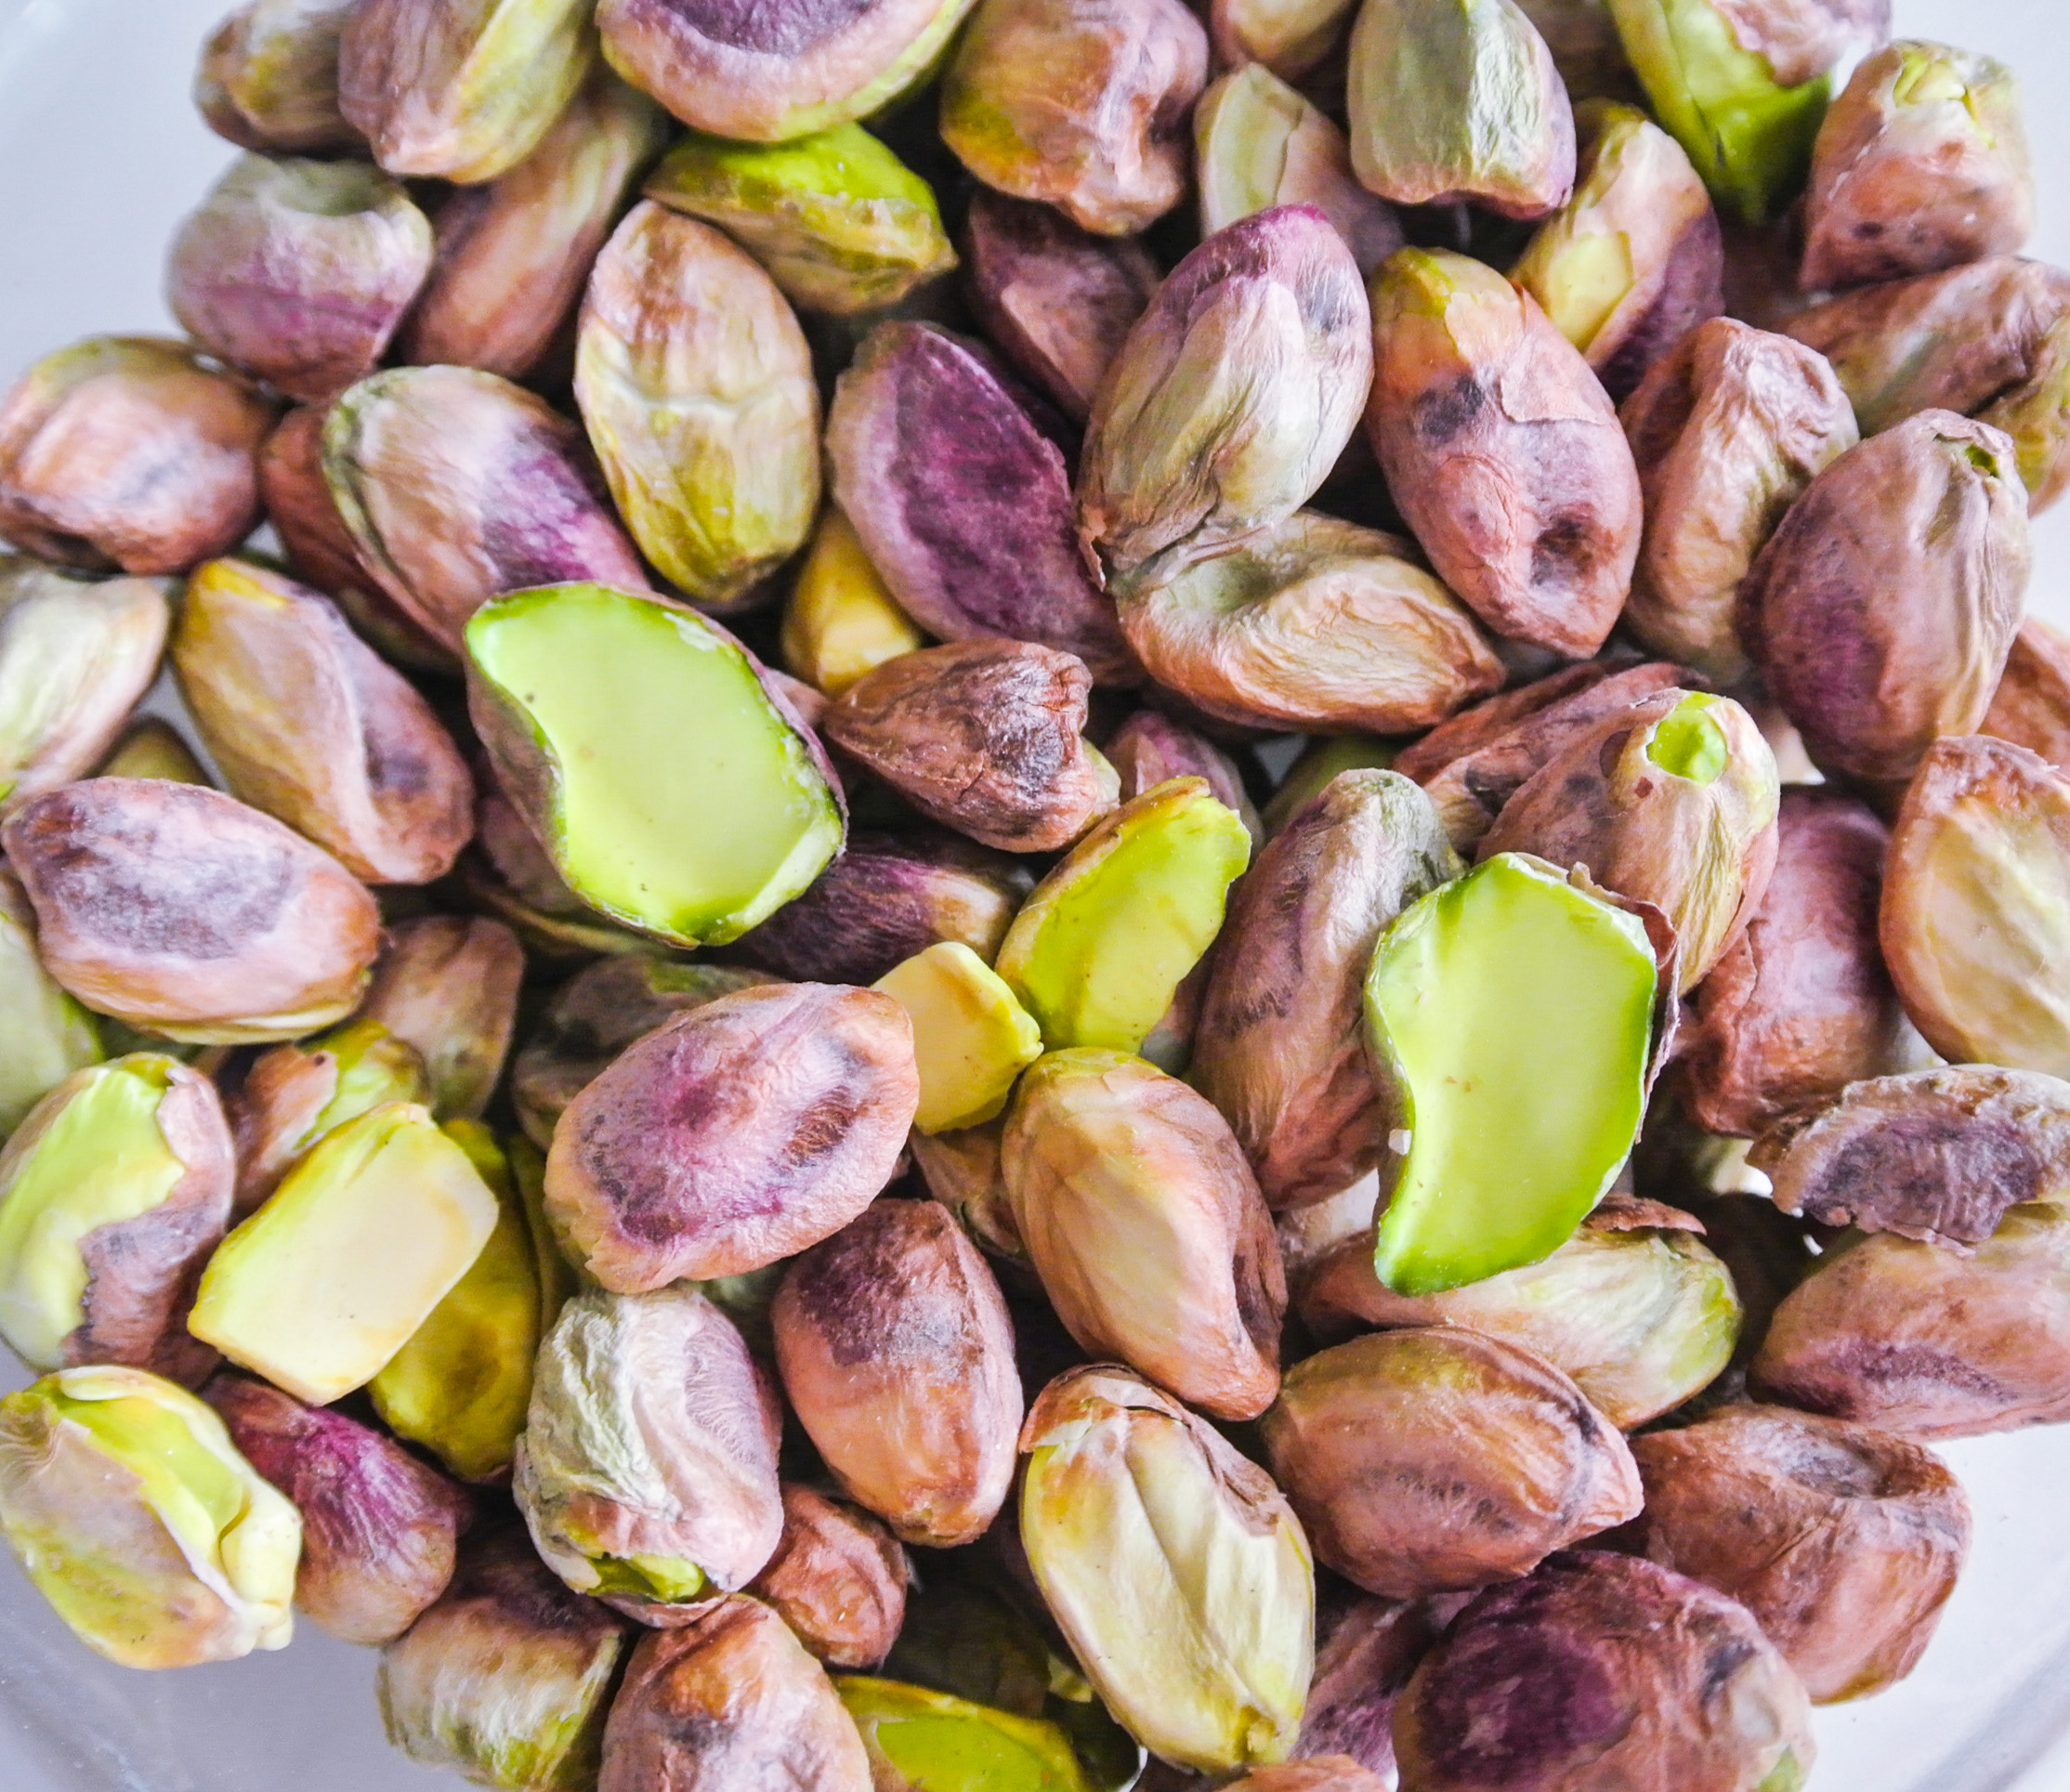
  • ¼ cup crunch (raw seeds, nuts, etc.) (optional) –> I’m using pecans (and a small amount of pistachios leftover from my nice cream recipe earlier this week).

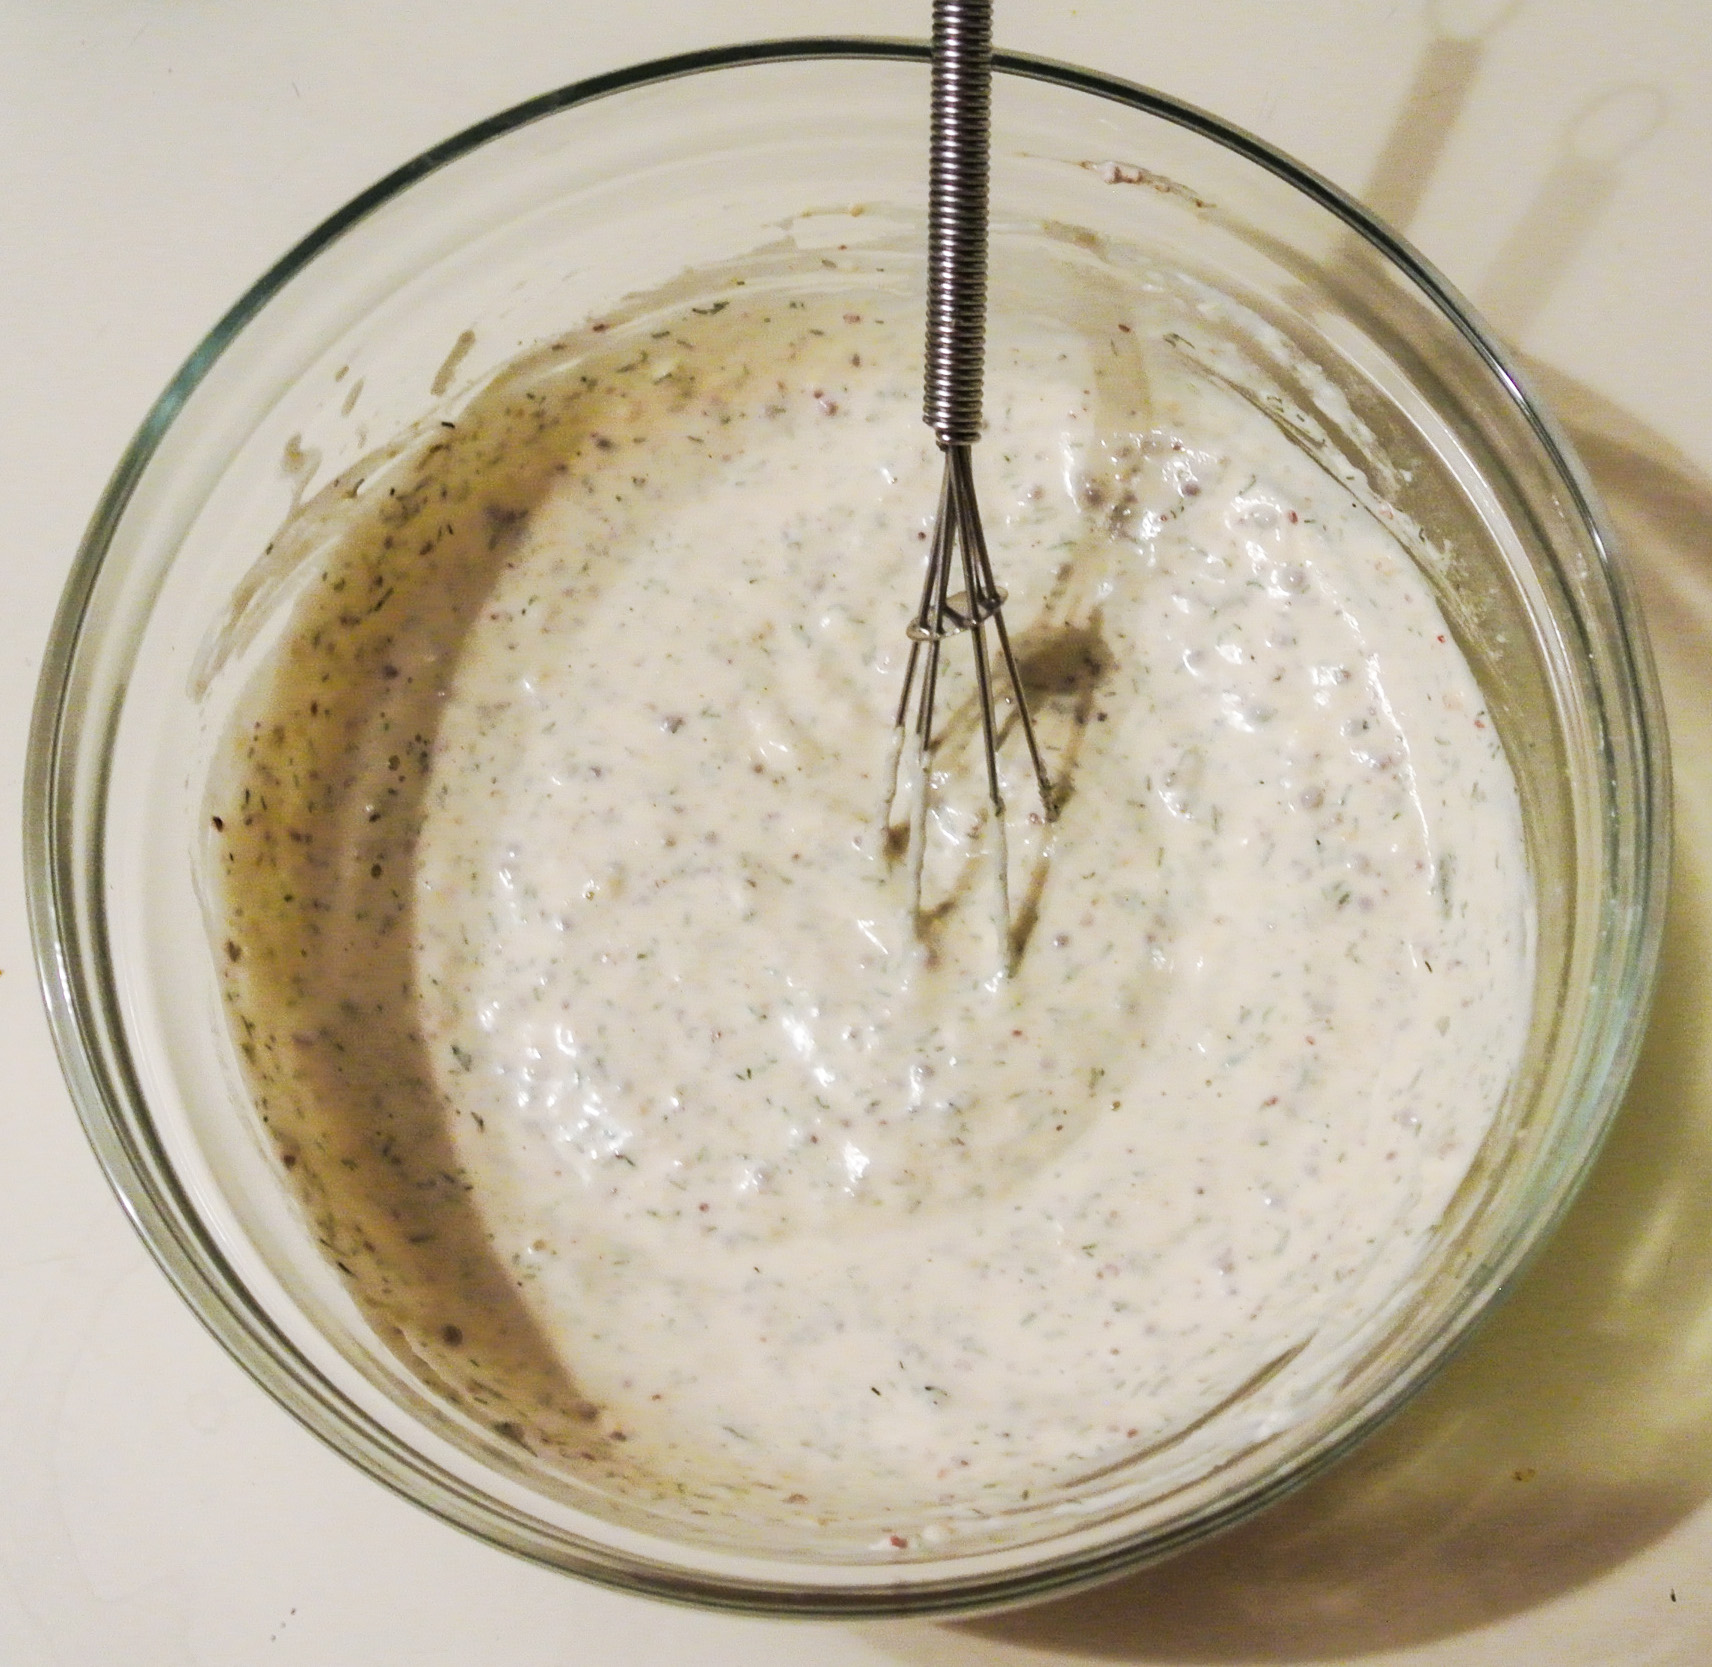
For the dressing (NOTE: Formula already doubled below.):

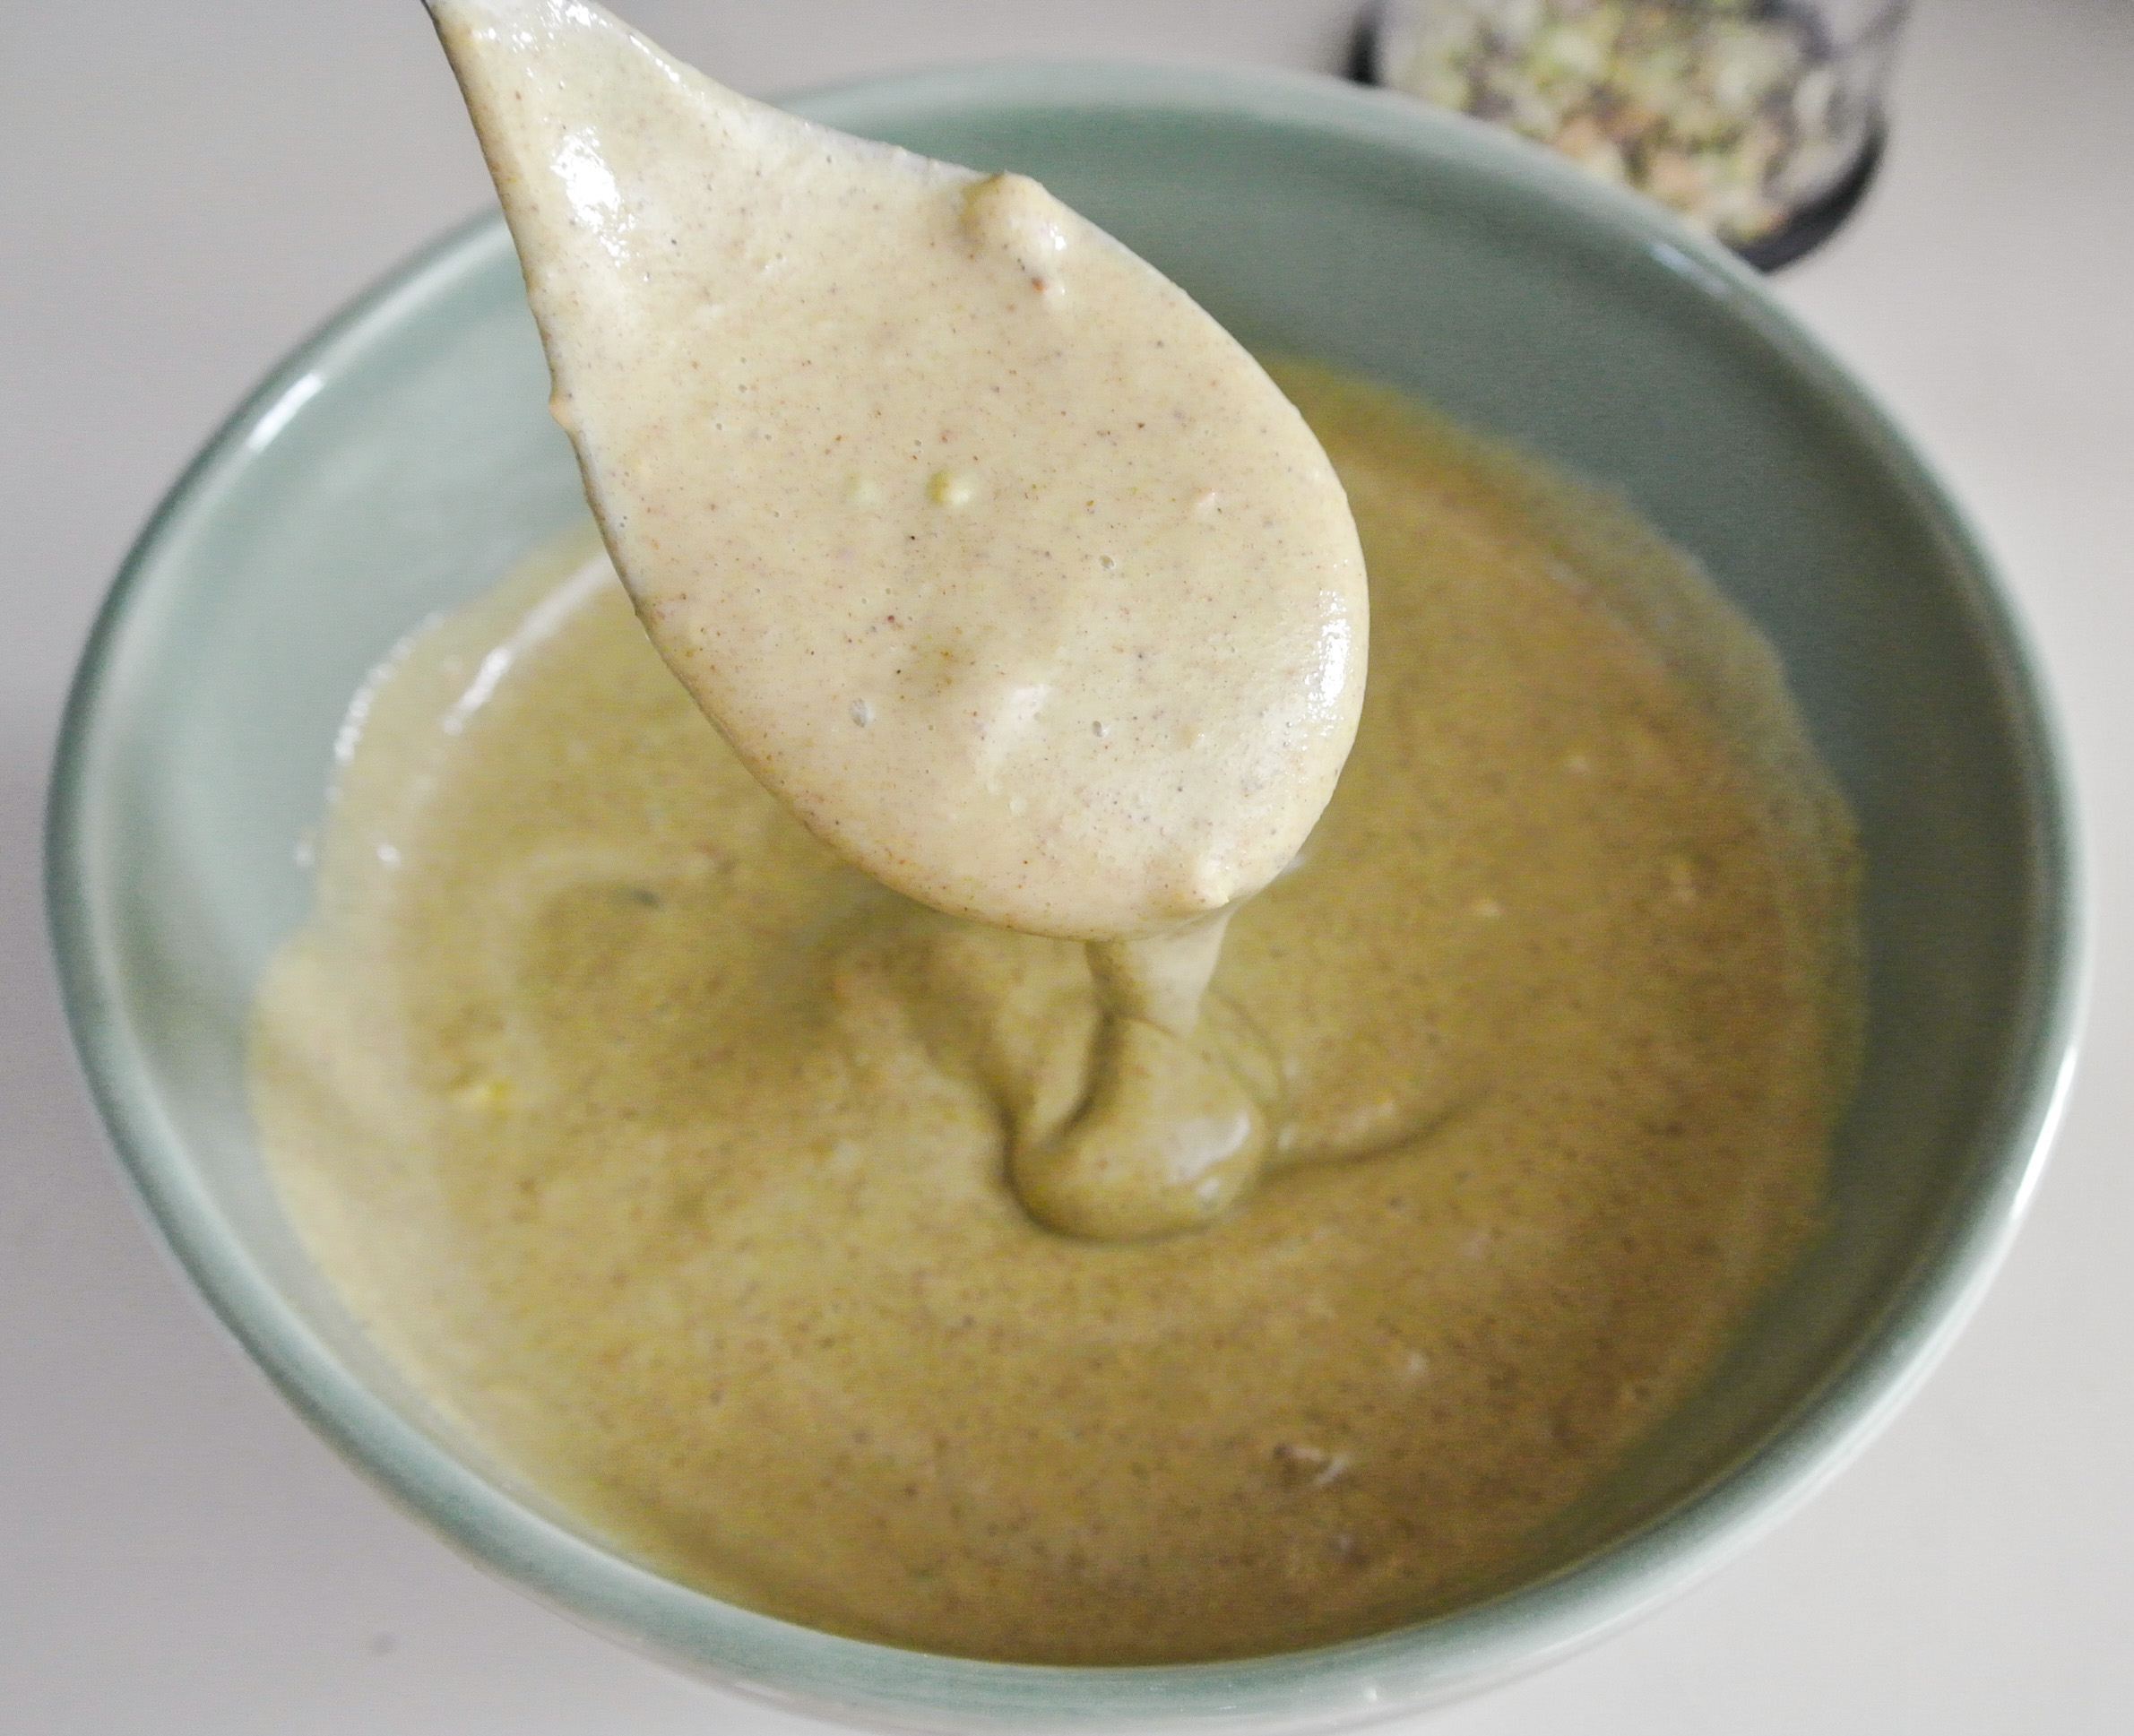
  • ½ cup seed or nut butter –> I’m using cashew cream (soak raw cashews overnight and blend with just enough water to form a thick cream).
  • 5 tbsps acid (citrus juice, vinegar, mustard, or a combination) –> I’m using half freshly squeezed lemon juice and half whole grain mustard.
  • Thinning liquid as needed (ideas: homemade veggie stock, water, or more acid) –> I’m not using any.
  • Up to 4 tbsps raw garlic and/or fresh/dried herbs and/or spices (optional) –> I’m using 2 ½ tbsps minced garlic and 1 tbsp dried dill.
  • 1-2 tsps sweetener (optional) –> I’m using 1 tsp agave syrup.
  • Pink Himalayan sea salt and pepper to taste –> I’m using ¼ tsp salt and no pepper.

Thoroughly wash your potatoes so that you can keep the skin on. Chop into bite size pieces and steam, boil, or roast (I’m boiling). While your potatoes are cooking, make your dressing. Cover and place in the fridge for the flavors to come together.

DSC_2309

When your potatoes are done cooking, drain (if necessary) and place in a glass bowl to chill in the fridge, at least to room temperature. While the potatoes are cooling, chop your veggies and crunch element, if using.  After the potatoes have cooled sufficiently, pour your dressing on top and stir gently to combine. Enjoy for several days (if you have any leftovers!).

DSC_2311 DSC_2314

We All Scream for Nice Cream!

So, I thought I was the only vegan/almost-vegan/vegetarian blogger obsessed with making dessert right now, but I have come to realize that with the heat of summer, I am not alone. I follow many plant-based dieters on social media and I see two popular desserts surfacing over and over again: cheesecake and ice cream.

Obviously, these traditional dessert names can be deceiving as there is no cheese in a vegan cheesecake and no cream in vegan ice cream, but you get the idea. Those in the plant-based world are finding healthy, natural, and creative ways to mimic the qualities we have come to love in dairy products. This is not to say that the flavors and the textures are exactly like those of the animal-based variety; they are, however, rich, decadent, just as a satisfying, and most importantly, much healthier.

Have a sweet tooth? Hot? Pregnant? Frustrated with pregnant partner? Bad day at work? Need a special treat for a party or group of kids? Love ice cream, but watching your figure? All of the above? It’s time to make vegan ice cream! I see vegan bloggers typically use two titles to describe their plant-based freezer creations: nice cream or nana ice cream. I’m going with nice cream because I am an English instructor by day and puns are the jam. 🙂

The second mock ice cream title does appeal to me, however, in its description of the ice cream base: bananas. That’s right: our nice cream gets its creamy consistency from frozen bananas. Good news is if you’ve mastered my dessert smoothie formula (this one is very similar), you’re ready to make nice cream! Less liquid + more chunky ingredients topped with chocolate sauce and whipped coconut cream will allow for more of a sundae experience, whereas the smoothie mimics a milkshake.

In order to be ready to make nice cream (or dessert smoothies) any time, I peel and chunk ripe or overripe bananas to keep in the freezer. I would highly recommend having a couple chilling at all times, but this is a great strategy if you have a few bananas that are on their way out and you don’t think you’ll eat them in time. (If I don’t pop overripe bananas in the freezer, I quickly whip them up into a batch of my super food muffins).

DSC_2289The banana is an amazing potassium-loaded, naturally sweet and creamy, and inexpensive fruit that has endless uses. Making a batch of nice cream will not only change the way that you view dessert, but it is so much easier to make that dairy-based ice cream, which often involves a machine and lots of waiting. As of late, when I want dessert, I want it now. 🙂

Today’s rendition features one of my favorite nuts: the pistachio. It’s amazing green color not only represents so much of what I stand for in life (plant-based living and the Michigan State Spartans, to name a couple!), but it signifies that pistachios are loaded with antioxidants. They are also a rich source of fiber, vitamin B6, copper, and manganese. Nuts are among my favorite super foods!

DSC_2288If you’ve got a blender or food processor and some bananas on hand, and you’re comfortable with my dessert smoothie formula, you’re ready to scream for nice cream. Here we go…

FORMULA BASE: NICE CREAM

Serves 3-4

  • 2 frozen bananas (or fresh bananas and ice)
  • ¾-1 cup specialty ingredients –> I’m using ¾ cup unsalted pistachio meats + ¼ tsp cinnamon.
  • ¼-½ tsp extract of choice (optional, and amount depends on flavor intensity) –> I’m using ¼ tsp almond.
  • Pitted medjool dates as needed for sweetness –> I’m using 2.
  • Juice or plant milk until desired consistency (start with just a splash) –> I’m using almond.
  • ¼ cup extras for mixing in by hand (optional) – think nuts, dried fruit, chocolate chips, etc. –> I’m using more unsalted pistachios, finely chopped.

If you plan to make whipped cream to accompany your nice cream, place a mixing bowl in the fridge to chill while you prepare the other components.Combine all ingredients (except the extras) in a blender or food processor and puree until smooth. Scoop the mixture into a bowl and fold in any extras you are using by hand. Cover and place in the freezer while you prepare your toppings (if any).  Your nice cream base will thicken in the freezer.

DSC_2290

Chocolate sauce*:

  • ½ cup plant milk –> I’m using almond.
  • 3-4 pitted mejool dates (depending on size) –> I’m using 4.
  • 1 tbsp unsweetened cocoa powder

*Chocolate not your thing? You could also make caramel or melt nut butter to top your nice cream. 🙂

Combine all ingredients in a blender. Pour into a sauce pan on the stovetop over medium high heat. Bring to a boil and then reduce the heat to medium low. Simmer for about five minutes until sauce has thickened slightly. Cool to a palatable temperature before serving.

DSC_2293

Leftovers? Store in a glass container in the fridge. Heat and add additional plant milk (if necessary) to thin out when using again.

Whipped coconut cream:

  • 1 can coconut cream or full fat coconut milk –> I’m using cream.
  • Powdered sweetener to taste (start with ¼ cup) –> I’m using ¼ + 1/8 cups powdered turbinado sugar.
  • ¼-½ tsp extract (depending on flavor intensity) (optional) –> I’m using ¼ tsp vanilla.
  • 1 pinch-¼ tsp spices (optional) –> I’m using a healthy pinch of cinnamon.

Chill your can of coconut cream/milk in the fridge overnight. After your nice cream is tucked away in the freezer and your sauce is cooling, remove your chilled mixing bowl from the fridge. Empty the can into the bowl and whip with a hand or stand mixer until smooth and creamy, about a minute. Add sweetener (and extract and spices, if using) and continue whipping until smooth and fluffy, about 3-5 minutes. This whipped cream will not quite achieve the height and stiffness of dairy whipped cream, but it will become a bit fluffy nonetheless. Store any extras in the fridge.

DSC_2295

Assemble your nice cream sundae and absolutely, enjoy!  Take it from Nolan:  “It’s so good!”

DSC_2300 DSC_2302

Salsa Verde with Semi-Homemade Chips

If you thought making my basic raw salsa was easy, you’ll appreciate the simplicity of my salsa verde, which uses nearly the same formula.  Although there is one extra step—cooking the tomatillos—one step is removed:  the fine dicing.  Salsa verde comes together with a food processor and requires only coarse chopping (we’re talking a few big pieces) of an onion.  And, just like my other salsa, this one is salt-free.  A win-win!

The basis of salsa verde is the tomatillo.  The tomatillo is a green vegetable that comes in a husk like corn (husk removed in the picture below), but resembles a tomato in appearance and interior texture.  It is loaded with vitamin C, fiber, and niacin and has a tart, somewhat bitter flavor.  The best way to describe a raw tomatillo is that it is hard and green when it is ripe, unlike traditional red, yellow, or orange tomatoes that are at this stage when they are just beginning to grow.  As a result of tomatillos’ tough outer texture, they are traditionally cooked in some way before becoming a salsa or sauce.

DSC_2268

As you know, I try to eat most of my fruits and vegetables raw, but I recently learned that tomatoes are one of the few vegetables (or fruits, technically) that are actually more nutritious in a cooked state.  In my research, I couldn’t find whether or not this applies to tomatillos as well—despite their resemblance, they aren’t tomatoes—but since I’m cooking them regardless, I’m just going to go with it and assume that I am reaping their maximum nutritional benefits!  (I am opting for simmering rather than roasting, which typically requires the addition of some oil, which you’ll see, I’m using plenty of below.)

The second component of today’s snack is the semi-homemade tortilla chips.  When they are offered with our weekly Bountiful Basket, Travis and I always pay a little extra for a variety pack of tortillas.  In addition to plain, the variety pack typically offers tortillas made with spinach, tomato and basil, and chipotle peppers, too.  We keep one flavor in the fridge for veggie wraps and the rest in the freezer.

Every once in a while, we don’t go through the fridge wraps before one or two start to get stale on the edges.  In the event that this occurs, not one to waste food and always innovating in the kitchen, I bust out our little deep fryer and turn the slowly hardening tortillas into semi-homemade chips.  Obviously, frying food isn’t its healthiest preparation option, but the occasional batch of prepared-at-home tortilla chips is a nice alternative to the store-bought dippers that are high in sodium and oftentimes fried as well.  (When I do buy store bought, you know I love Simply Balanced organic blue corn tortilla chips with flaxseed!)

I figure that if I’m going to eat something fried, I’d like to control the quality.  Travis and I use peanut oil, which is among the oils tolerant to high cooking temperatures.  I finish them with a light dusting of pink Himalayan sea salt.  One large tortilla makes ten to fifteen chips, depending on how you cut it.

You can, of course, buy chips for dipping or use your salsa verde in a number of other applications.  Layer it in a cheaper-than-but-inspired-by-Chipotle burrito bowl, marinate tofu or mushrooms for tacos or lettuce wraps, or thin it out for a quick and healthy salad dressing.  Salsa verde is delicious, nutritious, and versatile.  Enjoy!

FORMULA BASE:  SALSA VERDE

  • 1 ½-2* pounds whole husked tomatillos
  • ½ of a medium onion –>  I’m using yellow.
  • 1 large whole clove of garlic, peeled
  • ½ cup fresh herbs  –>  I’m using cilantro.
  • ¼ cup acid (vinegar or citrus juice**)  –>  I’m using lime juice.
  • Seasoning to taste

*Use fewer tomatillos if you would like to add extras like jalapeños or other peppers, or even fruit.

**Whenever possible, juice whole citrus fruits yourself. 🙂

Place your whole tomatillos in a deep sauté pan and cover with water to the best of your ability.  The tomatillos will bob and float a bit.  Bring the water to a boil and then turn down to medium high heat.  Simmer the tomatillos for 10 minutes, flipping over halfway through.

DSC_2269

Coarsely chunk your onion and any other vegetables (optional) that you’re adding to your salsa.  Place all ingredients–including the soft, whole, cooked tomatillos–into a food processor and pulse or puree until desired consistency is achieved.  Chill before serving and store in the fridge for a few days.

DSC_2280 DSC_2282

To make your own semi-homemade chips:

Preheat oil according to deep fryer directions or on the stove top in a sauté pan (about a 1 ½-in depth) over medium high heat.  Using a serrated knife, cut a soft tortilla(s) into triangles or the shape of your choice.

DSC_2275

Line a mixing or serving bowl with paper towel.  When the oil is to temperature, drop the tortilla triangles in in batches, ensuring that the cooking vessel isn’t crowded with overlapping chips.  Fry for 10-20 seconds on each side or until the edges start to lightly brown.  Empty into the mixing bowl and lightly dust with pink Himalayan sea salt, if you wish.  Repeat until all triangles are fried.  Let cool and enjoy with your salsa verde, raw salsa, or another dip (see my hummus or pesto for ideas).

DSC_2277

Two of My Favorite Things

Plant-based eating is about creating food that is as simple as possible, relying on the natural flavors of plants to trump the need for too much added fat, salt, or sugar. Today, I wanted to share with you a couple of vegan delights that I not only love, but that are healthy, too.

Let’s start with the gorgeous truffles you see pictured above and below. PuraTea Water is a fair trade tea shop strategically placed next to a vegan restaurant. (Remember my post about Sage Kitchen and its connected tea shop? Perhaps this is a trend?) As the name suggests, PT sells many varieties of tea and fresh herbs. One of the co-owners makes these truffles as a special treat, sitting at checkout.

DSC_2263

My husband knows the way to my heart and picked up a bunch of these precious goodies while out shopping with our son. The best part? These “desserts” are guilt-free powerhouses of nutrition! Animal product-based truffles are, of course, wonderfully delicious (see my cherry cordial smoothie post), but most are nothing to write home about in the way of nutritional content. The homemade truffles at PT contain such super foods as dates, seeds, cocoa powder, and nuts. They are minimally sweetened with agave and taste very similar to my protein-packed power balls. I ate them for breakfast this morning paired with PT’s iced apple spiced chai. 🙂  Yum!

Upon leaving the tea house, Travis and Nolan wandered into Loving Hut, a vegan chain with over 200 locations around the world. LH’s ethical and environmental stance on plant-based eating makes them a winner in my book. Plus, even though there are some processed items on the menu (gotta watch out – not all vegan food is created equally) there are some fantastic fresh eats, too.

These spring rolls are one of my favorite vegan takeout items ever. Fresh vegetables and tofu are rolled in rice paper and served with a sweet and savory peanut dipping sauce. As I always have my Fresh Formula thinking cap on, I would include unbreaded tofu since the moisture in the surrounding vegetables negates the purpose of a crunchy outer coating. Really, though, I shouldn’t complain…these are vegan bites at their nearly best and I could seriously eat them every day!

DSC_2267

Travis and Nolan coming home with two of my favorite things last night (plus having flowers delivered to the house during the afternoon, if you must know!) was pretty fantastic, but there was extra icing on this cake:  The sweet folks at PT were excited about my blog!  I started The Fresh Formula to help ordinary people like me live healthier lives, so the more people I can reach, the better.  Look forward to seeing what the future holds.  Go green!

DSC_2265

Cherry Cordial Dessert Smoothie

As mentioned a few times now (ok, maybe a lot of times!), I am craving sweets in this second pregnancy.  I’m happy to report that I’m now twenty-two weeks along, the baby is healthy, and I’m getting all the sweets I want, the Fresh Formula way.  (Don’t worry, I’m still eating a boat load of veggies, whole grains, beans, and nuts, too.)

If you’ve been tuning in recently, you’ve seen my peanut butter and jelly smoothie, homemade jam formula, and an epic cherry pie, all working together to satisfy my sweet tooth with little to no added sweetener.  Today’s cherry cordial dessert smoothie incorporates elements of one of my favorite candies, the abundance of cherries I am still consuming from my latest Bountiful Basket victory, and a whole bunch of nutritious deliciousness that will leave me satisfied and guilt-free.

Traditionally, the cherry cordial is a cherry and sweet syrup inside of a dark chocolate shell.  If you’ve never had one, at some point, splurge and please do.  They are so so so decadently yummy!  Could I sit down and eat the better part of a box right now?  You bet…but I won’t.  With my latest dessert smoothie concoction (the first being my chocolate peanut butter version), I get all there is to love about the classic cherry cordial without the added sugar.

With babies on the brain, I’m also thinking about two-year-old Nolan when I come up with one of these recipes.  I totally let Nolan dig in to a traditional dessert on occasion—the boy hasn’t met an ice cream he didn’t like—but by “on occasion” I mean I can literally count on less than two hands the number of times he’s eaten a dessert with animal products in it.  Because he rarely sees or consumes something like ice cream, he knows it’s a special treat and honestly, would be even happier with one of my dessert smoothies any day.  In our house, he doesn’t beg for ice cream, hot dogs, and chicken nuggets; he wakes up shouting “Chocolate smoothie!” instead.  🙂

Even these dessert smoothies are a “special treat” compared to the super food smoothies we make regularly.  As much as a two-year-old can, Nolan has developed quite the sophisticated palate and definitely knows the difference between routine healthy eating and special treats, like this one, that are often super healthy, too, especially when compared with other varieties.  I mean, look at the ingredients:

DSC_2254

The point is, this is “dessert” I feel excited about feeding my toddler and unborn child, so it’s definitely a-ok for me, Travis, and you, too.  Enjoy!

FORMULA BASE:  DESSERT SMOOTHIE

Serves 2-3

  • 2 frozen bananas (or fresh bananas and ice)
  • ½-1 cup specialty ingredients –> I’m using ¾ cup pitted sweet red cherries* and ¼ cup unsweetened cocoa powder.
  • 1 tbsp chia seeds
  • 1 tbsp ground flax seeds
  • 1 tbsp hulled hemp seeds
  • ¼-½ tsp extract of choice (optional, and amount depends on flavor intensity) –> I’m using ¼ tsp almond.
  • Pitted medjool dates as needed for sweetness –> I’m using 3.
  • Juice or plant milk until desired consistency (start with 4 oz) –> I’m using the minimum in almond.

*After I made this, Travis said he wanted more cherries.  Can’t go wrong with that.  Make it a full cup if you really like ’em!

Place all ingredients in a blender and puree until smooth, adjusting specialty ingredients as necessary.

DSC_2259

‘Tis the Season for Cherries

‘TIS THE SEASON FOR CHERRIES

While I’m not enjoying Phoenix’s 100 degree+ summer temperatures, I am loving that some of my favorite fruits are in season:  berries, stone fruits, melons, and cherries.  I’ve capitalized on numerous opportunities to stock up on these for cheap through our Bountiful Basket co-op.  This past weekend, I scored eighteen pounds of cherries for $1.59/pound – a smokin’ deal!

While I will surely eat most of these in salads, snacks, and breakfasts, I know I won’t get to all of them before they spoil, so I need to get creative.  I’m making a good portion of the cherries into jam (see my jam formula), am dehydrating a bunch to chop and add to my granola, and today, have even attempted a totally vegan cherry pie.  As with all of my formulas, this pie is lower in fat, sodium, and sugar than many (if not most) typical animal-product versions and of course, cholesterol-free.

What I came to discover in researching making a pie from scratch is that there are actually very few ingredients involved.  Of course, the fruit is the star and the crust is a close second.  I prefer to consume fruit raw and for the most part, under-ripe; in other words, I prefer fruit rock hard and crunchy.  So, the fruit preparation in pie kind of goes against how I prefer to eat it, thus making a crisp crust essential to balance out what to me, is “mushy” fruit.

Pie crust needs something to make it rich and dense.  In an ordinary pie, this is usually butter or some other form of fat.  My crust incorporates a little fat—from coconut oil—but achieves the bulk of its density from the garnet yam.  What?!  In my pie crust research, I came across a vegan blogger who uses banana in lieu of most of the typical fat.  In creating my formula, I thought that I would do the same, but didn’t have any ripe bananas on hand (for like the first time ever in my life!).  True to my Fresh Formula concept, I got creative and decided to substitute a garnet yam I had sitting on the counter.

As I explained while introducing you to my curry formula, yams are not sweet potatoes.  Although similar in taste and texture, sweet potatoes—often pale yellow inside—boast greater nutritional benefits, not that the yam is a poor choice whatsoever!  Many people use what they think are sweet potatoes in Thanksgiving dishes because of the appealing bright orange color.  With that said, beyond an attractive appearance, yams are also loaded with fiber, protein, and vitamins A and C.

DSC_2222I’m proud to have developed a formula that combines the flavors and textures I love while packing a ton of nutrients.  Cherries, in particular, have a number of amazing health benefits.  The most significant reason to chow down on cherries, in my opinion, is that they can help boost your melatonin production, thus resulting in better sleep.  Now five months pregnant with a babe that is constantly on the move and a bladder that has been squished to what seems like the size of a thimble, sleep is becoming more difficult; cherry season couldn’t have come at a better time!

DSC_2224Take this pie to your next summer barbeque and see if anyone even notices that it’s vegan.  🙂  Depending on how many cherries you have on hand, you can also make multiple pies and freeze them for when cherry season has long passed.  Enjoy!

FORMULA BASE:  FRUIT PIE

Makes 1 pie

For the crust:

  • 2 cups flour (+ ½ cup for dusting your work surface)  –>  I’m using whole wheat.
  • 1 cup mashed fruit or vegetable (e.g. banana, potato, applesauce, etc.)  –>  I’m using garnet yam, peeled and boiled.
  • ¼ cup chilled oil (+ 1 tbsp for greasing the pie plate)  –>  I’m using coconut.
  • ¼ ice cold water (literally, float ice in it while you’re prepping other ingredients)
  • 1 tbsp sweetener (+ 1 tbsp for topping the crust once the pie is assembled) –>  I’m using 100% pure maple syrup.
  • ½ tsp pink Himalayan sea salt
  • 1 tsp spices (optional)  –>  I’m using ½ tsp cinnamon, ¼ tsp nutmeg, and ¼ tsp cardamom.
  • 1 tbsp unsweetened plant milk  –>  I’m using hazelnut.

If necessary, peel and steam or boil your fruit/vegetable of choice and cool completely in the fridge or freezer.  Place this fruit/vegetable in your food processor first to puree.  Next, add all remaining ingredients except the water and plant milk.  Start the food processor and stream in the cold water (sans ice) from the top as the ingredients come together.  You should end up with a semi-sticky dough (similar to that of my bread formula).

DSC_2225Sprinkle ¼ cup of the remaining flour onto your preferred work surface.  Empty the dough onto the surface and knead with your hands just until the flour is incorporated and the dough is less sticky.  Place in a bowl, cover, and chill for at least 30 minutes.  Pit cherries while you’re waiting or complete any necessary fruit prep (i.e. peeling and steaming, etc.).

DSC_2229For the filling:

  • 4 cups raw cherries, berries, or another peeled and chopped fruit (e.g. apples, pears, peaches, etc.)  –>  I’m using sweet red cherries.
  • ½ cup sweetener  –>  I’m using turbinado sugar.
  • ¼ cup cornstarch or arrow root  –>  I’m using cornstarch.
  • ½-1 tsp extract (depending on flavor intensity)  –>  I’m using ½ tsp almond.
  • Pinch of pink Himalayan sea salt

If you’re using them, pit your cherries.  This is a long process!  While your dough is chilling, pop down in front of the TV with your cherries and get pittin’!

By the time you’re done preparing those cherries, it’ll be time to preheat your oven to 400 degrees.  Retrieve your chilled dough and separate into two balls:  one is approximately 2/3 of the dough and the other 1/3.  Use remaining flour to dust your work surface and roll out the larger ball.  It should be approximately an 1/8 of an inch thick and in as much of a circle shape as possible – perfection isn’t necessary.

DSC_2230

Grease your pie plate.  Carefully lift your smooth, flat circle into your pie plate and press down to coat the entire inside of the plate.  Make sure that this is as even in coverage and thickness as possible.  Again, perfection isn’t necessary.  Pinch the edges of the dough (if that’s your thing!) and mix up your glaze (plant milk + remaining sweetener from crust formula above).  Use a kitchen brush to glaze your crust and poke holes in the bottom to vent.  Set aside remaining glaze.

DSC_2231Pre-bake the crust—without the filling—for 10 minutes.  During baking time, roll out the smaller dough ball to the same thickness as the base and cut into your shape of choice.  Want to keep things simple?  Make a nice, smooth circle that you can use to cover the filling completely (slice vents on top).  If you’re feeling adventurous, use a pizza cutter to create strips for a traditional lattice pattern, or use a sharp knife to cut out other shapes.

DSC_2234Once the bottom crust is out of the oven, reduce the temperature to 350 degrees.  Combine all filling ingredients and pour into the pre-baked crust.  Gently top your filling with the remaining dough, pinching the edges to connect it with the bottom crust.  Glaze the top crust and vent if necessary.

DSC_2236 DSC_2239Place the pie back into the oven for 40-50 minutes or until the filling is bubbling and the top crust is golden brown and crisp.  Let cool before serving.

NOTE:  The edges of the crust on my pie are a little overdone.  🙂  Travis said that next time I can prevent this by covering just the circumference of the pie with foil.  Just a tip!

DSC_2244 DSC_2251

Veggie Burgers and Bites

Nearly since he started eating solid food, veggie burgers and bites have been a go-to of mine for getting Nolan to eat vegetables.  Hidden amongst other amazing plants—beans, lentils, grains, and seeds—he has never questioned one of my veggie-packed creations.

DSC_2216

Besides being amazing baby, toddler, and kid food, veggie burgers are delicious and nutritious for everyone.  I’ll admit, I very occasionally miss meat, but I rarely miss meat-based burgers.  To be honest, I feel kind of nauseous thinking about the fat and grease oozing out and soaking the bun (you know how I feel about soggy bread, ya’ll!).  I’ve been making my veggie burgers for my family and friends for years now without complaints…no one even asks for ketchup!

Naturally, the star of a veggie burger is the vegetables.  I finely chop or shred my vegetable(s) of choice and don’t typically precook it as it will cook just enough while baking in the oven.

The other powerhouse in these burgers are whole grains, which I use in many of my formulas, from my curry to multi-grain salad.  The grain of the day for this rendition is kaniwa.  I’m new to kaniwa and thought I would give it a try when I noticed it on sale in bulk next to the quinoa.  A smaller grain that is more like a seed, kaniwa is similar in taste and texture to quinoa.  It contains high levels of flavonoids and makes for an excellent gluten-free substitute that contains B vitamins and other nutrients coveted in whole-grain wheat.  Like many other grains, it is also packed with protein and fiber.

DSC_2203Speaking of protein, I have found that beans or lentils are an excellent “glue” (along with an “egg”) for veggie burgers and bites.  Since I don’t use a chicken egg and breadcrumb combo typical of meat patties and balls, I needed something else to bring the other ingredients together.  I puree my beans or lentils like a hummus before combining them with vegetables, grains, seeds, and spices.

One of my favorite things about this formula is that the burgers can be assembled quickly if you have precooked grains, beans, and lentils on hand.  I often, for instance, cook up a big pot of quinoa when I’m making my super food breakfast muffins knowing that I’ll use the extra quinoa in another dish later on.  Try and plan ahead when you can.

While I typically shape my veggie burger dough into patties or “meat” balls, you could certainly experiment with other shapes if you’re using this formula for entertaining as an appetizer or to entice a picky little eater.  Additionally, the flavor combinations are endless; this formula was born from black beans and quinoa with onions, corn, and bell peppers and today, will be a chickpeas and carrots with onions, garlic, and cumin.  Experiment and enjoy!

FORMULA BASE:  VEGGIE BURGERS

Yields 6 patties (or a varying number of bites)

  • 2 cups finely chopped or shredded raw vegetables  –>  I’m using ¼ of a small yellow onion and 1 ½ cups of shredded carrots.
  • 1 cup cooked whole grains  –>  I’m using kaniwa, cooked in homemade veggie stock.
  • 2 cups cooked beans or lentils  –>  I’m using canned, sodium-free chickpeas.  (Remember, cooking dried beans is ALWAYS healthier, but for some reason, those do not agree with my system.)
  • ¼ cup+ liquid for pureeing beans/lentils (i.e. homemade veggie stock, citrus juice, water, unsweetened and unflavored plant milk, oil, etc.)  –>  I’m using lime juice and a splash of extra virgin olive oil.
  • 1 “egg” (1 tbsp chia or flax seeds + 3 tbsps hot water)  –>  I’m using chia.
  • 2-4 cloves raw garlic  –>  I’m using 3.
  • 2 tsps herbs and spices –>  I’m using 1 tsp cumin, ½ tsp turmeric*, and ½ tsp paprika.
  • Pink Himalayan sea salt and fresh ground pepper to taste  –>  I’m using ½ tsp salt and three grinds pepper.

*What’s this?  See my super food smoothie formula.  🙂

If you need to, cook your grains, beans, and/or lentils first.  Once they are finished, preheat your oven to 350 degrees.  Puree the cooked beans/lentils with the garlic until smooth.  Finely chop or shred your vegetables (peel first if necessary) and use a wooden spoon to combine all ingredients except the egg.

DSC_2205

Massage the egg in with your hands.  A thick dough will form.  It should be sticky enough that all ingredients remain together, but not so sticky that your hands are pulling it apart in trying to form shapes.

Lightly grease a baking sheet and assemble patties and/or bites.

DSC_2207 DSC_2210

Cook times will vary depending on shape and thickness.  It takes me, for example, typically about 40-45 minutes for patties or shapes of comparable thickness, flipping halfway through.  Set a timer for twenty minutes to start, check back often, and flip as necessary until your burgers or bites are of a cooked and palatable consistency.

These burgers are so dense and filling that I eat them bun-less, but you can certainly serve them with your bread of choice.  Top with my creamy salad dressing, pesto, or hummus and fresh vegetables.  Travis particularly loves these with my low-sodium pickles on top.  🙂  If you’re serving bites, use one of these sauces as a flavorful dipper and spear with toothpicks.

DSC_2214

15-Minute Waffles

Breakfast for dinner, anyone?  Or, breakfast for breakfast, lunch, or snack?  Any time of day, you can make these waffles in fifteen minutes…or less!  You can also use this formula for pancakes, but those will take a little longer.  🙂

My first pregnancy, I wanted all things savory; this pregnancy, it’s all about the sweet.  Logically, I know that I can’t have dessert for dinner (at least not all the time…), so I’ve had to get my sweet fix in ways that are healthier and still, unfortunately, limited.  High blood sugar = problematic pregnancy.

Last night, I decided on waffles.  My formula includes no sweetener added to the batter itself and I top them with pure maple syrup.  This rich, gooey breakfast essential is packed with antioxidants, manganese, zinc, and calcium.  In addition, for the tree huggers out there (pun intended), harvesting maple syrup does not harm the tree or negatively impact its natural lifespan.  I love this brand of pure maple syrup, which is organic and GMO-free.

DSC_2194

Tonight’s waffles will be of the lemon poppy seed variety.  Poppy seeds are loaded with fiber and are good sources of calcium and copper.  They are easy to add to smoothies, salad dressings, and baked goods.  I often bake bread with poppy seeds and throw them into muffins and other breakfast items, too.

DSC_2179I’m also including rolled oats (see my granola formula) and cornmeal in my batter for a variation in texture.  Cornmeal is an excellent source of protein and fiber and also contains substantial quantities of iron, zinc, and niacin.  Too much cornmeal will leave your waffles/pancakes tasting gritty, but I always add a little to the batter.  I also dust the bottom of my pizza crust to add texture and prevent sticking.  And of course, I use it in making cornbread (another post, another day).

DSC_2178Who said a quick breakfast (or lunch, dinner, or snack!) can’t be delicious, flavorful, and special?  I eat more raw plants than anything else—the ultimate fast food—but like many people, believe that variety is the spice of life!  Believe it or not, I can make these waffles in less time than it takes me to peel and chop my favorite fruits and veggies for a salad.  They are a guilt-free, healthy alternative to my typical diet.

Additionally, this formula would be easy to double, triple, etc. for a big crowd.  If you have some helping hands in the kitchen, you could feed a crowd in no time.  Enjoy!

FORMULA BASE:  WAFFLES (OR PANCAKES)

Makes 5 large waffles

  • 1 cup flour  –>  I’m using whole wheat.
  • ½ cup textured grain (i.e. quinoa, oats, cornmeal, etc.)*  –>  I’m using ¼ cup rolled oats and ¼ cup cornmeal.
  • 1 ¼ cups unsweetened plant milk**  –>  I’m using almond.
  • 2 tbsps flax or chia seeds  –>  I’m using flax.
  • 2 tbsps oil  (just 1 tbsp for pancakes) –>  I’m using coconut.
  • 1 tsp baking powder
  • ½ tsp baking soda
  • 1-2 tbsps citrus juice  –>  I’m using the juice of 1 small lemon (approximately 2 tbsps).  This ingredient adds brightness, but won’t really add flavor unless you use the full amount and the zest.  I want to taste the lemon, so I’m using the juice and zest of the whole fruit.
  • EXTRAS (optional):  raw seeds, nuts, fruit***, etc.  –>  I’m using ½ tsp poppy seeds.

*Don’t want to alter the texture?  Just use extra flour.  🙂

**Since pancakes take longer to make, you will want to keep extra milk nearby to thin the batter as necessary throughout cooking.

***I find that putting fruit into the batter causes a lot of sticking in my waffle maker; I use fruit to top waffles instead, but would put it directly into the batter to make pancakes.

Preheat your waffle iron.  If you are zesting citrus, be sure not to go past the top layer.  The white pith underneath is bitter.

DSC_2186

Combine all ingredients with a whisk.

DSC_2187

Prepare waffles according to iron directions.  Place on a cooling rack to prevent sogginess on the bottom of the waffles if they won’t all be consumed immediately.

DSC_2195

Top with fresh fruit, raw nuts or seeds, maple syrup, etc.  Leftovers keep well in the fridge, but will likely lose their crispiness.

DSC_2197

The Pomegranate Cafe

Today, I’m sharing with you my review of a vegetarian/vegan restaurant called The Pomegranate Café here in Ahwatukee, Arizona.  In a part of the country known primarily for its authentic Mexican cuisine (which I also love), it isn’t always easy to find healthy eats that cater to our plant-based lifestyle.  When I have the chance to try something new here in the valley, I really relish the opportunity to eat high-quality food that will ultimately inspire me in my own kitchen.

TPC, a mother/daughter created concept, is located in a bustling strip center in the east valley of Phoenix.  It is a charming establishment—as I’m finding many vegetarian/vegan restaurants are—with reclaimed wood tables, mason jar lights, fresh flower centerpieces, and images of plants displayed on the walls.  I could hear Bad Religion playing in the kitchen and the young people on staff appeared to really embrace the way of life that comes with plant-based eating.

The menu at TPC is lengthy and diverse.  I really appreciate choices, especially when it comes to plants.  I was happy to see that they indicated when an item was raw (not cooked above 118 degrees) and even when an item’s proceeds went to charity.  While just about everything looked absolutely delicious, after watching a powerful documentary called An Apology to Elephants, I couldn’t resist the opportunity to play a small role in helping the elephants in need; I ordered the Elephant Bowl Curry.

The curry was a little spicy for me, but I’ve admitted before to being a total wimp.  🙂  This rendition had a variety of vegetables and sat atop one of my favorite super foods, quinoa.  It wasn’t much unlike my own curry formula.

FullSizeRenderTravis ordered a Macro Bowl, which I don’t see here on their online menu.  It was also fantastic and a harmonious pairing between raw and cooked elements, from tofu to black beans to kale to seaweed.  It came with a zesty lime macadamia pesto that reminded me of my pesto formula; I now have a new combo idea!

IMG_5061

In case you were wondering, Nolan had an almond butter sandwich on whole grain brain with fresh fruit and a vegan cookie.  Once we saw his cookie, Travis and I knew we needed dessert for ourselves.  All of the pastries at TPC are vegan, but don’t taste like it.  Rich, sweet, buttery, and filling, I needed to take the rest of my “cheesecake” home.  That’s a raspberry vanilla slice below, along with Travis’s selection, a play on an Almond Joy candy bar.  Both were, in a word, impressive.

IMG_5064

IMG_5065

What was not so impressive, however, was the service.  While the staff was friendly and knowledgeable, they were inattentive to detail, bringing our dinners out at three different times (Nolan, me, then Travis) and messing up simple orders (green tea instead of mint, Almond Joy instead of Snickers).  Being that we were one of three tables occupied on the 4th of July, I wouldn’t have expected it too much of a challenge.  You win some, you lose some; I’d come back for the food any day.

TPC:  Take out rather than dine in, but definitely try it.  Double check the bag and enjoy eating green.

IMG_5062

My First Fresh Formula Request: Lettuce Wraps

WARNING:  There will not be leftovers.  🙂

These lettuce wraps—really made amazing by the marinade I developed—are hands down, one of the best dishes I’ve ever made, including the animal-based dishes of my past.  Lettuce wraps are easy, nutritious, and great for entertaining or just dinner.

I was so excited to receive my first reader request a couple of weeks ago.  An old friend of mine, who recently started experimenting in the kitchen, contacted me for a recipe for chicken lettuce wraps.  I told her that I would create a formula that allowed her sub in chicken if she wanted, but that my version, of course, would be vegan.

I’d like to start by describing some of the ingredients I’m using in today’s rendition.  For my wraps, I’m using butter lettuce.  The leaves make for perfectly cup-shaped vessels that can easily be folded up.  (An alternative would be using endive to make lettuce “boats.”)  Butter lettuce is low in calories (for those counting) and rich in vitamin A and phosphorous.

DSC_2161

Next up, mini-sweet peppers.  These are fantastic for snacking—you can dip them right into hummus or munch by themselves—and taste just like bell peppers.  They happen to be cheaper than bells at my grocer and I love the color variety for food presentation.  They are loaded with vitamins A, C, and E, as well as beta-carotene.  They are delicious and very palatable raw.

DSC_2162The “meat” of today’s lettuce wraps takes the form of mini-portobello mushrooms.  Like meat, these fungi are a source of protein, as well as an even richer source of copper, selenium, and vitamin B6.  They are also among one of the only natural sources of vitamin D, although in small amounts.  Portobello mushrooms are an ideal meat substitute for those still trying to kick the stuff.  (PS:  The large caps make for excellent burgers!  PPS:  That’s a crockpot of my three-bean chili in the background, which would also be delicious with mushrooms!)  You can certainly eat the stems, but I remove them and save them for homemade veggie stock.

DSC_2153

Finally, a word about green onions.  As I mentioned in my bean salad formula, you want to try and power through with consuming some raw onions in your plant-based diet.  They are great for skin elasticity and pack a lot of flavor.  The green onions you see here were purchased years ago.  I’m sorry…what?  YEARS ago?  That’s right.  We bought a bunch of green onions a couple of years ago and continue to regrow them.  You can place them in a cup like this in your window sill until they become large and then transfer them to a pot of dirt or garden.  Once they are even larger, harvest, consume, and continue the cycle.

DSC_2158

My absolute favorite part about this formula is that my lettuce wraps can be consumed completed raw or mostly raw.  As you know, most fruits and vegetables are at their optimal nutrition level in a raw state, so I try to cook as little as possible.  Mushrooms, in particular, do not need to be cooked, but should you consider another protein sources for these wraps, such as beans, there will be necessary cooking involved.

Today, I will be lightly cooking my portobello mushrooms just to reinforce their meaty texture and reduce the marinade.  Everything else will be raw.

Travis and I polished off the entire batch of these lettuce wraps in one sitting; I imagine you will do the same.  🙂  Enjoy!

FORMULA BASE:  LETTUCE WRAPS

Makes approximately 10 wraps/cups/boats

For the marinade/sauce:

  • ½ cup room temperature seed or nut butter (seeds/nuts only) –> I’m using peanut.
  • ¼ cup soy sauce or liquid amino acids* –> I’m using liquid amino acids.
  • ¼ cup acid (citrus juice, vinegar, mustard, etc.) –> I’m using ¼ cup rice wine vinegar + an additional tbsp of whole grain mustard.
  • ¼ cup liquid sweetener (agave syrup, maple syrup, etc.) –> I’m using light agave.
  • 1 clove minced raw garlic
  • 1 tbsp herbs and/or spices (optional) –> I’m using freshly grated ginger.
  • 2+ dashes of hot sauce (optional) –> I’m using the minimum. 🙂

*See my profile of Sage Kitchen’s walnut sausage recipe for an explanation.

For the filling:

  • 4-5 cups finely chopped protein (beans, lentils, mushrooms, tofu, tempeh, etc.) –> I’m using mini-portobello mushrooms.
  • 2 cups finely chopped raw vegetables –> I’m using about a 1/3 cup thinly sliced green onions and 1 ½ cups tri-color mini-sweet peppers.
  • ½ cup finely chopped “crunch” (raw seeds, nuts, etc.) –> I’m using unsalted blanched peanuts.

Make your marinade by mixing all ingredients with a small whisk.  Set aside.

DSC_2150

Precook your protein if necessary (beans/lentils).  Finely chop your protein and mix with approximately ½ of your marinade.  Cover and place in the fridge for an hour.

DSC_2155During the hour that your protein is marinating, prepare your wraps/cups/boats, vegetables, and crunch element.  When the hour is nearly up, heat a sauté pan over medium high heat, if you are planning to cook or heat your protein source.

DSC_2165If you are not cooking your protein, assemble your wraps according to taste preferences and add additional sauce if necessary.  If you are cooking your protein, sauté it over medium high heat just long enough to reduce/thicken the marinade.  Stir often to prevent sticking.

Let your protein cool for a few minutes in order to prevent wilting the lettuce.  Assemble wraps accordingly.  Save any leftover sauce to marinade other vegetables or use as a flavorful salad dressing.

DSC_2169 DSC_2175