New Learnings from Fed Up

DSC_2000

A couple of nights ago, Travis and I sat down to watch the documentary Fed Up, exploring the childhood obesity problem in the United States. Not a dietician, doctor, or chef, I love to continue to learn—especially about food, health, and nutrition—and this film did provide me with some new insight.

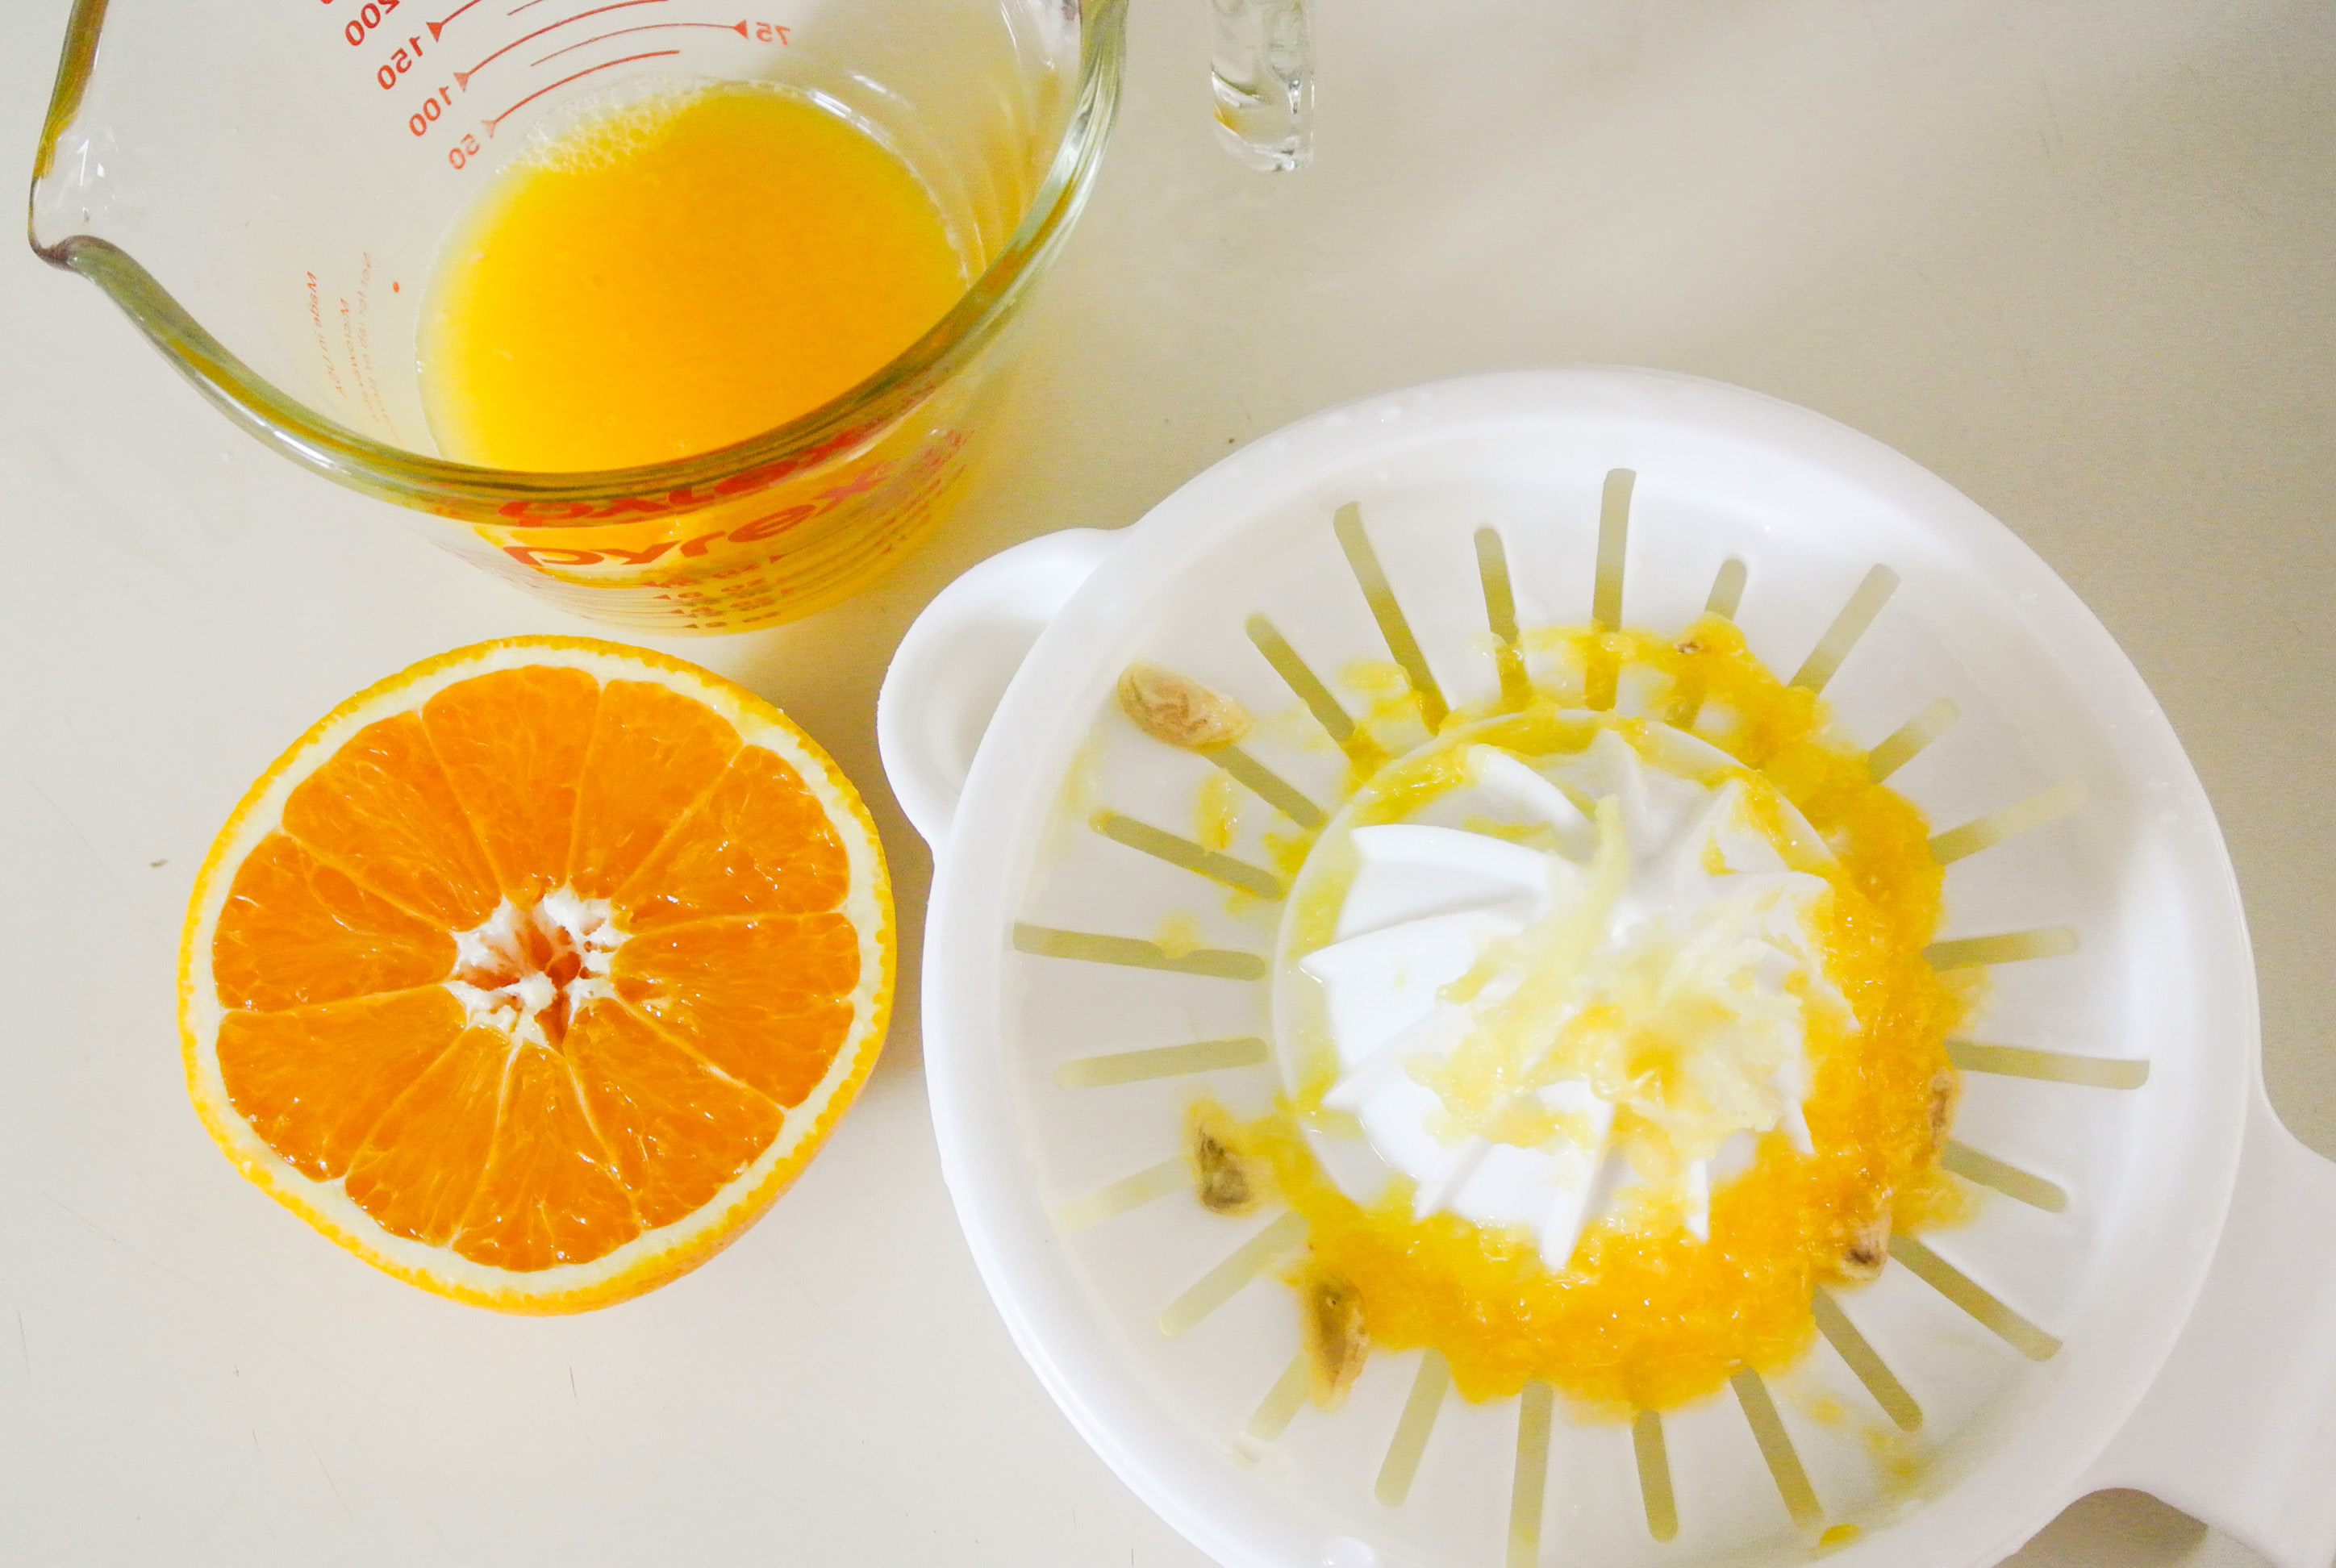
First of all, I learned that juice is not what it’s cut out to be. A couple of years ago, after watching a documentary entitled Fat, Sick and Nearly Dead, Travis and I were inspired to have more fruit and vegetable juice in our lives. In that documentary, an overweight gentlemen got his health in check with a juice-only diet. He bought a high-quality juicer and transformed his whole produce in seconds. He did lose weight and became a healthier person all around.

I remember thinking that I could never sustain myself on liquids only, but that I would try to make freshly squeezed juices a bigger part of my diet. Travis and I bought a juicer and started drinking juice (with an approximately 70%/30% ratio of vegetables to fruits) every morning with or for breakfast. I found that this practice helped me to feel more energized throughout the day and kept me regular, too. Until we obtained a high quality blender capable of pulverizing whole fruits and vegetables to a smooth consistency, we kept juicing. Our juicer has since been collecting dust for the past couple of years.

Despite our short period of success with juicing, I have always known that eating the whole fruit or vegetable is preferable, thus leading to the switch to smoothies. Why juice an apple when you can just eat one, skin and all, whole or in a smoothie? The skin and pulp of fruits and vegetables are where the fiber is contained and of course, fiber is nutritious and essential to a healthy diet.

DSC_2001

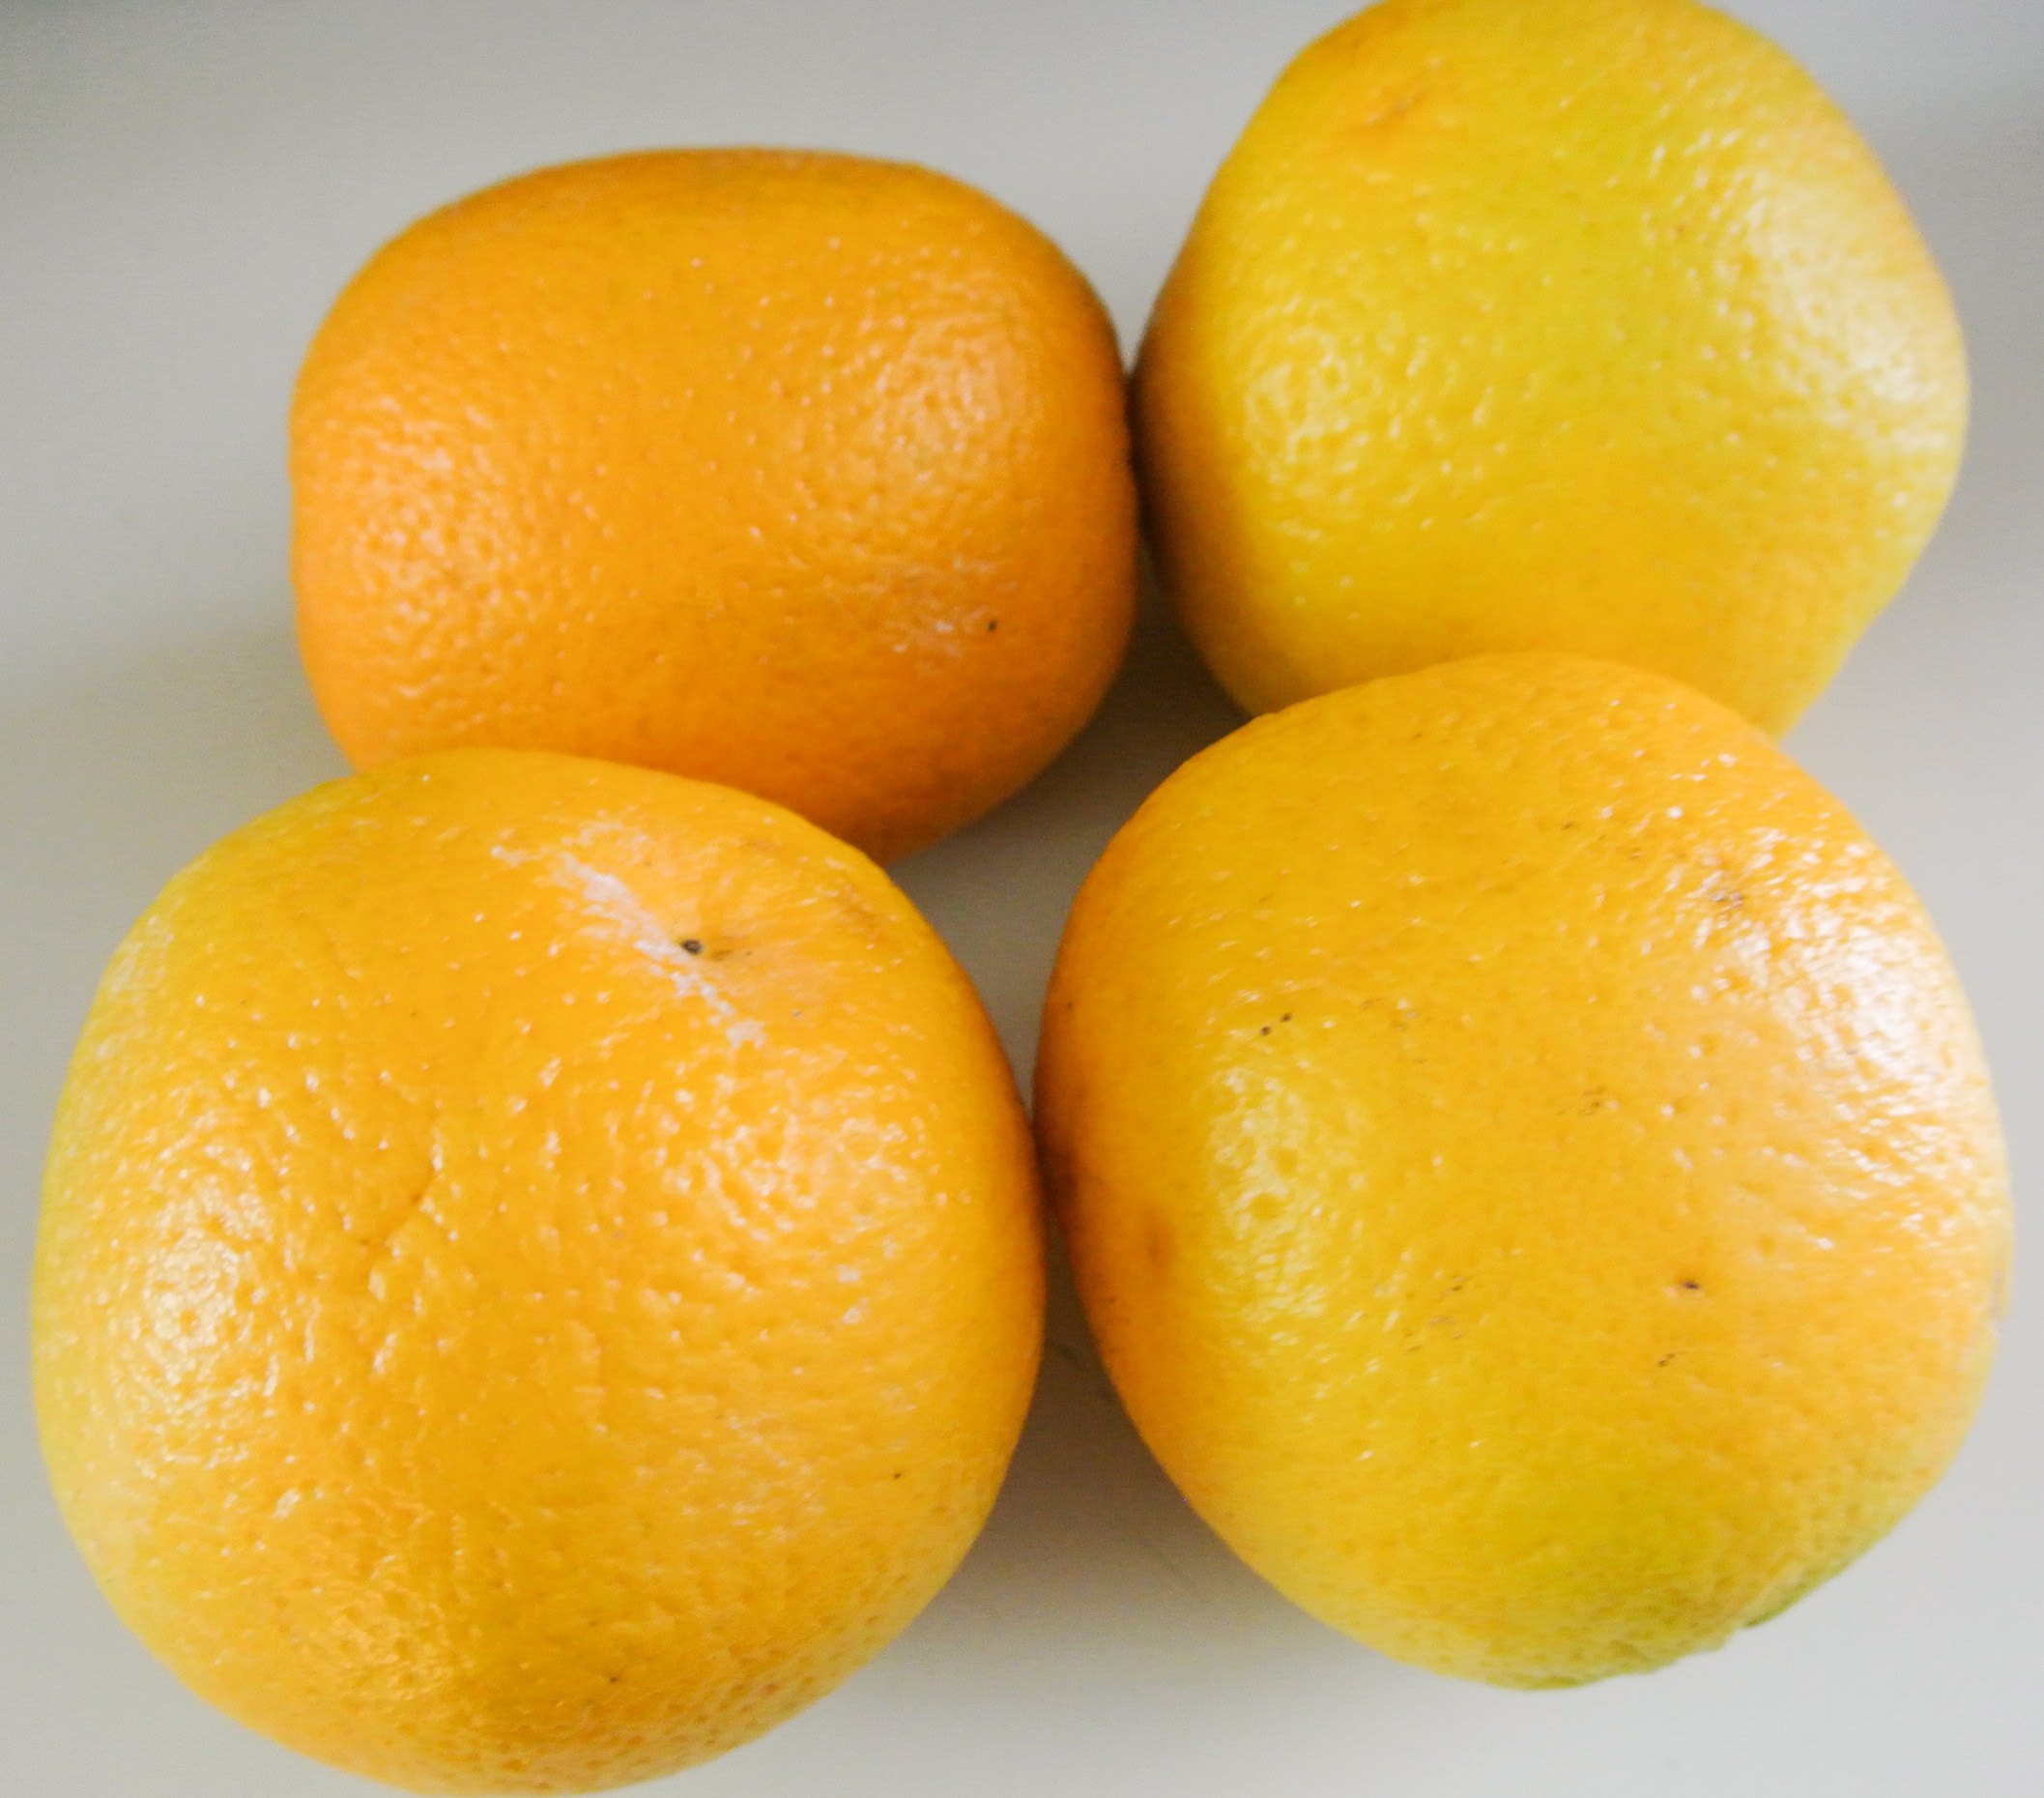
Even though I knew that whole foods were better, I didn’t really understand what the body did to process juice until I watched Fed Up. The example given was comparing eating an apple to drinking the equivalent in calories in soda. Because the apple contains fiber, it is processed much more slowly, preventing its sugars from turning into fat. Soda, containing no fiber, runs quickly through the digestive system and well, you know the rest.

After providing this example, the expert explained that our bodies process juice similarly to soda. Without the fiber from skin, flesh, and pulp, the sugar in juice is really no different than the sugar in soda, as far as how the body processes it. Now, if the juice contains skin, flesh, or pulp, you’re in a little better shape, but no matter what, it isn’t the same as consuming the whole food.

Nowadays, I sometimes use juice in smoothies, salad dressings, etc. While it goes through the body similarly to soda, it does still contain nutrients that soda never will. I figure if I were a regular, everyday juice drinker, then I’d have a habit to worry about.

This lesson, illustrated with fruit vs. soda, also made me realize why counting calories is a flawed system. I have never counted calories and don’t plan to start, but I have many friends that do/did. It is clear that 160 calories in apples and 160 calories in soda are not the same calories at all. It isn’t enough to decide to eat only 1,500 calories a day without conscious thought about where those calories are coming from. If you eat 1,500 calories of just soda, rather than 1,500 calories of fruits and vegetables, the body won’t use them in the same way. I have heard too many times things like, “I have 500 calories left for today, so I can eat that piece of cheesecake!” We all know where that cheesecake will end up…

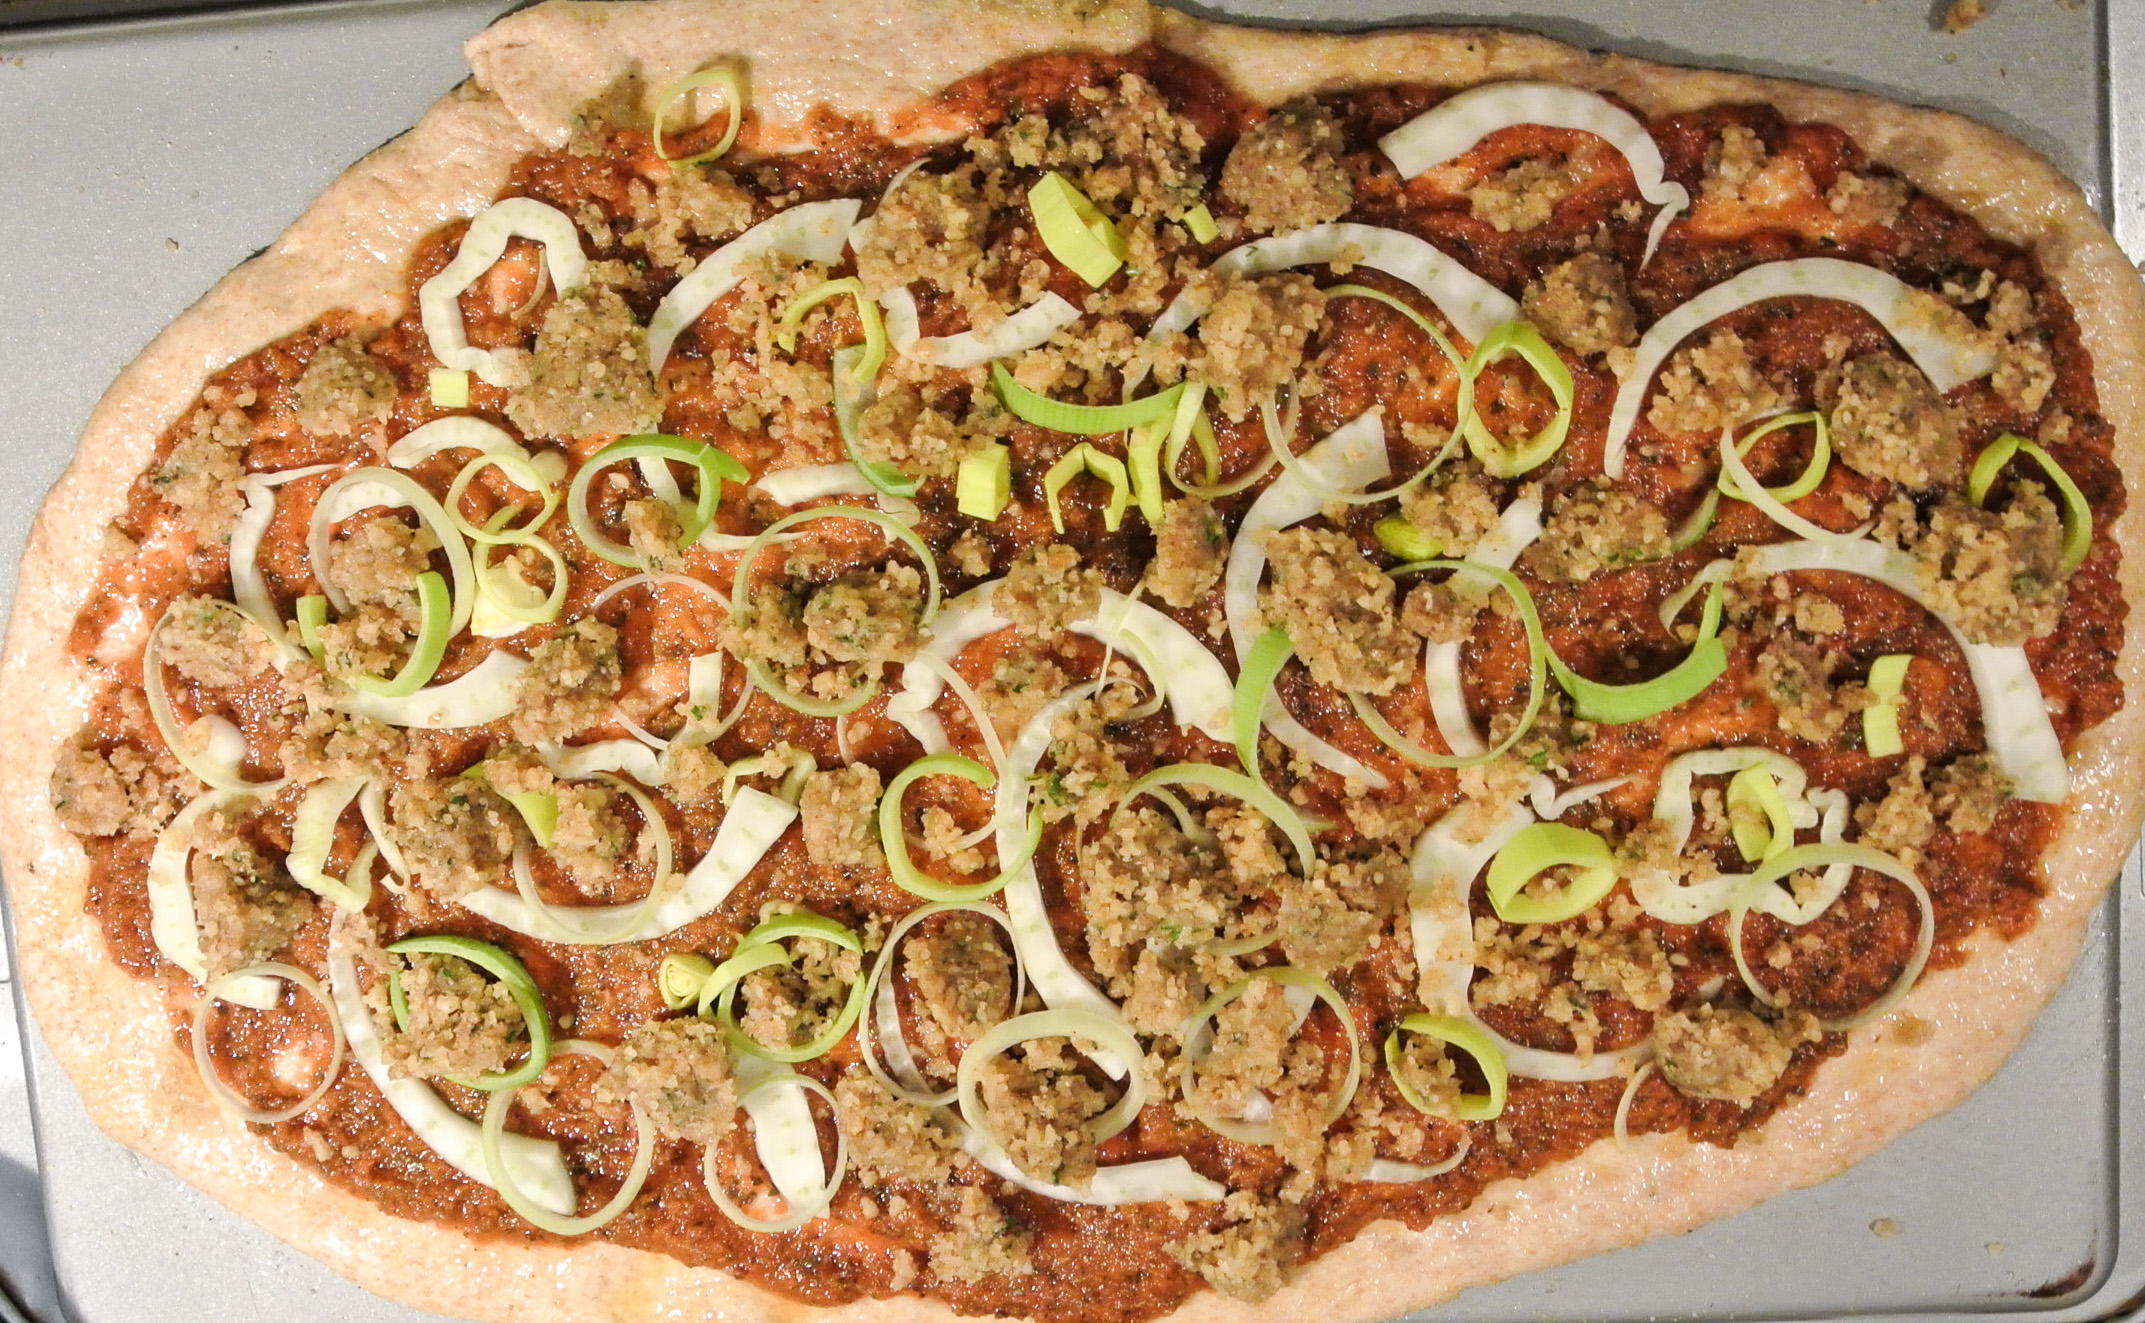
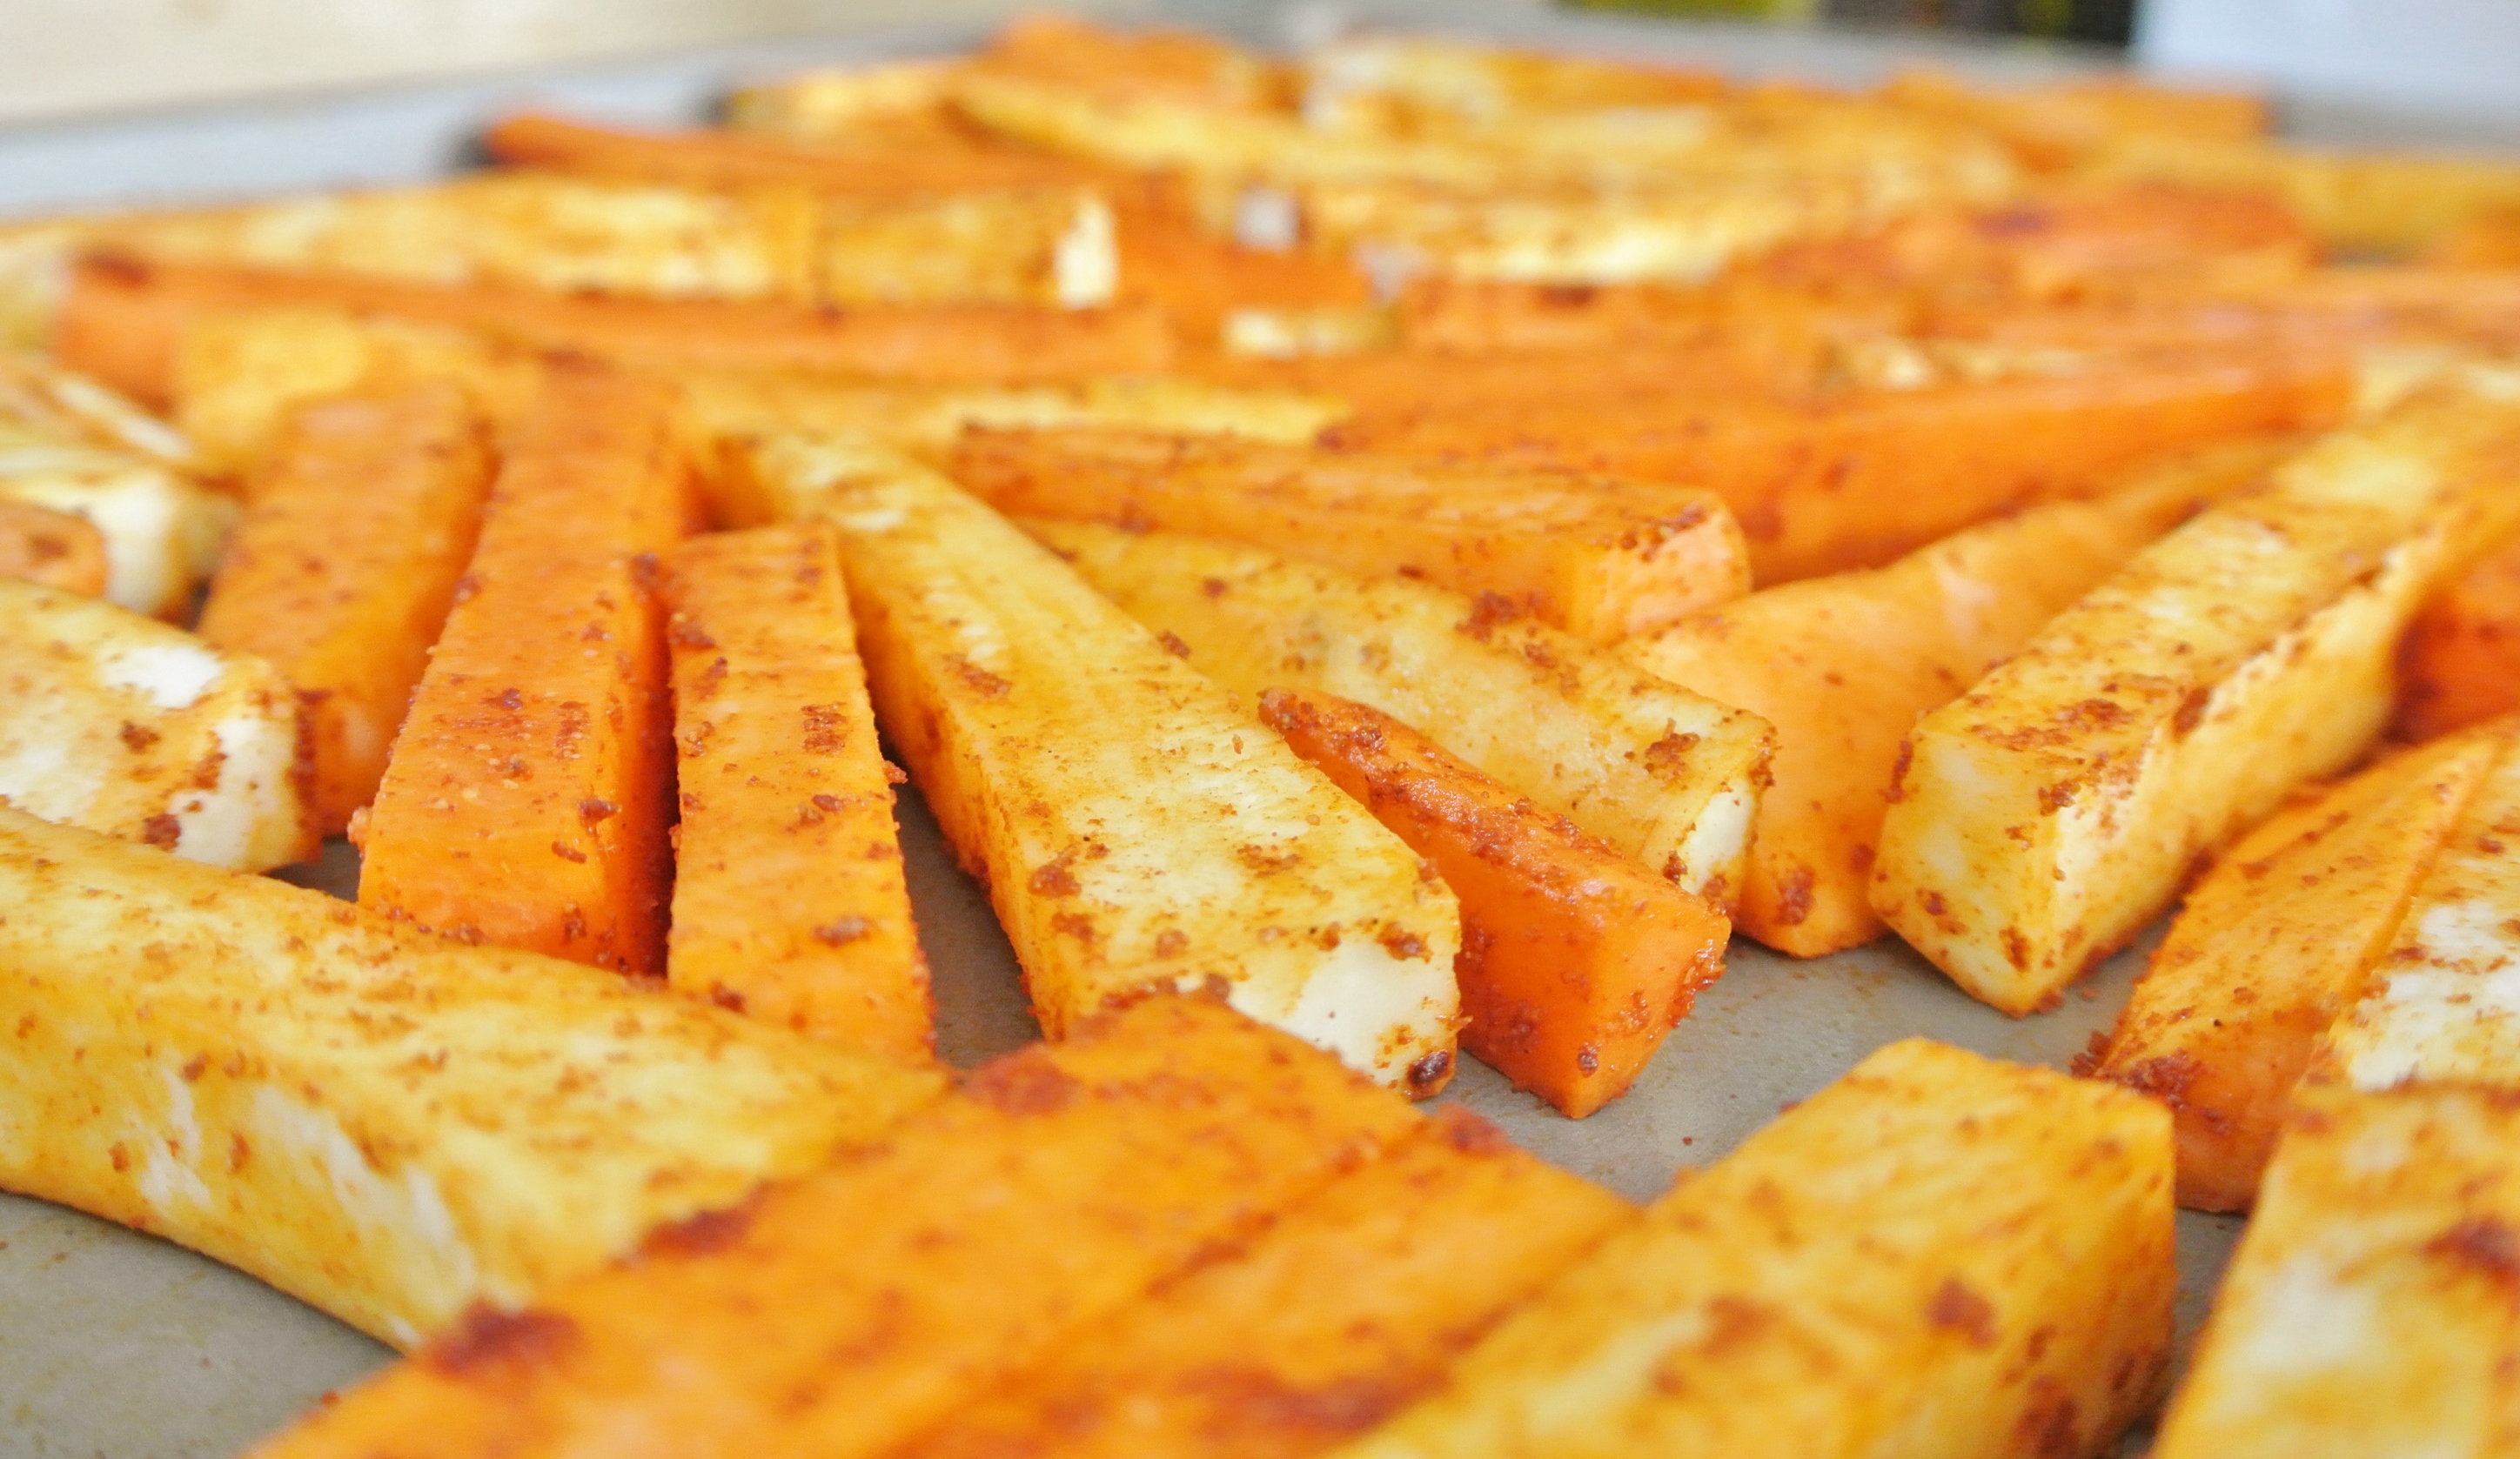
The second major learning I took from Fed Up was that the legal requirements for school lunches in America are really just missing the beat. Did you know, that in the U.S., French fries are considered a vegetable and so is pizza, because of the tomato paste? I’m sorry, what?! If the fries were baked with minimal oil (check out my version!), that would be one thing. If the pizza were totally vegan (I’ve got a formula for that, too!), topped with a homemade sauce, and loaded with vegetables, that would be different, too. Ugh.

DSC_1727DSC_1869At the end of the day, it feels hard to make a difference in the childhood obesity epidemic. I can play my part by teaching Nolan how to eat healthy foods. In the grocery store today, he spotted his favorite food and went right over and picked some up to put in the cart. Was it French fries? Pizza? Nope, blueberries. An older gentlemen who was doing his shopping and had observed my son’s excitement for fresh fruit was impressed and said, “You don’t see too many kids these days excited about healthy food. Bless you for what you’re doing with your son.” Made my day. 🙂

Nutrient-Rich Chocolate Mousse

DSC_1977

You read that title correctly:  Nutrient-Rich Chocolate Mousse.  As I’ve mentioned before, I don’t make traditional desserts a regular part of my diet, but like many people, I definitely get a sweet tooth now and then. Between my cake formula, dessert smoothie formula, and today’s feature—chocolate mousse—I can typically quench my desire for sweets pretty quickly and with a healthier option.

Friday night was my department chair’s retirement party and I signed up to bring dessert. I was told that many instructors offered to do the same, so my dessert need only be a sweet nibble for approximately six people. I knew that my chocolate mousse—which today, I’m making as a pie—would do just the trick. Wanna bet that party-goers didn’t even notice it’s vegan?! 🙂

The base of this mousse is of course, chocolate. Your options are dark chocolate (likely with an added sweetener) or vegan semi-sweet chocolate. Today, I’m using semi-sweet chocolate chips that I’ve found don’t contain milk fat, as some varieties do. Don’t forget to read the packaging to make sure.

DSC_1972

While I use cocoa powder in other chocolatey concoctions, it won’t work in this mousse. When bar or chip chocolate is melted, it will eventually re-solidify, ultimately stiffening the mousse so that it isn’t a runny mess. I have tried doing this with cocoa powder, simply because it contains fewer processed ingredients and it just doesn’t allow the mousse to stiffen up the way that it needs to, especially if being served as a pie that requires slicing.

Today, I’m taking some help from the store with a premade graham cracker crust (I know, sooo not like me!). The main reason for this is that it comes in a disposable aluminum pie plate that I can just leave at the party. Remember, you don’t need a crust, but if you’re not pressed for time and are able to use (and easily get back!) a glass pie plate, you can make your own. Consider crusts made from foods other than graham crackers, too. (Travis’s homemade vegan graham cracker recipe is another post, another day. :))

This mousse is just sweet enough to satisfy a craving without being too rich. Topping with chopped fresh fruit will add even more sweetness of the best kind: natural. Experiment with various flavor combinations and textures, considering fruit and nuts particularly. Dessert could certainly be worse for you than this one, jam-packed with protein (from the tofu), calcium (from the plant milk), antioxidants (from the chocolate), fiber, vitamins, and minerals (all from the fruit). Enjoy!

FORMULA BASE: CHOCOLATE MOUSSE

Serves 4-6

  • 1 block (14 oz) silken tofu (see my togurt formula for an explanation of tofu)
  • 3/4 cup semi-sweet chocolate chips (sans milk fat) or chopped dark chocolate –> I’m using semi-sweet chips.
  • 1/2 + 1/8 cup plant milk –>  I’m using almond.
  • ½-1 tsp extract of choice (amount depends on flavor intensity) –>  I’m using 1 tsp vanilla.
  • 1 tbsp sweetener (optional) –>  I’m not using any.
  • ½-1 cup specialty ingredients (optional) –>  I’m using one small banana.

Using a double boiler, melt the chocolate into your plant milk. It doesn’t need to completely melt, but rather, soften enough to puree easily.

DSC_1974

Let cool for a minute or two and transfer into a blender with all remaining ingredients. Blend until smooth.  The air bubbles are normal.  You can smooth them out with a spatula or cover them up with toppings later! Pour into your serving dish(es) of choice, with or without a crust, and chill for at least two hours.

DSC_1975

After chilling, I like to top mine with fresh fruit and/or chopped raw nuts before digging in.  🙂

DSC_1978

Make Smart Substitutions

DSC_1985

I am excited to share with you that I completed my first Fresh Formula publication outside of my blog.  🙂  I completed an article for the Adjunct Faculty Association spring newsletter, The Connection, and was among only five adjuncts selected to write in the health and wellness section.  Today, I thought I’d share that article with you.

If you’re a regular subscriber of The Fresh Formula, some of the article’s content won’t be new information, but a refresher never hurts.  I also included the recipe for my chocolate peanut butter banana smoothie, which was one of my first blog posts.  Click the link above to see the original article or read the text below:

On my plant-based living blog, The Fresh Formula, I share information and recipes for healthy eating.  One of the easiest changes we can make to our diets is to consider healthier substitutes for the items that we are using regularly.  Below, I have listed some examples of substitutions that I have made in my own kitchen:

  • White flour –> Whole wheat flour, spelt flour, graham flour
  • White granulated sugar –> Turbinado sugar, maple syrup, agave syrup, medjool dates
  • Iodized table salt –> Pink Himalayan sea salt

DSC_1980

  • Nut butters with additives –> Nuts-only nut butters
  • Eggs –> Chia seeds or ground flaxseed (mixed with water), bananas, steamed apple puree
  • Dairy milk –> Unsweetened almond, cashew, coconut, grain, and hemp milks
  • Canned beans –> Dry beans or unsalted canned beans (beans only)
  • White rice –> Brown rice, farro, quinoa, wheat berries, cracked wheat, barley
  • Prepackaged popcorn –> Bulk popping corn (made on the stovetop)

DSC_1982

  • Vegetable or canola oil –> Coconut, avocado, sesame, peanut, and olive oils
  • Boxed/canned stock/broth –> Unsalted homemade stock (can also be used as a flavorful substitute for water when cooking whole grains)

While many of these substitutions are more expensive, some are cheaper than their preservative-laden brethren; I believe that the health benefits are worth it either way.  I adopted a plant-based lifestyle because I had high cholesterol, so eggs, for example, were one of the first items to cross off of my shopping list.  Chia seeds, by contrast, are cholesterol-free sources of omega-3 fatty acids, protein, and calcium.

I have included my irresistible chocolate peanut butter banana smoothie recipe incorporating many of the aforementioned substitutions.  It is so decadent, it can serve as dessert, but is a healthy option for a meal or snack, too!

CHOCOLATE PEANUT BUTTER BANANA SMOOTHIE

Serves 2-3

  • 2 frozen bananas (or fresh bananas and a few ice cubes)
  • ½ cup peanut butter (nuts only)
  • 1 heaping tbsp of unsweetened cocoa powder
  • 1 tbsp chia seeds
  • 1 tbsp ground flaxseed
  • 2 pitted medjool dates
  • Unsweetened almond milk to achieve desired consistency (start with ½ cup)

Combine all ingredients in a blender and puree until silky smooth.

DSC_1505

For more valuable health tips, information on plant-based living and eating, and tons of delicious recipes, visit thefreshformula.com and subscribe for regular updates.  Cheers to good health!

How I Made the Switch

10860945_10105950389328904_2142054229820765234_o_edited

What I love about being an educator is my ability not only to teach students important academic content, but to help shape their lives.  I am thankful that my work habits trickle into my personal life, allowing me to reach those outside of the classroom, too.  Since adopting a plant-based lifestyle over three years ago, I’ve had many students, friends, and family members interested in making the switch themselves.  They’ve asked me for ideas and recipes, just wanting to live a healthier life.

As I’ve always stressed, I am not an expert in nutrition or dieting; I know what I know from old-fashioned research and experimentation.  For me, the proof of my lifestyle and Fresh Formula concept is in how I look, and more importantly, feel, in the day-to-day.  While I’ve never been overweight or unhealthy overall, I really believe that we can always improve, which is what I set out to do.

I also believe that the people in my life bring out the best in me, making me want to live as long and as healthy a life as I possibly can.  My husband and son in particular are what inspire me to make smart choices (as my mom always says!) each and every day.  I don’t want to watch my son ride his bike off to school; I want to ride my bike with him.

11001720_10204884344286016_940481854688695948_o_edited198628_10101096867216124_2241408_n_edited The most common question that students (and people in general) ask me once they learn that I don’t typically eat animal products is “What do you eat?”  I addressed this in a previous post, so I’m here today to answer the second most popular question:  “How do/did you do it?”

I’m an ordinary person with a busy lifestyle and like many people, occasionally make a really unhealthy food choice.  As a result, I knew that I would have to take baby steps in transitioning from a traditional, animal-laden American diet to one revolving around plants.

For me, the first step was doing away with cow’s milk.  Many varieties contain added sugar, hormones, and more (I’ll let you research that on your own).  I gave up cow’s milk over six years ago and should have done it sooner, being that I am mildly lactose-intolerant.  Skim milk never irritated my system much, but I knew that it wasn’t the healthiest milk option for me for a number of reasons.  So, I have since switched to plant milk.  I drink primarily almond, but I also like cashew, hemp, oat, and grain.

Less than two years later was when I was told I had high cholesterol.  Ugh!  My doctor advised me to give up red meat, pork, eggs, and butter.  I went without these for an entire year—not that I previously ate them much anyway—before I kicked all meat and most dairy to the curb.  Despite being lactose-intolerant, it’s been more difficult to give up dairy because it is often the staple ingredient in comfort foods:  ice cream, mac ‘n cheese, mashed potatoes, etc.  I am no different than the average person – sometimes, comfort food just sounds damn good.

Now, “comfort food” to me is a big salad or rich smoothie because that’s what I’ve come to crave.  I also really look forward to making customary animal-based comfort foods vegan, trying new things, and learning about the latest super foods.  That leads me to the next stage in my plant-based journey…

About six months after eliminating animal products, I decided to make it my mission to try new fruits and vegetables.  A friend that I used to teach high school with and I would head out to the farmer’s market and while I would buy plenty of familiars, I would also try to grab at least one or two items that I didn’t recognize.  While this sometimes wound up in failure (you can’t help what you like and don’t like!), 90% of the time I found some—or a lot of—success with new produce.

The last phase in my journey to plant-based living involved what I call, for no particular reason other than simplicity, “picky vegan things.”  I gave up honey, gelatin, white sugar, etc.  In other words, I gave up the foods that don’t outwardly say “I’m made with animal products,” or that we commonly associate with chickens cooped in their pens or salmon being fed corn, but foods that contain animals or are made by animals nonetheless.

Today, I am working on becoming even more dedicated to an imperfect model.  I am not above grabbing a slice of pizza at a party; I just choose not to eat like the majority 95% of the time.  For this, I am healthier than ever, with great blood work, loads of energy, reliable sleep habits, and a normal weight and heart rate.

I hope that taking a look into how I got where I am inspires you to make a healthy change in your lifestyle, however big or small.  There’s nothing wrong with baby steps and there is no perfect diet.  🙂  For more inspiration and ideas, read more about me, plant-based living, and my Fresh Formula concept.  As always, enjoy!

Easy Homemade Granola

DSC_1970

I love granola! It’s versatile, filling, and when made properly, very nutritious. Today, I’m going to walk you through my homemade granola formula that is low in sugar, fat, and sodium, and free from high fructose corn syrup and preservatives found in many packaged varieties.

The staple ingredient of granola is rolled oats. Oats are among the first foods a baby can eat and I figure, if they’re safe for a six-month-old who’s trying food for the first time, they’ve gotta be some really good-for-you stuff. Oats contain more dietary fiber than any other grain and even have cholesterol-lowering properties. Given my history with battling hereditary high cholesterol, I’ve always been in when it comes to this super food.

DSC_1956

Of all of the different types of oats out there, granola comes together best with rolled. Rolled oats are whole grain oats that have been steamed and pressed. They retain more texture in many kitchen applications than instant oats and cook faster than steel-cut oats (which I also love). I buy them in bulk and always have some in my pantry for a quick oatmeal.

In today’s granola, I’m also using raw sunflower seeds. Their flavor is mild and texture crunchy, but easy to chew; Nolan will eat a whole pile of them as is. Sunflower seeds are rich in Vitamins E and B-1 and copper, which benefits skin and hair. In addition, if you’ve got a nut allergy, you can buy sunflower butter as an alternative to peanut, almond, or cashew.

DSC_1957Before you get into making this breakfast formula, you should know that on its own, it is not very sweet. The low sugar content doesn’t bother me one bit since I never eat my granola without fresh fruit on top or with togurt, but you could always add more dried fruit if you want to take the sweetness up a notch. With very little exposure to sweets in his young life, Nolan is perfectly content eating this granola with just plant milk.

A couple more notes… If you don’t have all of these seeds on hand, no worries; you can make the granola without, it just won’t be as nutrient-packed. And finally, whenever possible, make your own juice to avoid preservatives and added sugar.  Enjoy!

DSC_1961FORMULA BASE: GRANOLA

Serves 6

  • 4 cups rolled oats
  • 1 cup dried fruit*, raw nuts, and/or raw seeds –> I’m using a combination of sunflower seeds, dried cherries, dried cranberries, almonds, and pecans.
  • 1 tbsp ground flaxseed
  • 1 tbsp chia seeds
  • 1 tbsp hulled hemp seeds
  • 1 cup 100% fruit juice –> I’m using fresh-squeezed orange (2) and grapefruit (1/2).
  • 1 heaping tbsp nut butter –> I’m using peanut.
  • 2 tbsp sweetener –> I’m using agave syrup.
  • 1 tsp cinnamon
  • Oil enough to grease a cookie sheet or baking dish –> I’m using coconut oil to grease a 9 x 13 glass baking dish as it is easier to stir the granola.

*Whenever possible, if you do not dehydrate your own fruit, look for dried fruit that contains little to no added oil or sugar. Also avoid dried fruit that contains sulfur dioxide, as it is not allergy-friendly. See my trail mix post for more info.

Preheat your oven to 325 degrees. Combine juice, nut butter, sweetener, and cinnamon in a saucepan over medium heat. Once it begins to bubble, turn the heat down to low and let thicken for about 15 minutes.

DSC_1963

While what I call “the sticky” simmers, finely chop your dried fruit/seeds/nuts, if necessary, and combine with the oats and seeds in a large bowl. When the sticky is ready, slowly incorporate it into the oat mixture as you stir. Spread evenly on a lightly greased cookie sheet or in a lightly greased baking sheet.

Bake for 30-35 minutes – or until granola is crunchy and golden brown – turning every ten minutes or so. Let cool completely and store in a tightly sealed container in the pantry.

DSC_1967

Want to make granola bars? Try doubling “the sticky” and spread the complete mixture onto parchment paper. Bake at least 20 minutes, or until golden brown.


The Plant-Based Decadence That Is Risotto

DSC_1955

If you’re like me, at some point, you may have thought or assumed that risotto contained milk, cheese, or some other form of dairy to give it its creamy consistency. While some cooks add dairy to make risotto extra creamy, it is a naturally plant-based and wonderfully decadent dish.

I use risotto as an opportunity to fulfill a craving for comfort food and to eat vegetables that must be cooked to be palatable, such as sweet potatoes. When Travis and I whip up a batch, it almost always contains some form of potato or other root vegetable, allowing us to eat the majority of our other vegetables raw. If you’re not in the mood for veggies (hopefully because you’ve been chowing them all day!), just make it plain, seasoned to taste.

Since it doesn’t, in fact, contain dairy, you should know that risotto achieves its creamy consistency through a slow and steady cooking process that involves an abundance of liquid and regular stirring. Risotto is NOT a last-minute go-to dish, nor is it for light snacking; this, is a square meal that will fill you up before you get to the bottom of your bowl.

Risotto is prepared with an Italian short-grain rice called Arborio. Arborio rice is high in protein, packed with vitamins and minerals, easy to digest, and can even help to fend off disease and maintain regular bodily functions. Plus, when slowly simmered in white wine, vegetable stock, sweet onions, and fresh herbs, it is simply delicious!

DSC_1936While you can certainly prepare this Italian must-have as a side dish, I put down a whole bowl as my dinner. Enjoy!

FORMULA BASE: RISOTTO

Serves 4 (as a meal)

  • 8 cups homemade vegetable stock (or water)*
  • 2 cups Arborio rice**
  • 1 cup chopped vegetables (optional) –>  I’m using one medium peeled garnet yam.
  • ½ cup white wine –>  I’m using Riesling.
  • 1 small onion –>  I’m using yellow.
  • Several cloves garlic (go with what you like) –>  I’m using three large.
  • 2 tbsps oil –>  I’m using refined coconut.
  • Fresh herbs, spices, salt, and pepper to taste –>  I’m using a sprig of fresh rosemary (which I will remove after cooking) and a pinch each pink Himalayan sea salt and fresh cracked pepper.

*You may not use it all, but it’ll be close. Have it handy on your stovetop in a pot on low heat, ladle-ready.

**Unlike other grains, do not rinse your Arborio rice before use.

Start by chopping your onion and garlic and sauté in a touch of oil over medium-high heat until they are almost cooked through, but not quite. Then, transfer them to a bowl, return the pan to the stovetop, add a touch more oil, and sauté your vegetables, if using, until almost cooked. Transfer them to a separate bowl and return the pan to the stovetop, this time over medium heat.

Add more oil (about 1 tbsp) to the pan to toast your dry rice. Stir the rice constantly to prevent sticking, toasting it until it has deepened in color slightly, about 5 minutes. Add in half of the cooked onions and garlic, as well as your seasoning of choice, and deglaze your pan with the white wine. After the wine cooks down, add a ladle of your veggie stock and stir fairly regularly over the course of the time it takes for that ladle to absorb completely. You can expect 3-5 minutes between ladles.

DSC_1946 DSC_1947

You will repeat this process—ladle and stir—many times over the course of 40-45 minutes. When the rice is almost finished, add in the remaining onion and garlic, as well as your veggies (if any), to the pan to finish cooking. From start to finish, this dish will take you 60-75 minutes (depending on how fast you prep and such) and a lot of attention. As soon as the rice is tender, you’re done, so taste as you go.

DSC_1948

Garnish with fresh herbs or thinly-sliced green onion. Makes for yummy, comforting leftovers for 3-5 days.

The Burrito Bowl: A Perfect Vegan Meal

DSC_1928

As evidenced in my post about my daily eating habits, a plant-based lifestyle can be easily well-rounded, providing all of the nutrients that the body needs, sans cholesterol, hormones, excess fat, and other animal by-products. Over the last three years, I’ve found ways—including my Fresh Formulas, of course—to obtain a ton of nutrients accompanied by a ton of flavor, all while feeling satisfied and not having to count calories.

The more I think I about this, the burrito bowl concept just might be the perfect vegan meal. In one bowl, you can combine whole grains, protein, and fresh fruits and vegetables. You’re guaranteed full and satisfied without the guilt that comes with meat, cheese, and sour cream.

I’m not a big fan of fast food, but if I’m going to indulge, I love the fast-casual establishment Chipotle. Even though I don’t eat it, I even appreciate the company’s stance on meat! Chipotle just knows how to do it right, and when I think of a burrito bowl, their buffet-style setup is the first thing that comes to mind. Chipotle—and burrito bowl—fans, you’re definitely going to want to keep reading!

Yes, a dish with the word “burrito” in it can be vegan, and more importantly, healthy. It’s all about smart substitutions: brown rice for white, beans for meat, etc. In today’s formula adaptation, I’m using ground tofu (pictured below the basic formula) and the black beans and fresh vegetables below:

DSC_1925

Corn is an easy veggie to have on hand in the freezer. I don’t use a lot of it because other fruits and vegetables certainly pack more nutrients, but I love the texture and flavor, especially in a dish like this. Next, we have green onions, which I’ll be using as a garnish. Then, you see a salsa I quickly threw together with yellow onion, roma tomatoes, sweet red peppers, cilantro*, and fresh-squeezed lemon juice (I’m all out of lime). Making salsa can be easy, ya’ll; stay away from the jarred stuff that’s packed with sodium.

*There is cilantro growing in my front yard! In my post about starting your own garden, I promised you that if you took care of the birds and the bees that they would do their job in pollinating and spreading seeds. Between our backyard critters and the wind, we now have a randomly delicious cilantro plant driveway-adjacent. Very cool.

Finally, we have shredded baby kale. When I order Mexican food, it is often topped with or including shredded iceberg lettuce. While there is nothing wrong with this, if you’re looking for the freshness and texture of a leafy green in your burrito bowl, why not use something like spinach or kale instead? One cup of baby kale, for instance, has double the protein content, three times the iron content, nine times the calcium content, nearly thirty times the Vitamin A content, and over forty times the Vitamin C content of one cup of iceberg lettuce. Whoa. Need I say more…

DSC_1918Switching gears, you’ll notice that this formula contains very little salt. I combat what might be perceived as a lack of flavor by really ramping up the spices. I cook my whole grains and tofu (when I use it) in a variation of the spice blend I use in my chili formula. The entire formula—which serves 4-6 people—contains less than ½ tsp of salt. Impressive, huh? You don’t even need to use any at all if you don’t want!

On to the beans. Beans are the only product I buy in a can and I wish I didn’t. Dried beans are less expensive. In addition, even though beans don’t contain the level of BPA-leaching acid present in tomatoes (see my homemade marinara post), they are still somewhat exposed to this chemical in the cans’ linings. For some reason, when I prepare dried beans, I am sick the entire next day after I eat them…bloating, gas, terrible cramps…you get the idea. Let me know if you have any ideas about this or better yet, a solution. 🙂

Finally, more about the tofu. Check out my post on vegan yogurt for a more detailed explanation of tofu and why some people love it and some hate it. For today’s purposes, just know that a little bit of tofu won’t hurt you and when sautéed in crumbles on the stove, a mock “ground chicken” is born, if you’re having a tough time kicking meat. I swear it’s good! On top of that, the tofu I use is organic and non-GMO. Wins across the board (until I learn to make it myself)!

DSC_1920It’s time for a burrito adaptation that you won’t regret eating and that combines the necessities of a healthy diet. Enjoy!

FORMULA BASE: BURRITO BOWL

Serves 4-6

  • 2 cups whole grains (e.g. brown rice, farro, wheat berries, quinoa, etc.) –>  I’m using brown rice.
  • 2 cups protein (e.g. beans, lentils tofu, tempeh, etc.) –>  I’m using black beans and crumbled tofu.
  • 2 cups raw fruit/vegetables –>  I’m using baby kale, corn, and salsa.**
  • 1 cup “crunch” (e.g. tortilla chips, nuts, seeds, etc.) –>  I’m using broken tortilla chips.
  • ½ cup garnish (e.g. fresh herbs, green onions, etc.) –>  I’m using thinly-sliced green onion.
  • Spices, herbs, salt, and pepper to taste –>  I’m using the following spice blend for my rice:
    • 1 tsp chili powder
    • 1 tsp paprika
    • 1 tsp dried cilantro
    • 1 tsp dried minced onion
    • ½ tsp garlic powder
    • ¼ tsp cumin
    • ¼ tsp pink Himalayan sea salt

**Guacamole would be delicious as well. I just don’t happen to have any avocados on hand. Either way, DIY to avoid excess salt and other preservatives.

First, get your grains cooking in homemade veggie stock or water. Add all of your seasonings directly to the cooking liquid so that the grains absorb the flavor as they cook.

DSC_1922Next, prepare your protein. If you’re using canned beans, they are already cooked and simply need to be drained and rinsed. If you’re using dried beans, soak them in water overnight and then boil on the stovetop while your grains cook, until tender. Tofu and tempeh are also precooked, but I like to doctor up the tofu so that it more so resembles the texture of ground meat.

After opening a package of tofu, drain the water and wrap the block in a clean towel to absorb even more water. Then, crumble into a medium-hot pan and season. I am using the same spice combination that I am using for the rice, just in a lesser amount. No measurements needed; just give the tofu a healthy sprinkle of the spices you like and stir so that it is evenly seasoned. After about 5 minutes, turn the heat down to medium low and stir occasionally. The tofu crumbles will reduce in size as they lose moisture, giving them a more meat-like consistency (if that’s what you’re going for).

DSC_1923While your grains and protein are cooking and/or hanging out, chop all of your produce and prepare your crunch and garnish. When all components are ready, layer them in a bowl in this order:

  1. Grains
  2. Protein
  3. Produce
  4. Crunch
  5. Garnish

Then, eat! I would store leftover components separately in the fridge…although I doubt there will be any. J This formula would be easy to make in large quantities and set up buffet-style for a family dinner or party.

DSC_1927

New Formula: Simple Marinara Sauce

DSC_1913

On my mom’s side of the family, I grew up eating authentic Italian cuisine. Buying premade, jarred sauce was sacrilege, and I am not going to be the one to disappoint.

I have clear memories of my mom’s red sauce bubbling away on the stovetop for hours before topping a pasta or filling up a lasagna. Her traditional sauce includes ground beef and although it is delicious, even as a child, I remember picking out the meat.

Today, I have my own totally vegetarian marinara recipe. When I met my husband of nearly four years, he expressed to me that he prefers his Italian cuisine without meat, too. I knew we were meant to be. 🙂 While he likes a sauce that is tarter, I have come to enjoy it best on the sweet side, as my mother adds a little bit of sugar when she’s making hers.

I used to make this recipe with canned tomatoes, simply because it’s quicker and will yield a slightly smoother sauce. After reading an article about the most dangerous foods you can put in your body and seeing canned tomatoes on the list, I have since opted for the path of more resistance. What’s so bad about canned tomatoes? Cans are lined with BPA, and while some canned products do not contain enough acid to leach very much of this chemical into the food itself, tomatoes do and they will.

DSC_1905

DSC_1907

So, I now puree my own tomatoes and the cooking process takes me a little longer. What’s the expression…Nothing that is worthwhile is easy? Something like that. Trust me, your sauce will be delicious and even though you are really really really starting from scratch, this recipe is still quite simple and will be ready in no time. Use this sauce with your favorite Italian dish or try it out with my vegan pizza. Enjoy!

FORMULA BASE: MARINARA SAUCE*

  • 1 ½ pounds tomatoes –> I’m using a combination of vine ripe and roma.
  • ½ of a small yellow or white onion –> I’m using yellow.
  • 3 cloves garlic
  • 2 tbsp sweetener (optional) –> I’m using turbinado sugar.
  • 1 ½ tbsp dried fennel fronds (or a small handful of fresh) –> I’m using dried.
  • 1 tbsp dried basil (or a small handful of fresh) –> I’m using fresh.
  • 1 tbsp dried oregano (or a small handful of fresh) –> I’m using fresh.
  • 1 bay leaf
  • Salt and pepper to taste

*Today, I’m making a double recipe, so don’t be discouraged that the amounts listed above don’t match the pictures. I’m just doubling everything. 🙂

Thoroughly wash your vegetables so that you can save the scraps for homemade veggie stock. Coarsely chop your tomatoes and onion. Throw them into a blender with your garlic, herbs (not the bay leaf), and seasoning and puree until smooth.

DSC_1908

DSC_1909

Pour into a pot on the stove, add your bay leaf, and simmer on medium low for 1-2 hours, or until your sauce reduces by approximately one third.

When I am just over the halfway mark, depending on what I’m going to be using the sauce for, I finely dice vegetables that I don’t anticipate my two-year-old being eager to eat and throw them in the pot. Today, I’m sneaking in some asparagus.

DSC_1910

I’ve pulled one over on Nolan a few times with great success. 🙂 You can skip this step if you want to keep this recipe extra simple.

Remove the bay leaf and your sauce is ready!

DSC_1912

If you’re feeling adventurous and like to plan ahead, quadruple the recipe and freeze in containers the perfect size for a box of pasta. When “there’s nothing to eat” strikes, you’re ready for a quick pasta dinner!

How to Start Your Own Garden

DSC_1883

I am often asked how Travis and I make a plant-based lifestyle affordable.  As I’ve mentioned before, although I spend less than I did in my omnivorous days, to purchase high quality, organic, GMO-free, all-natural, plant-based foodstuffs isn’t cheap, and that may be one of the reasons why more people don’t get on board.

First of all, let me reassure you that we are NOT perfect at this and I’m sure that there are some deals that we miss, but we are pretty diligent and creative.  In my post about Bountiful Baskets, I shared a few of the ways that we stock up and save for cheap.

Sometimes, we make compromises.  You can find lists in a number of places of the produce that is considered “dirty” if not purchased organic (we discovered one in a baby food cookbook ourselves).  These, we don’t compromise on; if the organic version of grapes is not available, we don’t buy them.  Other items, like bananas, we aim to buy organic, but if the organic is out, we will buy the non just because we love bananas so much and consider them crucial to our diet.

When I buy something that is processed—almond milk, for example—I try to avoid the “big” brands that are known for using GMOs.  The problem is, I don’t yet know what all of the those companies are, so I’m learning more and more each day that goes by.

One way that I can guarantee the quality of our foodstuffs is by growing it myself.  If you pay your garden adequate attention, you can produce a great amount of produce for pennies on the dollar.  In addition, your backyard will look and smell wonderful.  🙂

Travis and I maintain an all-organic garden in our yard.  We started small—with fresh herbs (basil pictured below)—and grew to planting larger produce that takes longer to grow.  We also have a compost pile in one corner from which a number of surprises have grown.  We once through butternut squash seeds out there and without even consciously tending or watering that area ate a few delicious squashes months later.

DSC_1870

If you’re interested in starting your own garden, begin with research.

  • What type of soil do you have where you live?
  • What grows best in it?  In what season?

Then, plan.

  • What space in your yard will you designate for gardening only?  (No dog poop, no kids playing, etc.)
  • Will you plant from seeds or small plants?
  • Will you install an automatic watering/drip system or water by hand?
  • How much shade vs. sun do you have available?
  • What types of critters come through your yard that might help or hinder your garden’s growth?
  • Do you have room for a compost pile?
  • Do you have someone that can (and wants to!) tend to your garden if you go out of town often?

Finally, start small.  Here are the steps that Travis and I took to creating a garden in our backyard:

  • We started growing herbs from seeds in small pots in our house, just to get a feel for our gardening abilities.  Hey, some people can’t keep a simple house plant alive, so we had to make sure we could do this before we committed.
  • Next, we designated gardening space in our backyard.  The perimeter of the yard was made up of landscaping rocks with periodic trees.  We left the trees, cleared out the rocks, and tilled the soil beneath it to prep for planting.  One corner of this perimeter is our compost pile and the rest is space for growing shrubs, trees, and produce.  The entire area is surrounded by a short fence so that the dogs don’t poop back there and Nolan doesn’t play.  🙂
  • Then, we planted flowers and flowering shrubs and installed a hummingbird feeder to attract the birds and the bees.  They are essential to pollinating crops and spreading seeds for new growth.

DSC_1875 DSC_1879

  • Finally, we researched what crops grow best in Phoenix soil in various seasons and got to planting.  Sometimes we start with seeds and other times small plants.  The herbs that we started growing inside eventually grew big enough to be transferred to larger pots and then, to the ground.

Since we started gardening, we have reaped nearly ten different herbs, cilantro and basil in particular in large quantities that come back on their own every season.  We have also reaped tomatoes, cauliflower, kale, carrots, potatoes, squash, green onions, and lemongrass.  We have pomegranate bushes (pictured below…pardon all of the leaves that have fallen from our tree!  Trav insists we let them stay once they’ve fallen because they trap moisture for the soil underneath, which is certainly critical in Arizona!) that are growing from a pomegranate that we opened and stuck in the ground.  They are still years away from producing, but are going strong!

DSC_1874Due to the increased influx of birds and bees, we have also seen the growth of new trees, shrubs, and flowers that we didn’t plant ourselves…they really hold up their end of the bargain if you provide them some pollen and sugar water!

Our garden is evolving all the time and we have had plenty of failures, but we are getting better and better at it and have saved tons of money on herbs alone, which are quite pricy to purchase fresh in much smaller quantities than what we can grow ourselves.

Don’t be daunted – start with windowsill herbs and build up.  You’ll be growing your own organic produce and saving money in no time!

DSC_1880

New (And Surely Long-Awaited) Formula: Pizza

DSC_1869

I’m excited to report that Travis and I have found a way to make cheese-less pizza totally delicious. We’ve always known it was damn good, but the proof was in my meat-and-dairy-loving father’s approval; when he comes to Phoenix to visit, he always requests that we make our vegan pizza.

What’s especially wonderful about pizza meets The Fresh Formula is that the creation of this American favorite is already formulaic in nature: dough + sauce + toppings in endless combinations. I’m here today to help you with ideas, quantity, and process…the rest is up to your taste buds and creativity.

Great news: If you’ve already mastered my yeast bread formula, you can make pizza dough! Woo! Below, you’ll see my bread formula with a few slight changes, suggestions, and optional ingredients that you may want to consider. The key is determining the type of crust you want—chewy or crunchy—and going from there.

Next, you’ll want to think about sauce. We most often use a homemade marinara (another post, another day), but have also made pizzas with barbeque sauce, pesto, and curry at the base. While I haven’t yet done a post about BBQ, I have written about how you can make pesto and curry, if you want to go an atypical route. I also have a formula for a “cheesy” sauce similar to an alfredo if you’re looking for what some restaurants call a “white” pizza.

Finally, toppings. Earlier this week, I made my first homemade vegan sausage (pictured below) and used that to top the pizza in this post. If you’re after a protein punch, you could use something similar (homemade, of course), or add tofu, tempeh, beans, nuts, or seeds. Wait…beans on a pizza?! Yessir, I wouldn’t make my BBQ “chicken” (tofu) pizza without black beans…

DSC_1857You might also consider adding fruits or vegetables. Most fruits don’t hold up to the high heat that pizza requires for baking, but a classic such as pineapple or a hearty fruit like pears will. Determining which vegetables to add comes down to preference of flavor and texture. Cooked vegetables will maintain fewer nutrients and be higher in calories, but will have a softer texture and richer flavor. Raw vegetables, will then, be higher in nutrients, lower in calories, crunchier, and a little less flavorful. Since I’m in the business of eating as many raw fruits and vegetables as possible, I do not typically pre-cook them before they top the pizza; they will par-cook a little in the fifteen or so minutes that the pizza is in the oven.

Here are a few combinations that we love:

  • “Sausage,” fennel, and leek atop marinara sauce (featured today)
  • Ground “chicken” (crumbled tofu), black beans, corn, onions, and bell peppers atop BBQ sauce
  • Zucchini, bell peppers, onions, pineapple, and cashews atop curry sauce
  • Pears (or apples), pistachios, and rosemary atop pesto

NOTE: Plan pizza night well in advance. 🙂 I always have yeast in my pantry, but you may not if you haven’t—until now!—made your own bread or dough. You also need a number of ingredients for a sauce and toppings, so don’t wait until you’re starving to start a pizza adventure.

Also, this is a formula best executed as a team. You can do it alone, but with a dough and sauce to make from scratch, a whole bunch of toppings to chop, and an intricate prep and baking process, having an extra set of hands would help. Man, I can’t wait until Nolan is old enough to pitch in!

FINALLY (imagine chorus singing): Pizza you can feel good about! No grease, no cholesterol, and tons of nutrients. Enjoy!

FORMULA BASE: PIZZA

For the dough*:

  • 3-4 cups of flour –> Travis recommends all whole wheat flour for a chewy crust, all bread flour for a crunchy crust, or half and half to achieve both textures.
  • ½ tsp salt –> We use pink Himalayan sea salt.
  • 1 packet rapid rise yeast
  • 1 tbsp oil
  • 1 ¾ cups very warm water (hot, but touchable)
  • 1 tbsp sweetener (optional) –> Trav usually adds turbinado sugar to “feed” the yeast.
  • Spices or herbs to taste (optional)
  • Cornmeal and additional flour for dusting your workspace –> This prevents the dough from sticking to the pan later. Trav keeps cornmeal in a food storage container premixed with spices, flour, and a little salt to add even more flavor to the dough.

*If you need to see step-by-step pictures in making the dough, check out my bread post

For the sauce:

See my pesto, curry, or alfredo formulas for unique inspiration, or use your own recipe for BBQ or marinara sauce. If you’re concerned about biting off more than you can chew your first time making pizza, use a high quality premade jarred or bottle sauce (just this once!) or ask Mom to make a little extra of her secret recipe for you to take home in a food storage container. 🙂 No matter your decision, you’ll need about 2 cups. I’ll do a more extensive post about homemade marinara sauces at a later date, but if you want to try making mine, you’ll need:

  • 1 ½ pounds tomatoes –> I’m using about 7 medium to large romas.
  • ½ of a small yellow or white onion –> I’m using yellow.
  • 3 cloves garlic
  • 2 tbsp sweetener –> I’m using turbinado sugar.
  • 1 ½ tbsp dried fennel fronds
  • 1 tbsp dried basil
  • 1 tbsp dried oregano
  • 1 bay leaf
  • Salt and pepper to taste

For the toppings:

  • 1 tbsp oil (for rubbing on the crust) –> I’m using olive.
  • 2 cups chopped/sliced raw or cooked protein and/or produce –> I’m using 1 cup homemade vegan sausage and ½ cup each thinly sliced raw fennel and leek.
  • Approximately 1-2 tbsps nutritional yeast (nooch)
  • Homemade vegan cheese (optional) –> I’m new to this world, so I’m not using it today…another post, another day. 🙂
  • Spices, herbs*, salt, and pepper to taste (optional)

*If you want to use fresh herbs, use these to garnish the pizza after it is cooked.

If you are making a sauce from scratch, get that started first. To make a homemade marinara, for example, as I’m doing today, very coarsely chop the tomatoes, onion, and garlic and puree them together in a blender or food processor. Pour into a sauce pan, add the remaining ingredients, and simmer on medium-low heat for 1-2 hours, or until the sauce has reduced by at least one third. Remove the bay leaf at this point.

DSC_1862If you’re not making sauce from scratch, have it on standby to top your dough when it’s ready.

Next, attach a dough hook to your stand mixer. Thoroughly clean and dry your countertop and sprinkle with cornmeal.  Lightly oil a large bowl.

Combine 3 cups of flour, salt, and yeast in the mixer on low. Add the sugar and any additional spices or herbs, if using. Add the water and oil to the dry ingredients and scrape down the sides of the mixing bowl before starting the mixer. Start on low speed and increase the speed as the dry ingredients become incorporated into the wet.

Add additional flour gradually until your dough forms a minimally sticky ball on high speed. I can tell that the dough is ready for kneading if it is still somewhat sticky to the touch, but does not stick to the mixing bowl itself when whipping around on a high speed.  (See my bread post for more pictures.)  Flour your hands, remove the dough, and place the dough onto your dusted countertop.

Knead the dough, adding small amounts of flour as necessary, until it makes a smooth ball.  Knead for 5-7 minutes total and then place the ball into your oiled bowl. Cover with a clean towel and let it rise in a warm place for 45 minutes.

After 45 minutes, punch down the dough, and separate into two smaller balls of dough.  Leave sitting uncovered on your workspace for about 15 minutes.  About 10 minutes into this second rise, preheat your oven to 425 degrees. In the time that it takes the oven to preheat, you will roll out and top your dough.

DSC_1858

Just to keep the pizzas simple, albeit not the prettiest, we roll each of our dough balls into oval-ish shapes that fit perfectly on the BACK side of a cookie sheet (don’t want the lip of the sheet interfering with sliding the pizza off later).  After you roll out each ball, make sure that the bottom has been freshly dusted with cornmeal and place the cornmealed side down on the back of your cookie sheet. Brush the crust with oil to keep some of the moisture in, sprinkle the entire middle with nutritional yeast, and top with sauce, etc. as you see fit.

DSC_1859 DSC_1861One at a time, your pizzas go into the oven atop the cookie sheet for 8 minutes.  After 8 minutes, gently slide the pizza onto a pizza stone for an additional 6.  The stone assists you in achieving a crunch to the bottom of the pizza, even if you are going for chewy inside.  If you don’t have a pizza stone, bake the pizza atop the cookie sheet for approximately 15 minutes total.  Either way, when the pizza is cooked, slide onto a large cutting board and slice.  This shape won’t give you typical pie-shaped pieces, but it doesn’t matter how they look as long as they taste fantastic!

DSC_1865Store in the fridge for 2-3 days, keeping in mind that without a thick layer of cheese on top to lock in moisture that the pizza will slowly dry out the longer that it sits.

DSC_1863