
Yea, I know, today’s post is not about food (and it’s pretty long, too). It is, however, about the most important room in my house where all of my plant-based eats are prepared: the kitchen. I gave you a tour of my kitchen early in the life of this blog so that you could get an idea of the food that I purchase and keep on hand to maintain a plant-based lifestyle, so you’ve seen a little bit of it already.
I wanted to share my kitchen renovation with you for a number of reasons. First of all—and most importantly—I’m happier preparing food in a workspace that I can enjoy. Looks aren’t everything, but I grew tired of staring at the 1980’s builder grade Formica splashed all over my kitchen. I found myself depressed at the thought of preparing food on countertops that were clean, but stained and scratched from years and years of use (and surely, abuse…we bought our home foreclosed and in rough shape over five years ago). When Travis was super busy completing his MBA, it was just me in the kitchen…a place I started to resent because it didn’t feel as fresh as the food I was prepping in it.
Secondly, I think that it’s valuable to see how I make the most out of a small space. My sister, Petra—author of 100 Tacks and currently living in Tokyo, Japan—has a series on her blog called Small Kitchen Missions. Her work in a space a third of the size of my kitchen has inspired me to make the most of what I consider a very small American kitchen, at least for someone that chops, blends, and cooks as much as I do. Travis and I always joke that we have the perfect kitchen for people who live on takeout, not people that like to prepare their own food. The sad truth behind the laughs is that a lot of people in a small space probably do get frustrated and resort to too many ready-to-eat meals that are either expensive, unhealthy, or both. Part of why I write this blog is to help people change that.
Lastly, speaking of expensive eating, I wanted to show you just how inexpensive a perfectly workable, presentable kitchen renovation can be, thus motivating you to do more food preparation at home. As I’ve mentioned before, plant-based living is not cheap when you’re striving for organic, non-GMO, fresh, and non-processed foods. You know how I live by Bountiful Baskets and am otherwise as thrifty as possible, so the place where all of the consumption magic happens needed to align with how I spend my money.
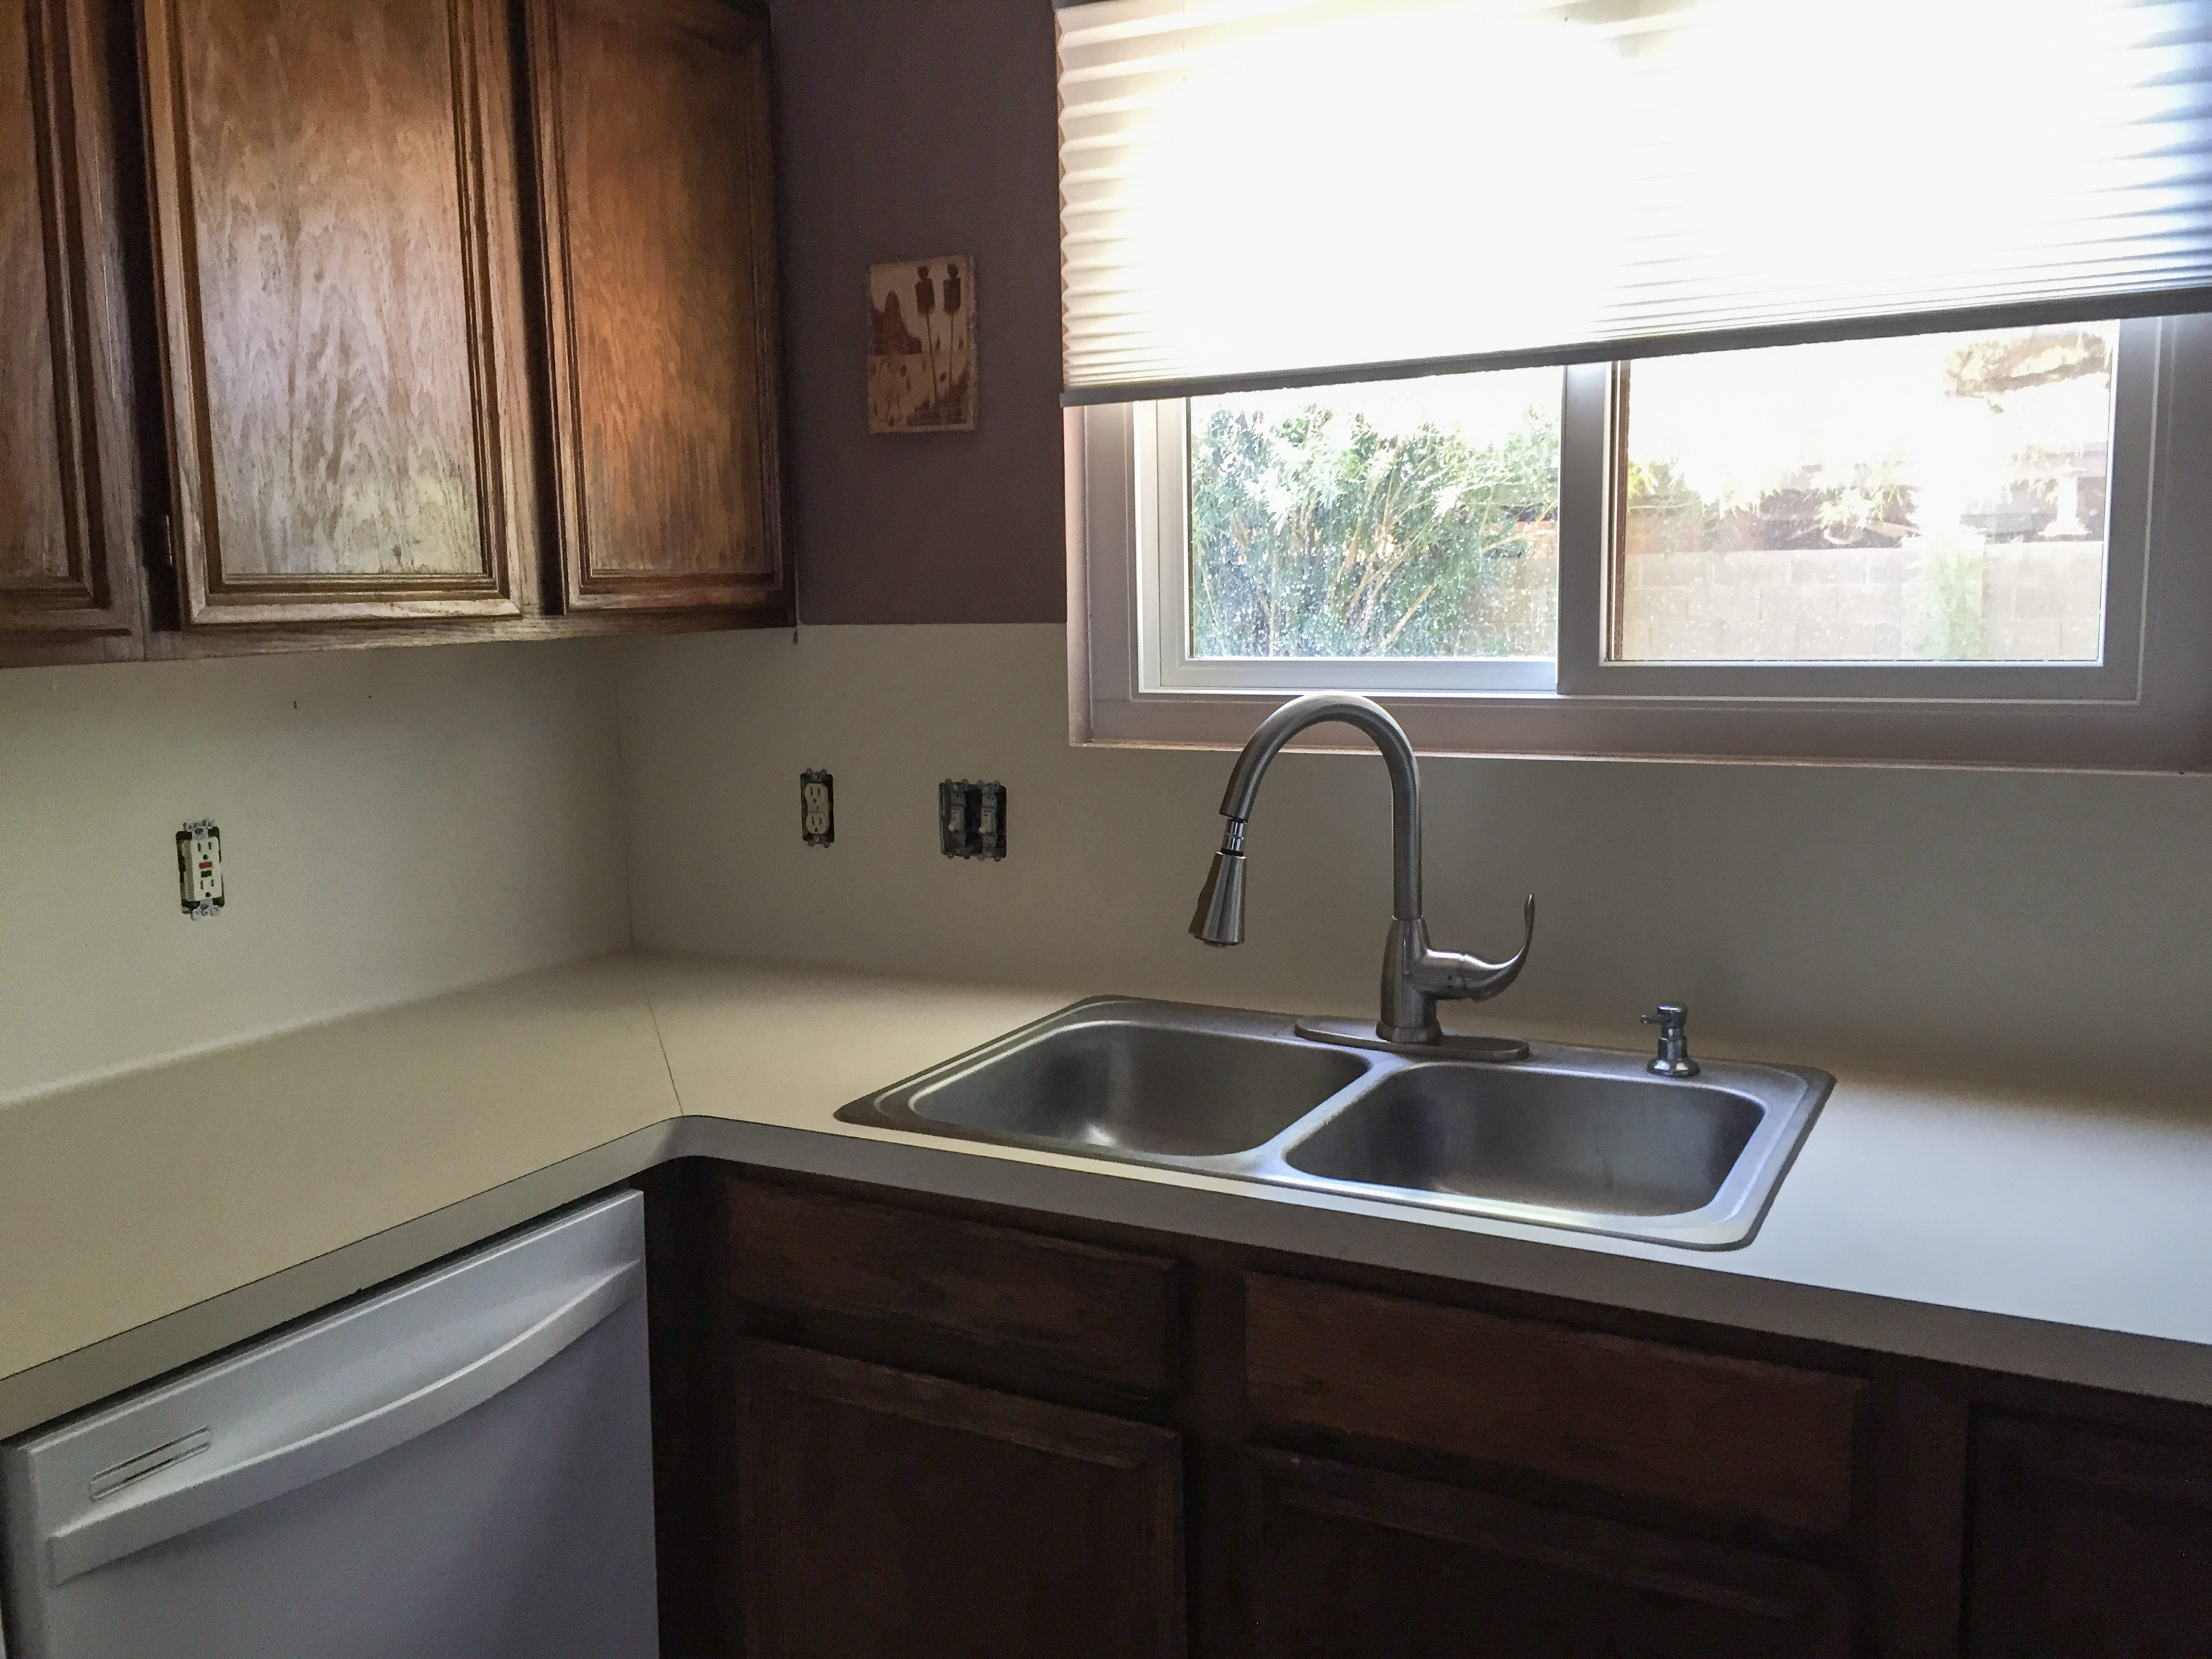
So, what exactly did we do to spruce up our dated space (pictured below)? When we first moved into our home in 2010, we removed all of the cabinets, sanded, and stained them. We were able to remove/cover years of wear and tear and ended up with a refreshed, darker, richer color than what came with the house. Are they my dream cabinets? No, but they look so much better than they did when we moved in. After completing that tiring, but inexpensive project, I wanted to keep going on the rest of the kitchen (we didn’t have kids yet, ha!), but the budget at the time—I was a seventh grade teacher and Travis was a college student—just didn’t allow it.

Flash forward five years and we found ourselves expecting Baby #2. I cannot explain what the popular term “nesting” is from a biological perspective, but I am TOTALLY in the mode. I have a seemingly endless list of DIY projects to complete before the baby arrives and have been cleaning even the tiniest crevices of my home to ensure the best possible environment for he/she to come home to. I decided—okay, so my husband had a little input—that now was the time to finally finish the kitchen we started renovating five years ago…and we did it for just $300!
A friend and neighbor of mine did concrete countertops in her kitchen a while back and I was seriously impressed with both the appearance and the cost. She said that she poured, spread, sanded, stained, and sealed the concrete right on top of her existing Formica and completely transformed the look of her kitchen. I did some research online about how to complete the project and found this helpful article, which I followed step-by-step. I even bought the same materials to increase my chances of achieving an outcome similar to what I saw in the pictures.
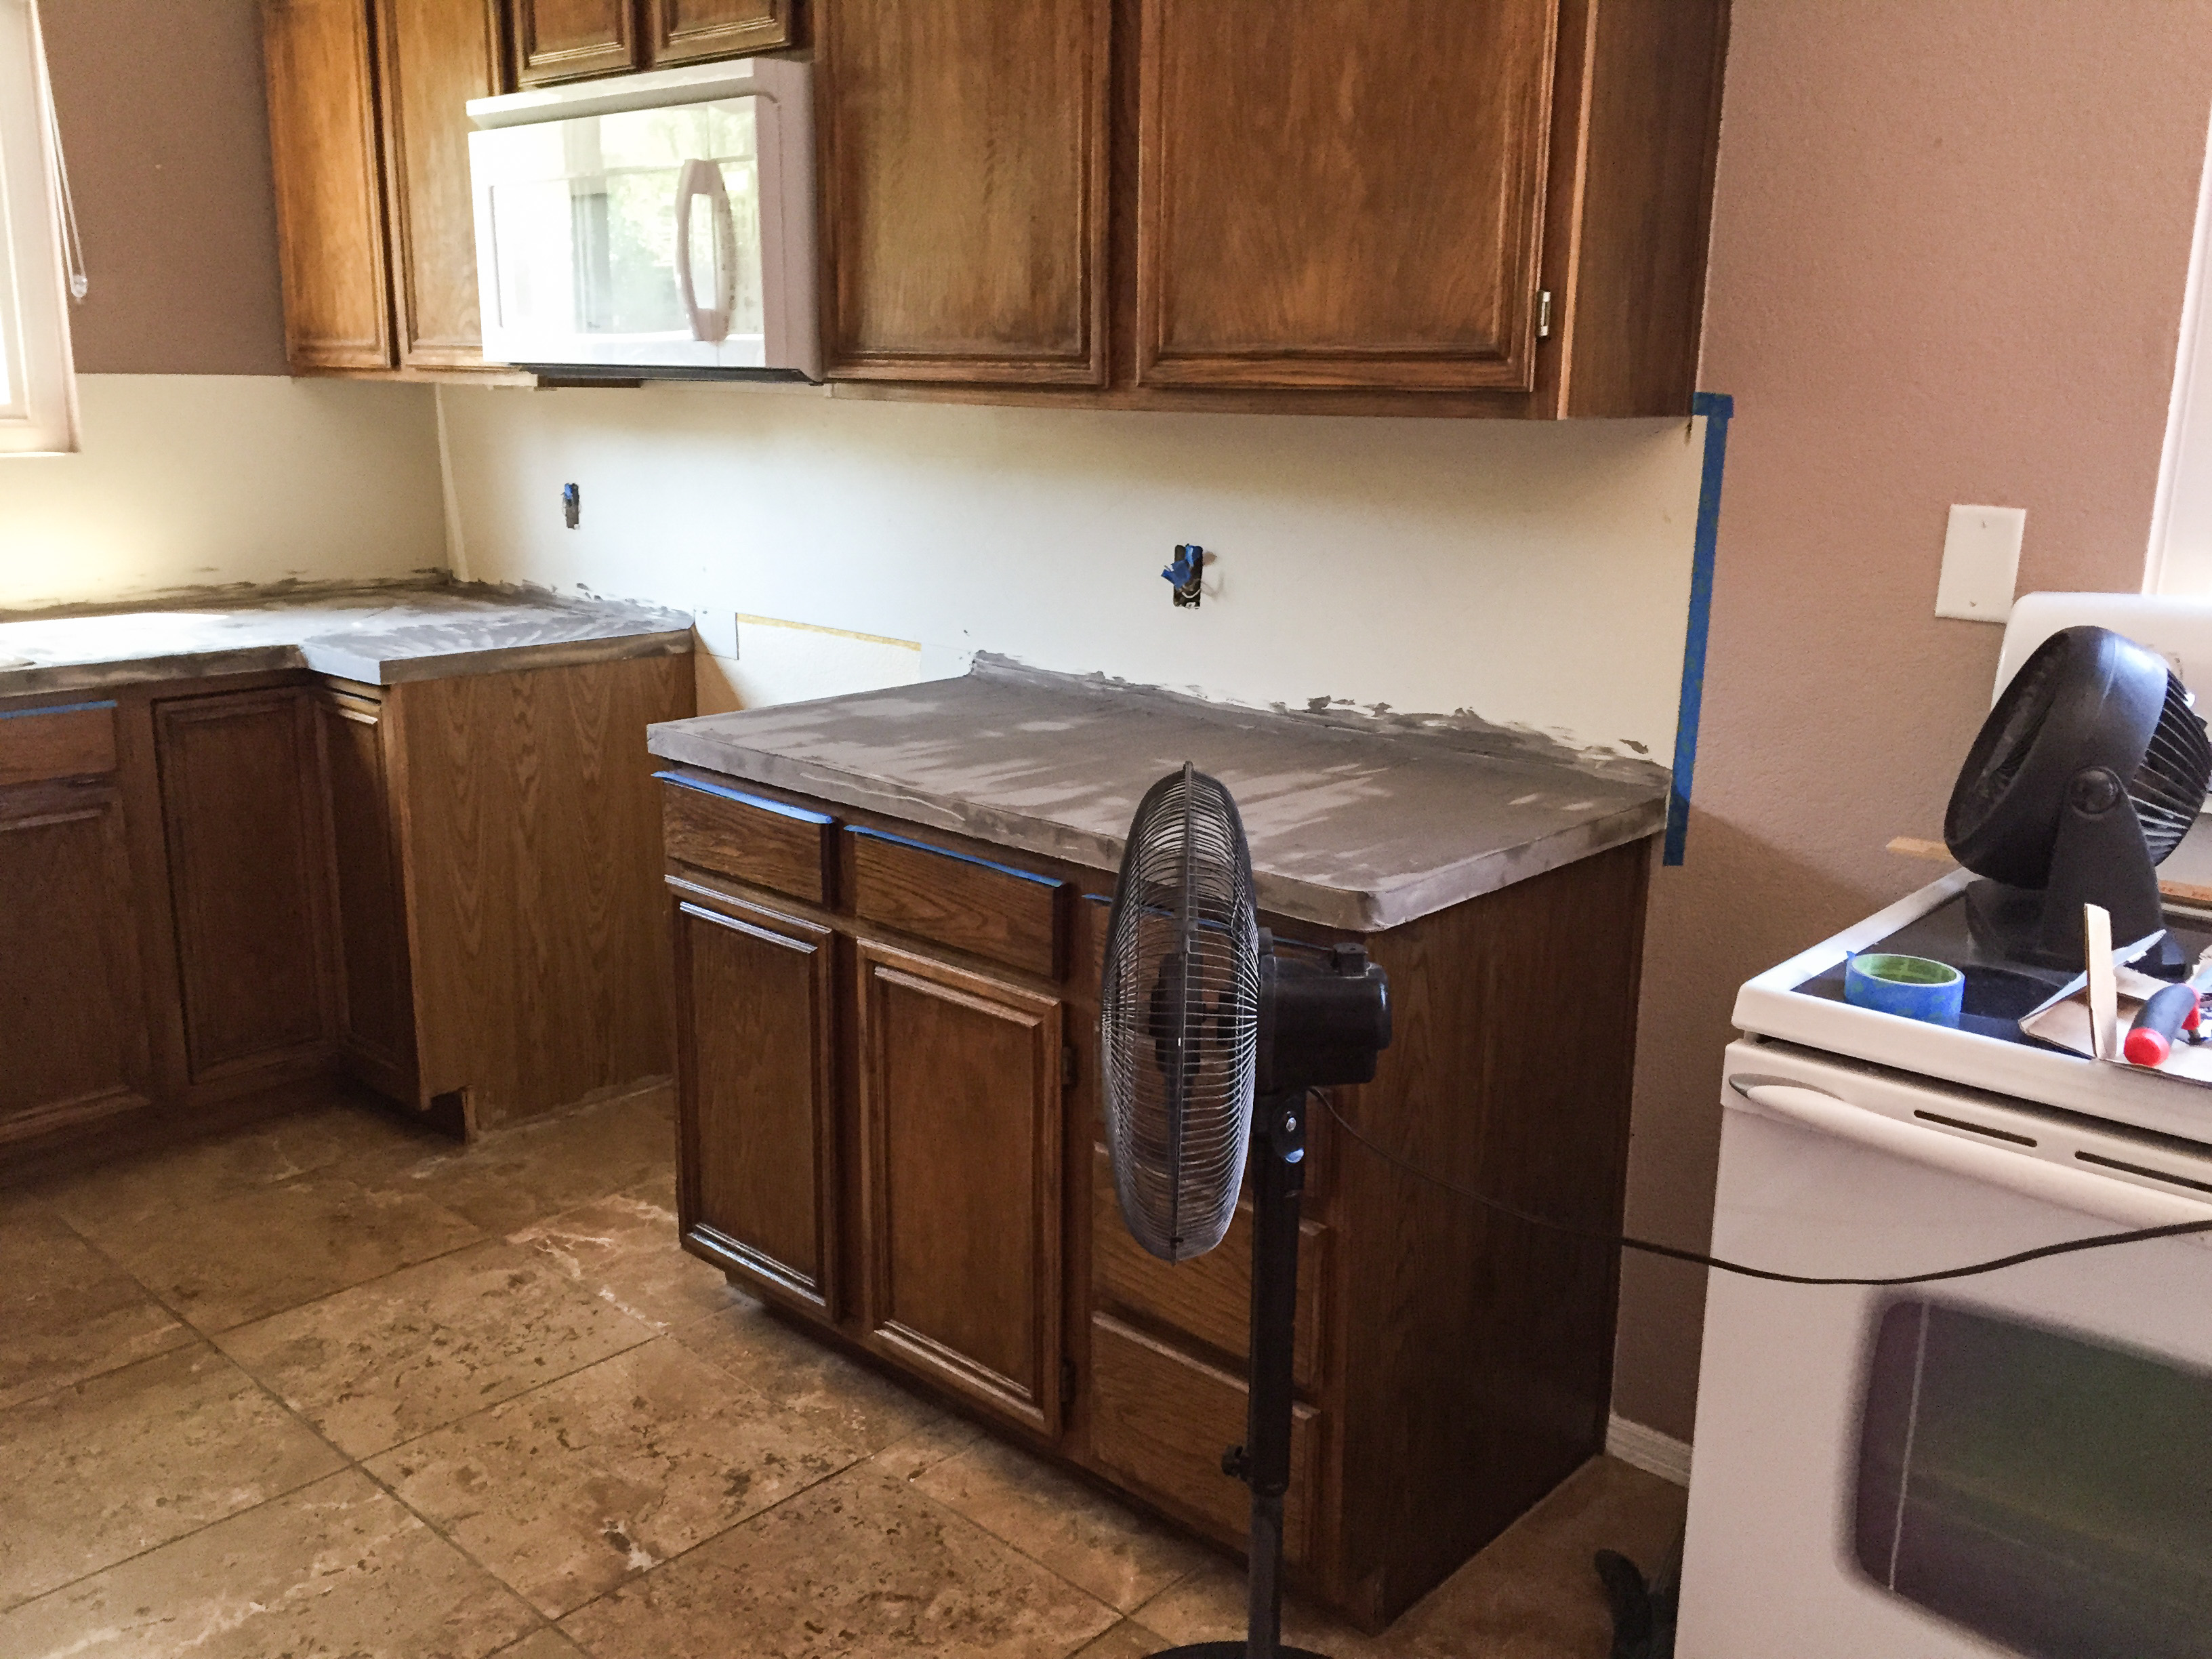
One Saturday, Travis and I sent Nolan over to Mimi and Papa’s for the day and got to work. We cleared out the kitchen, scoured the existing countertops and backsplash (to allow for better adhesion), removed all of the switches and outlets, and laid and sanded three layers of concrete all in about a ten-hour period that included food breaks and showers, too. The next day, we sent Nolan back to his grandparents’ and spent another eight hours or so applying three layers of concrete stain, two layers of seal, and one layer of waterproof wax, and hanging an entirely new backsplash.


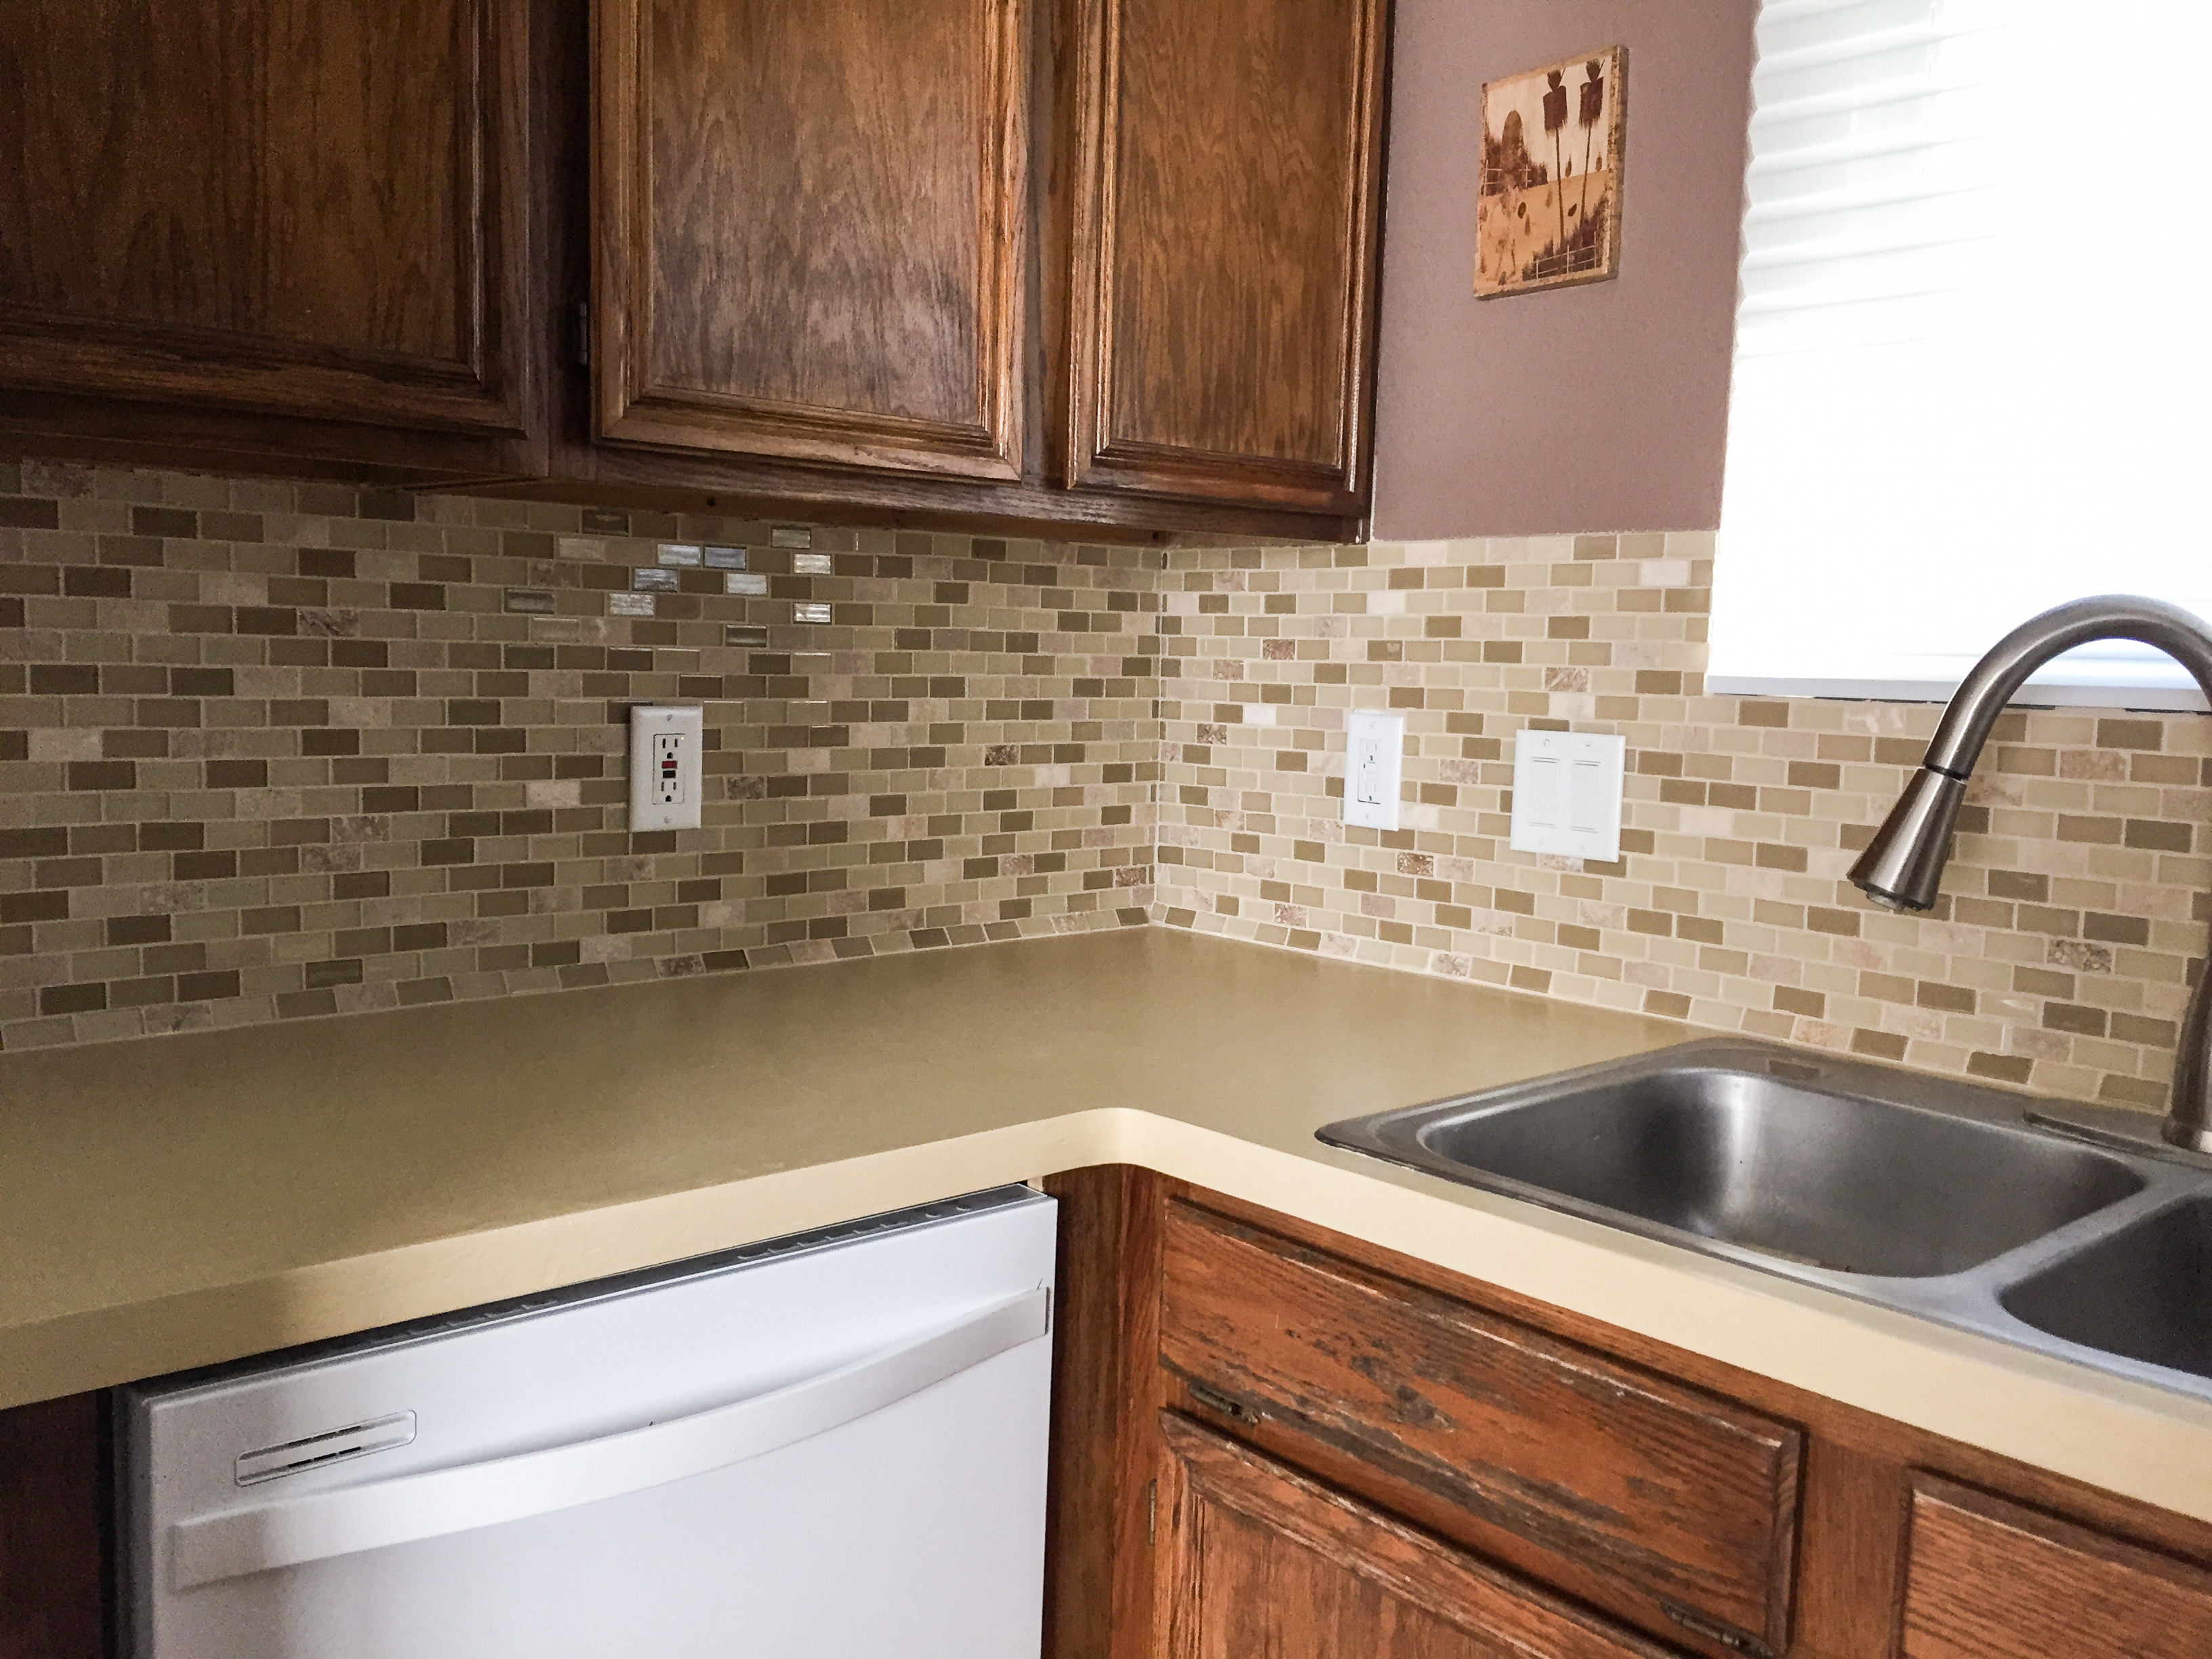
We found a great backsplash that is a combination of glass tiles and natural stone for $3.99/square foot and used almost thirty-eight square feet for our space. Travis learned how to cut, affix, grout, and seal tile from YouTube videos years ago when he renovated his parents’ shower. Neither of us has any background in construction; we just like to save money and get our hands dirty now and again.

The following day we grouted the tile, a process that took almost two hours, including all of the wiping that needed to occur. The next couple of days, whenever we had a few minutes to spare here and there, we chipped away at any dried grout that we missed in the wiping process and then sealed the backsplash. Sealing took about ten minutes and we let it dry overnight, just to be on the safe side.
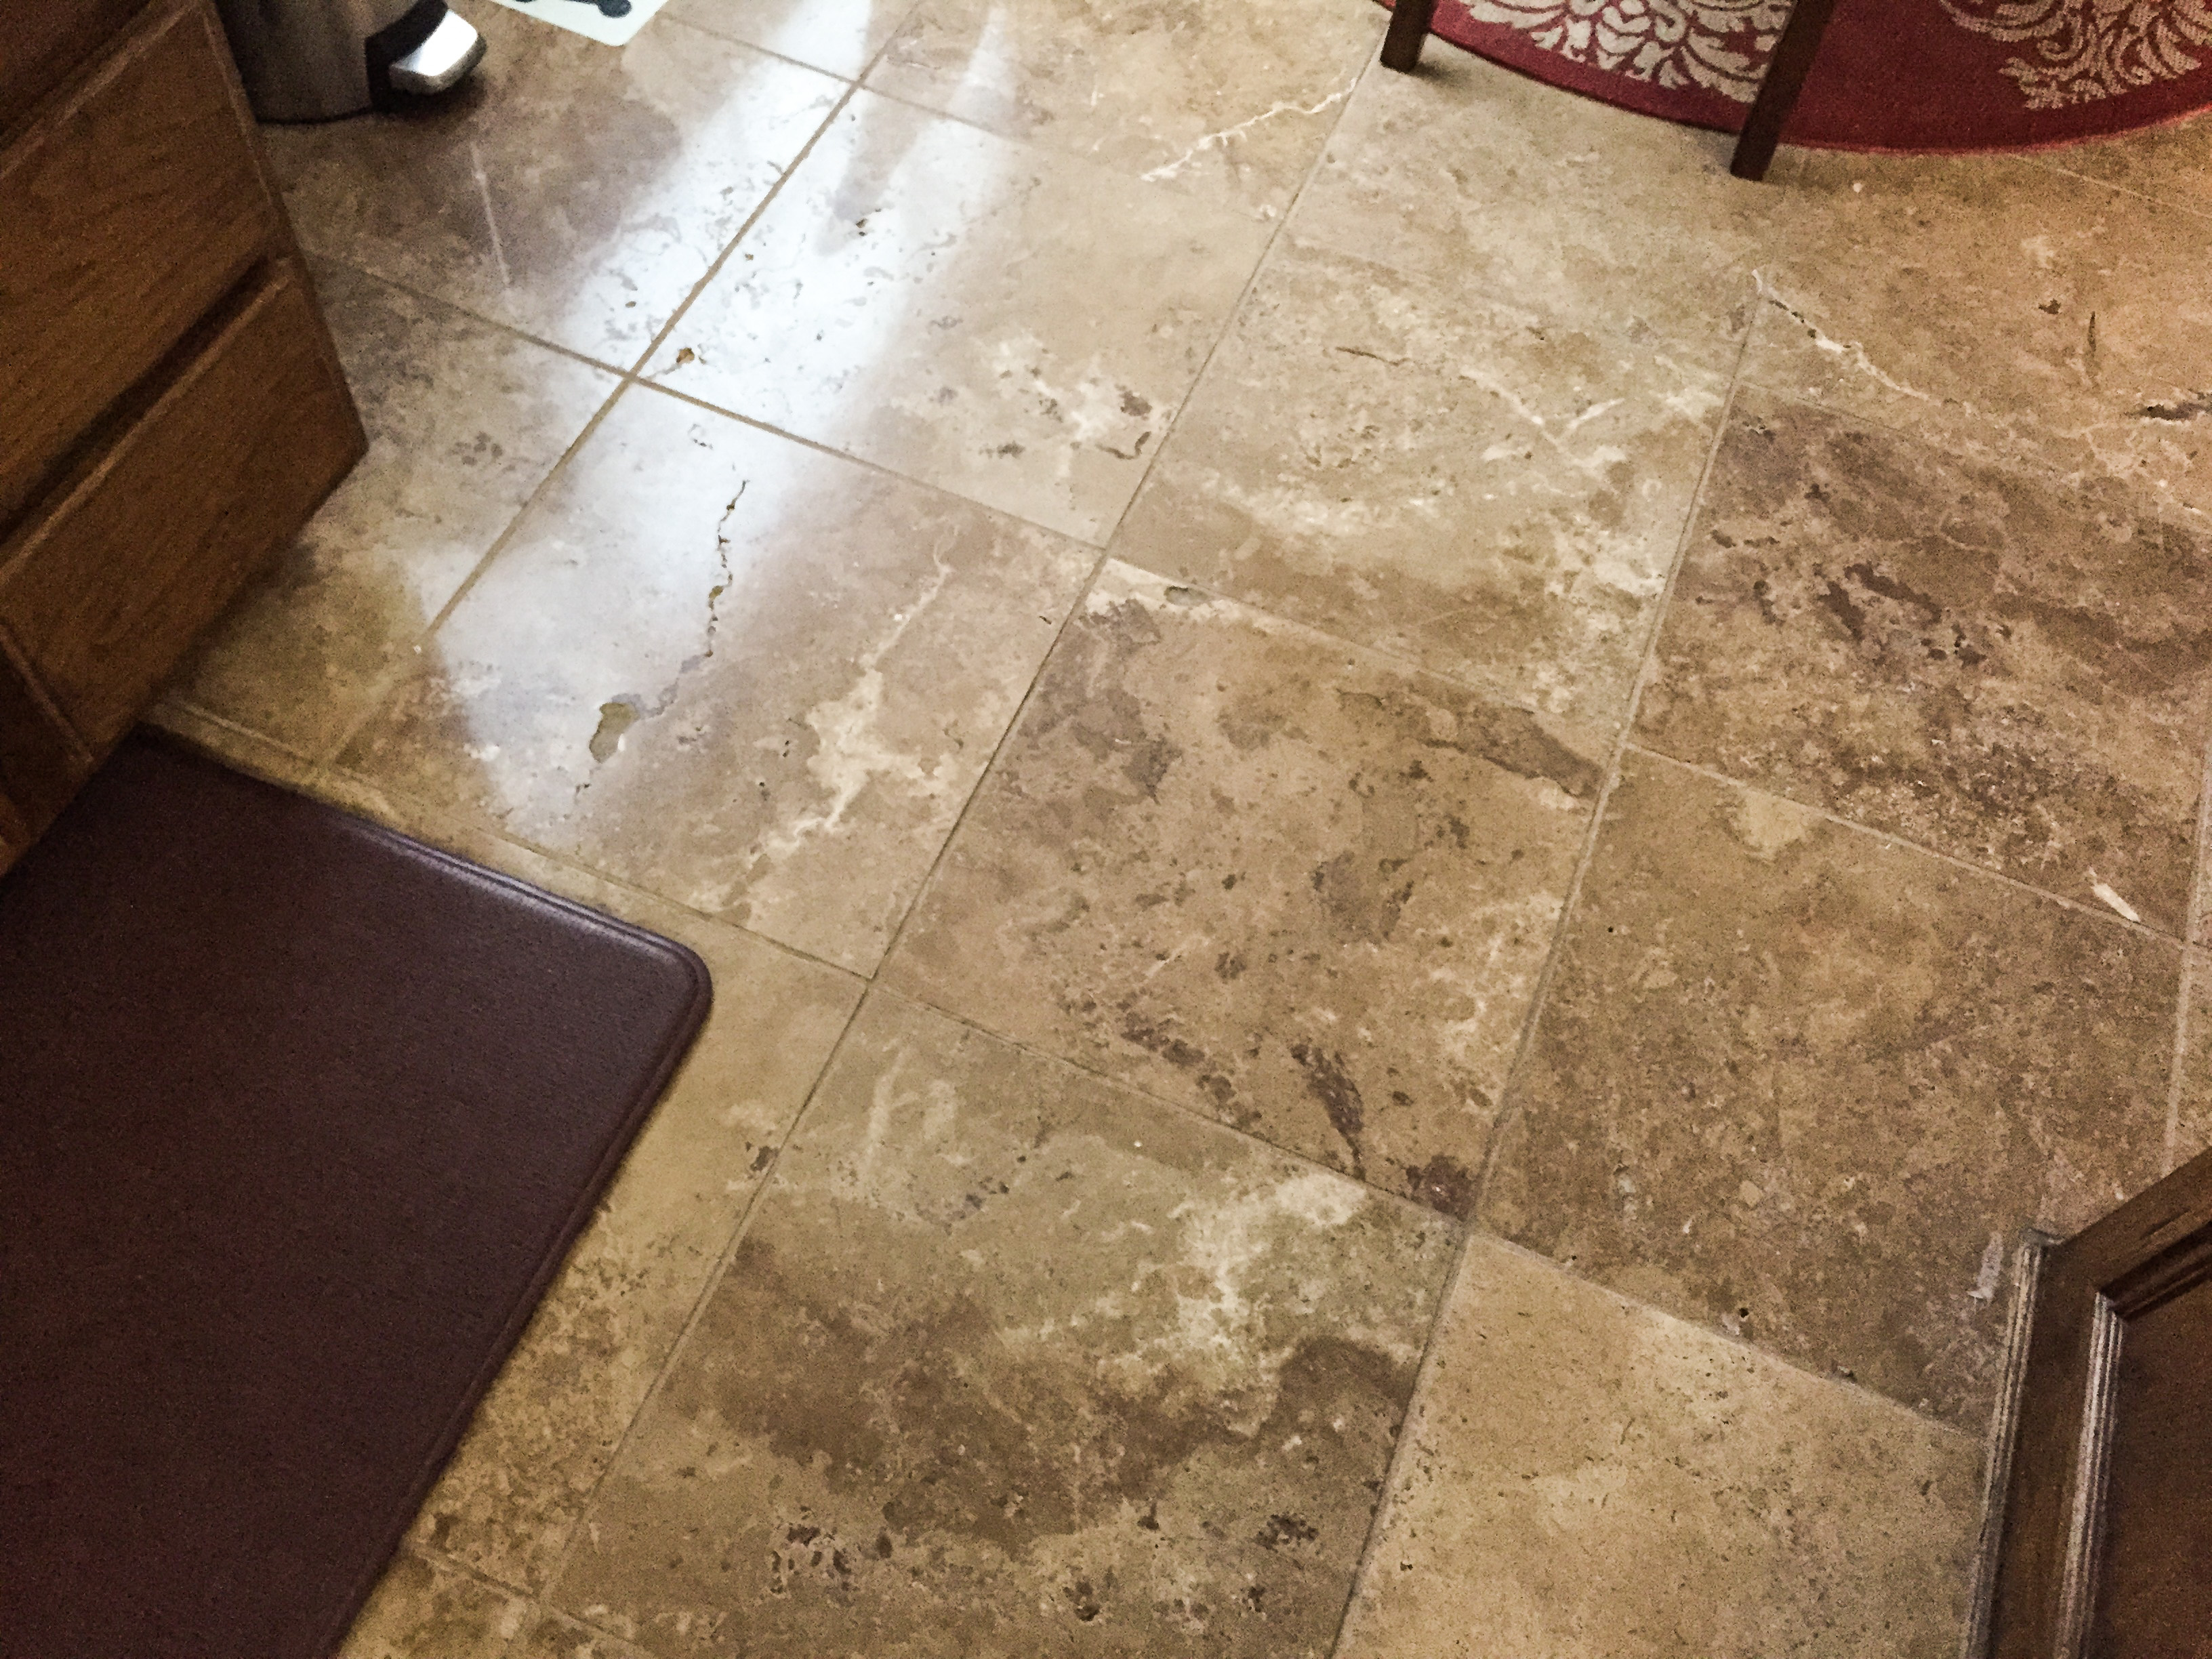
The last step, which took another couple of hours, was installing new, crisp, clean, white outlets and switches. Travis finished this in time for the baby’s diaper party (future post) and the look we were going for was finally realized: a noticeable, inexpensive upgrade that complimented our travertine floors. If you’re not familiar, travertine is an expensive natural stone. It was in the house when we moved in and every kitchen decision we’ve made has centered on those gorgeous tiles.
When we went to place all of our usual countertop clutter back into the kitchen, we reduced we had and found new homes for some of the items—like cookbooks—that really didn’t need to be sitting on the countertop 24/7. Our small space got a little bit bigger, motivated by a long-awaited facelift. We didn’t want to cover up everything we worked so hard to create, so in the process of aesthetically improving our kitchen, we also obtained a slightly larger one. 🙂
What do we leave on the countertops? Two appliances that we don’t have any other space for: the toaster oven (which honestly isn’t used often) and the extremely heavy KitchenAid stand mixer. We also have a knife block, three jars of baking goods (e.g. flour, etc.), a paper towel holder, a typically empty cookie jar (sad, but good for the body, folks!), a couple of bottles of infused oils for cooking, salad dressings, etc., a wire vessel in which we collect wine corks (woo!), and a large basket for produce that need not be refrigerated. This might sound like a lot or a little, depending on your kitchen, what you do in it, and how big it is, but this is the best we could do with limited cabinet space.
In a nutshell, we now have a kitchen that feels bigger and is more enjoyable to work in, all for a little sweat equity and about $300 (countertop materials, backsplash, and electrical upgrades). If you’re willing to put in the time and effort, you can find amazing deals and learn a lot, too. Someday, I’ll have a professional chef’s gourmet kitchen with luscious countertops and high-end appliances. For now, living simply is providing us everything we could want or need. Good luck with your next DIY project!

So proud of both of you! It looks great!
LikeLike